Hey there, compost curious friends! Ever wish you could turn your kitchen scraps into garden gold, even if you’re living in an apartment? It can feel impossible with limited space, right? You want to be eco-friendly, but the thought of a smelly mess is a big no-no. Well, guess what? It’s totally doable! We’re diving into aerobic composting specifically for apartment dwellers. Get ready to transform your food waste into nutrient-rich compost, right from your cozy abode. We’ll guide you through every simple step!
Apartment Aerobic Composting: Your Genius Solution
Living in an apartment doesn’t mean you have to miss out on the amazing benefits of composting. Aerobic composting, often called the “fast composting” method, is perfect for smaller spaces because it’s efficient and, crucially for apartment living, it’s designed to be odor-free when done correctly. Let’s break down how you can become an apartment composting pro, turning your food waste into valuable soil amendment without any fuss or funk.
Why is this so great? You reduce your landfill waste, cut down on methane production (a harmful greenhouse gas), and create free, top-quality fertilizer for any plants you might have, whether it’s a small balcony garden or just a few indoor houseplants. We’ll show you how to set it up, maintain it, and enjoy the rewards.
What is Aerobic Composting Anyway?
Think of aerobic composting as feeding beneficial microbes with oxygen. “Aerobic” literally means “with air.” These tiny helpers munch their way through your organic materials, breaking them down into nutrient-rich compost. Unlike some other composting methods that can get a bit stinky if they go anaerobic (without air), aerobic composting is a clean and controlled process. It’s all about providing the right balance of “greens” (nitrogen-rich materials) and “browns” (carbon-rich materials), plus plenty of air and moisture.
The key difference from other methods is the emphasis on airflow. This helps the aerobic bacteria thrive, speeding up the decomposition process and preventing the buildup of smelly byproducts that can happen when air is scarce. For apartment dwellers, this means a tidier, more pleasant composting experience.
Why Aerobic Composting is Perfect for Apartments
Space is often the biggest hurdle for apartment dwellers wanting to compost. Traditional compost bins can be bulky. But aerobic composting can be adapted to fit neatly into your living space. Here’s why it’s such a smart choice:
- Compact Systems: Many aerobic composting systems are designed for small spaces, like tumblers, compact bins, or even stackable units.
- Odor Control: When managed properly, aerobic composting produces very little odor. The quick decomposition means waste doesn’t sit around long enough to become unpleasant.
- Speed: Aerobic decomposition is generally faster than passive methods, meaning you get compost sooner.
- Less Pests: A well-maintained system is less likely to attract pests compared to open compost piles.
- Versatility: You can compost a wide range of kitchen scraps, reducing your household waste significantly.
Choosing Your Apartment Aerobic Composting System
The right system is crucial for success in an apartment. You want something that manages moisture, allows for airflow, and is easy to use. Here are some popular choices:
1. Compost Tumblers
These are sealed drums that you can rotate. Tumblers are fantastic for apartments because they keep pests out, are relatively compact, and the tumbling action provides excellent aeration. They often come in sizes that fit on balconies or even indoors in a utility area.
- Pros: Great aeration, fast composting, contained, pest-proof, easy to turn.
- Cons: Can be pricier, may require some physical effort to turn if full.
2. Aerated Bin Systems
These are typically enclosed bins with ventilation holes or specialized aeration mechanisms. Some have internal augers or pumps to introduce air. They are designed to contain the compost neatly and prevent odors.
- Pros: Good for medium-sized batches, relatively contained, can be very effective.
- Cons: May require manual turning with a compost aerator tool, less pest-proof than tumblers.
3. Worm Composting (Vermicomposting) – An Aerobic Option!
Yes, worm composting is a form of aerobic composting! The red wiggler worms do the work, and their bedding needs airflow too. Worm bins are incredibly compact and can live happily under your sink or in a closet. They produce nutrient-rich worm castings, which are an excellent fertilizer.
- Pros: Extremely compact, very fast to produce “castings,” great for small apartments, odorless.
- Cons: Limited to certain food scraps (avoid citrus, onions, meat/dairy), requires live worms.
For this guide, we’ll focus on a general approach that works well with most enclosed aerobic systems, particularly tumblers and aerated bins, as they are the most common for general kitchen scrap composting in apartments.
What You Need: Your Apartment Composting Toolkit
You don’t need a lot of fancy gear to get started. Here’s a basic list of what will make your aerobic composting journey smooth:
- Your Chosen Composting System: (Tumbler, Aerated Bin, etc.)
- Kitchen Countertop Compost Pail: A small, lidded container to collect scraps before taking them to your main bin. Look for ones with filters to minimize any initial odors.
- “Greens”: Nitrogen-rich materials.
- “Browns”: Carbon-rich materials.
- Water Source: For maintaining moisture levels.
- Compost Aerator Tool (Optional but Recommended): If your system doesn’t have an automatic turning mechanism, this tool helps mix and aerate the pile.
- Sturdy Gloves: For handling materials and maintaining your bin.
- A Small Shovel or Trowel: For scooping finished compost.
The “Greens” and “Browns” Ratio: Your Recipe for Success
The secret to fast, odor-free aerobic composting is balancing your “greens” and “browns”. Think of it like a well-balanced diet for your compost microorganisms.
Greens (Nitrogen-Rich): These materials provide the moisture and nitrogen that the microbes need to multiply and work quickly. They tend to be wet and break down faster.
- Fruit and vegetable scraps
- Coffee grounds and tea bags
- Grass clippings (in moderation)
- Plant trimmings (non-diseased)
- Eggshells (crushed)
Browns (Carbon-Rich): These materials provide the carbohydrates for energy and add bulk, creating air pockets essential for aerobic decomposition. They are usually dry and break down slower.
- Shredded newspaper (black and white ink only)
- Cardboard (uncoated, torn into small pieces)
- Paper bags (torn up)
- Dry leaves
- Straw or hay
- Sawdust (from untreated wood)
- Paper towel and toilet paper rolls (torn up)
What to Avoid (Generally) for Apartment Composting:
- Meat, fish, and bones
- Dairy products
- Oily or greasy foods
- Diseased plants
- Weeds that have gone to seed
- Feces from cats or dogs
- Chemically treated wood or paper
A good starting ratio is roughly 2-3 parts Browns to 1 part Greens by volume. This might seem like a lot of browns, but they are key to preventing sogginess and odors. You’ll get a feel for it as you go!
Step-by-Step: Setting Up Your Apartment Aerobic Composter
Let’s get this composting party started! Follow these simple steps:
Step 1: Choose Your Location
Find a spot for your composter. A balcony is ideal as it provides airflow and direct sunlight (which can help heat the compost). An unused corner of a laundry room or utility closet can also work, though it might slightly slow down decomposition without direct sun. Ensure it’s accessible and on a surface that can handle a little moisture.
Step 2: Prepare Your Materials
Start collecting your kitchen scraps in your countertop pail. When it’s full, take it to your composter. For your browns, keep a bag of shredded newspaper or torn-up cardboard near your bin. Chop or tear larger items (like banana peels or large cardboard pieces) into smaller bits. Smaller pieces decompose faster.
Step 3: Start Layering Your Composter
This is where the magic begins! You want to create a base and then alternate layers of greens and browns.
- Initial Layer: Start with a few inches of brown materials (like shredded cardboard or dry leaves) at the bottom. This helps with drainage and airflow from the start.
- Add Greens: Add your collected kitchen scraps (greens). Try to bury them slightly within the browns to minimize any potential odors or fruit flies.
- Add Browns on Top: Cover the greens completely with a layer of brown materials. This is crucial for balancing the moisture and carbon content.
- Moisture Check: Your compost should feel like a wrung-out sponge – damp, but not soaking wet. If it’s too dry, add a little water (spritz with a spray bottle if using a very small bin) or more moist greens. If it’s too wet, add more browns.
Step 4: Aerate Regularly
This is the “aerobic” part! Depending on your system, you’ll need to introduce air.
- Tumblers: Close the lid and turn the tumbler 5-10 times, every few days.
- Aerated Bins: Use your compost aerator tool to poke and mix the contents every 3-7 days. For bins with forced aeration, ensure the fan or pump is running as per the manufacturer’s instructions.
Regular aeration prevents the compost from becoming dense and anaerobic, which is where smells can develop.
Step 5: Maintain and Monitor
Keep adding your greens and browns, always ensuring you finish a layer with browns. Continue to monitor the moisture and aeration. You’ll notice your compost pile shrinking as it breaks down. This is a good sign!
Step 6: Harvesting Your Compost
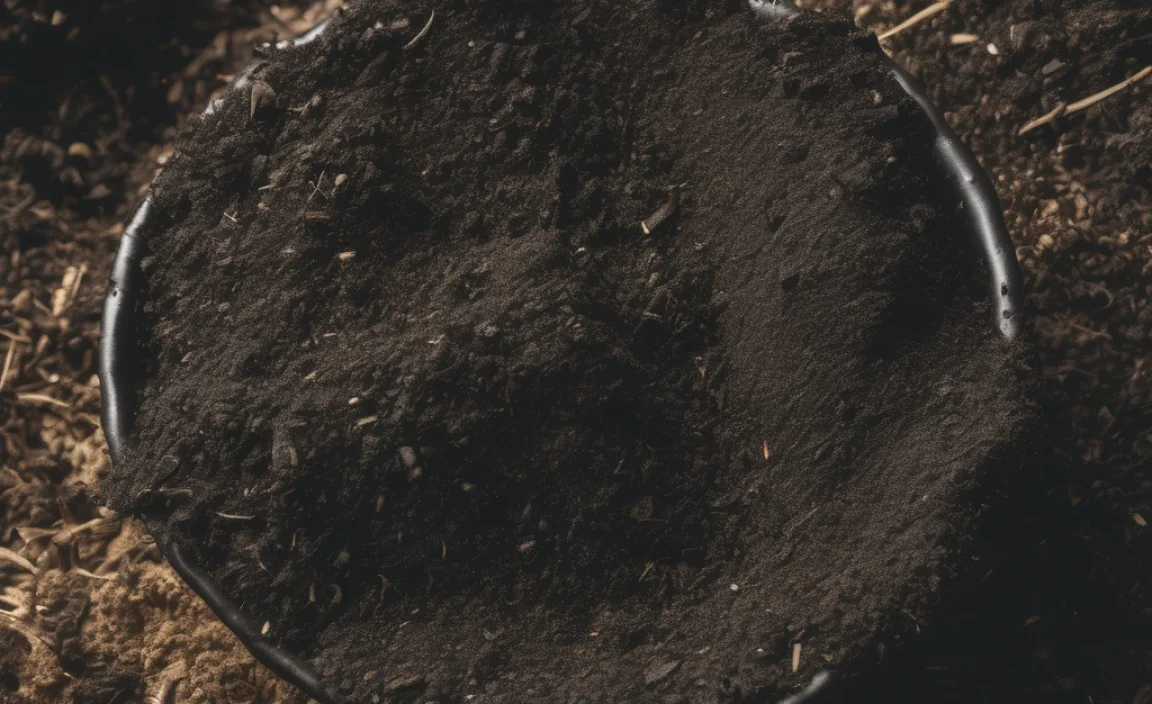
Composting time varies depending on your method, ingredients, and how often you aerate and maintain moisture. It can take anywhere from 4 weeks to a few months. Your compost is ready when it looks dark and crumbly, smells earthy (like a forest floor), and you can no longer recognize the original materials.
- For Tumblers: Some have a separate door to access finished compost.
- For Bins: You might need to empty the entire bin or access compost from a bottom hatch if your model has one.
Sift out any larger, undecomposed pieces and return them to the composter to continue breaking down.
Troubleshooting Common Apartment Composting Issues
Even with the best intentions, you might run into a few snags. Don’t worry; these are usually easy to fix!
Issue: It Smells Bad!
This is the most common fear. A bad smell usually means your compost is too wet and/or doesn’t have enough air (anaerobic conditions).
- Fix: Stir in a generous amount of brown materials (shredded paper, dry leaves). Ensure you’re consistently covering your greens with browns. Increase the frequency of turning or aeration. Make sure you’re not adding meat, dairy, or oily foods.
Issue: It’s Too Wet and Soggy
Often caused by too many “greens” or not enough “browns.”
- Fix: Add more brown materials. Shredded cardboard or paper is excellent for this. Try to let your compost materials drain a bit before adding very wet scraps.
Issue: It’s Too Dry
The microbes need moisture to work. A dry pile will decompose very slowly, if at all.
- Fix: Add water. If you have a bin, use a watering can to gently moisten the contents, or spritz with a spray bottle for smaller setups. If you’re adding fresh food scraps, they will usually add enough moisture.
Issue: Fruit Flies or Other Pests
These are usually attracted to exposed food scraps.
- Fix: Always cover fresh kitchen scraps with a layer of brown material. Ensure your bin lid is secure and there are no gaps. If using a tumbler, make sure the lid is tightly sealed.
Using Your Finished Compost
Congratulations, you’ve made compost! Now what? This dark, crumbly material is pure gold for your plants.
- Houseplants: Mix a portion of compost into your potting soil (about 1 part compost to 3 parts soil). It improves drainage, aeration, and provides slow-release nutrients.
- Balcony Garden: Use it as a top dressing (sprinkle a layer around the base of your plants) or mix it into your container soil when planting.
- Share It: Got more compost than you need? Offer it to friends, family, or community gardens!
Committed to sustainable practices? Consider looking into resources from the Environmental Protection Agency (EPA) which offers extensive guidance on composting and waste reduction.
Quick Summary: Apartment Aerobic Composting
Aerobic composting in an apartment is achievable and rewarding. It involves balancing nitrogen-rich “greens” and carbon-rich “browns” with adequate airflow and moisture. Compact systems like tumblers or aerated bins are ideal for small spaces and help control odors and pests. Regular turning or aeration is key to fast, efficient decomposition. By following these simple steps, you can turn kitchen waste into valuable fertilizer for your plants and significantly reduce your household’s environmental impact.
Conclusion
See? Apartment aerobic composting isn’t some complicated chore reserved for people with sprawling backyards. It’s a practical, effective, and surprisingly simple way for anyone, anywhere, to reduce waste and create something truly valuable. By choosing the right system, understanding the simple “greens” and “browns” balance, and remembering to give your compost pile plenty of air.
Frequently Asked Questions (FAQ) – Apartment Aerobic Composting
Q1: How much space do I really need for apartment composting?
You can start composting in even a small apartment. Many compact compost tumblers or worm bins are designed to fit on a balcony, in a utility closet, or even on a large kitchen counter. The key is choosing a system that fits your available space.
Q2: Will my apartment smell like a compost bin?
No, not if you’re doing aerobic composting correctly! The primary cause of compost odor is anaerobic conditions (lack of air). By ensuring good airflow through regular turning or aeration and maintaining the proper balance of greens and browns, your compost should smell earthy, not foul.
Q3: How often do I need to add new scraps?
You can add new kitchen scraps (greens) to your composter as you accumulate them. Just remember to always cover them with a layer of brown material and give everything a good mix or turn afterward. This helps maintain that crucial greens-to-browns balance and airflow.
Q4: Can I compost everything from my kitchen?
You can compost most fruit and vegetable scraps, coffee grounds, tea bags, and eggshells. However, it’s generally best to avoid meat, dairy products, oily foods, and bones in apartment composting systems, as these can attract pests and cause odors if not managed perfectly.
Q5: How long does it take to get usable compost?
The timeline varies based on the system, the materials you add, and how well you manage aeration and moisture. For aerobic systems, you can often get finished compost in as little as 4-8 weeks, though it can sometimes take a few months. You’ll know it’s ready when it’s dark, crumbly, and smells like fresh earth.
Q6: What if I don’t have a balcony? Can I compost indoors?
Yes! Many apartment dwellers successfully compost indoors. Worm composting (vermicomposting) is especially well-suited for indoor use. Compact, well-sealed compost tumblers can also work indoors, as long as they are placed on a protected surface and have some minimal ventilation or are turned regularly.
Q7: Is worm composting the same as aerobic composting?
Yes, worm composting, or vermicomposting, is a form of aerobic composting! The worms, along with beneficial microbes, break down organic matter. The key is that the worms and microbes need oxygen, so the bedding material in a worm bin must incorporate airflow. Worm bins are an excellent, compact option for apartment dwellers.

I am passionate about home engineering. I specialize in designing, installing, and maintaining heating, ventilation, and air conditioning systems. My goal is to help people stay comfortable in their homes all year long.