Hey there, fellow gardeners and eco-warriors! Ever feel like your kitchen scraps are mocking you? They pile up, they start to smell, and you wonder, “What am I supposed to do with all this?” It’s a common puzzle, but I’ve got a neat trick to share. We’re going to talk about making your own super-plant food using a method called aerobic composting, and how to find the right gear to make it easy. Get ready to turn that waste into garden gold!
What Exactly is Aerobic Composting, and Why Should You Care?
Alright, let’s break down aerobic composting. ‘Aerobic’ simply means ‘with air.’ So, aerobic composting is all about giving the good microbes – the little helpers that break down your organic stuff – plenty of oxygen. Think of it like breathing room for your compost pile. This is great because it speeds things up and helps prevent those funky, rotten smells. Plus, it creates a nutrient-rich soil amendment that your plants will absolutely love!
Why is this a big deal? Well, instead of sending food scraps and yard waste to the landfill, where they can release methane (a greenhouse gas), you’re turning them into something valuable. It’s a win for your garden and a win for the planet. You get amazing fertilizer for free, and you reduce waste. Pretty smart, right?
The Magic Ingredients: What Goes In Your Aerobic Compost Bin
The key to successful aerobic composting is a good balance of ‘greens’ and ‘browns’. Don’t worry, it’s not about the color of your money; it’s about what these materials bring to the pile.
Greens (Nitrogen-Rich Materials)
- Fruit and vegetable scraps
- Coffee grounds and tea bags
- Grass clippings (in thin layers to avoid matting)
- Plant trimmings (non-diseased)
- Eggshells
Browns (Carbon-Rich Materials)
- Dry leaves
- Shredded newspaper and cardboard (avoid glossy paper)
- Straw or hay
- Wood chips or sawdust (in moderation)
- Twigs and small branches
A good rule of thumb is to aim for roughly a 2:1 or 3:1 ratio of browns to greens by volume. This helps keep the pile airy and prevents it from getting too wet and smelly. And remember, avoid meat, dairy products, oily foods, and diseased plants, as these can attract pests or introduce unwanted things into your compost.
Choosing Your Aerobic Composting Store: Where to Gear Up
Now, you might be thinking, “Okay, Troy, I’m sold! But where do I get the stuff to do this?” That’s where the “aerobic composting stores” come in. These aren’t always standalone shops specifically labeled ‘Aerobic Composting Emporium’ (though wouldn’t that be cool?). Instead, it’s about knowing where to look!
Types of Stores Selling Composting Supplies
You can find what you need at a variety of places. Here’s a breakdown:
- Garden Centers and Nurseries: These are your go-to spots for composting bins, tumblers, shovels, aerators, and sometimes even beneficial microbes or compost activators. They understand plant needs and will likely have knowledgeable staff.
- Home Improvement Stores: Places like Home Depot, Lowe’s, or local hardware stores often have a selection of compost bins, from simple plastic bins to more complex tumblers. They’re also great for tools like pitchforks and shovels.
- Online Retailers: Websites like Amazon, specialized garden product sites, or even direct manufacturer websites offer a vast selection. Shopping online is convenient, and you can often compare prices and read reviews easily. This is a fantastic resource for finding very specific types of aerobic composters.
- Farm and Feed Stores: If you live in a more rural area, these stores are goldmines. They might carry larger compost bins, bulk materials for ‘browns’ like straw, and tools that are built to last.
- Manufacturer Websites: Many popular brands of composters (like Earth Machine, compost tumblers from specific brands) have their own websites where you can buy directly. This can sometimes offer better deals or access to unique models.
When you’re looking, use terms like “compost bin,” “compost tumbler,” “garden composter,” or “aerobic composter” to find what you need. Don’t be afraid to ask the staff for recommendations; they’re usually happy to help.
Essential Gear for Your Aerobic Composting Journey
To make aerobic composting less of a chore and more of a breeze, having the right tools is key. Here’s what to look for when you’re shopping:
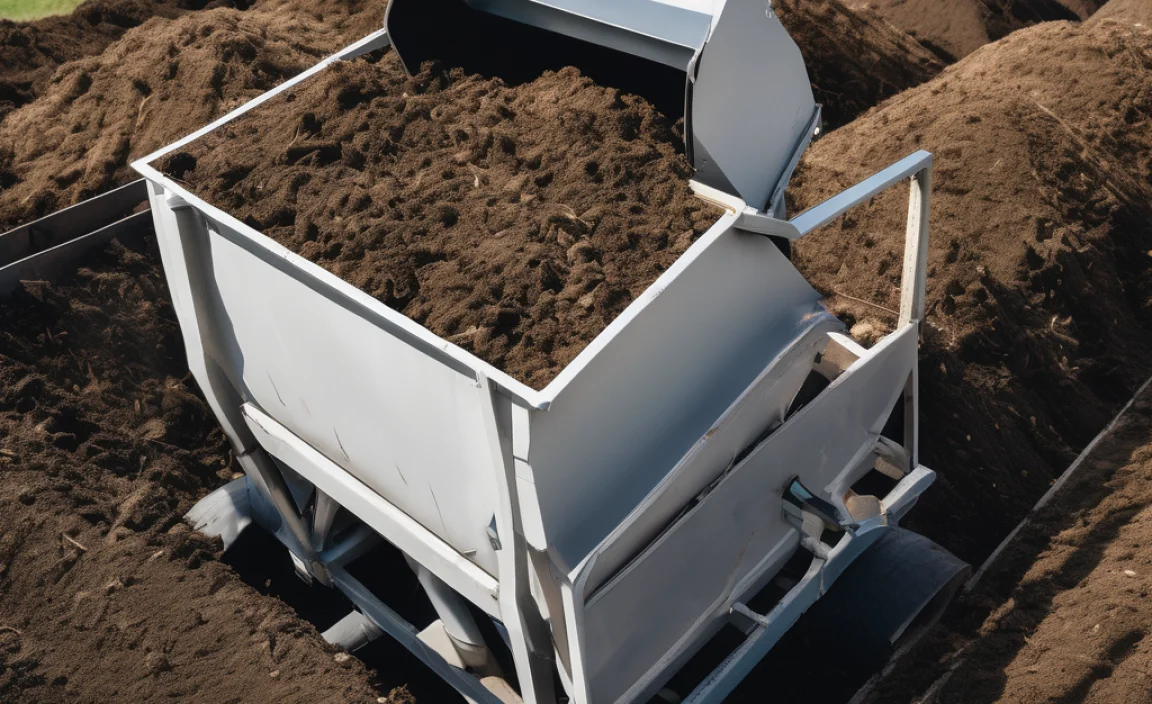
Compost Bins and Tumblers
This is probably the most important piece of equipment. There are a few main types, each with its pros and cons:
- Stationary Bins: These are typically large containers (plastic or wood) where you add materials. They are good for larger yards and produce compost over time. Some have doors at the bottom to access finished compost.
- Compost Tumblers: These are enclosed barrels or containers that you can rotate. Tumblers are fantastic for aeration, speeding up the composting process, and making turning the compost easy. They often keep pests out more effectively.
- Open Piles: While not a “store-bought” bin, you can simply create a pile in your yard. This requires more manual turning and might be more exposed to the elements and pests, but it’s the most budget-friendly option.
Pros and Cons of Compost Bin Types
| Type of Bin | Pros | Cons |
|---|---|---|
| Stationary Bins | Good for large volumes, relatively inexpensive, can be aesthetically pleasing (wood models) | Slower composting, requires manual turning with a fork or aerator, can be harder to access finished compost |
| Compost Tumblers | Faster composting, easy to turn, keeps pests out, neat and contained | Can be more expensive, limited capacity per batch, can get heavy and hard to turn when full |
| Open Piles | Free, can handle very large volumes, natural look | Slowest, requires significant manual effort for turning, prone to pests and weather, can look messy |
Tools for Turning and Aerating
Even with a tumbler, you’ll need to help things along. If you have a stationary bin or an open pile, these tools are essential:
- Compost Aerator Tool: These are long tools with corkscrew-like ends designed to be plunged into the compost pile to introduce air. Super easy to use and much less work than a pitchfork.
- Pitchfork or Shovel: A sturdy pitchfork is great for turning larger piles, while a shovel can help move materials around.
Optional but Helpful Items
- Compost Thermometer: Helps you monitor the internal temperature of your pile. A hot pile (130-160°F or 55-70°C) breaks down faster and kills weed seeds and pathogens. For more on compost temperatures, check out resources from university extension offices, like this guide from NC State Extension.
- Compost Activator: These are sometimes sold as powders or liquids containing beneficial microbes, nutrients, or enzymes that can kick-start the decomposition process. Often, a bit of finished compost or a shovel full of garden soil is enough to inoculate your new pile.
- Gloves: Keep your hands clean and protected.
- Watering Can or Hose: Compost needs to be moist, like a wrung-out sponge.
Step-by-Step Guide to Setting Up Your Aerobic Composter
Ready to get your hands dirty (but not too dirty!)? Here’s how to set up your aerobic composting system.
Step 1: Choose Your Location
Find a spot for your composter that’s:
- Convenient: Close enough to your kitchen and garden so you’ll actually use it.
- Partially Shaded: Too much direct sun can dry out the pile, while full shade can keep it too cool and wet.
- Well-Drained: You don’t want it sitting in a puddle.
- Accessible: Make sure you can easily add materials and remove finished compost.
Step 2: Assemble Your Bin or Tumbler
Follow the manufacturer’s instructions for assembly. Most tumblers are pretty straightforward, and stationary bins might involve simply placing the sections together or inverting the lid. If you’re building your own, ensure it allows for airflow.
Step 3: Start with a Base Layer of Browns
Begin by adding a layer of coarse brown materials to the bottom of your bin. This could be small twigs, straw, or shredded cardboard. This helps with drainage and encourages airflow from the start.
Step 4: Layer Your Greens and Browns
Now, start adding your kitchen scraps (greens) and yard waste (browns). Remember that balance: aim for more browns than greens by volume. Chop up larger items to speed up decomposition. Burying your fresh kitchen scraps under a layer of browns helps deter pests and odors.
Step 5: Moisten as You Go
With each layer, lightly water the materials. The goal is for the compost to be as damp as a wrung-out sponge. If it’s too dry, decomposition slows down. If it’s too wet, it can become anaerobic and smelly.
Step 6: Turn, Turn, Turn!
- For Tumblers: Give the tumbler a few turns every few days or at least once a week.
- For Stationary Bins/Open Piles: Use your aerator tool or pitchfork to mix the materials every week or two. This is crucial for an aerobic system. You’re essentially fluffing up the pile to let oxygen in.
Step 7: Monitor and Maintain
Keep adding new materials, maintaining the green/brown balance and moisture levels. If your compost pile seems sluggish, consider adding a compost activator or a shovel full of garden soil to introduce more microbes. If it smells bad, it’s likely too wet and needs more browns and/or turning. If it’s dry and not breaking down, it needs more moisture and greens.
Troubleshooting Common Aerobic Composting Issues
Even with the best intentions, you might run into a few bumps in the road. Here’s how to fix common composting problems:
- Problem: The compost smells bad (like ammonia or rotten eggs).
- Cause: Too much nitrogen (too many greens) or it’s too wet, leading to anaerobic conditions.
- Solution: Add more brown materials (leaves, shredded paper, cardboard) to absorb moisture and balance the nitrogen. Turn the pile thoroughly to introduce air. Ensure good drainage.
- Problem: The compost isn’t heating up or breaking down.
- Cause: Pile is too small, too dry, or lacking nitrogen (too many browns).
- Solution: Make sure your pile is at least 3x3x3 feet if it’s an open pile or bin. Add more green materials. Moisten the pile thoroughly. Turn it to mix things up. Consider adding a compost activator.
- Problem: Pests (flies, rodents) are attracted to the compost.
- Cause: Exposed food scraps, meat/dairy products are present, or the bin isn’t secure.
- Solution: Always bury fresh kitchen scraps under a layer of brown materials. Avoid adding meat, dairy, or oily foods. Use a compost tumbler or a bin with a secure lid and fine mesh to prevent entry.
- Problem: The compost is too wet and soggy.
- Cause: Too many wet green materials, too much rain, poor drainage.
- Solution: Add plenty of dry brown materials. Turn the pile regularly to dry it out. Ensure the composter is not sitting in a waterlogged area.
Don’t get discouraged if you have issues. Composting is a science and an art, and it takes a little practice! Keep experimenting, and you’ll get the hang of it.
When is Compost Ready?
You’ll know your compost is ready when it looks and smells like dark, crumbly earth – like rich topsoil. You shouldn’t be able to recognize the original materials you put in. It will smell pleasantly earthy, not sour or rotten. This can take anywhere from a few months to a year, depending on your method, materials, and how often you turn it. For a look at compost maturity, this University of Minnesota Extension page offers great insights.
Conclusion: Your Garden Will Thank You!
So there you have it! Aerobic composting is a fantastic way to reduce household waste, create nutrient-rich soil for your plants, and connect with nature in a really practical way. From choosing the right bin at your local garden store or online retailer to layering your greens and browns, you’ve got the tools and the know-how to get started. Don’t be afraid to try it out!
Remember, it’s a learning process. Your first few batches might not be perfect, but with a little patience and attention to air, moisture, and the balance of materials, you’ll be producing beautiful, dark compost in no time. Happy composting, and happy gardening!
Frequently Asked Questions About Aerobic Composting
Q1: What’s the biggest difference between aerobic and anaerobic composting?
A: Aerobic composting uses oxygen, so it’s faster and less smelly. Anaerobic composting happens without much air, which takes much longer and can produce strong, unpleasant odors.
Q2: Do I really need a special bin, or can I just make a pile?
A: You can absolutely just make a pile! However, a bin or tumbler helps contain the materials, makes turning easier, deters pests, and can speed up the process. If you’re just starting or have limited space, a bin is often a great choice.
Q3: How often should I add new kitchen scraps?
A: You can add them as you generate them! Just remember to bury fresh ‘greens’ (kitchen scraps) under a layer of ‘browns’ (dry materials) to keep odors down and deter pests.
Q4: Can I put diseased plant matter in my compost?
A: It’s best to avoid putting diseased plant matter in your compost, especially if you’re not aiming for very high temperatures. Diseased matter might not break down completely and could spread disease back to your garden.
Q5: Do I need to buy a compost “activator,” or can I use something else?
A: While activators can help speed things up, they aren’t essential. You can “activate” your compost by adding a shovel full of finished compost or just garden soil, which introduces beneficial microbes. Good aeration and the right mix of greens and browns are your best “activators.”
Q6: How much finished compost can I expect from a batch?
A: This varies greatly, but a typical 50-gallon composter can yield around 10-20 gallons of finished compost per cycle, depending on how much material you started with and how well it breaks down.

I am passionate about home engineering. I specialize in designing, installing, and maintaining heating, ventilation, and air conditioning systems. My goal is to help people stay comfortable in their homes all year long.