Feeling overwhelmed by kitchen scraps and yard waste? Want to do your part for the planet without a lot of fuss? Composting is a fantastic way to reduce waste and create amazing fertilizer for your garden. If you’re new to the idea, aerobic composting might sound a bit technical, but it’s actually super simple and incredibly effective. We’ll break it down into easy steps so you can start turning your waste into garden gold in no time. Get ready to boost your garden’s health and your eco-cred!
Aerobic Composting: Your Sustainable Superpower for a Greener Garden
Hey there, fellow eco-enthusiasts and garden lovers! Troy D Harn here, your go-to neighbor for all things home and garden. Today, we’re diving into something that might sound a little advanced but is actually a game-changer for your waste bin and your garden: aerobic composting. Think of it as a natural recycling process that your food scraps and yard trimmings can undertake, powered by tiny, invisible helpers – microorganisms. And the best part? It’s incredibly sustainable and surprisingly easy to get started. In this guide, we’ll explore what aerobic composting is all about and give you some genius eco-tips to make it a breeze.
What Exactly is Aerobic Composting?
Let’s ditch the jargon and get down to basics. “Aerobic” simply means “with air.” So, aerobic composting is all about creating the perfect conditions for beneficial microorganisms (like bacteria and fungi) to break down organic materials. The key ingredient here is oxygen. These little guys need to breathe! Unlike other composting methods where air might be limited, aerobic composting actively encourages airflow. This means your compost pile breaks down faster, smells way better (or not at all!), and produces high-quality compost that your plants will absolutely love.
Imagine a busy, well-ventilated workshop where tiny workers are efficiently sorting and breaking down materials. That’s sort of what’s happening in an aerobic compost pile. When these microorganisms get plenty of oxygen, they work quickly and digest the material without producing the foul odors often associated with decomposition. This makes it an ideal method for backyards and even smaller spaces.
Why Choose Aerobic Composting? The Brilliant Benefits
There are tons of reasons to love aerobic composting. It’s not just about reducing landfill waste, though that’s a huge win! Here are some of the standout benefits that make it a truly sustainable and genius choice:
- Faster Decomposition: With ample oxygen, the microbes work overtime. This means you can often get usable compost in a couple of months, rather than many months or even a year.
- Odor Control: Properly managed aerobic compost piles rarely smell bad. Any unpleasant odors usually mean there isn’t enough air.
- Higher Quality Compost: The quick and efficient breakdown process creates nutrient-rich, stable compost that is excellent for improving soil structure and feeding your plants.
- Reduces Greenhouse Gases: Anaerobic decomposition (without air) can release methane, a potent greenhouse gas. Aerobic composting significantly reduces these emissions.
- Waste Reduction: It diverts a significant amount of organic waste from landfills, where it would otherwise contribute to methane production.
- Cost Savings: You save money on fertilizers and soil amendments for your garden, and you’re giving your wallet a break from buying new products.
Getting Started: Your Aerobic Composting Toolkit
You don’t need fancy equipment to start aerobic composting. The simplest methods use just your yard and what you already have. For those who want a bit more structure, there are excellent bins available. The core idea is to allow air to circulate. Here’s what you might consider:
Option 1: The Simple Open Pile
This is the most basic approach. Find a spot in your yard that gets some sun and is easy to access. You just start piling your organic materials directly onto the ground. For good airflow, make sure the pile isn’t too compacted and is at least 3 feet by 3 feet by 3 feet. This size helps it retain enough heat to speed up decomposition.
Option 2: Basic Bin Systems
If you prefer a contained system, several options work great for aerobic composting:
- DIY Pallet Bin: Easy to build by standing four wooden pallets on end and securing them together. This creates a simple, airy enclosure.
- Wire Mesh Bin: You can create a cylindrical bin using hardware cloth or chicken wire. This offers excellent aeration and is very budget-friendly.
- Commercial Compost Bins: Many plastic bins are designed with ventilation holes. Some even have lids, which can help retain moisture and heat. Tumbler composters also work on an aerobic principle by allowing easy turning.
No matter which system you choose, the goal is to ensure air can get into the pile. You can learn more about different bin types from resources like the U.S. Environmental Protection Agency (EPA), which offers great general composting advice.
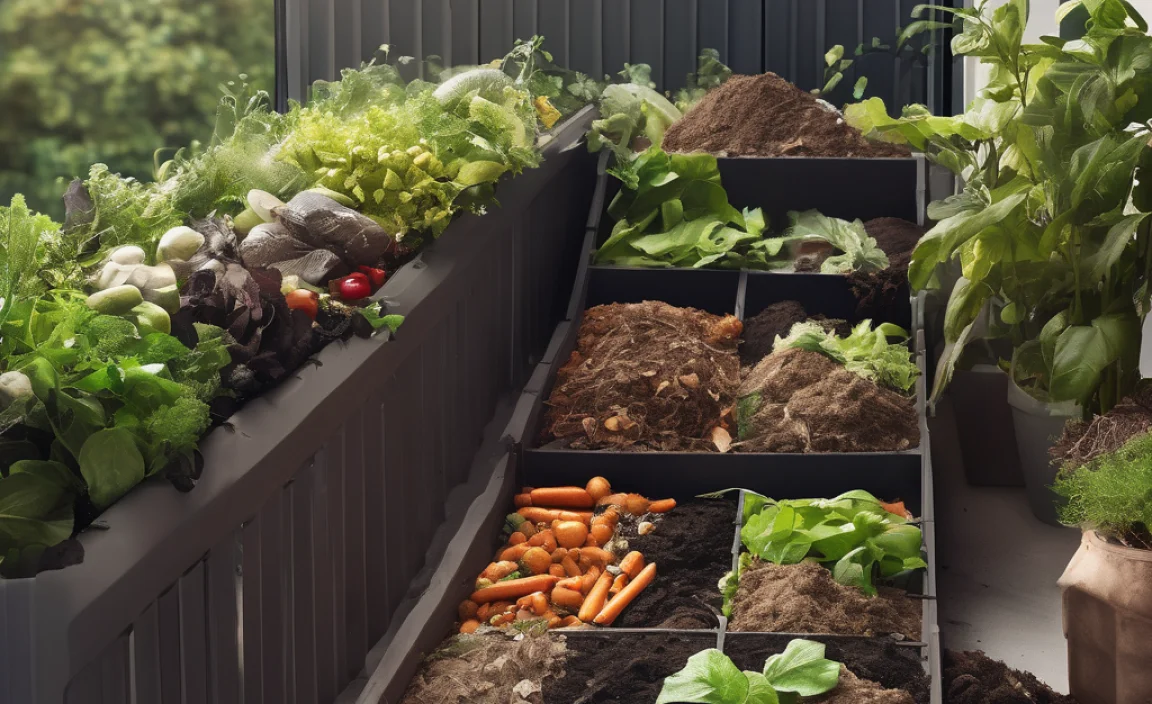
The “Greens” and “Browns”: What to Compost
The magic of composting happens when you combine the right ingredients. Think of it like a balanced diet for your compost microorganisms. You need a good mix of “greens” (nitrogen-rich materials) and “browns” (carbon-rich materials).
The ideal carbon-to-nitrogen ratio is often cited as around 25-30 parts carbon to 1 part nitrogen by weight. For beginners, aiming for roughly a 2:1 or 3:1 ratio of browns to greens by volume is a good starting point. This translates to more browns than greens.
Greens (Nitrogen-Rich)
These materials are generally moist and will provide nitrogen for the microorganisms to thrive.
- Fruit and vegetable scraps
- Coffee grounds and tea bags (without staples)
- Grass clippings (in thin layers)
- Plant trimmings and spent flowers
- Manure from herbivores (cows, horses, rabbits, chickens – ensure it’s aged if you’re concerned about pathogens)
Browns (Carbon-Rich)
These materials are drier and provide the energy source and bulk for the compost pile.
- Dry leaves
- Shredded newspaper and cardboard (avoid glossy or colored inks)
- Straw and hay
- Wood chips and sawdust (use sparingly; can take longer to break down)
- Pine needles (in moderation)
- Eggshells (crushed)
What to AVOID
Some items can cause problems or are best left out:
- Meat, fish, and dairy products (attract pests and can smell)
- Oily or greasy foods
- Diseased plants
- Weeds that have gone to seed
- Pet waste (from dogs or cats, as it can contain pathogens)
- Treated wood
- Coal ash
Here’s a quick reference table:
| Greens (Nitrogen) | Browns (Carbon) | Avoid |
|---|---|---|
| Fruit & Vegetable Scraps | Dry Leaves | Meat, Fish, Dairy |
| Coffee Grounds & Tea Bags | Shredded Newspaper/Cardboard | Oily Foods |
| Grass Clippings | Straw & Hay | Diseased Plants |
| Plant Trimmings | Wood Chips/Sawdust | Weeds with Seeds |
| Herbivore Manure | Pine Needles | Cat/Dog Waste |
Your Step-by-Step Guide to Aerobic Composting Success
Ready to build your first pile? It’s simpler than you think. Follow these steps:
Step 1: Choose Your Location and Bin
Pick a spot that’s convenient for adding materials and for eventual harvesting of compost. It should drain well and ideally get partial sun. Then, set up your chosen bin or designate your open pile area.
Step 2: Start with a Layer of Browns
Begin your compost pile with a thick layer (about 4-6 inches) of carbon-rich “browns” like dry leaves, straw, or shredded cardboard. This provides a base that allows air to circulate from the bottom.
Step 3: Add Your Greens
Now, start adding your kitchen scraps and other nitrogen-rich “greens.” Try to cover any fresh food scraps with a thin layer of browns to help prevent odors and deter pests. Chop larger items into smaller pieces; this speeds up decomposition.
Step 4: Alternate Layers
Continue layering greens and browns. A good rule of thumb is to add about two to three times more browns than greens. You don’t have to be exact, but a good balance is key. Think of it like building a lasagna!
Step 5: Keep it Moist
Your compost pile should be as damp as a wrung-out sponge. Not soggy, not dry. If it feels dry, water it. If it’s too wet, add more browns. The moisture is crucial for the microorganisms.
Step 6: Introduce Air – The “Aerobic” Part!
This is where aerobic composting shines. You need to regularly supply oxygen. Here’s how:
- Turning: The most effective way is to “turn” your compost pile. Use a pitchfork or compost aerator to mix the outer layers into the center and the inner layers to the outside. Aim to turn it at least once a week, or every couple of weeks. A compost tumbler makes this much easier!
- Aeration Tubes: You can insert perforated pipes or even old pieces of PVC pipe into the pile to allow air to flow in from the bottom.
- Fluffing: If you have an open pile, try to keep it loosely piled rather than packed down. Gently poking it with a fork can also help.
You can find great compost turning tools and aerators at most garden supply stores or online retailers. A good compost aerator tool is a real helper!
Step 7: Be Patient and Monitor
Composting isn’t an exact science, and pile contents vary. A healthy aerobic compost pile will heat up in the center as the microorganisms work. It should also look and smell earthy. If it smells rotten, it likely needs more air or browns. If it’s not breaking down, it might be too dry or need more greens.
Genius Eco-Tips for Supercharged Composting
Want to take your aerobic composting from good to great? Here are some tips that make a real difference and boost its sustainability factor:
- Chop It Up: Smaller pieces break down much faster. Before adding materials (especially browns like cardboard or tougher plant matter), shred or chop them into smaller bits.
- “Cook” Your Pile: To speed things up, aim for a pile that’s a good size – roughly 3x3x3 feet. This size retains heat better, which helps the microorganisms work more efficiently.
- Moisture Management is Key: Too much water leads to anaerobic conditions and bad smells. Too little and the microbes get sluggish. Check the moisture regularly, especially during dry spells. A good cover can help regulate moisture.
- Layering Matters (but don’t stress!): While not super strict, good layering from the start helps with airflow and balancing greens/browns. Think of it as setting up the pile for success from day one.
- Don’t Compost in Pure Sunshine: While some sun is okay, a pile in direct, scorching sun can dry out too quickly. Partial shade is often ideal.
- Use a Thermometer: A compost thermometer can tell you if your pile is heating up properly, indicating active decomposition. Temperatures between 130-160°F (54-71°C) are ideal for killing weed seeds and pathogens.
- Finish with a Cure: Once your compost looks dark, crumbly, and smells earthy, it’s almost ready. Let it sit for a few more weeks (cure) before using it.
- Feed Your Garden, Feed the Planet: Once it’s ready, use your compost! Spread it on garden beds, around trees and shrubs, or mix it into potting soil. This nourishes your plants and improves soil health, reducing the need for synthetic fertilizers.
Troubleshooting Common Composting Hiccups
Even with the best intentions, you might run into a few snags. Don’t worry, they’re usually easy fixes!
- Smelly Pile: This is the most common complaint. It usually means there’s not enough air (anaerobic conditions) or too many “greens” (nitrogen).
- Fix: Turn the pile thoroughly to introduce air. Add a generous amount of “browns” (dry leaves, shredded paper) to absorb excess moisture and balance the nitrogen.
- Pile Isn’t Heating Up or Decomposing: If your pile is cold and nothing much is happening, it might be too small, too dry, or lacking nitrogen.
- Fix: Ensure it’s at least 3x3x3 feet. Add more “greens” and moisture. Turn it to mix materials and introduce oxygen.
- Pests (Flies, Rodents): While less common with aerobic composting if managed well, pests can sometimes show up, especially if you’re adding meat or dairy.
- Fix: Always bury food scraps deep within the pile and cover them with a layer of browns. Avoid adding prohibited items. A sturdy, enclosed bin can also help.
- Pile is Too Wet: A soggy pile means it’s probably anaerobic.
- Fix: Turn it well and add plenty of dry “brown” materials to absorb excess moisture. You might need to stop adding new wet materials for a little while.
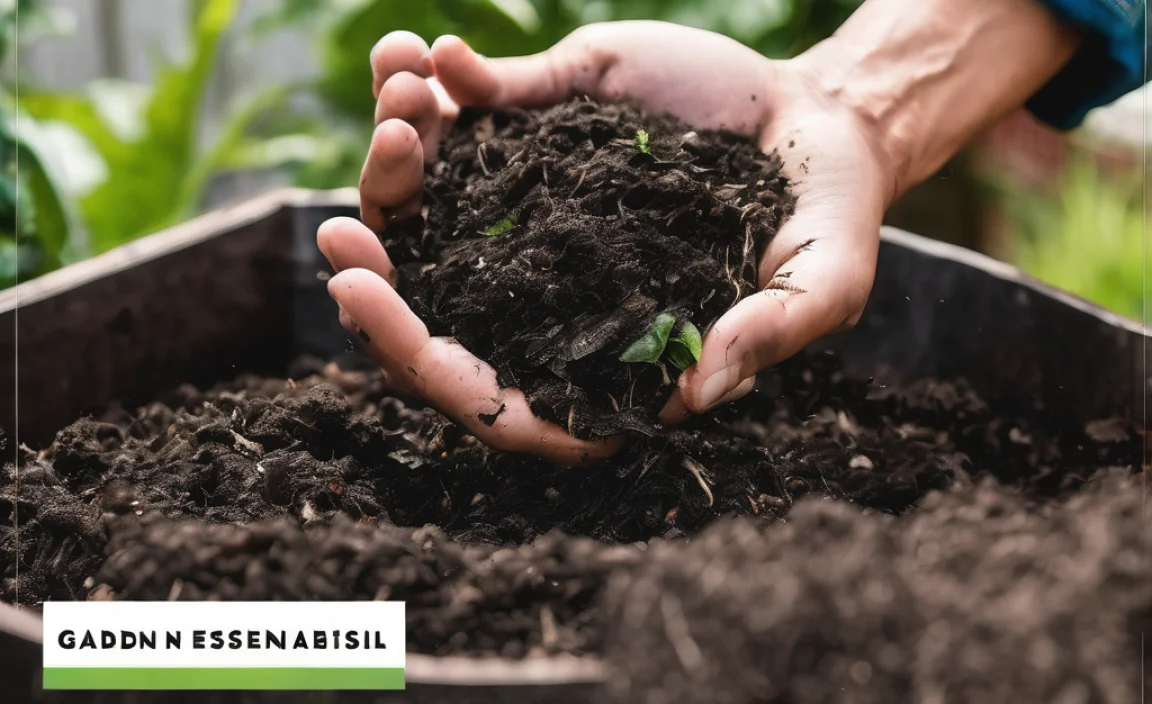
When is Compost Ready? Recognizing “Black Gold”
You’ll know your compost is ready when it turns dark brown or black, has a crumbly texture, and smells earthy and pleasant, like a forest floor after rain. You shouldn’t be able to recognize the original materials (like banana peels or leaves) anymore. It will look and feel like rich soil.
This finished compost is often called “black gold” by gardeners, and for good reason! It’s packed with nutrients, beneficial microbes, and organic matter that will improve your soil’s ability to retain water and nutrients, leading to healthier, happier plants. You can sift it to remove any larger, unfinished pieces (which can go back into a new pile) or use it as is.
The Big Picture: Aerobic Composting and Sustainability
Choosing aerobic composting is more than just a gardening technique; it’s a conscious step towards a more sustainable lifestyle. By diverting organic waste from landfills, you’re directly reducing methane emissions. You’re also creating a valuable resource that enhances soil health, reduces the need for chemical fertilizers (which can leach into waterways), and lessens water usage in gardens because compost-rich soil holds moisture better. It’s a powerful way to close the loop – turning waste into a nutrient-rich product that benefits your garden and the planet.
For more detailed information on sustainable practices, resources like the EPA’s Sustainability page offer a broad view of how we can all contribute.
Frequently Asked Questions About Aerobic Composting
Q1: How long does aerobic composting take?
A1: With good management and regular turning, you can often have finished compost in as little as 2-4 months. This can vary depending on the materials used, temperature, and moisture levels.
Q2: Do I really need to turn my compost pile?
A2: Turning is highly recommended for faster, more efficient aerobic composting. It ensures oxygen reaches all parts of the pile. If you can’t turn it often, consider using aeration tubes or a compost tumbler.
Q3: My compost pile smells? Is it still aerobic?
A3: A truly aerobic pile should smell earthy, not foul. A strong foul smell usually indicates it’s gone anaerobic due to lack of oxygen or being too wet. Turn it and add more dry brown materials.
Q4: Can I compost grass clippings in an aerobic system?
A4: Yes, grass clippings are great “greens”! However, add them in thin layers and mix them with browns. Large, wet clumps can mat down and block airflow, leading to anaerobic conditions.
Q5: What are the best “brown” materials to use for beginners?
A5: Dry leaves are fantastic and often abundant. Shredded newspaper and plain brown cardboard (torn into small pieces) are

I am passionate about home engineering. I specialize in designing, installing, and maintaining heating, ventilation, and air conditioning systems. My goal is to help people stay comfortable in their homes all year long.