Want to turn food scraps and yard waste into amazing fertilizer for your garden? It might sound complicated, but it’s actually quite simple once you know the basics. Aerobic composting is a fantastic way to reduce waste and boost your soil’s health. Let’s dive in and get this done together, step-by-step!
Aerobic Composting in USA: Your Essential Grown-Up Guide
Hey there, D.I.Y. enthusiasts and garden lovers! Troy D Harn here, your friendly guide from TopChooser. Ever look at your kitchen scraps and yard trimmings and think, “There has to be a better way than the trash can?” You’re right! Composting is a game-changer, and today, we’re focusing on a super-effective method: aerobic composting. It’s like giving your waste a second life to become black gold for your plants. We’ll break it all down, so you can feel confident building your own compost pile right here in the USA. Let’s get started!
What Exactly is Aerobic Composting?
Think of “aerobic” as meaning “with air.” Aerobic composting is a process where beneficial microorganisms, like bacteria and fungi, break down organic materials. The key ingredient here is oxygen! These tiny helpers need plenty of fresh air to do their work efficiently. When they have enough oxygen, they multiply quickly and break down your compostable materials much faster, and without that unpleasant, rotten-egg smell. It’s the most common and by far the quickest method for home composting.
Why Choose Aerobic Composting?
There are tons of benefits to getting your compost on! For starters, it’s a fantastic way to:
- Reduce Landfill Waste: So much of what we throw away is actually compostable material. By composting, you’re diverting a significant amount of waste from landfills, which is great for the environment.
- Create Nutrient-Rich Soil: Compost, often called “black gold,” is packed with nutrients that your plants will absolutely love. It improves soil structure, drainage, and water retention.
- Save Money: You’ll buy fewer fertilizers and soil amendments for your garden. Plus, some municipalities offer discounts or rebates for composting bins.
- Improve Garden Health: Healthier soil means healthier plants that are more resistant to pests and diseases.
- It’s Faster: Compared to other methods like anaerobic composting (which smells and takes forever), aerobic composting is significantly quicker. You can have finished compost in as little as a few weeks to a few months.
What You’ll Need: Your Aerobic Composting Toolkit
Getting started is simpler than you think! You don’t need fancy equipment. Here’s a basic rundown of what’s helpful:
Compost Bin Options
You have a few good choices for holding your compost pile. The best one for you depends on your space, budget, and how hands-on you want to be.
- DIY Piles/Bins: This is the most budget-friendly. You can simply create a pile in a corner of your yard or build a simple enclosure using pallets, chicken wire, or lumber. Just make sure it’s at least 3x3x3 feet to hold heat effectively.
- Plastic Compost Bins: These are widely available at garden centers and home improvement stores. They often come with lids to keep moisture in and pests out, and some have doors at the bottom for easy compost harvesting. Look for bins with good ventilation.
- Tumbler Composters: These enclosed bins spin on an axis, making it super easy to turn your compost. They are great for keeping critters out and can speed up the composting process, but they tend to be more expensive.
Tools for the Job
- Pitchfork or Compost Aerator: Essential for turning and aerating your pile. A pitchfork works well, or you can buy specialized aerators.
- Shovel: For moving materials and harvesting finished compost.
- Water Source: A hose or watering can to keep your compost pile moist.
- Kitchen Countertop Bin: A small container for collecting food scraps before taking them to your main compost bin.
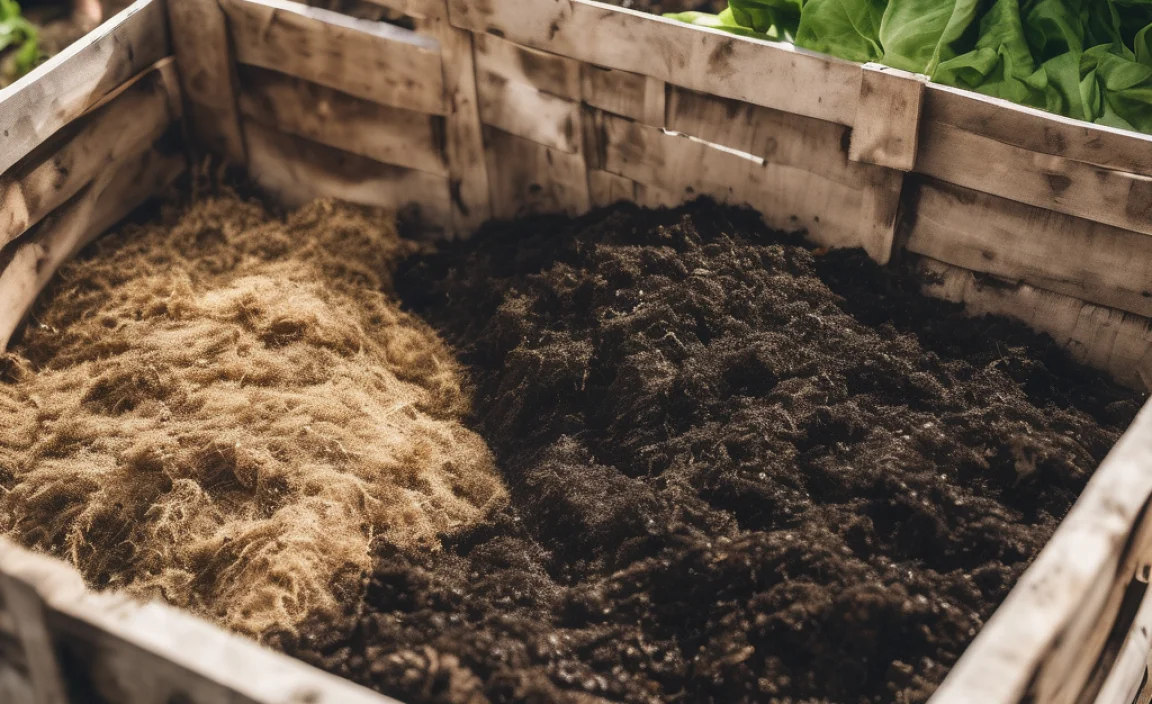
The “Greens” and “Browns”: Your Compost Recipe
This is the secret sauce to successful aerobic composting! You need a good balance of nitrogen-rich “greens” and carbon-rich “browns.” Think of it like a balanced diet for your compost microbes.
What are “Greens”?
Greens are materials that are wet and rich in nitrogen. They provide the protein for your microbes and help heat up the pile. Examples include:
- Fruit and vegetable scraps
- Coffee grounds and tea bags
- Grass clippings (in moderation)
- Plant trimmings (non-diseased)
- Manure from herbivores (like rabbits, chickens, cows, horses – steer clear of pet waste!)
What are “Browns”?
Browns are materials that are dry and rich in carbon. They provide the energy for your microbes and, importantly, help create air pockets to keep the pile from getting dense and slimy.
- Dry leaves
- Shredded newspaper and cardboard (avoid glossy or colored ink)
- Straw or hay
- Wood chips or sawdust (in small amounts)
- Small twigs and branches
- Eggshells (crushed)
The Ideal Ratio
A good starting point is to aim for roughly a 2:1 or 3:1 ratio of browns to greens by volume. This means for every one part of greens, you want two or three parts of browns. Don’t stress too much about being exact; you’ll learn to eyeball it. If your pile smells like ammonia, you probably have too many greens. If it’s not heating up and seems damp and sluggish, you likely need more browns.
What NOT to Compost
To keep your compost healthy and free of pests and diseases, there are some things you should avoid adding:
- Meat, fish, and dairy products: These can attract pests and create foul odors.
- Oily or greasy foods: Same reasons as meat and dairy.
- Diseased plants: You don’t want to spread plant diseases back into your garden.
- Weeds that have gone to seed: Unless your compost pile gets consistently very hot (over 140°F or 60°C), these seeds can survive and sprout in your garden.
- Pet waste (dog and cat): These can contain pathogens that are harmful to humans.
- Treated wood: Chemicals can leach into your compost.
- Coal ash: Can contain harmful substances.
Building Your Aerobic Compost Pile: A Step-by-Step Guide
Now for the fun part! Let’s get this pile built and start turning waste into wonder!
Step 1: Choose Your Location
Find a spot that’s:
- Accessible: You’ll need to get to it with your kitchen scraps and tools.
- Reasonably level: So your bin or pile doesn’t shift.
- Well-drained: You don’t want it sitting in a puddle.
- Partially shaded: This helps maintain consistent moisture levels. Too much sun can dry it out; too much shade can make it too wet.
Step 2: Start with a Base Layer of Browns
Begin by laying down a 4-6 inch layer of coarse brown materials at the bottom of your bin or chosen spot. This could be twigs, straw, or shredded cardboard. This layer helps with drainage and air circulation from the start.
Step 3: Add Layers of Greens and Browns
Now, start layering your compostable materials. Aim for that approximate 2:1 or 3:1 ratio of browns to greens. As you add kitchen scraps (greens), it’s a good idea to cover them with a layer of brown material. This helps deter pests and manage any potential odors. You can add:
Greens: Fruit peels, vegetable trimmings, coffee grounds, grass clippings.
Browns: Shredded newspaper, dry leaves, straw.
Chop larger items into smaller pieces. Smaller pieces break down faster!
Step 4: Add Water
Your compost pile needs to be moist, but not soggy. Think of a wrung-out sponge. As you build the layers, lightly water each new addition. If you’re adding dry leaves, they’ll need more water than fresh grass clippings.
Step 5: Aerate (Turn) Your Pile
This is the “aerobic” part! To get air into the pile, you need to turn it regularly. Aim to turn the pile at least once a week, or every couple of weeks if you’re short on time. Use your pitchfork or aerator to mix the outer layers into the center and bring the inner layers to the outside. This ensures all materials get exposed to oxygen and heat, speeding up decomposition and preventing anaerobic (smelly) conditions.
How to Turn Your Pile:
- Gather your tools: Pitchfork or compost aerator.
- Start from the outside: Loosen the materials on the edges and top.
- Mix it in: Move these loosened materials towards the center of the pile.
- Bring the center out: Dig into the center and bring some of that material to the outer edges.
- Ensure even mixing: Try to distribute the wet and dry parts as evenly as possible.
Step 6: Monitor and Maintain
Keep an eye on the moisture level. If it seems dry, add more water. If it’s too wet and smells, add more dry brown material and make sure you’re turning it well.
You can also monitor the temperature. A healthy, active compost pile will heat up. You can use a compost thermometer, but often you can feel the warmth when you’re turning it. High temperatures (130-160°F or 55-70°C) kill weed seeds and pathogens, which is ideal. This heat is generated by the microbes doing their work!
Troubleshooting Common Composting Problems
Even with the best intentions, you might run into a few hiccups. Here’s how to fix them:
| Problem | Cause | Solution |
|---|---|---|
| Bad Odor (Ammonia/Rotten Eggs) | Too many green (nitrogen-rich) materials, or the pile is too wet and compacted, leading to anaerobic conditions. | Turn the pile thoroughly to introduce air. Add more brown materials (leaves, shredded paper) to absorb excess moisture and balance the nitrogen. Ensure good aeration. The EPA has great resources on composting best practices. |
| Pile Isn’t Heating Up / Decomposing Slowly | Not enough green materials (nitrogen), too dry, or needs turning and aeration. Pile might be too small. | Add more green materials. Water the pile if it’s too dry. Turn the pile more frequently (at least weekly). Ensure your pile is at least 3x3x3 feet for optimal heat retention. |
| Attracting Pests (Rodents, Flies) | Exposed food scraps, or including items that attract pests (meat, dairy, oily foods). | Bury fresh food scraps deep within the pile and cover them with a layer of brown materials. Ensure your bin has a secure lid. Avoid adding meat, dairy, or oily items. A tumbler composter can also help deter pests. |
| Pile is Too Wet and Slimy | Too many green materials, not enough browns, or poor drainage. | Turn the pile and add a generous amount of dry brown materials (shredded cardboard, dry leaves) to absorb excess moisture. Ensure your bin location has good drainage. |
When is Compost Ready?
Patience is key here! Finished compost is dark, crumbly, and smells earthy, like a forest floor after rain. You shouldn’t be able to recognize the original materials you put in. The time it takes can vary from a few weeks to several months, depending on the materials, how often you turn it, and the weather.
Harvesting Your Compost
Once your compost is ready, you can harvest it! If you have a bin with a door at the bottom, this is where it comes in handy. Simply scoop out the finished compost. For open piles or bins without doors, you can either shovel it off the top or sort through it, separating the finished compost from any incompostable bits (like twigs that haven’t fully broken down) which can go back into a new compost pile.
How to Use Your Finished Compost
Finished compost is amazing for your garden!
- Soil Amendment: Mix it into your garden beds before planting. It improves soil structure, nutrients, and water retention. Aim for a 2-3 inch layer worked into the top 6-8 inches of soil.
- Top Dressing: Spread a thin layer around existing plants, shrubs, and trees.
- Potting Mix: Mix it with soil and perlite or vermiculite to create a nutrient-rich potting mix for containers and houseplants.
- Lawn Care: Rake a thin layer over your lawn in the spring or fall to improve its health.
Quick Summary: Aerobic Composting Essentials
Here’s a quick recap to keep in your back pocket:
- Goal: Break down organic matter using oxygen-loving microbes.
- Key Ingredients: Balance “greens” (nitrogen-rich) and “browns” (carbon-rich).
- Don’t Compost: Meat, dairy, oily foods, diseased plants, pet waste.
- Process: Layer greens and browns, keep moist like a wrung-out sponge, and turn regularly for air.
- Signs of Readiness: Dark, crumbly, earthy smell.
- Benefits: Reduces waste, creates rich soil, saves money.
Conclusion: Happy Composting!
See? Aerobic composting is totally achievable and incredibly rewarding! You’re not just tossing waste; you’re actively creating something valuable that will enrich your garden and contribute to a healthier planet.
Frequently Asked Questions About Aerobic Composting
Q1: How much space do I need for aerobic composting?
A1: You can start small! Even a compact bin on a patio or balcony works for kitchen scraps. For yard waste, a minimum pile size of about 3x3x3 feet is recommended for effective heating, but you can build smaller or larger depending on your needs and space.
Q2: How often should I turn my compost pile?
A2: For faster results, turn your pile every 7-10 days. If you’re busy, once every 2-3 weeks will still work, but it will take longer to get finished compost.
Q3: Can I compost in the winter?
A3: Yes, you can compost in winter! Decomposition will slow down due to colder temperatures, but it often won’t stop completely, especially if your pile is well-insulated and you continue adding materials. You might just need to turn it less often.
Q4: How do I know if my compost is too wet?
A4: It will feel slimy and might smell bad (like ammonia or rotten eggs). If it’s too wet, add more dry brown materials like shredded cardboard, dry leaves, or sawdust, and turn the pile thoroughly to improve air circulation.
Q5: My compost pile is attracting flies. What’s wrong?
A5: This usually means there are exposed food scraps or too many green materials without enough browns. Bury fresh kitchen scraps deep within the pile and always follow them with a layer of brown material. Ensure your bin has a lid or cover.
Q6: Can I just throw everything into the compost bin?
A6: While it’s tempting, it’s best to avoid certain items like meat, dairy, fats, diseased plants, and pet waste, as they can cause odors, attract pests, and spread diseases. Sticking to fruits, vegetables, yard trimmings, and paper/cardboard is a safe bet for beginners.

I am passionate about home engineering. I specialize in designing, installing, and maintaining heating, ventilation, and air conditioning systems. My goal is to help people stay comfortable in their homes all year long.