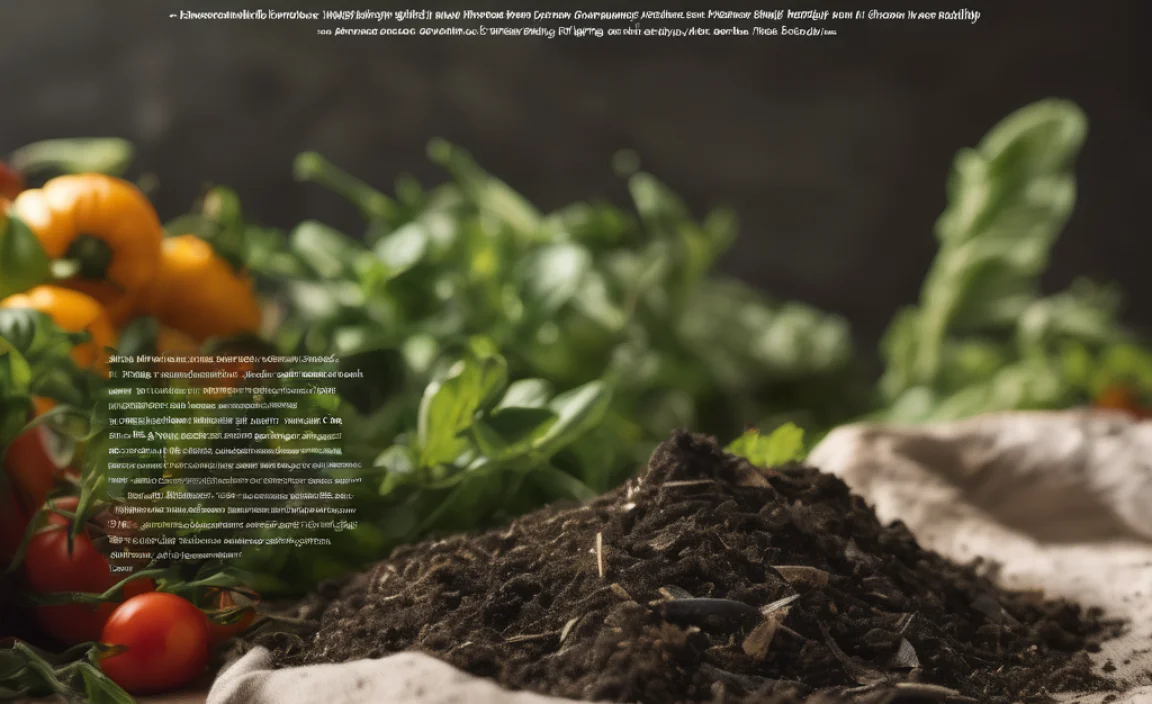
Composting your kitchen scraps can feel like magic, turning waste into garden gold. But some folks find the usual “hot” composting a bit much to manage. What if there was a simpler, almost hands-off way? That’s where anaerobic composting comes in. It’s a bit different, and honestly, way easier for many busy households. Stick with me, and I’ll break down this super-cool method step-by-step so you can start turning your waste into amazing fertilizer in no time.
What Exactly is Anaerobic Composting? (The “No Oxygen” Twist)
So, you’ve probably heard of regular composting, right? That’s usually “aerobic” composting. It means the little microbes that break down your food scraps need air (oxygen) to do their job. You’re always encouraged to turn the pile to keep it airy and help it heat up. Think of it like a cozy, active party for microbes working in the open.
Anaerobic composting, on the other hand, is the exact opposite. “Anaerobic” just means “without air.” Instead of needing oxygen, the microbes that work in this system thrive in an oxygen-free environment. This changes how things break down, and yes, it can smell a bit different than aerobic compost, but don’t let that worry you. It’s a genius way to compost, especially if you don’t have the time or space to constantly turn a compost pile.
Why Choose Anaerobic Composting? The Genius Benefits
Why would you want to compost without air? It sounds counterintuitive, but there are some seriously cool advantages:
- Less Work, Less Turning: This is the big one! You don’t need to constantly flip or aerate an anaerobic system. Close the lid and let it do its thing. Perfect for busy folks.
- Faster Breakdown (Sometimes): While it seems slower because there’s no heat generation like hot aerobic composting, some anaerobic methods can break down materials quite quickly.
- Controls Odors (Yes, Really!): While it might smell a bit “swampy” initially or if the system isn’t balanced, a properly working anaerobic system is often contained and can minimize external smells compared to a poorly managed open pile.
- Handles More Types of Waste: Some anaerobic methods can handle things like meat scraps and dairy products more readily than open-air aerobic piles, helping reduce household waste even further.
- Reduced Greenhouse Gases (Compared to Landfills): When organic waste breaks down in a landfill without oxygen, it produces methane, a potent greenhouse gas. Anaerobic composting, when managed, can capture some of this or break it down differently, being a greener option than simply tossing food waste.
- Minimal Space Required: Many anaerobic systems are enclosed bins or tumblers, making them ideal for smaller yards, balconies, or even apartment living.
Understanding the Anaerobic Process: The Magic Behind the Scenes
Think of anaerobic composting as a staged process, kind of like different crews tackling different parts of the job. It’s a bit more complex in terms of the types of microbes involved, but it all happens within your compost container.
In simple terms, it goes like this:
- Hydrolysis: Big, complex molecules like carbohydrates and proteins are broken down into smaller ones.
- Acidogenesis: These smaller molecules are converted into volatile fatty acids. This is where you might notice a slightly sour or vinegary smell if the system is just starting.
- Acetogenesis: The fatty acids are further broken down into acetic acid, water, and carbon dioxide.
- Methanogenesis: Finally, methane-producing bacteria convert these into methane and carbon dioxide. This is the stage that produces biogas, which is why some anaerobic systems are designed to capture it.
The key is that each stage happens in the absence of oxygen. It’s a different biological pathway than what happens in your garden compost bin.
Choosing Your Anaerobic Composting Method: Options Galore!
When we talk about anaerobic composting for home use, it often boils down to a few popular methods. The best one for you really depends on your space, how much waste you generate, and your budget.
1. The Bokashi Bin System
This is hands-down the most popular and accessible anaerobic method for home gardeners and households. Bokashi isn’t technically “composting” in the traditional sense of breaking things down into finished soil on its own. Instead, it’s a form of fermentation. You use a special airtight bin and an inoculant (often called Bokashi bran) that contains effective microorganisms (EM). These EM kickstart the fermentation process.
How it works:
- You layer your kitchen scraps (yes, including meat and dairy!) with the Bokashi bran in the airtight bin.
- The EM work to “pickle” the waste, preventing it from rotting and smelling bad while it breaks down anaerobically.
- The bin has a spigot at the bottom to drain off “Bokashi tea,” a nutrient-rich liquid fertilizer.
- Once the bin is full, you let it ferment for a couple of weeks.
- The fermented material then needs to be buried in your garden or added to a traditional compost pile to finish breaking down into rich soil. It’s like pre-composting!
Pros: Great for small spaces, can handle almost all food waste, produces a liquid fertilizer, relatively odorless during fermentation.
Cons: The fermented material needs a secondary stage of decomposition (buried or further composted), requires purchasing Bokashi bran.
2. Anaerobic Digesters (Biogas Systems)
These are more sophisticated systems designed to capture the biogas produced during anaerobic digestion. They are often used on farms or in communities where there’s a significant amount of organic waste. Smaller, home-scale units are available, but they are usually a bigger investment and require more management.
How it works:
- Organic material is added to a sealed tank.
- Anaerobic bacteria break down the material, producing biogas (mostly methane and carbon dioxide).
- This biogas can be captured and used for cooking, heating, or electricity generation.
- The leftover digestate is a nutrient-rich fertilizer, similar to compost.
Pros: Produces usable energy, creates excellent fertilizer, can handle large volumes of waste.
Cons: High upfront cost, typically requires more space and technical knowledge, not ideal for most individual households just starting out.
3. Sealed Compost Tumblers (Some Models)
While many compost tumblers are designed for aerobic composting (you’re supposed to tumble them to introduce air), some people use them in a more anaerobic fashion, especially if they don’t tumble them often. However, this can be tricky to balance and might lead to a smelly, slimy mess if not managed carefully. If you have a tumbler and want to try minimal aeration, you can add materials and let it sit for a longer period, occasionally turning it. This method is less predictably anaerobic and more of a hybrid, often leading to slower decomposition and potential anaerobic odors.
Getting Started with Bokashi: Your Easy Anaerobic Composting Course
Since Bokashi is the most beginner-friendly and practical anaerobic method for most homes, let’s focus on that. It’s like giving your food scraps a head start in a controlled, fermented environment.
What You’ll Need for Bokashi
Don’t worry, it’s not a lot of fancy stuff!
- Bokashi Bin(s): You can buy specific Bokashi bins, which are airtight containers with a lid that seals well and a spigot at the bottom to drain the liquid. Many people buy two so they can fill one while the other is fermenting.
- Bokashi Bran (Inoculant): This is specially prepared rice bran or sawdust that has been inoculated with effective microorganisms (EM). You can find this online or at some garden supply stores.
- Kitchen Scraps: Pretty much all of your food waste! This includes fruit and vegetable peels, cores, coffee grounds, tea bags, eggshells, and even (and this is the cool part) meat scraps, fish bones, dairy products like cheese and yogurt, and cooked leftovers.
- A Drip Tray or Container: To collect the “Bokashi tea” from the spigot.
- A Scoop or Small Trowel: To sprinkle the Bokashi bran.
Step-by-Step: Your Bokashi Composting Guide
Step 1: Prep Your Bin
Make sure your Bokashi bin is clean. Place it on a stable surface where you can easily access it. If it has a spigot, make sure it’s closed tightly or plugged.
Step 2: Start Adding Scraps
Begin adding your kitchen scraps to the bin. Try to chop larger items into smaller pieces, as this helps them ferment more evenly. Don’t worry about being perfect, though!
What to Add:
- Fruit and vegetable waste
- Meat, fish, and bones
- Dairy products
- Coffee grounds and tea bags (remove staples from tea bags if necessary)
- Cooked leftovers
- Eggshells
What to Avoid (Generally):
- Large amounts of liquids like oils or fats (a little is fine, but a lot can hinder the process)
- Large bones that won’t break down easily
- Non-food items (plastic, metal, etc.)
Step 3: Sprinkle the Bokashi Bran
Every time you add a new layer of scraps (or after every few inches of scraps), sprinkle a tablespoon or two of Bokashi bran evenly over the top. You want to make sure the microorganisms have good contact with the waste.
Step 4: Press Down the Scraps
After adding your scraps and bran, use a scoop or your hand to press the materials down firmly in the bin. This helps to remove air pockets, creating that crucial anaerobic environment. You want it to be compact!
Step 5: Seal the Bin Tightly
Close the lid of the Bokashi bin securely or press down the inner lid if your system has one. The seal is vital to keep oxygen out and allow the fermentation process to happen.
Step 6: Drain the Bokashi Tea
Every few days, or whenever you add new scraps and press them down, check the Bokashi tea level. Open the spigot and drain the liquid into your drip tray or container. This liquid is packed with nutrients! You can dilute it with water (about 1:100 ratio) and use it as a potent liquid fertilizer for your plants. If you don’t drain it, the liquid can create unwanted odors and inhibit the fermentation.
Step 7: Repeat Until Full
Continue adding scraps, sprinkling bran, pressing down, and draining the tea until your Bokashi bin is full. Once it’s full, seal it tightly and let it sit for at least two weeks (three to four weeks is even better) without opening it.
Step 8: The Second Stage – Burying or Adding to Compost
After the fermentation period, you’ll have a bin full of pickled food waste. It will look much like it went in, but it will be significantly broken down and fermented, not rotted. It might smell a bit tangy or vinegary. This material is not yet finished compost. You need to introduce it to the soil:
- Bury it: Dig a hole in your garden bed or a large planter, at least 10-12 inches deep. Empty the contents of the Bokashi bin into the hole, cover it with soil, and mix it in. Wait another 2-4 weeks for it to fully decompose into rich soil before planting directly on top.
- Add to a Compost Pile: If you have an existing aerobic compost pile, you can add the fermented Bokashi contents directly to it. It will break down much faster in an active compost pile as it’s already partially decomposed and sterilized by the fermentation process.
Anaerobic vs. Aerobic Composting: A Handy Comparison
To really see why anaerobic methods like Bokashi are so appealing, let’s quickly compare them to their oxygen-loving counterparts.
| Feature | Anaerobic Composting (e.g., Bokashi) | Aerobic Composting (e.g., Yard Bin, Tumbler) |
| Oxygen Requirement | None (airtight) | High (needs turning/aeration) |
| Typical Smell | Tangy, vinegary (during fermentation); low odor if sealed | Earthy, pleasant (when balanced); can be sour/rotten if wet/compacted |
| Speed of Initial Breakdown | Fermentation takes 2-4 weeks. Full decomposition requires secondary stage. | Can be fast (hot composting) or slow (cold composting). |
| What You Can Compost | Most food scraps, including meat, dairy, oils. | Primarily fruit/veg scraps, leaves, grass clippings, cardboard. Meat/dairy often avoided. |
| Turning Required | None for fermentation. | Frequent turning is ideal for hot composting. |
| Finished Product (Initial) | Fermented material (needs further breakdown). | Finished compost (ready to use). |
| Space Efficiency | Good, especially for bins. | Varies, can take up significant space for large piles. |
| Bokashi Tea/Liquid | Yes, valuable liquid fertilizer. | Little to no liquid produced. |
As you can see, Bokashi offers a unique set of advantages, especially for those who want to divert nearly all food waste without the hassle of turning or worrying about what they can and can’t put in.
Troubleshooting Common Bokashi Issues
Even with a simple system, sometimes things need a little tweak. Here are a few common hiccups:
- It smells really bad (rotten, sulfurous): This usually means the bin isn’t sealed properly, or too much liquid wasn’t drained. Open the bin, try to drain any excess liquid, and sprinkle a bit more Bokashi bran. Ensure the lid is airtight. If you can’t fix it, you might have to discard the batch safely (away from your home) and start fresh.
- Not much liquid being produced: This can happen if your scraps are very dry, or if the temperature is very cold. Add slightly wetter scraps, or if it’s very cold, move the bin to a warmer spot. If there’s no liquid, the microbes aren’t very active.
- Mold growing on top: A normal, fuzzy white mold is usually fine and part of the fermentation. However, if you see large patches of black, green, or hairy mold, it could indicate too much air getting in. Press down the material again and ensure a good seal.
- Fermented material not breaking down after burying: Make sure you’re burying it deep enough (at least 10-12 inches) and giving it enough time. Also, ensure the soil isn’t waterlogged. If you have pets that might dig it up, ensure it’s buried deep or protected.
Remember, Bokashi is a fermentation process. A slight tangy or sour smell is normal and expected. An overwhelming foul odor typically means something is off balance.
Tips for Success with Anaerobic Composting
Here’s how to really nail your new composting habit:
- Consistency is Key: Try to add scraps regularly and sprinkle the bran each time. This keeps the microbial activity going.
- Chop it Up: Smaller pieces mean faster and more even fermentation.
- Press Firmly: Get as much air out as possible by pressing down your layers.
- Seal it Tight: An airtight seal is non-negotiable for anaerobic success.
- Don’t Skip the Drainage: Regularly draining the Bokashi tea prevents sogginess and odor.
- Be Patient: Fermentation takes time. Let the full cycle complete before trying to use the material.
- Experiment with Burial/Composting: Find out what works best for your garden – burying directly or adding to an existing compost pile.
Where to Find More Information
For more in-depth research on the science of composting and anaerobic digestion, check out these resources: