Got a compost pile that seems a bit… slow? Or maybe you’re curious about a different way to break down kitchen scraps and yard waste? Anaerobic composting might be your answer. It’s a method that works without oxygen, and while it might sound a little technical, it’s actually quite straightforward. We’ll walk through everything you need to know to get started, making it easy for anyone to try!
Anaerobic Composting Ideas: Essential Tips for Beginners
Hey there, fellow home improvers and garden enthusiasts! Troy D Harn here from TopChooser. You’ve probably heard a lot about composting, and many of you might already have a trusty compost bin humming along aerobically (that’s with oxygen). But what if I told you there’s another way, a method that works in a different environment and can be just as effective? I’m talking about anaerobic composting. It sounds a bit fancy, but don’t let the name fool you. Think of it like a different kind of kitchen for your organic waste – one that doesn’t need a lot of fresh air.
For some, a traditional compost pile might be a bit too much work, or maybe they have unique space constraints. Others might have specific waste they want to process. Whatever your reason, anaerobic composting offers an interesting alternative. It can even be quicker for certain types of waste, and sometimes, it’s just plain easier to manage. This guide is all about breaking down the “anaerobic composting ideas” you need to get started, with simple, practical tips so you can feel confident tackling this without any stress.
We’ll cover what it is, how it works, what you can and can’t compost, and the best ways to set it up. Ready to dive in and discover a new composting skill?
What Exactly is Anaerobic Composting?
Let’s break down that word: “anaerobic.” It simply means “without air.” So, anaerobic composting is a way of decomposing organic materials (like your food scraps and yard waste) in an environment where there’s little to no oxygen. Unlike traditional “aerobic” composting, which relies on oxygen-loving microbes to break things down, anaerobic composting uses microbes that thrive in oxygen-free conditions.
Think of it in contrast to your everyday compost bin. In a typical compost pile, you’re encouraged to turn it, fluff it up, and ensure it has plenty of air. This helps the “good bugs” (aerobic bacteria) do their job quickly and efficiently, producing compost relatively fast and keeping smells down. Anaerobic composting, on the other hand, creates conditions where different types of bacteria take over. These microbes break down organic matter in a way that doesn’t require oxygen.
How Does Anaerobic Composting Work (The Simple Version)?
In an anaerobic system, materials decompose through a process called fermentation. It’s similar to how things ferment in making sauerkraut or even in your gut! The microbes that don’t need oxygen go to work on the organic matter. This process can actually break down materials quite rapidly, sometimes even faster than aerobic composting for certain items.
Here’s a super simplified look at the stages:
- Hydrolysis: Big, complex molecules like carbohydrates and proteins are broken down into smaller, simpler ones.
- Acidogenesis: These simpler molecules are further converted into volatile fatty acids, alcohols, and other organic acids.
- Acetogenesis: The fatty acids and alcohols are converted into acetic acid, hydrogen, and carbon dioxide.
- Methanogenesis: Finally, methane-producing bacteria (methanogens) convert these into methane gas and carbon dioxide.
The key takeaway is that it’s a microbial process, just like aerobic composting, but with a different cast of characters and in a different environment. Because there’s no oxygen, these microbes give off different byproducts, which can include gases like methane. This is why some anaerobic composting methods are done in sealed containers, and why managing potential odors is an important consideration.
Anaerobic Composting vs. Aerobic Composting: What’s the Difference?
It’s helpful to see how these two methods stack up. While both aim to break down organic waste, they use different pathways and have different characteristics.
| Feature | Aerobic Composting | Anaerobic Composting |
|---|---|---|
| Oxygen Requirement | Requires oxygen (composting with air) | Little to no oxygen required (fermentation) |
| Microbes Involved | Aerobic bacteria, fungi, actinomycetes | Anaerobic bacteria, including methanogens |
| Process Speed | Can be slow to moderate, depending on management | Can be faster for some materials, especially in optimal conditions |
| Temperature | Can reach high thermophilic temperatures (hot composting) | Typically cooler temperatures, often mesophilic (lukewarm) |
| Byproducts | Humus, CO2, water, heat | Organic acids, volatile compounds, CO2, methane (CH4) |
| Smell Factor | Generally earthy and pleasant when managed well | Can produce strong, sour, or unpleasant odors if not managed properly |
| Management | Frequent turning, maintaining moisture and carbon-to-nitrogen ratio | Sealing the system, managing moisture and feeding inputs |
| Best For | General yard waste, kitchen scraps; widely used for garden soil amendment | Certain kitchen scraps, can be part of biogas production systems, some specialized methods |
As you can see, they are quite different in their approach. Aerobic composting is more common for home gardeners looking to enrich their soil directly, while anaerobic methods might be chosen for specific reasons like speed or integration into other systems.
What Can You Compost Anaerobically? (And What to Avoid!)
Just like with aerobic composting, there are certain materials that work better than others. The goal is to feed the right kind of microbes. For anaerobic composting, you’ll want to focus on materials that ferment well.
Great Anaerobic Composting Inputs:
- Fruit and Vegetable Scraps: These are excellent. Their sugars and starches break down readily.
- Grains and Breads: Cooked or uncooked, these are also good fermenters.
- Grass Clippings: In moderation, they can be part of an anaerobic mix.
- Coffee Grounds and Tea Bags: Similar to aerobic composting, these are usually fine.
- Food Scraps (cooked and uncooked): Generally, most plate scrapings will work, but be mindful of fats and oils.
Materials to Be Cautious With or Avoid:
- Meat, Fish, and Dairy Products: While some anaerobic systems can handle small amounts, they can lead to very strong odors and attract pests. Many beginners are best to avoid these entirely, especially in simple home setups.
- Oily or Greasy Foods: Large amounts of oil or grease can create a barrier, hindering decomposition and causing foul smells. Small amounts mixed in are usually okay, but aim to keep it minimal.
- Diseased Plants: Anaerobic decomposition may not kill all pathogens or weed seeds, so it’s best to avoid diseased plant material or persistent weeds.
- Pet Waste (Dog & Cat): These can contain harmful pathogens that may not be reliably eliminated in a simple anaerobic setup. It’s safer to compost them separately in a hot aerobic system (if at all) or avoid them.
- Woody Materials (Twigs, Branches): These are very tough to break down quickly in either aerobic or anaerobic systems. They are better suited for traditional composting or mulching.
- Inorganic Materials: Plastic, metal, glass, synthetic fibers – these will not decompose.
A good rule of thumb is to stick to what you’d normally compost in your regular bin, but be extra cautious with anything that might really stink up the place or attract unwanted visitors. For beginners, focusing on plant-based kitchen scraps is usually the easiest way to go.
Popular Anaerobic Composting Ideas and Setups
There are a few ways to approach anaerobic composting at home. Some are more contained, while others are more open. The choice often depends on your space, the volume of waste, and your willingness to manage potential odors.
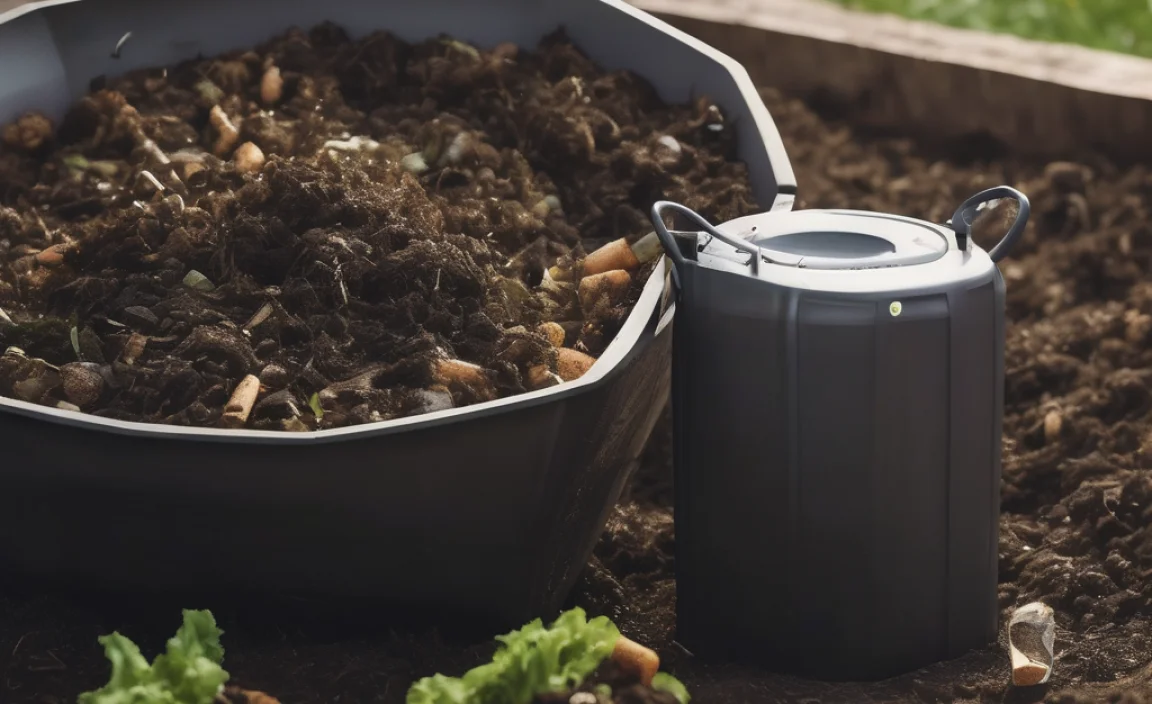
1. The Sealed Bin or Bucket System
This is perhaps the most common and beginner-friendly “anaerobic composting idea.” It involves using a sealed container, like a plastic bucket with a tight-fitting lid, or a specialized anaerobic digester. You add your kitchen scraps, seal it up, and let them ferment.
How it works:
- Materials: 5-gallon buckets with secure lids are readily available. You can even find kits designed for this purpose.
- Process: Fill the bucket with your accepted organic waste, leaving a little headspace. Seal the lid tightly. The lack of oxygen will kickstart the anaerobic process.
- Management: These systems are often “set it and forget it” for a period, usually a few weeks to a couple of months, depending on the material and temperature. Some advanced systems include ways to collect gases produced.
- Output: The result is a partially decomposed, fermented material that can still be added to a traditional compost pile to finish decomposing aerobically, or it can sometimes be used directly as a soil amendment after further maturation.
Pro-Tip: If using food scraps, consider chopping them into smaller pieces. This increases the surface area, allowing the microbes to work more efficiently.
2. Biodigesters (Biogas Systems)
These are more advanced systems designed to capture the methane gas produced during anaerobic digestion. This gas (biogas) can then be used for cooking or heating. These are less common for casual home composting but are popular in areas where energy is scarce or for larger-scale operations.
How it works:
- These are typically large, airtight tanks where organic waste is fed.
- As the material decomposes, biogas is produced and collected in a gas holder.
- The leftover slurry is a nutrient-rich liquid fertilizer.
- Resources: Organizations like NESFP have great resources on small-scale biodigesters that explain the science and practicalities.
Note: This is a more involved setup and requires a greater understanding of biogas handling for safety.
3. Bokashi Composting
This is a very popular and successful method of anaerobic fermentation for kitchen waste. Bokashi isn’t technically “composting” in the traditional sense, as it doesn’t fully break down waste into usable compost on its own. Instead, it pickles or ferments the waste using a special inoculant (often bran) that contains effective microorganisms (EM).
How it works:
- Materials: You use a special Bokashi bin, which is an airtight bucket with a spigot at the bottom to drain off the “Bokashi tea” (a nutrient-rich liquid).
- Process: You add food scraps (yes, even meat and dairy work well with Bokashi!), sprinkle a layer of Bokashi bran over them, and press down to remove air. Seal the lid tightly. This process ferments the waste.
- Management: You continue layering scraps and bran until the bin is full. Then, let it sit and ferment for another two weeks after the last addition.
- What to do with the result: The fermented Bokashi material is not finished compost. It needs to be buried in the garden, added to a traditional compost pile to finish breaking down, or placed in a worm farm. The liquid (“tea”) can be diluted and used as a liquid fertilizer.
Bokashi is fantastic because it can handle almost all food scraps, is relatively fast for the fermentation stage, and the resulting “tea” is a valuable byproduct. You can learn more about effective microorganisms at places like EM Technologies which explains the science behind these beneficial microbes.
Essential “How-To” Tips for Anaerobic Composting Success
Whether you’re using a simple bucket or trying Bokashi, there are a few key things to keep in mind to make your anaerobic composting efforts successful and minimize common issues like smell.
Tip 1: Choose the Right Container
The most critical aspect of anaerobic composting is keeping oxygen out. Your container needs to be airtight.
- Sealed Buckets: Ensure the lid seals tightly. You might want to add a rubber gasket if it’s loose.
- Specialized Bins: Bokashi bins come with airtight lids and often a spigot.
- Avoid Gaps: Any openings will let in air, compromising the anaerobic process and potentially leading to rot rather than fermentation.
Tip 2: Manage Moisture Levels
Moisture is key for microbial activity. Your compost material should be damp, like a wrung-out sponge, but not soaking wet.
- Too Dry: If your mixture is too dry, microbes won’t be able to move and work effectively. Add a little water or moist food scraps.
- Too Wet: Excessive moisture can create a slimy environment and contribute to foul odors. If using lots of wet kitchen scraps, you might need to add some dry material (like shredded paper or leaves) to absorb excess liquid, though this is less common in sealed anaerobic systems. In Bokashi, this is less of an issue as the bran helps absorb some moisture.
Tip 3: Control Odors
Anaerobic decomposition can produce a distinct smell, often described as sour or pungent. There are ways to manage this:
- Airtight Container: This is the first line of defense. A well-sealed bin will contain most odors.
- Bokashi Bran: The specialized bran used in Bokashi contains microorganisms that help out-compete odor-causing bacteria and create a more pleasant, fermented smell.
- Add “Browns” Sparingly: While less critical for simple sealed systems than aerobic, adding too many dry, carbon-rich materials (like sawdust or large amounts of dry leaves) can sometimes lead to imbalances. Stick to food scraps, a bit of grass, or Bokashi bran.
- Proper Digestion: Ensure your materials are appropriate. Avoiding large amounts of grease, meat, and dairy in non-Bokashi systems will significantly reduce odor potential.
- Disposal of “Tea”: If you’re draining liquid from your system (like Bokashi tea), use it promptly or bury it.
Tip 4: Chop Your Inputs
Breaking down your food scraps and yard waste into smaller pieces is a game-changer.
- Smaller Surface Area: Microbes can access and break down smaller pieces much more easily.
- Faster Process: This speeds up the fermentation process.
- Easier Packing: Smaller pieces pack more densely into your container.
Aim to chop things into pieces no larger than an inch or so. A kitchen knife, spade, or even kitchen scissors can work for this.
Tip 5: Don’t Overfill
It might seem tempting to cram as much as possible into your bin, but leaving a little headspace is important.
- Gas Production: Anaerobic digestion produces gases (CO2, methane). You need space for these to accumulate.
- Easier Mixing: For systems where you might stir or where the material settles, headspace is useful.
- Lid Seal: An overflowing bin makes it difficult to get a proper seal on the lid.
Leave at least a few inches of space at the top.
Tip 6: Patience and Post-Digestion
Anaerobic decomposition is often a two-stage process if you want usable compost.
- Fermentation Phase: This typically takes 2-6 weeks, depending on material and temperature. The material will look partially broken down, perhaps a bit mushy, and smell fermented.
- Finishing Phase: At this point, the fermented material is usually added to a traditional aerobic compost pile or buried in the garden. Here, it will finish breaking down into rich soil amendment over a few more weeks or months.
Don’t expect fully finished compost straight from a simple anaerobic container. It’s usually an intermediate step.
Tip 7: Temperature Matters (But Less Than You Think for Beginners)
While aerobic
.lwrp.link-whisper-related-posts{
margin-top: 40px;
margin-bottom: 30px;
}
.lwrp .lwrp-title{
}.lwrp .lwrp-description{
}
.lwrp .lwrp-list-container{
}
.lwrp .lwrp-list-multi-container{
display: flex;
}
.lwrp .lwrp-list-double{
width: 48%;
}
.lwrp .lwrp-list-triple{
width: 32%;
}
.lwrp .lwrp-list-row-container{
display: flex;
justify-content: space-between;
}
.lwrp .lwrp-list-row-container .lwrp-list-item{
width: calc(25% – 20px);
}
.lwrp .lwrp-list-item:not(.lwrp-no-posts-message-item){
max-width: 150px;
}
.lwrp .lwrp-list-item img{
max-width: 100%;
height: auto;
object-fit: cover;
aspect-ratio: 1 / 1;
}
.lwrp .lwrp-list-item.lwrp-empty-list-item{
background: initial !important;
}
.lwrp .lwrp-list-item .lwrp-list-link .lwrp-list-link-title-text,
.lwrp .lwrp-list-item .lwrp-list-no-posts-message{
}@media screen and (max-width: 480px) {
.lwrp.link-whisper-related-posts{
}
.lwrp .lwrp-title{
}.lwrp .lwrp-description{
}
.lwrp .lwrp-list-multi-container{
flex-direction: column;
}
.lwrp .lwrp-list-multi-container ul.lwrp-list{
margin-top: 0px;
margin-bottom: 0px;
padding-top: 0px;
padding-bottom: 0px;
}
.lwrp .lwrp-list-double,
.lwrp .lwrp-list-triple{
width: 100%;
}
.lwrp .lwrp-list-row-container{
justify-content: initial;
flex-direction: column;
}
.lwrp .lwrp-list-row-container .lwrp-list-item{
width: 100%;
}
.lwrp .lwrp-list-item:not(.lwrp-no-posts-message-item){
max-width: initial;
}
.lwrp .lwrp-list-item .lwrp-list-link .lwrp-list-link-title-text,
.lwrp .lwrp-list-item .lwrp-list-no-posts-message{
};
}
Related Posts

I am passionate about home engineering. I specialize in designing, installing, and maintaining heating, ventilation, and air conditioning systems. My goal is to help people stay comfortable in their homes all year long.