Hey there, fellow DIYers and garden enthusiasts! Troy D Harn here from TopChooser. Ever feel like your kitchen scraps are a waste, piling up and heading to the landfill? It’s a common problem, and finding the right way to tackle those food scraps can feel overwhelming. But what if I told you there’s a neat, tidy, and super effective way to turn them into something amazing for your garden, right in your kitchen?
We’re diving into Bokashi composting today. Stick around, and I’ll show you how it works and why it might be just the trick you’ve been looking for to go green and boost your garden’s health. We’ll break down the essentials, making it simple and clear so you can get started with confidence.
Bokashi Composting: What It Is and Why It’s a Game-Changer
So, what exactly is Bokashi? It’s a unique composting method that’s quite different from your backyard pile. Instead of breaking down with oxygen (aerobic), Bokashi uses an anaerobic fermentation process. Think of it as pickling your food scraps! This means it’s perfect for small living spaces, apartments, or even if you just don’t have a lot of outdoor room. It’s fast, it doesn’t smell (seriously!), and it can handle things that traditional composting often can’t, like meat and dairy. Plus, it creates a nutrient-rich liquid that’s fantastic for your plants.
This method relies on special Bokashi bran, which is inoculated with beneficial microorganisms, primarily Effective Microorganisms (EM). When you add this bran to your kitchen waste in an airtight container, these microbes get to work fermenting everything. It’s a gentle process that preserves the nutrients in your food scraps, making them easily digestible for your garden soil later on.
Why is this a big deal? Well, traditional composting can take months, can attract pests if not managed perfectly, and might not handle all food types. Bokashi bypasses many of these common composting headaches. It’s a closed system, requires minimal space, and the fermentation stage is remarkably quick. You’re essentially pre-composting your waste, converting it into a nutrient-rich intermediate product that then needs to be buried or added to a traditional compost pile for the final breakdown.
The goal here is to give you a clear understanding of Bokashi composting. We’ll explore its key features, the simple steps involved, and how it stacks up. By the end, you’ll know if Bokashi is the right composting solution for your home.
Bokashi Composting vs. Traditional Composting: Key Differences
When you’re looking at composting options, it’s easy to get a little lost. Bokashi composting and traditional composting are the two most popular methods for home use, but they work in fundamentally different ways. Understanding these differences will help you choose the best fit for your lifestyle and needs.
Traditional composting, the kind most people picture with a pile or bin in the yard, relies on air, moisture, and a mix of “greens” (like food scraps) and “browns” (like leaves and cardboard) to break down organic matter. It’s a slower, more natural decomposition process driven by bacteria, fungi, and other organisms that thrive in oxygen-rich environments. While very effective for creating nutrient-rich soil amendments, it requires space, time, and careful management to prevent odors and pests.
Bokashi, on the other hand, is an anaerobic (without air) fermentation process. It uses a special inoculant, usually a bran or sawdust mixture containing beneficial microbes, to ferment your food waste within an airtight container. This process is much faster than traditional composting, can handle a wider variety of food scraps (including meat, dairy, and oils), and the airtight nature means no unpleasant odors or pest issues during the fermentation phase. It produces a ‘pre-compost’ material that then needs a second stage of decomposition, often by burying it in the garden or adding it to a traditional compost pile.
Let’s break down some of the main distinctions:
| Feature | Bokashi Composting | Traditional Composting |
|---|---|---|
| Process Type | Anaerobic Fermentation | Aerobic Decomposition |
| Speed | Fermentation is 2-4 weeks; final breakdown depends on method (burying/adding to pile) | Can take 2-12 months or longer, depending on method and management |
| Odor | Little to no odor (slight pickling smell is normal) | Can have odors if not managed properly (unbalanced greens/browns or too wet) |
| Pests | Airtight system generally prevents pests | Can attract rodents and insects if not properly maintained |
| Waste Types | All food scraps (including meat, dairy, oils) | Primarily fruit and vegetable scraps, coffee grounds, yard waste (meat/dairy often discouraged) |
| Space Requirement | Compact, suitable for indoors (kitchen, pantry, under sink) | Requires outdoor space (bin, pile, tumbler) |
| Outputs | Fermented ‘pre-compost,’ nutrient-rich ‘tea’ (leachate) | Finished compost |
| Additives Needed | Special Bokashi bran (microbe inoculant) | Greens (nitrogen), Browns (carbon), water, air |
Traditional composting is a classic for a reason – it’s a natural process that, once established, can yield fantastic compost with minimal ongoing cost. However, Bokashi shines when space is limited, access to outdoor composting is difficult, or when you want a faster way to process a wider range of food waste with minimal fuss and no smells.
How Bokashi Composting Works: A Step-by-Step Guide
Getting started with Bokashi composting is surprisingly simple once you understand the basic steps. It’s a hands-on process, but it’s not messy or complicated. Think of it as inoculating your food waste with good microbes to get the fermentation party started!
Essentially, you’re feeding beneficial microorganisms with your kitchen scraps in an airtight environment. These microbes transform the waste through fermentation, breaking it down into a nutrient-rich material that’s then ready for its final decomposition. Here’s how it’s done:
What You’ll Need
Before you start, gather your supplies. You don’t need much, and most come in handy Bokashi starter kits:
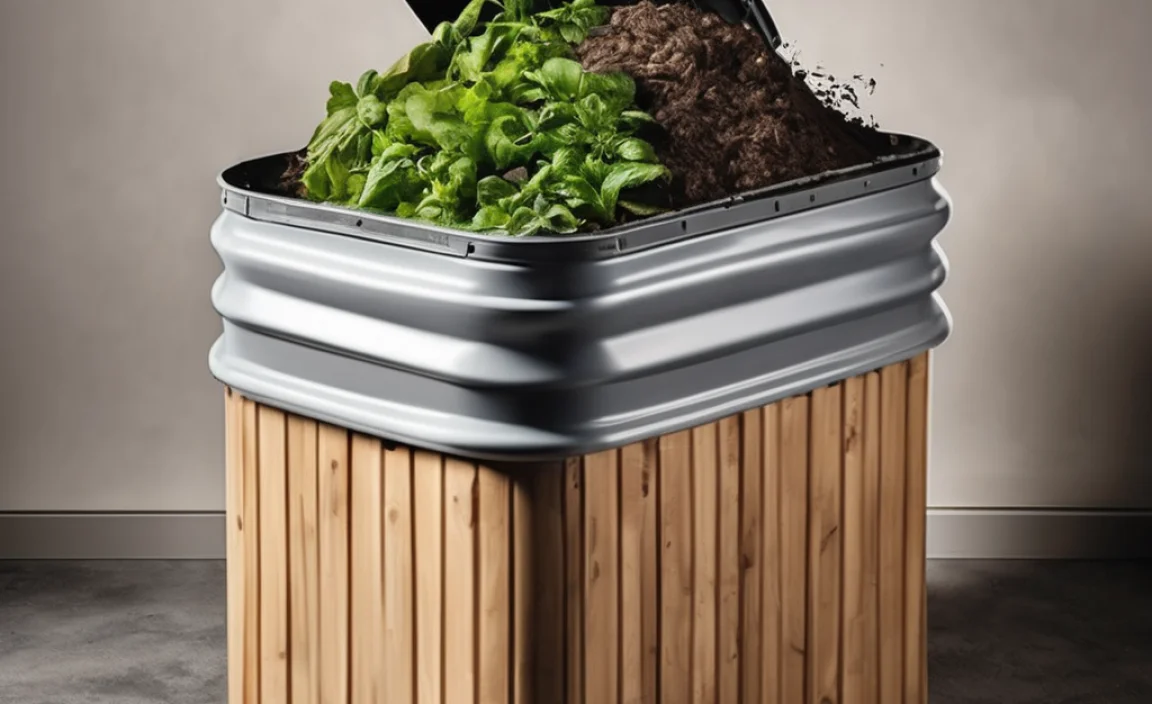
- Bokashi Bin System: This usually consists of two airtight buckets with lids, and ideally a spigot at the bottom of one to drain the liquid.
- Bokashi Bran: This is the magic ingredient! It’s a carrier material (like bran or sawdust) that has been inoculated with Effective Microorganisms (EM). You can buy this online or at some garden centers.
- Kitchen Scraps: Almost any food waste will do! Chopping larger items helps speed up the process.
- A Trowel or Fork: For pressing down the scraps.
- A Final Decomposition Spot: This could be a trench in your garden, a raised bed, a large pot, or a traditional compost bin.
The Bokashi Composting Process:
- Add Your Food Scraps: Start by adding a layer of your kitchen scraps to the bottom of your Bokashi bin. Chop any large pieces into smaller bits – this helps them break down faster. You can add things like fruit and vegetable peels, coffee grounds, tea bags, cooked food, meat scraps, dairy products, and even small bones.
- Sprinkle the Bokashi Bran: Sprinkle a generous tablespoon or two of Bokashi bran evenly over the food scraps. Make sure to get good coverage. This bran is full of the microbes that will do the fermenting.
- Press Down the Scraps: Use a trowel or a clean hand to press down the layers of scraps. This is important for removing air pockets, as Bokashi is an anaerobic process. The tighter you pack, the better the fermentation.
- Close the Lid Tightly: Make sure the lid is sealed completely. This keeps the air out and the process going.
- Add More Scraps: Continue adding your kitchen scraps in layers, always sprinkling Bokashi bran over each new layer and pressing down to remove air.
- Drain the “Tea”: This is a crucial step! Over time, as the scraps ferment, a liquid called “Bokashi tea” or leachate will collect at the bottom of the bin. This liquid is rich in nutrients. Use the spigot to drain it out every couple of days (or when it starts to accumulate). If you don’t have a spigot, you’ll need to carefully pour it out. Don’t let the scraps sit in this liquid for too long, as it can make the process too wet.
- Fermentation Period: Once the bin is full, seal it tightly and let it sit for at least two weeks (some people go up to four weeks). During this time, the fermentation process takes place. You might notice a slightly sweet, vinegary, or pickly smell – this is normal.
- Second Stage Decomposition: After the fermentation period, you’ll have a bin full of pickled, softened food waste. This isn’t finished compost yet! You need to introduce it to the soil. You have a few options:
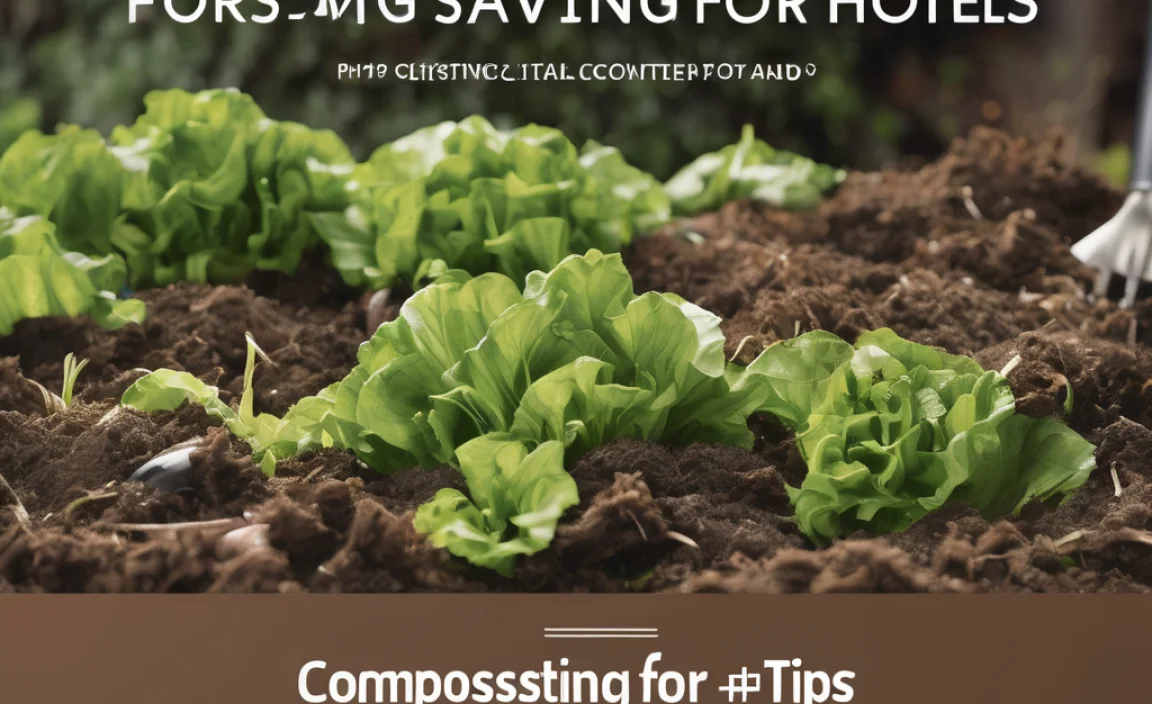
- Bury in the Garden: Dig a trench about 8-12 inches deep in your garden bed or a large pot, pour in the fermented Bokashi material, cover it with soil, and let it break down for another 2-4 weeks before planting.
- Add to a Compost Pile: Mix the fermented Bokashi material into an existing, active compost pile. It will speed up the decomposition of the pile.
- Use in a Worm Farm (Caution): Some people add small amounts to worm farms, but this needs to be done carefully as the acidic nature of Bokashi can harm worms if not properly neutralized or diluted.
And that’s it! You’ve transformed your kitchen waste into a superfood for your soil. The Bokashi tea can also be diluted (usually 1:100 with water) and used as a potent liquid fertilizer for your plants – just don’t let it sit around too long. It’s a simple, effective cycle that turns waste into garden gold.
Bokashi Bin Systems: Choosing the Right One for You
When you decide Bokashi composting is the way to go, the next step is picking out a bin system. Don’t worry, it’s not overly complicated. Most Bokashi bins are designed pretty similarly, but there are a few factors to consider to make sure you get the best fit for your kitchen and your waste habits.
The core of any Bokashi system is an airtight container. This is non-negotiable because the fermentation process needs to happen without oxygen. Most systems are made of plastic for durability and ease of cleaning. You’ll typically find they come in pairs, which is incredibly useful. While one bin is being filled and fermenting, you can use the second bin to start a new batch. This continuous cycle ensures you’re always processing waste.
Key features to look for:
- Airtight Lid: This is paramount. It needs to seal well to keep air out.
- Spigot/Tap: A tap at the bottom is a huge convenience for draining the Bokashi tea. Without one, draining can be a bit messier.
- Inner Strainer/Tray: Some bins have an inner perforated tray that helps keep your food scraps from sitting directly in the collected liquid, which can be beneficial.
- Size: Bins vary in size, usually between 2 to 5 gallons. Consider how much food waste your household generates. A typical family might need a 5-gallon bin.
- Material and Durability: Most are made of robust plastic. Check reviews for build quality.
- Ease of Cleaning: With food preparation, ease of cleaning is always a win.
Here’s a quick look at what you might expect when comparing different bin types:
| Bin Type | Pros | Cons | Ideal For |
|---|---|---|---|
| Standard 2-Bucket System (with spigot) | Most common and effective. Spigot makes draining easy. Usually comes in pairs for continuous use. Good capacity. | Can be bulky if you have very limited space. | Households of all sizes, especially those producing moderate to large amounts of food waste. |
| Single Bin System (without spigot) | More compact, often cheaper. | Draining the liquid is less convenient and can be messier. May require more active management to prevent excess moisture. | Very small households, those on a tight budget, or individuals experimenting with Bokashi short-term. |
| Commercial/Large Capacity Systems | Higher volume for larger households, small businesses, or community composting projects. Often very durable. | More expensive, take up more space. | Larger families, small restaurants, community gardens. |
| DIY Bokashi Bin (using existing buckets) | Most budget-friendly. Allows customization. | Requires some DIY effort to ensure airtightness and add a spigot if desired. May not be as aesthetically pleasing. | Budget-conscious DIYers, those who enjoy tinkering. |
Many reputable brands offer Bokashi bin kits. Look for ones that come with a good amount of Bokashi bran to get you started. Brands often found include those specializing in composting solutions or eco-friendly home goods. You can find detailed reviews and comparisons on gardening forums or eco-living blogs.
For beginners, I highly recommend a standard 2-bucket system with a spigot. It’s the easiest to use, manage, and maintain, offering the best experience as you learn the ropes. It takes the guesswork out of managing the liquid, which is a common point of confusion for newcomers.
The Bokashi Bran: Your Microbe Powerhouse
You can’t talk about Bokashi composting without talking about the Bokashi bran. This isn’t just some filler; it’s the heart and sole of the entire process. Think of it as the “seed” that kickstarts the fermentation.
What exactly is this magical bran? It’s typically a base material, like wheat bran, rice bran, or sawdust, that has been treated with a special blend of beneficial microorganisms, or EM (Effective Microorganisms). These are not genetically modified organisms (GMOs) or anything scary. They are naturally occurring microbes, often including various species of lactic acid bacteria, yeasts, and photosynthetic bacteria. These are the same types of microbes found in things like yogurt, sourdough starter, and even healthy soil!
When you add the Bokashi bran to your food scraps in the airtight bin, these microbes go to work. They consume the sugars and starches in the food waste and, in the absence of oxygen, they ferment it. This fermentation process:
- Breaks down organic matter: It starts the decomposition process, softening and breaking down the food scraps.
- Creates beneficial byproducts: The fermentation produces organic acids (like lactic acid) and other compounds that inhibit the growth of harmful bacteria and pathogens, and also tenderize the food material, making it ready for the next stage.
- Creates nutrient-rich essence: It helps preserve the nutrients within your waste.
Where to Get Bokashi Bran:
You’ll primarily find Bokashi bran available through:
- Online Retailers: Gardening supply websites, Amazon, and specialized composting stores are great places to look.
- Specialty Garden Centers: Some local garden shops that focus on organic or sustainable practices will carry it.
- DIY Kits: You can often purchase a Bokashi bin system that comes with a starter supply of bran.
Using the Bokashi Bran:
The general rule of thumb is to use about 1-2 tablespoons of Bokashi bran per layer of food scraps. It’s important not to be too stingy with it, as it’s what drives the fermentation. You want to ensure there are enough active microbes to get the job done. Simply sprinkle it evenly over the food scraps after you’ve added them to the bin and pressed them down.
Storage of Bokashi Bran:
Bokashi bran contains live microorganisms, so it needs to be stored properly to maintain its effectiveness. After purchasing, store it in a cool, dry, dark place. An airtight container in a pantry or cupboard is ideal. Avoid direct sunlight or very high temperatures, as this can kill the beneficial microbes. It typically has a shelf life of about 1-2 years

I am passionate about home engineering. I specialize in designing, installing, and maintaining heating, ventilation, and air conditioning systems. My goal is to help people stay comfortable in their homes all year long.