Cold Composting in Asia: Essential Guide

Hey there! Ever look at your kitchen scraps and garden waste and think, “There’s got to be a better way than just tossing this?” You’re not alone! Many of us in Asia are looking for simple ways to reduce waste and create healthy soil for our plants. It can seem a bit tricky, but I’m here to show you that making compost doesn’t have to be complicated. We’ll walk through how to do it, step-by-step. Get ready to turn your trash into treasure!

Cold Composting in Asia: Your Easy-Peasy Guide to Rich Soil

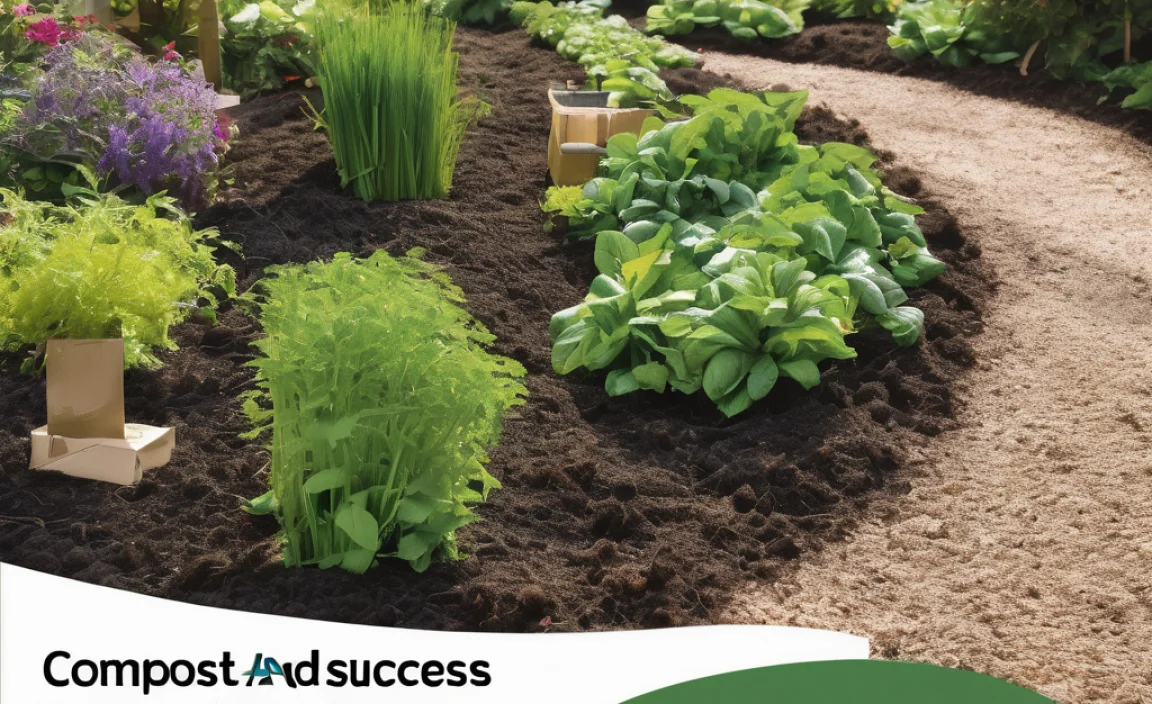
Hey neighbors! Troy D Harn here, your go-to guy for making home projects, gardening, and yes, even composting, totally doable. If you’re in Asia and curious about turning your kitchen scraps and yard trimmings into amazing garden gold without all the fuss, you’ve landed in the right spot. We’re diving into the world of cold composting. It’s a super simple method, perfect for beginners, and I’ll break it down so you can start right away. We’ll cover what it is, why it’s great for us here in Asia, and exactly how to set it up. Let’s get composting!

What Exactly is Cold Composting?

Think of cold composting as the “set it and forget it” approach to making compost. Unlike hot composting, which requires a lot of attention – turning the pile regularly and managing temperature – cold composting is much more laid-back. You simply pile your organic materials together, and nature does most of the work. It’s slower, yes, but it requires significantly less effort.

The microbes and organisms that break down the organic matter work at a more leisurely pace in a cold compost pile. There’s no need to rush the process, making it ideal if you’re busy or just starting out and want a low-stress way to manage waste. It’s all about layering and patience.

Why Cold Composting is a Great Choice for Asia

Asia is a diverse continent with varying climates, from bustling cities with limited space to rural areas with abundant gardens. Cold composting offers a flexible and accessible solution for many of us.

  • Low Effort, High Reward: This method is perfect for busy lifestyles. You don’t need to be a composting expert or spend hours tending to your pile.
  • Space-Friendly Options: Whether you have a sprawling garden or a small balcony, cold composting can be adapted. You can use a simple pile, a bin, and even smaller containers for urban dwellers.
  • Cost-Effective: You don’t need special equipment. You can start with materials you already have, like old bins or pallets, and your own yard and kitchen waste.
  • Waste Reduction: It’s a fantastic way to divert food scraps and yard waste from landfills, which is crucial for environmental health and managing waste in growing urban areas across the continent.
  • Nutrient-Rich Soil: The end product is fantastic for your plants, improving soil structure, water retention, and providing essential nutrients.
  • Adapts to Climate: While decomposition might be slower in cooler climates, cold composting still works. In warmer Asian climates, however, the process can actually be quite efficient, even without active management.

What You Can Compost (and What to Avoid)

Getting the mix right is key, even for cold composting. We want to feed the organisms that break down the waste, and that means a good balance of “greens” and “browns.”

The “Greens” (Nitrogen-Rich Materials)

These are typically moist materials that provide nitrogen, essential for microbial growth. Think of them as the “food” for your compost pile.

  • Fruit and vegetable scraps (peels, cores, rinds)
  • Coffee grounds and tea bags
  • Grass clippings (in moderation, as they can mat)
  • Plant trimmings (non-woody)
  • Eggshells (crushed for faster breakdown)

The “Browns” (Carbon-Rich Materials)

These materials are drier and provide carbon. They add bulk and allow air to circulate within the pile. Think of them as the “bedding” and “air” for your compost.

  • Dry leaves
  • Shredded newspaper and cardboard (avoid glossy paper and colored inks)
  • Straw and hay
  • Small twigs and wood chips
  • Sawdust (from untreated wood)
  • Paper towels and plain paper scraps

What to Keep Out!

Some things can cause problems like attracting pests, spreading diseases, or not breaking down well. It’s best to avoid these:

  • Meat, fish, and dairy products (attract pests and can smell bad)
  • Oily or greasy foods
  • Diseased plants or weeds that have gone to seed
  • Pet waste (dog and cat feces can contain harmful pathogens)
  • Treated wood or sawdust from treated wood
  • Inorganic materials (plastic, metal, glass)
  • Synthetics and non-biodegradable items

Setting Up Your Cold Compost System

You don’t need a fancy setup. The goal is to create a space where organic materials can break down naturally. Here are a few popular options!

Option 1: The Simple Pile

This is the most basic method. Find a quiet corner in your yard where it won’t be an eyesore and where you can easily add materials.

How to do it:

  1. Choose a spot that gets some sun but also some shade. Full sun can dry out the pile too much, while deep shade might keep it too wet and slow decomposition. An area with dappled sunlight is often ideal.
  2. Start by layering some coarse brown materials, like twigs or wood chips, at the bottom. This helps with drainage and airflow.
  3. Begin adding your kitchen scraps and yard waste, alternating between green and brown materials. Try to maintain a ratio of about 2 parts browns to 1 part greens by volume.
  4. Don’t make the pile too neat! A looser pile with more air pockets will decompose better.
  5. Cover the pile loosely with a tarp or a layer of straw or leaves if you want to retain some moisture or hide it from view, but ensure air can still get in.

Pros: Easiest and cheapest to start. No construction needed.

Cons: Can look messy. May attract pests if not managed carefully. Decomposition might be slower and less predictable than in a bin.

Option 2: The Compost Bin (DIY or Purchased)

Compost bins are great because they contain the materials neatly and can help retain moisture and heat, speeding up the process slightly. You can buy one or make your own.

DIY Options:

  • Pallet Bin: Collect four wooden pallets and stand them up on their edges to form a square. You can secure them with wire, zip ties, or screws. Leave one side with an opening or a removable panel for easy access when your compost is ready. This is a very popular and eco-friendly option. For more inspiration on building with pallets, check out resources like Hometalk’s guide to pallet compost bins.
  • Wire Mesh Bin: Use chicken wire or hardware cloth to create a cylinder or square. Secure the ends with wire or sturdy clips. This allows for excellent airflow.
  • Plastic Bin with Holes: An old trash can or large plastic storage bin can be repurposed. Drill plenty of holes around the sides and bottom for aeration and drainage.

Purchased Bins: There are many types available, from simple plastic tumblers to enclosed rodent-proof bins. Choose one that suits your budget and space. Look for bins with lids and good ventilation.

How to use a bin:

  1. Place the bin in a convenient location.
  2. Start adding your materials as you would with a pile – layering greens and browns.
  3. If using a purchased bin with a lid, keep it closed to deter pests and retain moisture.
  4. If you can, turn the compost occasionally with a pitchfork or compost aerator. Even a few turns every few weeks helps.

Pros: Tidy appearance. Can deter pests more effectively. Retains moisture and heat better.

Cons: Cost if purchasing, or effort if building. May require more effort to turn.

Step-by-Step: Making Your First Cold Compost Pile

Ready to get started? It’s simpler than you think. Here’s your foolproof plan:

Step 1: Choose Your Location

Find a spot that’s easily accessible, has decent drainage, and can tolerate a bit of moisture. Partial shade is usually best to prevent it from drying out too quickly.

Step 2: Gather Your Materials

Start collecting your kitchen scraps (fruit/veg peels, coffee grounds) and yard waste (dry leaves, grass clippings, small twigs). Aim to have a good stash of both “greens” and “browns” before you start, or plan to collect them as you go.

Step 3: Build Your Base (Optional but Recommended)

If you’re making a pile or using a bin with open bottom, lay down a layer of coarse brown material like small twigs, branches, or wood chips (about 4-6 inches thick). This is crucial for drainage and air circulation from the bottom.

Step 4: Start Layering

Begin adding your materials. Aim for a balance. A common guideline is to alternate layers of greens and browns.

  • Add a layer of greens (e.g., vegetable scraps).
  • Cover it with a thicker layer of browns (e.g., dry leaves or shredded cardboard).
  • Repeat this layering process. Try to finish with a layer of browns on top. This helps mask any odors and deter pests.

Tip: It doesn’t have to be perfect! Don’t overthink the exact ratio. If you have too many greens, add more browns. If it looks too dry and dusty, add more greens or a little water.

Step 5: Add Water (if needed)

Your compost pile should be about as damp as a wrung-out sponge. If your materials are very dry, or if you live in a hot climate and it’s not raining, you might need to add some water. Gently water the pile as you build it, or after you’ve finished a layer.

Step 6: Let Nature Do Its Thing

This is the “cold” part! You don’t need to turn it daily, or even weekly. Resist the urge to fuss over it constantly. Just keep adding new materials as you generate them. Try to bury fresh kitchen scraps under a layer of brown material.

Step 7: Monitor and Maintain

While it’s “cold” composting, a little bit of attention helps.

  • Check the moisture level every few weeks. If it feels dry, add some water. If it’s too wet, add more brown materials.
  • If you notice any unpleasant odors, it’s usually a sign of too many greens or not enough air. Burying the offending material under browns and adding more brown materials can help.
  • You can give it a gentle turn with a pitchfork every month or two if you remember. This helps with aeration but isn’t strictly necessary for success.

Step 8: Harvesting Your Compost

This is the rewarding part! In cold composting, it can take anywhere from 6 months to 2 years for your compost to be ready. You’ll know it’s ready when it looks dark, crumbly, and smells earthy. You shouldn’t be able to recognize the original materials anymore.

  • You can harvest from the bottom of the pile or bin while continuing to add new materials to the top (this is called the continuous method).
  • Or, you can stop adding new materials to a full bin/pile and let it finish completely before harvesting.
  • Sift the finished compost through a screen or sieve to get a finer texture, or use it as is.

Cold Composting vs. Hot Composting: A Quick Look

It’s helpful to know the difference, especially when you’re just starting out. Cold composting is your low-effort friend, while hot composting requires more active management.

Feature Cold Composting Hot Composting
Decomposition Speed Slow (6 months to 2 years) Fast (1-3 months)
Effort Required Low (minimal turning, just adding materials) High (frequent turning, temperature monitoring, precise ratios)
Temperature Ambient (cool) High (130-160°F / 55-70°C)
Microbial Activity Slower, less heat production Rapid, generates significant heat
Best For Beginners, busy individuals, low-maintenance gardening, large volumes of yard waste. Experienced composters, those needing quick compost, pest control (heat kills pathogens and weed seeds).
Pest/Weed Seed Control Limited (heat doesn’t get high enough) Effective (high heat kills most pathogens and weed seeds)

For most beginners in Asia looking for a simple way to manage waste and improve soil, cold composting is the clear winner due to its ease and minimal time commitment. You can always explore hot composting later if you get really into it!

Tips for Success in Asian Climates

Asia’s diverse climates present unique advantages and challenges for composting.

  • Warm & Humid Climates: Great for composting! Decomposition can happen quite quickly, but you need to be mindful of over-watering or your pile becoming too dense. Ensure good airflow and add plenty of brown materials to balance the moisture. Use bins with good ventilation.
  • Hot & Dry Climates: The biggest challenge here is moisture loss. Make sure your pile or bin is in partial shade and cover it with a lid or a layer of straw. Add water regularly, and try to bury fresh kitchen scraps under the drier browns to retain moisture.
  • Monsoon Seasons: Excessive rain can waterlog your compost pile, leading to anaerobic conditions (lack of air) and foul smells. Ensure your location has excellent drainage, and consider covering your pile with a waterproof tarp during heavy downpours. You might need to add extra brown materials to absorb excess moisture.
  • Urban Areas: Space might be limited. Consider using a compact bin, a tumbler, or even a worm farm (vermicomposting, which is a bit different but also very effective for kitchen scraps). Balcony composting is definitely possible! Resources from organizations like the U.S. Environmental Protection Agency (EPA) offer general composting principles that can be adapted.

Troubleshooting Common Cold Composting Issues

Even with the easy method, you might run into a few snags. Here’s how to fix them:

  • Bad Smells (Rotten Egg, Ammonia): This usually means too much nitrogen (greens) or not enough air.
    • Solution: Add more “browns” (leaves, shredded paper/cardboard) to absorb excess moisture and balance the carbon-to-nitrogen ratio. Gently turn or fluff the pile to introduce air. Bury smelly materials under a layer of browns.
  • Pile is Too Wet: If it’s soggy and slimy.
    • Solution: Add more dry “browns.” Ensure good drainage at the bottom of your pile or bin. If it’s in a very rainy area, consider covering it during downpours.
  • Pile is Too Dry: If it feels dusty and things aren’t breaking down.
    • Solution: Add more “greens” or moist materials, or simply add water. Cover the pile to help retain moisture.
  • Attracting Pests: Fruit flies, rodents, etc.

Leave a Comment

Cold Composting in Asia: Essential Guide

Cold Composting in Asia: Your Simple Guide to Creating Black Gold

Quick Section

Got kitchen scraps piling up? Wondering how to turn that organic waste into something useful for your garden? If you’re in Asia and thinking about composting, you might feel a bit overwhelmed by all the different methods. But what if I told you there’s a super simple way that requires very little effort and no turning? That’s where cold composting comes in. It’s perfect for busy folks, beginners, or anyone who wants to compost without the hassle. We’ll walk you through everything, step by step, so you can start turning your waste into rich compost for your plants, no matter where you are in Asia.

Why Cold Composting Makes Sense for You

Composting is a fantastic way to reduce waste and get amazing fertilizer for your plants. Hot composting is known for being fast, but it needs constant attention: turning piles, monitoring temperature, and getting the mix just right. That’s where cold composting shines. It’s the low-effort, set-it-and-forget-it method. You just pile your organic materials, and nature does the rest, albeit a bit slower. This relaxed approach is ideal for many living situations, especially in diverse Asian climates and urban environments.

The Magic of Slow Decomposition

Cold composting relies on naturally occurring microbes and worms to break down your organic materials over a longer period. Unlike hot composting, which heats up to kill weed seeds and pathogens, cold composting is more about slow, gentle decay. This means it might take longer to get finished compost, but the process is incredibly forgiving. You’re less likely to mess it up, and it’s a perfect introduction to composting for anyone.

Understanding the Basics: What You Need and What to Expect

Before you start piling things up, let’s get a clear picture of what cold composting involves. It’s not complicated, and you probably already have most of what you need.

Your Cold Composting Ingredients: The Greens and Browns

Like any composting, cold composting works best when you have a good balance of “greens” and “browns.” Think of greens as your nitrogen-rich materials and browns as your carbon-rich ones. A good mix helps everything break down smoothly.

What are “Greens”?

  • Fruit and Vegetable Scraps: Peels, cores, rinds – everything from your kitchen prep.
  • Coffee Grounds and Tea Bags: Rich in nitrogen and great for the compost.
  • Grass Clippings: Fresh grass clippings are excellent “greens.”
  • Plant Trimmings: Non-woody green plant material.
  • Manure: From herbivores like cows, horses, sheep, or rabbits (avoid pet waste).

What are “Browns”?

  • Dry Leaves: A goldmine for your compost bin!
  • Cardboard and Paper: Torn-up cardboard (no glossy print) and shredded newspaper are perfect.
  • Straw and Hay: Excellent carbon sources.
  • Wood Chips and Sawdust: Use in moderation and ensure they are from untreated wood.
  • Twigs and Small Branches: Chopped up, they add structure and carbon.

Materials to AVOID in Your Cold Compost Pile

Some things just don’t belong in a compost pile, especially a cold one. They can attract pests, smell bad, or introduce diseases. Always err on the side of caution:

  • Meat, Fish, and Dairy Products: These attract pests and can create foul odors.
  • Oily Foods: Fats and greases can slow down decomposition and attract pests.
  • Diseased Plants: To avoid spreading illnesses to your garden.
  • Weeds with Seeds: Cold composting may not get hot enough to kill these seeds.
  • Pet Waste: Cat or dog feces can contain harmful pathogens.
  • Chemically Treated Wood or Yard Waste: These chemicals can harm your garden.

The Ideal Ratio: Aim for Balance

While cold composting is forgiving, having a rough idea of the green-to-brown ratio helps. A good starting point is to aim for about two to three parts browns to one part greens. Since we’re not measuring strictly with cold composting, just think about adding more dry, carbon-rich materials than your kitchen scraps and fresh clippings. If your pile seems too wet or smelly, you likely need more browns. If it’s not breaking down at all, you might need more greens.

Setting Up Your Cold Composting System in Asia

The beauty of cold composting is its simplicity. You don’t need fancy equipment. You can start with just a corner of your yard or even a large bin.

Choosing Your Composting Location

Find a spot that is:

  • Accessible: Easy to get to with your scraps and to collect finished compost.
  • Well-Drained: You don’t want your compost to become a soggy mess.
  • Partially Shaded: Full sun can dry out a compost pile too quickly, while deep shade can keep it too wet. A bit of sun and shade is ideal.
  • Away from Water Sources: Keep your compost pile a safe distance from wells, streams, or other water bodies to prevent contamination.

Types of Cold Composting Bins and Setups

You have a few practical options for containing your cold compost pile:

1. Open Piles

The simplest method! Just designate an area in your yard and start adding your materials. This is great if you have plenty of space. You can even use simple fencing (like chicken wire or bamboo) to keep it contained.

2. Contained Bins (DIY or Store-Bought)

These help keep things tidy and can deter pests more effectively. You can buy ready-made composting bins, or make your own!

  • DIY Wooden Bin: Made from scrap wood or pallets. Easy to assemble and customize.
  • Wire Mesh Bin: Simple to construct with hardware cloth or chicken wire. Offers good aeration.
  • Plastic Bins: Many come with lids. Ensure they have holes for air circulation.

For those in apartments or with very limited space, consider a compost tumblers (though these are often better for hot composting) or a worm bin (vermicomposting), which is a different, more controlled system but also excellent for smaller spaces.

3. Worm Bins (Vermicomposting)

While technically a different system, worm composting is a form of cold composting that works well in a contained, urban environment. It uses specific types of worms, like red wigglers, to break down food scraps quickly. This is a fantastic option if you don’t have outdoor space.

For more on bin types and construction, resources like the U.S. EPA’s composting guide offer excellent advice adaptable to many settings.

Step-by-Step: How to Start Cold Composting

Ready to get started? It’s easier than you think. Here’s how to build your pile and let nature do the work.

Step 1: Gather Your Materials and Choose Your Spot

Decide where your compost bin or pile will live and gather your initial “browns” and “greens.” It’s helpful to have a mix ready before you start, rather than just adding one type of material at a time.

Step 2: Start Layering Your Compost Pile

Begin by placing a layer of coarse brown material at the bottom – think twigs or straw. This helps with airflow and drainage. Then, start alternating layers of greens and browns. A good starting point is:

  1. A few inches of brown material (leaves, shredded cardboard).
  2. A few inches of green material (kitchen scraps, grass clippings).
  3. Another layer of brown material.
  4. And so on…

Try to cover fresh kitchen scraps with a layer of brown material. This helps prevent odors and discourages flies.

Step 3: Add Water (If Needed)

Your compost pile should be moist, like a wrung-out sponge. If your materials are very dry, lightly water each layer as you add it, especially the brown materials. If it’s very rainy, you might need to add more browns to absorb excess moisture.

Step 4: Let Nature Do Its Thing

This is the “cold” part! You don’t need to turn, mix, or aerate the pile regularly. The natural processes of decomposition will happen over time. Microorganisms will begin to break down the organic matter.

Step 5: Continue Adding Materials

As you generate more kitchen scraps and yard waste, continue adding them to your pile or bin. Remember to try and finish with a layer of brown material. If you’re using an open pile, add new materials to the top. If you have a bin with doors or a lid, you might add them to the top or a designated spot.

Step 6: Waiting for Compost

Patience is key with cold composting. It can take anywhere from 6 months to 2 years to get finished compost, depending on your climate, the materials you use, and the size of your pile. You’ll know it’s ready when it looks dark, crumbly, and smells earthy, like forest soil. You shouldn’t be able to recognize the original materials.

Troubleshooting Common Cold Composting Issues

Even with a simple method like cold composting, you might run into a few snags. Don’t worry; they’re usually easy to fix!

My Compost Pile Smells Bad (Ammonia or Rotting)

  • Problem: Too many greens (nitrogen), or the pile is too wet and anaerobic (lacking air).
  • Solution: Add more brown materials (leaves, shredded paper/cardboard). If the pile is very wet, mix in dry browns to absorb moisture. Ensure there’s some airflow; you can gently poke holes in the pile with a stick if it seems very compacted.

My Compost Pile Isn’t Breaking Down

  • Problem: Too many dry browns, not enough greens, or simply too dry.
  • Solution: Add more green materials. Moisten the pile gently with water if it feels dry. Ensure it’s not too cold for too long; if you’re in a colder Asian climate, this process will naturally be slower.

My Pile is Attracting Pests (Flies, Rodents)

  • Problem: Exposed food scraps, or the pile contains meat, dairy, or oily foods.
  • Solution: Always bury fresh kitchen scraps under a layer of brown material. Double-check that you haven’t added any prohibited items (meat, dairy, oils). If pests are persistent, consider a sturdier bin with a lid to deter them. Natural deterrents like introducing earthworms (for vermicomposting) can also help.

Cold Composting in Different Asian Climates

Asia is vast and diverse, with climates ranging from tropical rainforests to temperate mountains. Cold composting can work in most but might behave differently.

  • Tropical Climates: Decomposition can be quite fast due to warmth and moisture. However, be mindful of controlling excess moisture and potential pests. Ensure good airflow and consider adding more browns to balance.
  • Temperate Climates: Decomposition will slow down significantly during cooler months. Your compost may take longer. You might see faster breakdown in warmer spring and summer.
  • Arid Climates: Keeping the pile moist is crucial. You might need to water it more frequently, especially if covered only by a simple wire mesh. Consider a bin that retains moisture better.
Climate Type Considerations for Cold Composting Tips for Success
Tropical (e.g., Southeast Asia) High heat and humidity can speed up decomposition but also increase moisture and potential for odors/pests. Balance moisture with enough browns. Ensure good aeration. Consider a bin with better airflow. Cover food scraps thoroughly.
Temperate (e.g., Parts of China, Korea, Japan) Decomposition slows significantly in winter. Warmer months work best. Build a larger pile to retain heat. Start materials in spring. Accept that winter will be slow. Use yard waste accumulated over autumn.
Arid (e.g., Parts of Central Asia, Western India) Moisture retention is key. Piles can dry out quickly. Choose a bin that holds moisture (e.g., a closed plastic bin or a well-built wooden one). Water regularly, especially during dry spells. Add water-retentive materials like grass clippings.

Benefits of Cold Composting for Gardeners in Asia

Using the cold composting method offers several advantages, especially for home gardeners across the continent.

Environmental Advantages

  • Waste Reduction: Diverts significant amounts of organic waste from landfills, reducing methane emissions.
  • Resource Conservation: Creates a nutrient-rich soil amendment, reducing the need for synthetic fertilizers.
  • Eco-Friendly: A simple, low-energy way to manage waste.

Gardening Advantages

  • Improved Soil Health: Adds vital organic matter to your soil, improving structure, water retention, and aeration.
  • Nutrient Boost: Provides essential nutrients for plant growth, leading to healthier, more vibrant plants.
  • Natural Pest and Disease Resistance: Healthy soil leads to healthy plants that are often more resilient to pests and diseases.
  • Cost Savings: Reduces the need to buy expensive fertilizers and soil conditioners.

Lifestyle Advantages

  • Low Effort: Minimal physical work compared to hot composting.
  • Flexibility: Can be done with limited space or in various bin types.
  • Beginner-Friendly: Very forgiving and easy to start, even with no prior composting experience.

FAQ: Your Cold Composting Questions Answered

Q1: How long does cold composting take?

A: Cold composting is slower than hot composting. It typically takes anywhere from 6 months to 2 years to produce finished compost, depending on the materials, climate, and pile size.

Q2: Can I compost in a small apartment or balcony in Asia?

A: Yes! While traditional piles aren’t suitable, you can use worm bins (vermicomposting). These are compact, contained, and excellent for breaking down kitchen scraps in small spaces.

Q3: Do I need to turn my cold compost pile?

A: No, that’s the beauty of cold composting! You don’t need to turn or aerate it. Microbes and other beneficial organisms will work on the materials over time.

Q4: What is the main difference between cold and hot composting?

A: The primary difference is temperature. Hot composting reaches high temperatures (130-160°F or 55-70°C) through specific techniques, killing weed seeds and pathogens. Cold composting is a slower, cooler process that relies on natural decomposition without actively managing temperature.

Q5: Can I put all my kitchen scraps in a cold compost bin?

A: Most fruit and vegetable scraps, coffee grounds, and tea bags are fine. However, avoid meat, fish, dairy, and oily foods, as they can attract pests and create foul odors.

Q6: My compost is very wet and stinky. What should I do?

A: This usually means there are too many “greens” (nitrogen-rich materials) or too much moisture. Add plenty of dry “browns” like shredded cardboard, dry leaves, or straw to absorb excess moisture and balance the carbon-to-nitrogen ratio.

Conclusion: Start Your Composting Journey Today!

Cold composting in Asia offers a remarkably simple and effective way to transform your kitchen and yard waste into valuable garden gold. It’s a patient process that requires minimal effort, making it perfect for busy individuals, beginners, or anyone looking for a low-fuss approach to sustainability. By understanding the balance of greens and browns, choosing a suitable location, and letting nature take its course, you’ll be well on your way to enriching your soil and reducing your environmental footprint. Don’t be intimidated – start small, experiment with your materials, and enjoy the rewarding journey of creating your own compost. Your garden, and the planet, will thank

Leave a Comment