Thinking about starting a compost pile but worried about the price tag? You’re not alone! Many folks believe composting has to break the bank, but that’s just not true. Cold composting, in particular, is super forgiving and can be done with very little cash. I’m Troy, and I’m here to show you how you can create nutrient-rich compost for your garden without spending a bundle. Let’s break down the actual cold composting cost and find some smart ways to save money.
Why Cold Composting is Your Budget-Friendly Best Friend
Cold composting is essentially a “set it and forget it” method. Unlike hot composting, which requires careful balancing of greens and browns and regular turning to heat up quickly, cold composting takes its sweet time, sometimes six months to a year or more. This lazy approach means less effort and, importantly for our topic, fewer mandatory expenses. You don’t need fancy equipment or a precise recipe. Nature does most of the heavy lifting!
The biggest advantage for your wallet is flexibility. Got a spare corner in your yard? Perfect! A few kitchen scraps and yard trimmings? You’re already halfway there. We’ll explore how to set up a basic cold composting system that’s not just effective but also incredibly cheap to get started.
The Bare Minimum: What You Actually Need (and Likely Already Have!)
When we talk about the cold composting cost, the first thing to remember is that simple is best. You don’t need a store-bought tumbler or a fancy wooden bin to start. Let’s look at the absolute essentials:
1. A Space to Pile It
This is free! Find an out-of-the-way spot in your yard where you can create a heap or a mound. It’s helpful if it gets some sun but doesn’t dry out completely. A spot near your garden is ideal for when you’re ready to use your finished compost.
2. Your Compost Ingredients
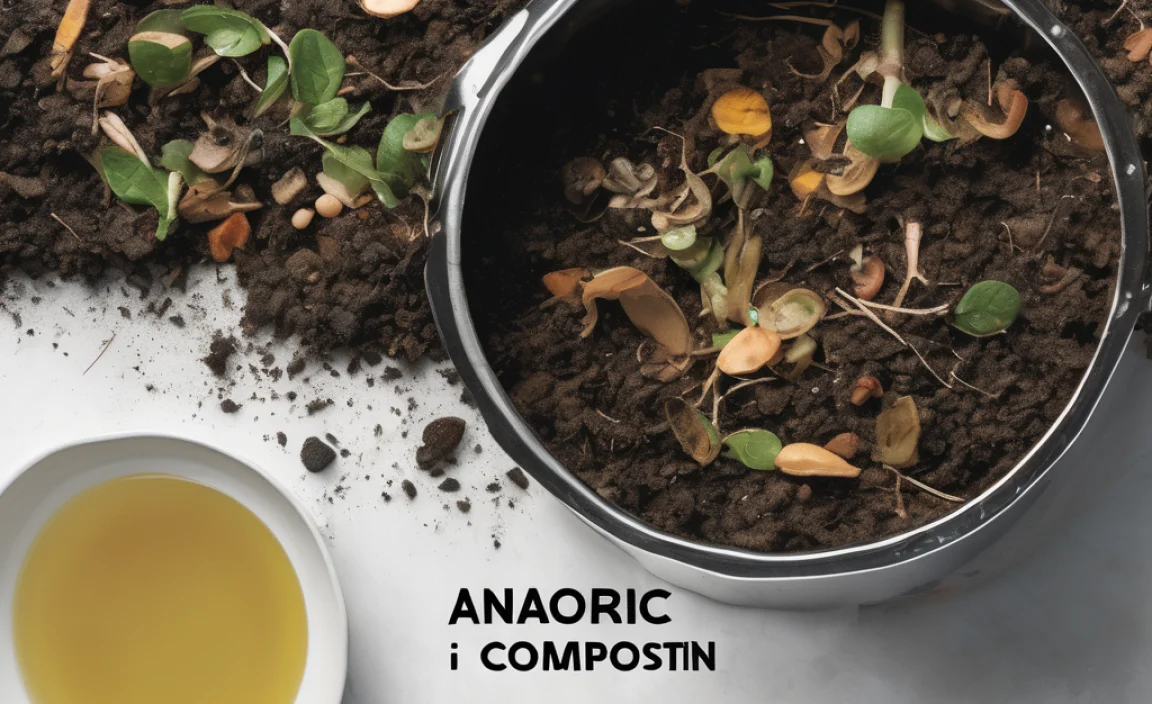
This is also largely free! Your kitchen scraps (vegetable peels, coffee grounds, eggshells) and yard waste (leaves, grass clippings, small twigs) are the building blocks of compost. Think of it as recycling your household waste into garden gold.
3. Something to Contain It (Optional, but Helpful)
While not strictly necessary, a little containment can make things tidier and more efficient. Here are budget-friendly options:
- The Free Pile: Just make a heap! Super simple, zero cost.
- Repurposed Pallets: You can often find free wooden pallets from local businesses. Nail or wire them together to form a simple enclosure.
- Chicken Wire or Old Fencing: Roll it into a cylinder and secure the ends. This allows for good airflow.
- DIY Bin from Scrap Wood: If you have leftover lumber from other projects, you can build a simple box.
4. Tools for Mixing (Eventually… and we’ll keep it cheap!)
Initially, you won’t need much. A pitchfork or a sturdy garden fork is useful for turning the pile down the line, but you can even use a shovel or a garden hoe. If you don’t have these, check thrift stores or ask friends if they have old ones they’re not using.
Breaking Down the Real Cold Composting Cost
Let’s get specific about what you might actually spend money on, and how to keep it low.
Container Costs: From Free to Under $50
This is often the biggest potential expense if you choose to buy something. Here’s a comparison:
| Option | Typical New Cost | Potential Free/Low Cost Method | Pros | Cons |
|---|---|---|---|---|
| DIY Wood Bin (simple) | $50 – $150+ (depending on new lumber) | Free (using scrap or salvaged wood/pallets) | Customizable, looks neat, good durability. | Requires tools and some effort to build. Salvaged wood might be treated. |
| Wire Mesh Bin (e.g., chicken wire) | $30 – $70 | Free (using old fencing, scrap wire) | Excellent aeration, easy to make, lightweight. | Can look messy, less durable than wood. |
| Store-Bought Tumbler | $100 – $400+ | Used models can sometimes be found cheaper. Check online marketplaces. | Easy to turn, contained, can speed up composting (though not the goal of cold composting). | Highest cost, can be heavy when full, requires specific space. Not ideal for true ‘cold’ composting approach. |
| Store-Bought Stationary Bin (plastic) | $50 – $150 | Used bins are sometimes available online. | Neat appearance, retains heat/moisture well, durable. | Can be hard to turn, requires modification for good airflow for cold composting. |
As you can see, the cold composting cost for a container can range from a few dollars for hardware to secure salvaged materials, or completely free if you’re resourceful. For a beginner trying to keep costs low, repurposing materials or simply creating a free-standing pile is the way to go.
Tools: Free to Under $30
If you need to buy basic tools:
- Pitchfork/Garden Fork: New costs can range from $20-$50. Look for used ones at garage sales, thrift stores (like Goodwill or local similar organizations), or ask neighbors. You might find one for $5-$15.
- Shovel: Similar pricing to a pitchfork if buying new. Used options are plentiful.
- Watering Can: If you don’t have one, you can use an old milk jug with holes poked in the lid, or a bucket. Free!
Budget Tip: Before buying anything, check your garage, shed, or ask family and friends. Many people have spare tools they’d be happy to lend or give away.
Activators/Additives: Mostly Free
Some people buy compost activators to speed things up. For cold composting, these are rarely necessary and add to the cold composting cost. Nature provides what you need.
- Finished Compost: A shovelful from an established compost pile (if a neighbor has one) can introduce beneficial microbes, but it’s not essential for cold composting.
- Manure: Animal manure (from herbivores like cows, horses, rabbits) is a great activator. If you know someone with chickens, horses, or rabbits, they might let you take some aged manure for free.
- Urine: Yes, human urine is a nitrogen-rich “activator”! Dilute about 1 part urine to 10 parts water and pour it onto your pile. It’s free and potent!
Budget Tip: Your kitchen scraps and fresh grass clippings are your primary “green” materials, providing the nitrogen that helps decomposition. They’re free!
Step-by-Step: Setting Up Your Low-Cost Cold Compost Pile
Let’s get this pile going without draining your bank account.
Step 1: Choose Your Location (Free!)
Find a level spot in your yard. Partial shade is good to prevent it from drying out too quickly, but some sun helps warm it. Make sure it’s accessible with a wheelbarrow or bucket.
Step 2: Create Your Bin (Free to Low Cost)
Decide on your container approach:
- Option A (Free Range): Just designate a spot for your pile. Aim for a minimum size of 3x3x3 feet if possible, as this holds heat better, but even a smaller pile will eventually compost.
- Option B (Repurposed Materials): Gather free wooden pallets, scrap lumber, or old fencing. Arrange them in a square or circle, securing them with wire, screws, or even sturdy twine. Ensure there are gaps for airflow.
Step 3: Start Layering Your Materials (Free!)
This is where your kitchen and yard waste come in. Aim for a good mix of “greens” (nitrogen-rich) and “browns” (carbon-rich). You don’t need to be exact for cold composting, but a general balance helps.
- Greens: Vegetable scraps, fruit peels, coffee grounds, tea bags, grass clippings, fresh plant trimmings.
- Browns: Dry leaves, straw, shredded newspaper/cardboard (avoid glossy paper), small twigs, sawdust (untreated wood).
Start with a layer of “browns” at the bottom for drainage and airflow. Then, add a layer of “greens” (kitchen scraps), followed by another layer of “browns.” Continue alternating layers. Aim for roughly 2-3 parts browns to 1 part greens.
Step 4: Add Water (Free!)
Your compost pile needs to be about as damp as a wrung-out sponge. If your materials are dry, water them as you add them. If you have a hose nearby, fantastic. If not, use a watering can, bucket, or even a repurposed jug.
Step 5: Wait and Let Nature Do Its Thing (Free!)
This is the beauty of cold composting. You don’t need to turn it religiously. Ideally, every month or two, give it a quick turn with a pitchfork or shovel if you notice it getting too compacted or smelly, but it’s not critical. Just keep adding materials as you generate them, trying to maintain that mix of greens and browns. Cover fresh kitchen scraps with browns to deter pests.
Step 6: Harvesting Your Compost (Free!)
After 6 months to a year (or longer), the bottom of your pile will start to look like dark, crumbly soil. This is your finished compost! You can either fork it out from the bottom, or simply stop adding to the pile and start a new one, letting the old one finish. You can sift it through a screen if you want a finer texture, but it’s not required.
Smart Shopping for Budget-Conscious Composting
If you do need to buy some items, here’s how to keep the cold composting cost down:
- Buy Used: Always check online marketplaces like Facebook Marketplace, OfferUp, or local classifieds for used compost bins, tools, or lumber.
- Freecycle/Buy Nothing Groups: These community groups are fantastic for finding free items people are giving away. Search for compost bins, tools, wood pallets, or even finished compost.
- Thrift Stores & Garage Sales: Excellent places to find used tools for pennies on the dollar.
- Hardware Store Sales: If you need new lumber for a DIY bin, keep an eye out for sales at your local hardware store.
- Pallet Pickups: Many garden centers, hardware stores, and small businesses give away used pallets. Just ask politely! Make sure they aren’t the “HT” (Heat Treated) kind, as “MB” (Methyl Bromide) treated pallets should be avoided.
What NOT to Compost (and Why it Saves Money!)
Avoiding certain items prevents pests, smells, and soil contamination, which can save you money on fixing potential problems down the line.
- Meat, Fish, Dairy, Oily Foods: These attract pests like rodents and can create foul odors.
- Diseased Plants: If you compost these, you risk spreading diseases to your garden.
- Weeds with Seeds: Unless your compost gets very hot (which cold composting doesn’t reliably do), weed seeds can survive and sprout in your garden.
- Pet Waste (Dog/Cat): Can contain harmful pathogens.
- Chemically Treated Wood or Yard Waste: Pesticides and herbicides can harm your garden and the beneficial microbes in your compost. Look for indicators on packaging. The EPA has great resources on what is safe to compost.
- Glossy/Coated Paper: Inks and coatings can contain plastics and heavy metals.
Sticking to plant-based materials and avoiding these items means less potential for trouble and fewer wasted efforts or money fixing problems.
Cold Composting Cost vs. Benefits: A Smart Investment
Let’s look at what you gain versus the minimal cold composting cost:
Benefits You Can See (and Feel!):
- Free, Nutrient-Rich Soil Amendment: Your garden will thank you for the improved soil structure, water retention, and nutrient boost. This can reduce your need to buy expensive fertilizers and topsoil.
- Waste Reduction: You’ll significantly cut down on your household waste, which is good for the environment and can feel incredibly rewarding.
- Healthier Plants: Compost leads to healthier, more robust plants that are better at fending off pests and diseases.
- Water Conservation: Compost acts like a sponge, helping your soil retain moisture, meaning you’ll need to water less often.
- Sense of Accomplishment: Turning waste into something valuable is a fantastic DIY win!
The Minimal Investment:
As we’ve seen, the cold composting cost can be as low as $0 if you’re resourceful, or perhaps $20-$50 if you need to purchase a basic tool or some inexpensive hardware to build a simple bin. Compare this to the cost of buying bags of compost or soil amendments, and the savings become very clear over time.
Consider this: A single bag of good quality compost can cost $5-$10. If you need 10 bags for your garden beds, that’s $50-$100 right there. Your DIY cold compost pile will produce far more than that, for a fraction of the cost.
Making Your Cold Compost Pile Work Better (Without Spending More)
Even with a hands-off approach, a few simple habits can help your cold compost pile work efficiently:
- Size Matters (Sort Of): While you don’t need a huge pile, 3x3x3 feet is optimal for heat retention and decomposition, even in cold composting. If you start smaller, try to accumulate materials until you reach this size or a bit more.
- Good Mix of Greens and Browns: This is key. Too many greens can make it slimy and smelly. Too many browns can make it take forever. Aim for a balanced ratio by sight and feel. If it looks wet and mushy, add more browns. If it looks dry and isn’t breaking down, add more greens and a little water.
- Aeration (Occasional Turns): While not mandatory, occasional turning (every 1-3 months) helps introduce oxygen, which speeds up the process slightly and prevents anaerobic (stinky) conditions. Use a pitchfork or shovel and move material from the outside to the inside of the pile.
- Moisture Check: Stick your hand into the pile. It should feel moist, like a wrung-out sponge. If it’s dry, water it. If it’s soggy, add more dry brown materials (like leaves or shredded cardboard) and turn it.
- Bury Kitchen Scraps: Always cover fresh food scraps with a layer of brown material (dry leaves, shredded paper). This helps deter pests and reduce odors.
Frequently Asked Questions About Cold Composting Costs
Is cold composting free?
Cold composting can be absolutely free if you utilize existing yard waste and kitchen scraps, and create a simple pile or a bin from salvaged materials like wood pallets. The only potential costs arise if you choose to buy a specialized compost bin or new tools, but these are not necessary for the process itself.
What is the cheapest way to start cold composting?
The cheapest way is to simply create an open pile in an unused corner of your yard. Collect your compostable materials (kitchen scraps, yard waste) and layer them. You can also build a very inexpensive bin using free-to-low-cost materials like salvaged wood pallets, chicken wire, or old fencing.
Do I need a special bin for cold composting?
No, a special bin is not required for cold composting. While bins can help contain the material and make it look neater, a simple heap or mound works perfectly well. Many gardeners prefer DIY bins made from repurposed materials to save money.

I am passionate about home engineering. I specialize in designing, installing, and maintaining heating, ventilation, and air conditioning systems. My goal is to help people stay comfortable in their homes all year long.