Hey there, green thumbs and aspiring soil whisperers! Troy D Harn here from TopChooser. Are you tossing kitchen scraps and yard waste into a pile, expecting magic, only to find a sad, smelly mess? You’re not alone! Cold composting can feel like a mystery, and it’s easy to make a few common blunders. But don’t worry. Today, we’re digging into those pesky cold composting mistakes and uncovering some super simple, genius solutions that’ll have your compost cooking (well, not really cooking, but decomposing!) in no time. Let’s turn that garden gold from a headache into a heap of happiness!
Cold Composting: The Lazy Gardener’s Dream (When Done Right!)
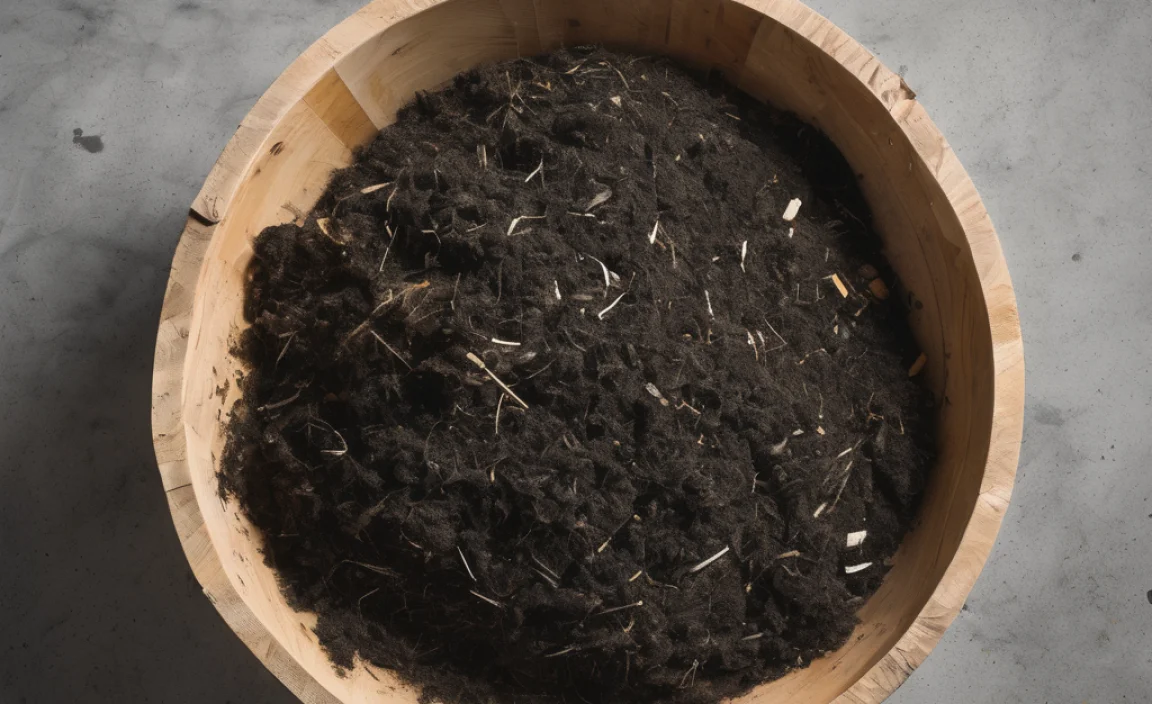
Cold composting, also known as passive composting, is essentially piling organic materials and letting nature do the hard work over a longer period. Unlike hot composting, it doesn’t require as much active management, like frequent turning or precise temperature control. This makes it a fantastic option for busy folks or those who just want a low-maintenance way to turn their waste into nutrient-rich compost. However, this “set it and forget it” approach can sometimes lead to frustrating results if you’re not careful. That slumped pile of damp leaves and undecomposed food scraps? Yep, that’s usually a sign a few common cold composting mistakes have crept in.
The beauty of cold composting is its simplicity. You gather your greens and browns, pile them up, and then… you wait. The microorganisms, fungi, and bacteria in the soil will eventually break everything down. It’s a natural cycle, and we’re just giving it a little nudge. But like any process, there are best practices that can make a huge difference in the speed and quality of your compost. Let’s make sure you’re not falling into the common traps that turn a promising compost pile into a composting catastrophe.
This guide is all about identifying those common cold composting mistakes and, more importantly, providing you with easy-to-implement solutions. We’ll cover common issues like bad smells, slow decomposition, and attracting unwanted guests, all explained in plain English. By the end, you’ll be armed with the knowledge to troubleshoot your current pile or start a new one with confidence. Get ready to transform your yard waste into black gold!
Common Cold Composting Mistakes and Their Genius Solutions
Let’s get down to business. We’ll break down the most frequent missteps people make with cold composting and then share the fix. Think of this as your go-to troubleshooting guide.
Mistake 1: The “Smelly Surprise” – Too Much Green, Not Enough Air
One of the biggest complaints with cold composting is an unpleasant odor, often described as rotten eggs or ammonia. This is usually a classic sign of anaerobic decomposition. Essentially, your compost pile is drowning in moisture and starving for oxygen. Too many “green” materials (like kitchen scraps, grass clippings, and coffee grounds) can contribute to this, as they are nitrogen-rich and tend to compact, preventing airflow.
Genius Solution: Balance Your Greens and Browns & Aerate!
The Fix: Ratio is Key! Aim for a good mix of “green” (nitrogen-rich) and “brown” (carbon-rich) materials. A general starting point for cold composting is roughly 2 to 3 parts brown material to 1 part green material by volume. This carbon-to-nitrogen ratio helps the microbes work efficiently without getting bogged down.
- Greens: Fruit and vegetable scraps, coffee grounds, tea bags, grass clippings, plant trimmings.
- Browns: Dried leaves, shredded cardboard, newspaper, straw, sawdust, small twigs.
The Fix: Let it Breathe! Lack of oxygen is oxygen-depriving for your compost pile! While cold composting isn’t as active as hot composting, it still needs airflow. If your pile is compacted or constantly soggy, the beneficial aerobic bacteria can’t do their job and anaerobic bacteria take over, producing those nasty smells.
- Incorporate Air Pockets: When adding materials, especially dense greens, try to mix in lighter browns like shredded cardboard or dry leaves. Don’t just dump everything in a dead center mass.
- Occasional Turning: While cold composting is low-maintenance, a gentle turn with a pitchfork every few months can make a world of difference. You don’t need to turn it weekly, but a little fluffing up helps.
- Build with Airflow in Mind: If you’re building a pile, try to incorporate coarser materials like small twigs at the bottom to create initial airflow.
Mistake 2: The “Sluggish Pile” – Too Dry, Too Slow
On the flip side, your compost pile might be sitting there, looking pretty much the same way it did months ago. This is often because it’s too dry. Composting microorganisms need moisture to survive and multiply. Without enough water, their activity grinds to a halt, and decomposition slows to a crawl.
Genius Solution: Add Water Strategically!
The Fix: The Damp Sponge Test! Your compost should feel like a damp, wrung-out sponge. Not dripping wet, but moist to the touch. If it feels dry and brittle, it’s time to add water.
- Water as You Build: When adding new layers of dry browns, consider giving them a light sprinkle with the hose.
- Rain is Your Friend: If your pile is out in the open, rain will help. However, if it’s covered or in a very dry climate, you might need to supplement.
- Don’t Drown It: Be careful not to over-water. This leads back to Mistake 1! If water starts pooling or running off, you’ve gone too far.
Mistake 3: The “Critter Convention” – Attracting Pests
Nobody wants their compost pile to become a buffet for rodents, raccoons, or other unwanted visitors. This is usually due to the presence of certain food scraps that are particularly attractive, or a pile that’s too open and accessible.
Genius Solution: Smart Material Choices & Secure Containment
The Fix: Be Picky About Your “Greens”! While you can compost most kitchen scraps, some are more likely to attract pests than others. For cold composting, it’s often best to avoid:
- Meat and Dairy Products: These are highly attractive to scavengers and can also create strong odors.
- Oily Foods: These can also smell and attract pests.
- Cooked Foods with Fats/Oils: Similar to above.
The Fix: Block Their Entry! If you’re concerned about pests, consider a compost bin designed for containment. Many commercially available bins have secure lids and solid sides. If you’re building your own pile:
- Bury Your Scraps: When you add kitchen scraps (the ones you do add), try to bury them a little bit into the existing compost material. This helps mask the smell and makes them less accessible.
- Use a Bin with a Lid: A sturdy bin with a well-fitting lid can deter many animals.
- Use Wire Mesh: For DIY bins, you can line the bottom and sides with hardware cloth (1/4 inch or 1/2 inch mesh) to prevent burrowing.
Mistake 4: The “Mystery Size” – Pieces Too Large to Break Down
You’ve got a pile, it’s moist, it doesn’t stink, but things are just not breaking down. Often, the culprit is simply that the organic materials you’re adding are too big. Microorganisms work on the surface area of materials. The larger the pieces, the less surface area exposed, and the longer they’ll sit there.
Genius Solution: Chop It Up!
The Fix: Smaller is Better! Take a few extra seconds (or minutes!) to break down your materials before adding them to the pile.
- Kitchen Scraps: Chop up large vegetable peels, rinds, and other waste.
- Yard Waste: Shred leaves with a mower or shredder, chop up larger twigs and branches into smaller pieces (1-2 inches is great), and break apart large clumps of grass clippings.
- Cardboard and Paper: Rip or shred them into smaller strips.
Think of it this way: you’re giving those tiny decomposers a head start by pre-processing the food for them. It really speeds things up!
Mistake 5: The “Inch Thick Layer” – Dumping One Material Type
Sometimes, people pile up just grass clippings one week, then just leaves the next. While breaking these down individually is fine if you start multiple piles, putting a huge, thick, uniform layer into one compost bin can cause problems. Thick layers of grass clippings can mat together, blocking air and leading to anaerobic conditions (Mistake 1). Thick layers of dry leaves can create a barrier that water can’t penetrate easily (Mistake 2).
Genius Solution: Mix It Up As You Go!
The Fix: Layer and Blend! As you add material to your compost pile, try to mix different types together. If you’re adding a lot of grass clippings, try to incorporate some shredded cardboard or dry leaves at the same time.
- Alternate Layers: You can alternate thin layers of greens and browns, but it’s even better to mix them slightly as you add them.
- The “Lasagna” Method: Some people swear by building their compost pile like a lasagna, with distinct layers. However, for cold composting, a more mingled approach as you add materials often works well to ensure better contact between different ingredients and prevent compaction.
Mistake 6: The “Compost Cover-Up” – Not Protecting Your Pile
While cold composting is meant to be low-maintenance, letting your pile be directly exposed to extreme weather can hinder decomposition. Too much rain can make it waterlogged, an extended dry spell can dry it out, and freezing temperatures can slow everything down to a glacial pace.
Genius Solution: Simple Cover Strategies
The Fix: A Little Protection Goes a Long Way! You don’t need anything elaborate. The goal is to buffer your pile from the elements.
- Tarp or Lid: A simple tarp secured with bungee cords or a loose-fitting lid for your compost bin can keep excess rain out while still allowing air circulation.
- Cover with Browns: A thick top layer of brown material, like straw or dried leaves, can help insulate the pile and retain moisture during dry spells.
- Location, Location, Location: If possible, choose a spot that gets some shade in the hottest part of summer but is not overly exposed to harsh winds.
For more information on the science behind composting and different methods, check out the EPA’s guide on composting at home. It’s a great resource from a reliable source.
Cold Composting vs. Hot Composting: A Quick Look
Understanding the difference can help you manage your expectations and apply the right strategies. Cold composting is passive, slow, and requires less effort. Hot composting is active, faster, and requires more precise management of temperature, moisture, and aeration.
Here’s a simple comparison:
| Feature | Cold Composting | Hot Composting |
|---|---|---|
| Speed of Decomposition | Slow (6 months to 2 years) | Fast (1 to 3 months) |
| Effort Required | Low (minimal turning, less precise ratios) | High (frequent turning, precise C:N ratio, temperature monitoring) |
| Temperature | Ambient (doesn’t heat up significantly) | Heats up to 130-160°F (54-71°C) killing weed seeds and pathogens |
| Ideal for | Busy gardeners, large volumes of material, patience | Garders needing compost quickly, dedicated composters |
| Common Mistakes Addressed Here | Smells, slow decomposition, pests, large materials, layering issues | Failure to heat, curing times, material imbalances |
For beginners, cold composting is often the most approachable. Once you get the hang of these solutions, you’ll find it’s a rewarding process with minimal fuss.
Troubleshooting Your Cold Compost Pile: A Decision Tree
Sometimes, you just need a quick way to figure out what’s wrong. Here’s a simple flow to help you diagnose your pile.
- Is your compost pile stinky (rotten eggs/ammonia)?
- YES: Likely too wet and/or not enough air. Solution: Add more Browns (carbon-rich materials like dry leaves or shredded cardboard), and fluff/turn the pile slightly to improve aeration. Ensure you’re not adding too many kitchen scraps at once without balancing with browns.
- NO: Proceed to the next question.
- Is your compost pile not breaking down or feel dry?
- YES: Likely too dry. Solution: Add water. Aim for the consistency of a damp sponge. Water thoroughly, especially if adding dry brown materials.
- NO: Proceed to the next question.
- Are you seeing lots of flies, rodents, or other pests?
- YES: You might be adding too many attractive food scraps or the pile is too open. Solution: Bury kitchen scraps deeper within the pile, avoid meat/dairy/oily foods, or use a pest-resistant bin and consider hardware cloth lining your bin base.
- NO: Proceed to the next question.
- Do the materials in your pile look mostly the same after a long time (months)?
- YES: Materials might be too large or the pile is too dry/lacking nitrogen. Solution: Chop or shred larger items before adding them. Check moisture levels and consider adding a bit more “green” material if it’s been very dry.
- NO: Your compost is likely progressing at its natural cold composting pace! Be patient.
Remember, cold composting is a marathon, not a sprint. Patience is a key ingredient, but applying these solutions will help ensure your marathon finishes with a triumphant harvest of compost!
Essential Tools for Cold Composting (Beginner Friendly)
You don’t need a lot of fancy equipment to get started with cold composting. Here are a few basics that make the process easier:
- A Container or Designated Pile Space: This could be a store-bought compost bin (many are designed for easy access), a DIY bin made from pallets, or simply a designated pile in a corner of your yard.
- Pitchfork or Compost Aerator: For occasional turning and fluffing. A pitchfork is versatile; a specialized compost aerator can reach deep into the pile.
- Shovel: Useful for moving materials and helping to turn the pile.
- Gardening Gloves: Keep your hands clean and protected.
- Optional: Kitchen Compost Caddy: A small bin with a lid for collecting kitchen scraps indoors before taking them out to the main compost pile.
- Optional: Hose with a Spray Nozzle: For adding water when needed.
DIY Compost Bin Ideas
If you’re on a budget or enjoy a little DIY, here are some simple bin ideas:
- Pallet Bin: Use four wooden pallets secured together to form a square or three pallets for an open-fronted bin. This is great for airflow and easy access.
- Wire Mesh Bin: Create a cylinder using chicken wire or hardware cloth. Secure the ends and place it in your desired location.
- Cinder Block Bin: Stack cinder blocks without mortar to create sturdy walls. Leave gaps for ventilation.
For more inspiration on DIY bins, a quick search for “DIY compost bin ideas” will yield tons of visual guides from reputable gardening sites like The Old Farmer’s Almanac.
Frequently Asked Questions (FAQ)
What is the biggest mistake in cold composting?
The biggest mistake is usually a combination of poor aeration and an imbalanced green-to-brown ratio, leading to a smelly, anaerobic pile. Over-watering or letting the pile become too dry are also major culprits.
How long does cold composting really take?
It varies greatly depending on your materials, C:N ratio, moisture, and climate. Generally, expect anywhere from 6 months to 2 years for materials to fully break down into usable compost.

I am passionate about home engineering. I specialize in designing, installing, and maintaining heating, ventilation, and air conditioning systems. My goal is to help people stay comfortable in their homes all year long.