“`html
Ever look at your kitchen scraps and yard waste and wonder if there’s an easier way to turn them into garden gold? You’re not alone! Many folks think composting is complicated, smelly, or just too much work. But what if I told you there’s a super simple method that practically takes care of itself? That’s where cold composting comes in, and it’s a total game-changer for busy gardeners and anyone who wants healthier plants without a fuss. Get ready to discover how easy it can be!

What Exactly is Cold Composting?
Cold composting, also known as passive composting, is the most straightforward composting method out there. Unlike hot composting, which requires precise layering, regular turning, and careful temperature monitoring, cold composting is all about piling it up and letting nature do the work. It’s a slow and steady process, meaning you won’t get finished compost in a few weeks, but the upside is the minimal effort required from you.
Think of it like this: hot composting is a fast-paced cooking class where every ingredient and temperature matters. Cold composting is more like letting a delicious stew simmer on the back burner all day – low effort, amazing results over time. This method is perfect for people who are short on time or just want a low-maintenance way to reduce waste and create nutrient-rich material for their gardens.
Why Choose Cold Composting? The Sweet Perks
You might be wondering, “Why pick the slower, colder method?” Well, the benefits are pretty sweet and can really make your gardening life easier:
- Effortless: This is the biggest win! No need to constantly “feed” your pile, dread the smell, or spend hours turning compost. Just add materials as you have them.
- Reduces Waste: You’ll divert a significant amount of food scraps and yard trimmings from landfills, which is great for the environment.
- Creates Nutrient-Rich Soil: The end product will be fantastic compost that improves your garden’s soil structure, drainage, and ability to retain moisture.
- Pest Management: Because it’s not actively heating up to kill weed seeds and pathogens, cold composting is less likely to attract certain pests compared to improperly managed hot piles. Also, materials like meat and dairy should still be avoided for this reason.
- Simplicity: It’s the ultimate beginner-friendly composting style. If you can toss things in a pile, you can cold compost!
The Science Bit (Simplified!): How It Works
Even though it’s called “cold,” the decomposition process still happens thanks to a whole host of tiny organisms: bacteria, fungi, and even larger critters like worms and insects. These hardworking decomposers break down the organic materials you add. In cold composting, this process happens at ambient outdoor temperatures.
Unlike hot composting, which aims to heat the pile to over 130°F (55°C) to speed up decomposition and kill off pathogens and weed seeds, cold composting relies on slower microbial activity. This means it takes longer, and the resulting compost might not be entirely free of weed seeds. But for most garden uses, it’s perfectly good!
What You’ll Need: Keeping it Simple
The beauty of cold composting is that you don’t need fancy equipment. Here’s a look at what you might want:
Compost Bin Options
You have a few choices for containing your cold compost. They all work, so pick what suits you best:
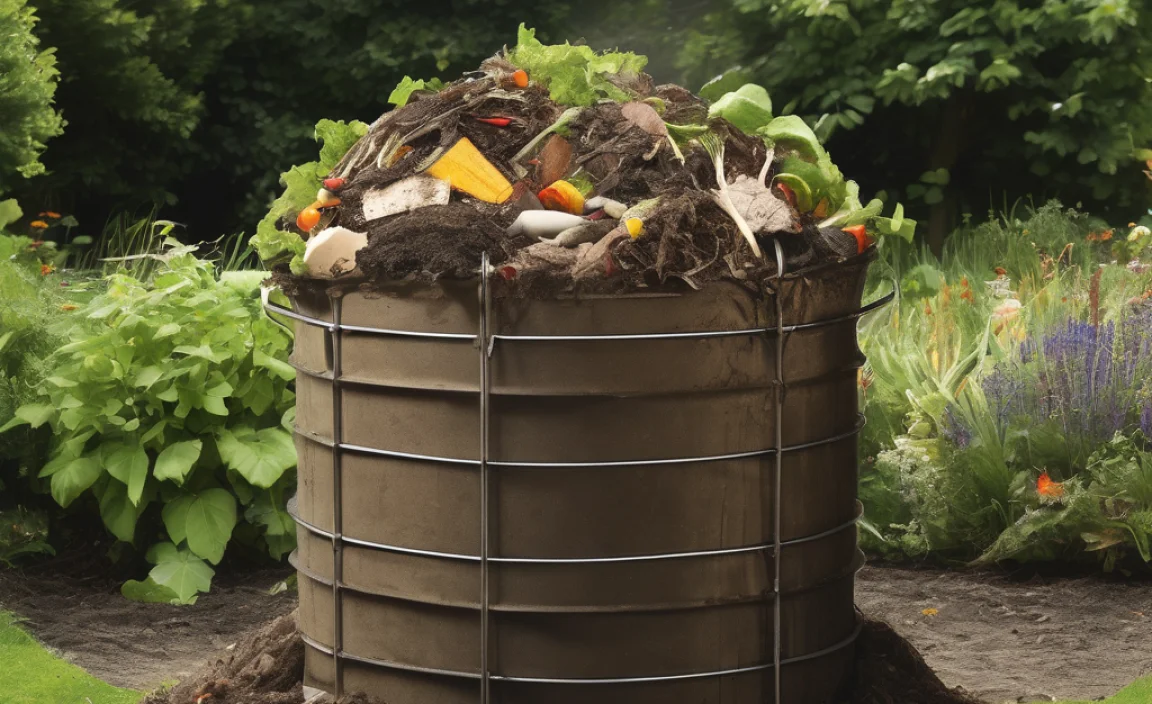
- DIY Bins: You can easily build a bin using wood pallets, chicken wire, or cinder blocks. This is a budget-friendly option and can be as simple as creating a three-sided enclosure or a square made of pallets.
- Purchased Bins: Many compost bins are available at garden centers or online. Look for simple, open-top bins or tumbler-style bins (though tumblers are often better for hot composting, they can still work for cold if left unturned).
- Open Piles: In larger yards, you can simply designate an area at the back of your property as a compost pile. This is the most basic approach and requires no construction.
Essential Tools
You don’t need much, but a couple of things will make your life easier:
- Pitchfork or Garden Fork: For occasionally aerating the pile (optional but helpful).
- Shovel: For moving finished compost.
- Gloves: To keep your hands clean.
- Kitchen Caddy/Scrap Collector: A small bin with a lid for collecting food scraps in your kitchen before taking them to the main compost bin.
The “Greens” and “Browns”: What to Compost (and What to Avoid!)
Composting is all about balancing nitrogen-rich “greens” and carbon-rich “browns.” This balance helps the decomposers do their job efficiently.
“Greens” (Nitrogen-Rich Materials)
These are typically moist materials that provide nitrogen. Think of them as the “fuel” for decomposition:
- Fruit and vegetable scraps
- Coffee grounds and filters
- Tea bags
- Grass clippings (in moderation)
- Plant trimmings (non-woody)
- Eggshells
- Manure from herbivores (like rabbits, chickens, cows, horses – not dogs or cats)
“Browns” (Carbon-Rich Materials)
These are typically dry materials that provide carbon. They help with aeration and prevent the pile from becoming a soggy mess:
- Dry leaves
- Straw or hay
- Shredded newspaper or cardboard (avoid glossy or colored inks)
- Wood chips or sawdust (in small amounts)
- Twigs and small branches (chopped up)
- Paper towels and napkins (unsoiled)
What to AVOID in Your Cold Compost Pile
Some things just don’t belong in a compost pile, especially a cold one, as they can cause odor problems, attract pests, or spread disease:
- Meat, fish, and bones
- Dairy products (cheese, yogurt, milk)
- Oils, grease, and fatty foods
- Diseased plants
- Weeds that have gone to seed (especially in cold composting, as it won’t get hot enough to kill them)
- Pet waste (from dogs, cats, or other carnivores)
- Coal ash or charcoal briquettes
- Treated wood
- Synthetic materials
When in doubt, it’s often safer to leave it out! Focusing on yard waste and kitchen scraps from fruits and vegetables is a good rule of thumb.
Your Step-by-Step Guide to Cold Composting
Ready to get started? It’s easier than you think. Follow these simple steps:
Step 1: Choose Your Location
Find a convenient spot for your compost bin or pile. Ideally, it should be:
- An accessible location where you can easily add materials and eventually remove compost.
- Partially shaded to prevent it from drying out too quickly in hot weather, but also gets some sun to help with warmth.
- On bare soil if possible. This allows moisture and beneficial organisms to move in and out of the pile. If you’re on a patio or deck, consider a bin with a solid base or place it on a waterproof mat.
Step 2: Set Up Your Bin or Pile
If you’re using a bin, assemble it according to the manufacturer’s instructions. If you’re building a DIY bin or using an open pile, simply create your enclosure or designated space.
For your first layer in any bin or pile, it’s a good idea to add a layer of bulky “browns,” like twigs or straw. This helps with aeration from the bottom, allowing air to circulate. Aim for a layer about 4-6 inches deep.
Step 3: Start Adding Your Materials – The “Lasagna” Method (but easier!)
This is where the magic happens. You’ll add your compostable materials in layers. Aim for a good mix of greens and browns. A common recommendation is two to three times as much brown material as green material by volume.
Don’t get too hung up on perfect ratios. The key is to avoid having too much of one thing for too long. If you have a lot of grass clippings (greens), try to mix them with leaves or shredded paper (browns). If you’ve just pruned a lot of woody material (browns), add in fruit scraps (greens).
Layering Tip:
- Add a layer of “browns.”
- Add a layer of “greens.”
- Cover the greens with a thin layer of browns. This is especially helpful for food scraps to deter pests and reduce odors.
- Continue layering as you accumulate materials.
You can learn more about composting basics from the U.S. Environmental Protection Agency (EPA), which offers a wealth of reliable information on waste reduction and composting.
Step 4: Add Materials Continuously
As you generate kitchen scraps and yard waste, simply add them to your compost pile. Try to bury kitchen scraps within the existing material, especially if you’re concerned about pests or odors. Always try to cover fresh “greens” with a layer of “browns.”
Step 5: Moisture Matters (But Don’t Overthink It)
A compost pile needs to be moist, like a wrung-out sponge. If it’s too dry, decomposition slows way down. If it’s too wet, it can become anaerobic and smelly.
- If it’s too dry: Add water. You can do this with a hose or watering can.
- If it’s too wet: Add more “brown” materials (like dry leaves, shredded cardboard, or straw) to soak up excess moisture and improve aeration.
No need to measure this precisely. Just check it periodically. A good way to test is to grab a handful of material from the middle of the pile – it should feel damp, but no water should drip out when you squeeze it.
Step 6: Aeration (Optional, But Helpful)
Cold composting is passive, so you don’t have to turn it. However, if you want to speed things up just a little, or if your pile looks like it might be getting too wet or compacted, you can give it a quick turn with a pitchfork every few months. This introduces oxygen, which is essential for many of the beneficial microbes doing all the work. Don’t feel obligated to do this religiously; it’s an optional boost.
Step 7: Patience is Key!
This is the most important step for a cold compost system. Decomposition takes time. Cold composting can take anywhere from 6 months to 2 years to produce finished compost, depending on the materials used, the climate, and the size of your pile.
You’ll know your compost is ready when it looks dark and crumbly, smells earthy (like good forest soil), and you can no longer recognize the original materials you put in. You might still see a few small twigs or eggshells, but the bulk of it should be well-broken down.
Troubleshooting Common Cold Composting Issues
Even with a simple system, you might run into a snag. Here are a few common problems and how to fix them:
| Problem | Possible Cause | Solution |
|---|---|---|
| Bad Odor (Ammonia-like or Rotten Egg Smell) | Too many greens (nitrogen) or the pile is too wet and lacking air. | Add more brown materials (leaves, shredded cardboard, straw) to absorb moisture and balance the nitrogen. Turn the pile to introduce air. Ensure the pile isn’t waterlogged. |
| Pile Isn’t Breaking Down | Too dry, not enough greens (nitrogen), or the pile is too small. | Add water if dry. Add more greens (kitchen scraps, grass clippings). Ensure the pile is at least 3x3x3 feet (1 cubic meter) if possible, as larger piles retain heat better. Turn the pile if it looks compacted. |
| Attracting Pests (Rodents, Flies) | Exposed food scraps, or the pile is too attractive. | Always bury kitchen scraps under a layer of brown materials. Avoid adding meat, dairy, and oily foods. Ensure your bin is secure if pests are a major issue. Consider a pest-proof bin. |
| Weeds Growing in Compost | Cold composting doesn’t always kill weed seeds as effectively as hot composting. | This is a common characteristic of cold composting. You can either let the compost finish and then remove any visible weed seeds, or use the compost in areas where weeds aren’t a major concern (e.g., around established shrubs or trees, not in your vegetable seed beds). You can also try to hot compost for a year or two before using it in sensitive areas. |
Using Your Finished Cold Compost
Once your compost is ready – dark, crumbly, and smelling earthy – it’s time to use it! Here are some fantastic ways to incorporate it into your garden:
- Soil Amendment: Mix a few inches of compost into your garden beds before planting. This improves soil structure, drainage, and aeration, helping plants establish strong roots.
- Top Dressing: Spread a 1-2 inch layer of compost around existing plants, shrubs, and trees. This feeds the soil slowly, suppresses weeds, and helps retain moisture.
- Potting Mix: You can mix compost with potting soil or coir to create a rich, nutrient-dense mix for containers and houseplants. A common ratio is 1 part compost to 2 parts potting mix.
- Compost Tea: For a liquid boost, steep finished compost in aerated water for 24-48 hours. This “compost tea” can be a great foliar spray or root drench.
Using compost is one of the best things you can do for your garden. It’s like giving your soil a multivitamin that improves its health for years to come. For more detailed information on soil amendments and their benefits, resources like the Gardening Know How website offer practical tips.
Cold Composting vs. Hot Composting: A Quick Comparison
To make sure you’re comfortable with the cold composting process, let’s quickly highlight how it differs from its faster cousin:
| Feature | Cold Composting (Passive) | Hot Composting (Active) |
|---|---|---|
| Decomposition Speed | Slow (6 months to 2+ years) | Fast (4 weeks to 3 months) |
| Effort Required | Very low. Just add materials. Occasional turning optional. | High. Requires precise layering, regular turning, and monitoring temperature. |
| Finished Product Quality | Good for soil structure, but may contain weed seeds and pathogens. | Nutrient-rich and often pathogen/weed seed-free (if managed correctly). |
| Ideal for | Beginners, busy individuals, large volumes of material, creating garden mulch. | Getting compost quickly, killing weed seeds/pathogens, smaller volumes. |
| Temperature | Ambient outdoor temperatures. | Actively managed to reach and maintain 130-160°F (55-71°C). |
Cold composting truly shines for its simplicity. You get amazing benefits for very little ongoing effort. If you’re new to composting, or simply want a low-stress way to enrich your garden, cold composting is your best bet.
Frequently Asked Questions About Cold Composting
Q1: How long does cold composting take?
A1: Cold composting is a slow process. It can take anywhere from 6 months to over 2 years to produce finished compost. The exact time depends on factors like the climate, the materials used, and how often you aerate the pile (if at all).
Q2: Will my cold compost pile attract animals like rats?
<p

I am passionate about home engineering. I specialize in designing, installing, and maintaining heating, ventilation, and air conditioning systems. My goal is to help people stay comfortable in their homes all year long.