Hey neighbor! Turning your kitchen scraps and yard waste into something amazing for your garden might seem like a big task. But it doesn’t have to be! We’ll break down how to find or make the perfect compost bin. Let’s get your composting journey started the easy way!
Compost Bin Solutions: Genius & Essential for Your Garden
Are you tired of seeing food scraps and yard trimmings go to waste in your trash? Want to give your garden a super boost without buying expensive fertilizers? Composting is the answer, and having the right compost bin is the first step to success. It might seem complicated, but I’m Troy D Harn from TopChooser, and I’m here to show you how simple and rewarding it can be. We’ll explore all sorts of compost bin solutions, from super simple DIY ideas to ready-made options, making sure you find the perfect fit for your home and your budget. Let’s dig in and transform that “waste” into garden gold!
Why You Need a Compost Bin: More Than Just Trash Reduction
Think of a compost bin as a mini-ecosystem in your backyard. It’s where the magic happens, turning everyday organic materials into nutrient-rich compost, often called “black gold” by gardeners. This amazing stuff can revitalize your soil, help plants grow stronger and healthier, and even reduce your need for chemical fertilizers. Plus, it’s a fantastic way to reduce the amount of waste you send to the landfill. It’s a win-win for your garden and the planet!
Choosing Your First Compost Bin: What to Consider
Before you dive headfirst into buying or building, let’s think about what’s best for you. A little planning goes a long way!
- Space: How much room do you have? A small apartment balcony might need a compact tumbler, while a large yard can handle a multi-bin system.
- Volume of Waste: How much kitchen and yard waste do you typically produce? This will help determine the size of bin you need.
- Budget: Are you looking for a low-cost DIY solution or a durable, ready-made bin?
- Effort Level: Do you want something low-maintenance, or are you happy to turn the compost pile regularly?
- Aesthetics: Does the bin need to look tidy and blend in with your landscaping, or is functionality the main goal?
Top Compost Bin Solutions: From No-Cost to High-Tech
There are tons of ways to set up your composting operation. Let’s look at some tried-and-true compost bin solutions that fit different needs and styles.
1. The Simple Pile (aka The Free & Easy Way)
This is the most basic method. If you have plenty of yard space, you can literally just create a pile in a corner. It’s free and requires no construction, but it can look a bit untidy and might attract critters more easily if not managed carefully.
- Pros: Absolutely free, no materials needed, can handle large volumes.
- Cons: Can be messy, slower composting if not turned, higher risk of pests, not ideal for small spaces or if aesthetics are a concern.
2. DIY Wire Mesh Bin
This is a step up from a simple pile, offering a bit more structure. It’s still very affordable and easy to make.
What you’ll need:
- Roll of hardware cloth or chicken wire (about 3-4 feet high, 10-12 feet long)
- Wire cutters
- Zip ties or sturdy wire to fasten
- Gloves
How to build it:
- Unroll the wire mesh and form it into a cylinder. Aim for a diameter of about 3 feet.
- Overlap the ends of the mesh by a few inches.
- Use zip ties or wire to securely fasten the overlapped ends together. Make sure it’s sturdy!
- Place your new bin in its desired location.
This provides containment for your compost materials while still allowing for good airflow, which is crucial for decomposition. Great for beginners!
3. Pallet Compost Bin (The Upcycler’s Dream)
Got some spare wooden pallets? This is a fantastic way to upcycle them into a sturdy, multi-bin system. It looks rustic and can be quite efficient.
What you’ll need:
- 4-12 standard wooden pallets (depending on whether you want a single or multi-bin system)
- Wire, screws, or heavy-duty zip ties
- Drill and screws (if using screws)
- Gloves
- Saw (optional, if you need to adjust pallet sizes)
How to build a single bin:
- Stand three pallets on their edges to form three sides of a square.
- Use wire, screws, or zip ties to connect these three pallets securely at the corners.
- The fourth side can be left open for easy access to turn the compost, or you can attach a fourth pallet with hinges or removable ties to create a door.
For a multi-bin system: Use additional pallets to create adjoining sections. This allows you to have compost in different stages of decomposition, which is super efficient. For example, you can have one bin for fresh scraps, one for actively composting material, and one for finished compost.
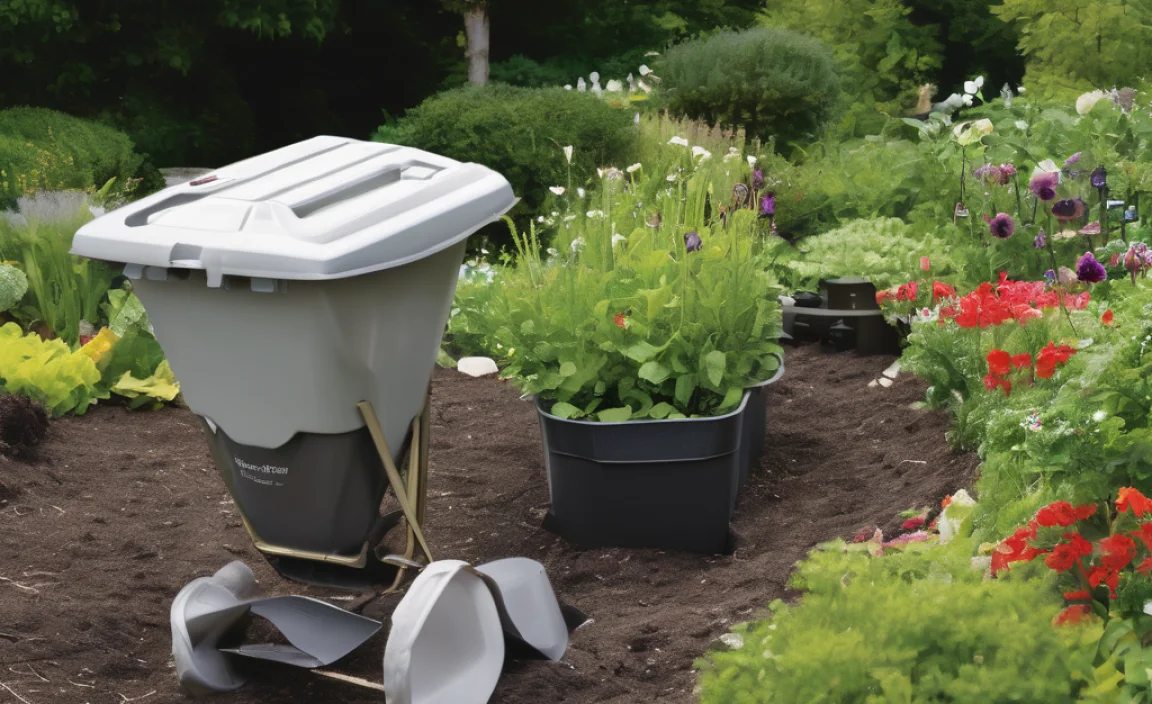
4. Plastic Bin (Store-Bought & Simple)
These are very common and easy to find at garden centers or online. They typically come as a single, large plastic container with a lid and sometimes aeration holes or a door at the bottom for harvesting finished compost.
- Pros: Easy to set up, relatively inexpensive, can keep pests out if the lid is secure, contained and tidy.
- Cons: Can be small if you produce a lot of waste, may not get as much airflow as open systems, the plastic can degrade over time.
Some popular types include the Worm Factory (for vermicomposting, which is composting with worms) or basic stationary plastic bins. They are great for smaller yards or if you’re just starting out and want a no-fuss option.
5. Compost Tumbler (The Modern & Fast Option)
Compost tumblers are rotating drums that make turning the compost incredibly easy. Just give it a spin every few days, and you’re done! This means faster composting and less manual labor.
Pros: Very easy to turn, speeds up composting significantly, keeps pests out effectively, contained and often looks neat.
- Cons: Can be more expensive, may have a smaller capacity than open bins, can become heavy when full, some can be tricky to balance when turning if not filled evenly.
When choosing a tumbler, consider its capacity, how easy it is to load and unload, and its durability. Many are made from recycled plastic.
6. Three-Bin System (For the Dedicated Gardener)
This is the professional setup for serious composters with plenty of space. It’s often built using wooden planks or pallets. As mentioned with the pallet bins, having three sections allows you to manage compost at different stages: active composting, maturing compost, and finished compost ready to use.
Pros: Highly efficient for large volumes, allows for continuous composting, can be made very durable.
- Cons: Requires significant space and materials to build, more labor-intensive to manage initially.
You can find plans for building three-bin systems online from university extension offices or reputable gardening sites. For example, the Purdue Extension has excellent resources on composting methods.
What Can (and Can’t) Go in Your Compost Bin
Knowing what to add is key to successful composting. Think of it as balancing your “greens” (nitrogen-rich) and “browns” (carbon-rich).
What TO Compost (Greens & Browns):
- Greens (Nitrogen):
- Fruit and vegetable scraps
- Coffee grounds and tea bags
- Grass clippings (in moderation)
- Plant trimmings
- Manure (from herbivores like chicken, rabbit, cow, horse – NOT dog or cat)
- Browns (Carbon):
- Dry leaves
- Shredded newspaper and cardboard (uncoated, no glossy print)
- Straw and hay
- Twigs and small branches (chopped up)
- Sawdust (from untreated wood)
- Eggshells (crushed)
What NOT to Compost:
- Meat, fish, and bones (attract pests and can smell bad)
- Dairy products (same reasons as meat)
- Oily or greasy foods
- Diseased plants
- Weeds that have gone to seed (they might sprout in your compost)
- Pet waste (dog and cat feces can contain pathogens)
- Treated wood or charcoal ash
- Inorganic materials (plastic, metal, glass)
The Importance of Airflow and Moisture
Compost needs air and moisture to break down properly. Too much of one or not enough of the other can slow things down or lead to unpleasant smells. Your compost should feel like a wrung-out sponge – damp, but not soaking wet.
Airflow: This is why many bins have holes or are open on at least one side. Regularly turning your compost helps with this. Tumblers do this automatically!
Moisture: If your compost looks too dry, add some water. If it’s too wet, add more “brown” materials like dry leaves or shredded cardboard. Covering your bin during heavy rain can also help.
Composting Materials at a Glance Table
Here’s a quick reference to keep handy when you’re deciding what goes into your bin.
| Category | Good to Compost | Avoid Composting |
|---|---|---|
| Kitchen Scraps | Fruits, vegetables, coffee grounds, tea bags, eggshells | Meat, dairy, oils, greasy foods |
| Yard Waste | Grass clippings, leaves, small twigs, plant trimmings | Diseased plants, weeds with seeds |
| Paper/Cardboard | Shredded newspaper, plain cardboard (no glossy print) | Glossy paper, waxed cardboard |
| Other | Herbivore manure, sawdust (untreated wood), straw | Pet waste (dog/cat), treated wood, charcoal ash |
DIY vs. Store-Bought Compost Bins: Pros and Cons
Deciding between making your own or buying one can be tough. Here’s a comparison to help you weigh the options:
| Feature | DIY Compost Bins | Store-Bought Compost Bins |
|---|---|---|
| Cost | Often very low to free (especially using recycled materials) | Can range from affordable to quite expensive |
| Customization | Fully customizable to your space and needs | Limited to available models and sizes |
| Effort to Acquire | Requires time for planning and construction | Minimal effort, just purchase and set up |
| Durability | Depends heavily on materials and construction quality | Generally designed for durability, but materials vary |
| Aesthetics | Can be rustic or utilitarian; may require finishing touches | Often designed to be tidy and blend into gardens |
| Pest Control | Can be harder to make fully critter-proof | Often designed with lids and solid sides for better pest control |
| Airflow | Can be designed for excellent airflow | Varies by design; some may require more attention |
Tips for Successful Composting, No Matter Your Bin Choice
Once you have your compost bin solutions in place, here are some tips to keep your compost cooking:
- Chop it up: Smaller pieces break down faster. Chop up large scraps and twigs.
- Balance your greens and browns: Aim for roughly a 1:2 or 1:3 ratio of greens to browns by volume. Too much green can make it slimy and smelly; too much brown slows decomposition.
- Keep it moist: The compost should feel like a damp sponge. Add water if it’s dry, or greens if it’s too wet.
- Turn it regularly: This aerates the pile and speeds up decomposition. Tumblers make this easy; for other bins, use a pitchfork or compost aerator every week or two.
- Be patient: Composting takes time. Depending on your method and materials, it can take anywhere from a few months to a year.
- Troubleshoot smells: Bad smells usually mean it’s too wet or there’s too much nitrogen (greens). Add more browns and turn the pile.
Conclusion: Your Journey to Garden Gold Starts Now!
Finding the right compost bin solutions is all about matching your lifestyle, space, and gardening goals. Whether you choose a simple wire circle, an upcycled pallet bin, a speedy tumbler, or a convenient store-bought option, you’re on your way to a healthier garden and a more sustainable home.
Remember, the best compost bin is the one you’ll actually use! Start simple, learn as you go, and don’t be afraid to experiment. You’ve got this, and your plants will thank you for it with vibrant growth and bountiful harvests. Happy composting!
Frequently Asked Questions About Compost Bins
Q1: How much space do I really need for a compost bin?
Even a small balcony can accommodate a worm bin or a small tumbler. For more traditional methods, a space about 3×3 feet is a good starting point for a DIY bin, while a three-bin system needs more like 9×3 feet.
Q2: Will my compost bin attract rodents or other pests?
Improperly managed compost, especially with meat or dairy, can attract pests. Using a bin with a secure lid, like a tumbler or a well-sealed plastic bin, and avoiding problematic food scraps greatly reduces the risk. Chopping up materials and burying fresh kitchen scraps in the center of the pile also helps.
Q3: How do I know when my compost is ready to use?
Finished compost will be dark, crumbly, and smell earthy, like a forest floor. You shouldn’t be able to recognize the original materials you put in. It will also have cooled down from the active composting temperature.
Q4: Can I compost in the winter?
Yes, you can! Composting usually slows down significantly in cold weather, but it doesn’t necessarily stop. Very cold temperatures can kill off beneficial microbes. Insulated bins or tumblers can help keep your compost active, or you can simply let it rest and resume in spring. For a three-bin system, continue adding materials; decomposition will just be slower.
Q5: What kind of tools do I need for composting?
For basic composting, a pitchfork or a dedicated compost aerator is helpful for turning. If you’re building a DIY bin, you’ll need basic tools like wire cutters, a drill, or a hammer. A shovel is useful for moving finished compost.
Q6: My compost is dry and not breaking down. What should I do?
This is a common issue! Your compost needs more moisture. Add water gradually and turn the pile thoroughly to distribute the moisture evenly. Adding some “green” materials (like kitchen scraps) can also help introduce moisture and nitrogen to kickstart the process.

I am passionate about home engineering. I specialize in designing, installing, and maintaining heating, ventilation, and air conditioning systems. My goal is to help people stay comfortable in their homes all year long.