Ever tossed kitchen scraps into a bin and hoped for the best, only to end up with a soggy, smelly mess? It’s a common frustration when you’re trying to make compost. You want that black gold for your garden, not a science experiment gone wrong.
The good news is, there’s a simple secret to speeding things up and getting fantastic results: compost enzymes. Think of them as tiny helpers that do the heavy lifting for you. We’ll break down exactly what they are and how to use them to get your best compost, faster.
Compost Enzymes: Your Secret Weapon for Super-Fast Compost
Hey everyone, Troy D Harn here from TopChooser! We’ve all heard about composting, right? It’s a fantastic way to reduce waste and create nutrient-rich food for our gardens. But sometimes, it feels like it takes forever. You pile up your greens and browns, turn it occasionally, and weeks or even months go by with not much happening except maybe a bit of a funky smell.
If you’ve been there, I get it. It can be discouraging. But what if I told you there’s a way to give your compost pile a serious boost, making it break down faster and more efficiently? We’re talking about compost enzymes.
These little powerhouses are the unsung heroes of composting, and using them can dramatically improve your compost results. Today, we’re diving deep into what compost enzymes are, why they matter, and the easiest ways to harness their power for that rich, dark compost you’ve always wanted – and get the best results, now!
What Exactly Are Compost Enzymes?
Don’t let the word “enzyme” scare you. In simple terms, enzymes are tiny protein molecules that speed up chemical reactions. In the world of composting, they are produced by the microorganisms (like bacteria and fungi) that are already working hard to break down your organic materials.
These microbes are the real composters, and they release enzymes to break down complex organic matter into simpler forms that they can then consume. Think of it like this: the microbes are the construction crew, and the enzymes are the power tools they use to break down buildings (your food scraps and yard waste) into usable materials.
Different enzymes target different types of materials:
- Cellulases: These break down cellulose, a major component of plant material (think leaves, grass, and paper).
- Hemicellulases: Similar to cellulases, these enzymes tackle hemicellulose, another plant wall component closely related to cellulose.
- Ligninases: These are specialized enzymes that break down lignin, a tough component found in woody materials.
- Proteases: These enzymes break down proteins, found in things like food scraps and manure.
- Lipases: These break down fats and oils.
The more active and diverse the microbial community in your compost pile, the more enzymes will be present, and the faster and more efficiently your compost will break down. Commercial compost enzyme activators essentially introduce a concentrated dose of these beneficial enzymes or the microbes that produce them, giving your pile an immediate kick-start.
Why Should You Use Compost Enzymes? The “Best Results Now” Factor
So, why bother with adding external enzymes if microbes are already doing the work? Good question! While a healthy compost pile will eventually break down materials on its own, adding compost enzymes can:
- Speed Up Decomposition: This is the big one. Enzymes get to work immediately, breaking down tougher materials much faster than microbes can on their own. This means you get finished compost in a fraction of the time.
- Reduce Odors: Unpleasant smells often arise when organic matter decomposes anerobically (without enough oxygen). Enzymes help speed up aerobic decomposition, reducing the chances of smelly byproducts and encouraging a more pleasant composting process.
- Improve Compost Quality: By breaking down materials more thoroughly and evenly, enzymes contribute to a more uniform and nutrient-rich finished compost.
- Handle Difficult Materials: Tougher materials like thick woody debris, cardboard, or even certain food waste can be stubborn. Enzymes help get the party started on these items.
- Boost Microbial Activity: While enzymes are the tools, they also signal to the microbes that there’s a lot of work to be done, encouraging them to multiply and become more active.
When you’re looking for the “best results now,” adding compost enzymes is one of the most direct ways to achieve that. It’s like giving your compost pile a supercharge!
Types of Compost Enzyme Activators
When you go looking for compost enzyme products, you’ll mostly find a few main types. They all aim to achieve the same goal: faster breakdown. Understanding the differences can help you choose the best one for your needs.
Here’s a quick look:
| Type of Activator | What It Is | How It Works | Pros | Cons |
|---|---|---|---|---|
| Concentrated Enzyme Solutions | Liquid or powder products with high concentrations of specific enzymes. | Directly break down organic molecules, making them easier for microbes to consume. | Fast-acting, targeted breakdown, easy to mix and apply. | Can be more expensive, need to be stored properly. |
| Microbial/Bacterial Starters | Products containing dormant beneficial bacteria and sometimes fungi. | When activated by moisture and warmth, these microbes reproduce rapidly and produce their own enzymes. | Introduces a robust population of decomposers, can be very effective over time. | Takes a little longer to see results as microbes need to multiply, effectiveness can vary depending on existing pile conditions. |
| Enzyme-Rich Organic Materials | Adding materials that naturally contain a lot of enzymes or the microbes that produce them. | These materials introduce or stimulate native enzymes and microbes. | Natural, often free or low-cost, readily available. | Less concentrated impact, results are slower compared to concentrated products. |
For the quickest results, concentrated enzyme solutions or robust microbial starters are usually your best bet. They directly provide the “boost” you’re looking for.
How to Use Compost Enzymes for Maximum Impact: A Step-by-Step Guide
Ready to get your compost cooking? Using enzyme activators is generally straightforward. The key is to incorporate them properly into your compost pile. Here’s how to do it:
Step 1: Prepare Your Compost Pile
Before adding any activator, make sure your compost pile has the basic ingredients for success: a good mix of “greens” (nitrogen-rich materials like kitchen scraps, grass clippings) and “browns” (carbon-rich materials like dead leaves, shredded paper, small twigs). You want a balance, often talked about as a 2:1 or 3:1 ratio of browns to greens by volume. The pile should also be moist, feeling like a wrung-out sponge. If it’s too dry, your microbes and enzymes won’t be active.
Step 2: Choose Your Enzyme Activator
Based on the table above, decide what kind of activator works best for you. For immediate “best results now,” you might lean towards a concentrated liquid enzyme solution or a high-potency bacterial starter. Read the product label carefully for specific instructions, as concentrations and application methods can vary.
Some popular and reputable brands are often found online or at garden supply stores. You can also look for products that are certified by organizations like the Colorado Department of Transportation (CDOT) for compost quality, though this is more for industrial-scale composting and indicates a focus on quality assurance.
Step 3: Apply the Activator
This is where you actually use the product. Most activators are designed to be diluted in water. Here’s a general idea, but ALWAYS follow the product’s specific directions:
- For Liquid Enzyme Solutions: Dilute the recommended amount of concentrate in a watering can filled with water. A common ratio might be 1-2 ounces per gallon of water, but check your label.
- For Powdered Microbial Starters: Usually, you’ll mix the powder with water as well. Sometimes, these instructions might involve letting the mixture sit for a short period to “awaken” the microbes.
Step 4: Distribute Evenly
Now, gently water your compost pile with the prepared solution. Try to distribute it as evenly as possible throughout the entire pile. If you have a large pile, you might need to systematically water layers as you build it or as you turn it. The goal is to get the activator into contact with all the different materials in the pile.
Step 5: Build or Mix Your Pile
- For New Piles: If you’re starting a new compost pile, you can add the activator to the materials as you layer them. Water each layer with the diluted solution as you build.
- For Existing Piles: If you have an established pile, turn it thoroughly first to aerate it and mix materials. Then, apply the activator solution as evenly as possible over the turned material. Some people like to add it to the core of the pile where decomposition is most active.
Step 6: Maintain Optimal Conditions
After applying the activator, your compost needs the right environment to thrive:
- Moisture: Keep the pile consistently moist, like that wrung-out sponge. Too dry, and the microbes and enzymes slow down. Too wet, and you risk anaerobic conditions (and smells!).
- Aeration: Turn your compost pile regularly (every 1-2 weeks is a good target). This provides oxygen, which is crucial for the aerobic microbes that work best with enzymes. Turning also helps distribute moisture and heat.
- Temperature: A healthy, activated pile will heat up. This heat is a sign of microbial activity and helps kill weed seeds and pathogens. Aim for temperatures between 130-160°F (55-70°C) in the core of the pile for optimal composting.
Step 7: Monitor and Enjoy!
You should start to see results relatively quickly. The pile might heat up faster, and the materials will appear to be breaking down more rapidly. Within a few weeks to a couple of months (depending on materials and conditions), you should have beautiful, dark, crumbly compost. It will smell earthy and pleasant, not like rotten food!
What NOT to Add to Your Compost Pile (That Might Hinder Enzymes)
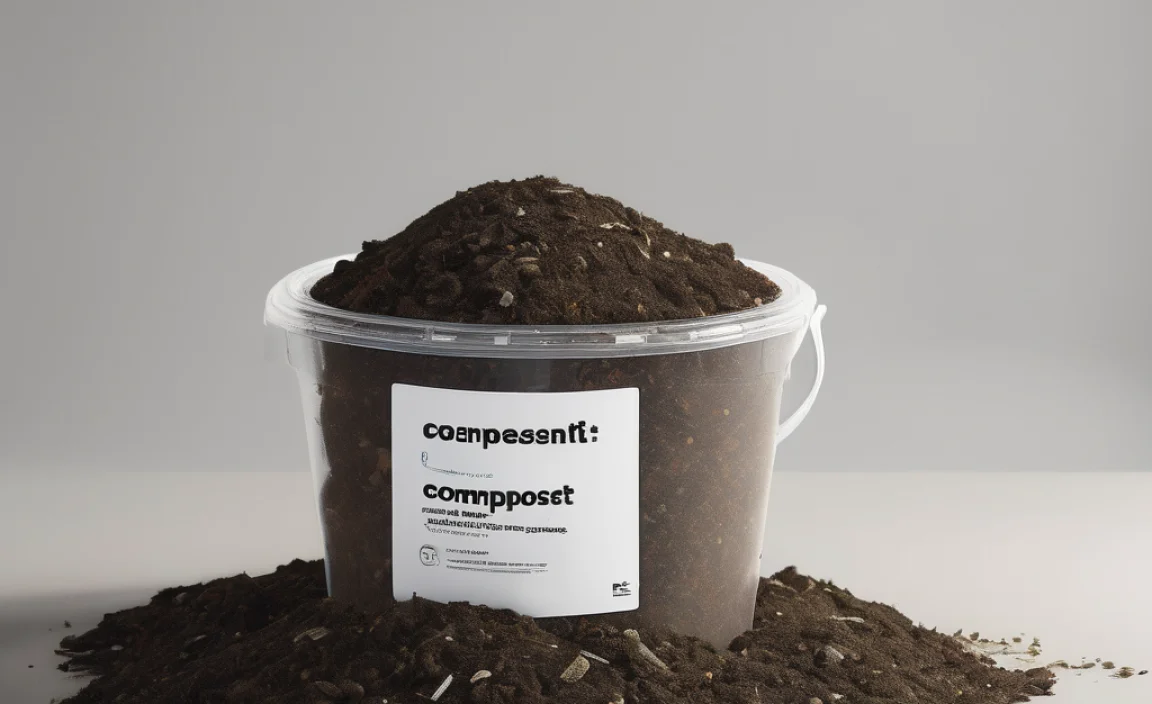
While enzymes are powerful, some compost “no-nos” can still stall the process or make life harder for your microbial friends. Knowing these helps ensure your enzyme boost isn’t wasted:
- Diseased Plants: While heat can kill some pathogens, it’s best not to risk spreading diseases into your compost, which you then add to your garden.
- Weeds with Seeds: Some persistent weeds can survive the composting process, especially if the pile doesn’t get hot enough.
- Meat, Dairy, and Oily Foods: These can attract pests, create strong odors, and slow down decomposition if not managed carefully. They are generally not recommended for beginner home composting.
- Pet Waste (from dogs and cats): These can contain harmful pathogens that don’t always get eliminated by standard home composting temperatures.
- Chemically Treated Yard Waste: Lawn clippings treated with herbicides or pesticides can harm beneficial microbes in your compost.
- Glossy paper and plastics: These won’t break down.
Keeping these items out allows your enzymes and microbes to focus on the materials that can be composted effectively, leading to better results.
Troubleshooting Common Composting Issues with Enzymes
Even with enzyme activators, you might run into a snag. Here’s how to deal with common problems:
Problem: My pile isn’t heating up.
Possible Causes & Solutions:
- Too Dry: Add water and mix.
- Too Many Browns: Add more greens (fresh kitchen scraps, grass clippings).
- Too Many Greens: Add more browns (leaves, shredded paper) to balance the nitrogen.
- Insufficient Volume: A pile needs to be at least 3x3x3 feet to generate and retain enough heat. Try adding more material or combining smaller piles.
- Activator Issue: Ensure you used the activator correctly and it wasn’t expired.
Problem: My pile smells bad (like ammonia or rotten eggs).
Possible Causes & Solutions:
- Too Wet/Poor Aeration: Turn the pile to introduce oxygen. Add dry, brown materials to absorb excess moisture.
- Too Many Greens (Ammonia Smell): Add more brown materials like shredded newspaper, cardboard, or dry leaves.
- Anaerobic Pockets (Rotten Egg Smell): This means there’s not enough oxygen. Turn the pile thoroughly.
Problem: Decomposition is still slow.
Possible Causes & Solutions:
- Materials Too Large: Chop or shred larger items into smaller pieces.
- Insufficient Moisture: Add water and mix.
- Not Enough Nitrogen: Add more “green” materials.
- Activator Ineffectiveness: Ensure you used the correct amount of activator and that it was fresh. Consider adding another dose or trying a different type of activator.
- Temperature Too Low: If it’s cold outside and your pile isn’t heating up, decomposition will naturally slow down.
Remember, composting is a living process. Be patient, observe your pile, and make adjustments. Enzymes help, but they work best when the basic composting conditions are right.
The Role of Microbes vs. Enzymes
It’s easy to get enzymes and microbes mixed up, but they are distinct and work in tandem. Think of it as a partnership:
- Microbes (Bacteria, Fungi, Protozoa, Nematodes): These are the living organisms doing the consuming. They are attracted to organic matter and actively break it down. They reproduce and need oxygen and the right moisture levels to survive.
- Enzymes: These are chemicals secreted by the microbes. Their job is to break down large, complex molecules (like cellulose) into smaller, simpler ones that the microbes can then absorb and digest. Enzymes are like the pre-digestion system.
A good compost enzyme product might supply both concentrated enzymes and a boost of beneficial microbes. When you add enzymes, you’re essentially pre-digesting the food for the microbes, making their job easier and much faster. This accelerates their reproduction and overall breakdown activity, leading to quicker composting.
Cost-Effectiveness: Are Enzyme Activators Worth It?
This is a question many budget-conscious DIYers ask. Buying a compost enzyme activator does add an upfront cost. However, let’s look at it from a “best results now” perspective:
Cost of Activator: Varies widely, from $10 to $30+ for a decent-sized container that can treat many batches of compost.
Time Saved: A standard compost pile might take 3-6 months or longer to mature. With enzyme activators, you could potentially halve that time, or even more. Imagine getting compost ready for your spring planting in early summer, instead of waiting until fall.
Reduced Effort: Faster composting often means fewer turns and less maintenance, saving you time and physical labor.
Improved Quality: Better quality compost means healthier plants, potentially fewer fertilizers needed in the long run, and a more productive garden.
If your goal is speed and efficiency, the cost of an enzyme activator is often well worth it. It turns a slow, sometimes frustrating process into a more predictable and rapid one. It’s an investment in getting better results, faster, with less hassle.
Environmentally Friendly Options and DIY Enzyme Boosts
Want to go even more natural or see if you can do it yourself? There are options!
- Compost Tea: Making “compost tea” from finished compost can introduce beneficial microbes and their enzymes. Brew finished compost with water (and sometimes a food source like molasses) for 24-48 hours, then water your pile.
- Yogurt/Buttermilk (Use Sparingly): Some sources suggest adding a small amount of plain yogurt or buttermilk. These contain live active cultures that can introduce beneficial bacteria. However, use this method cautiously, as dairy can sometimes attract pests or go off if not managed well. It’s generally safer and more effective to use commercial activators or high-quality finished compost for tea.
- Inoculating with Finished Compost: If you have access to well-made, finished compost, adding a shovel full or two to your new pile significantly inoculates it with active microbes and enzymes, effectively jump-starting your process without buying anything extra.
.lwrp.link-whisper-related-posts{
margin-top: 40px;
margin-bottom: 30px;
}
.lwrp .lwrp-title{
}.lwrp .lwrp-description{
}
.lwrp .lwrp-list-container{
}
.lwrp .lwrp-list-multi-container{
display: flex;
}
.lwrp .lwrp-list-double{
width: 48%;
}
.lwrp .lwrp-list-triple{
width: 32%;
}
.lwrp .lwrp-list-row-container{
display: flex;
justify-content: space-between;
}
.lwrp .lwrp-list-row-container .lwrp-list-item{
width: calc(25% – 20px);
}
.lwrp .lwrp-list-item:not(.lwrp-no-posts-message-item){
max-width: 150px;
}
.lwrp .lwrp-list-item img{
max-width: 100%;
height: auto;
object-fit: cover;
aspect-ratio: 1 / 1;
}
.lwrp .lwrp-list-item.lwrp-empty-list-item{
background: initial !important;
}
.lwrp .lwrp-list-item .lwrp-list-link .lwrp-list-link-title-text,
.lwrp .lwrp-list-item .lwrp-list-no-posts-message{
}@media screen and (max-width: 480px) {
.lwrp.link-whisper-related-posts{
}
.lwrp .lwrp-title{
}.lwrp .lwrp-description{
}
.lwrp .lwrp-list-multi-container{
flex-direction: column;
}
.lwrp .lwrp-list-multi-container ul.lwrp-list{
margin-top: 0px;
margin-bottom: 0px;
padding-top: 0px;
padding-bottom: 0px;
}
.lwrp .lwrp-list-double,
.lwrp .lwrp-list-triple{
width: 100%;
}
.lwrp .lwrp-list-row-container{
justify-content: initial;
flex-direction: column;
}
.lwrp .lwrp-list-row-container .lwrp-list-item{
width: 100%;
}
.lwrp .lwrp-list-item:not(.lwrp-no-posts-message-item){
max-width: initial;
}
.lwrp .lwrp-list-item .lwrp-list-link .lwrp-list-link-title-text,
.lwrp .lwrp-list-item .lwrp-list-no-posts-message{
};
}

I am passionate about home engineering. I specialize in designing, installing, and maintaining heating, ventilation, and air conditioning systems. My goal is to help people stay comfortable in their homes all year long.


