Ever looked at your balcony and wished it was a little greener, bursting with life, and maybe even producing your own yummy herbs or veggies? It’s totally doable! Many folks think you need a big backyard for gardening magic, but that’s just not true. Your small balcony can be a thriving oasis, and the secret ingredient? Homemade compost fertilizer!
It sounds fancy, but making your own plant food is simpler than you think. Think of it as turning kitchen scraps into garden gold. We’ll break it down, step-by-step, so you can start feeding your plants the best stuff and watch them flourish. Ready to unlock your balcony garden’s potential?
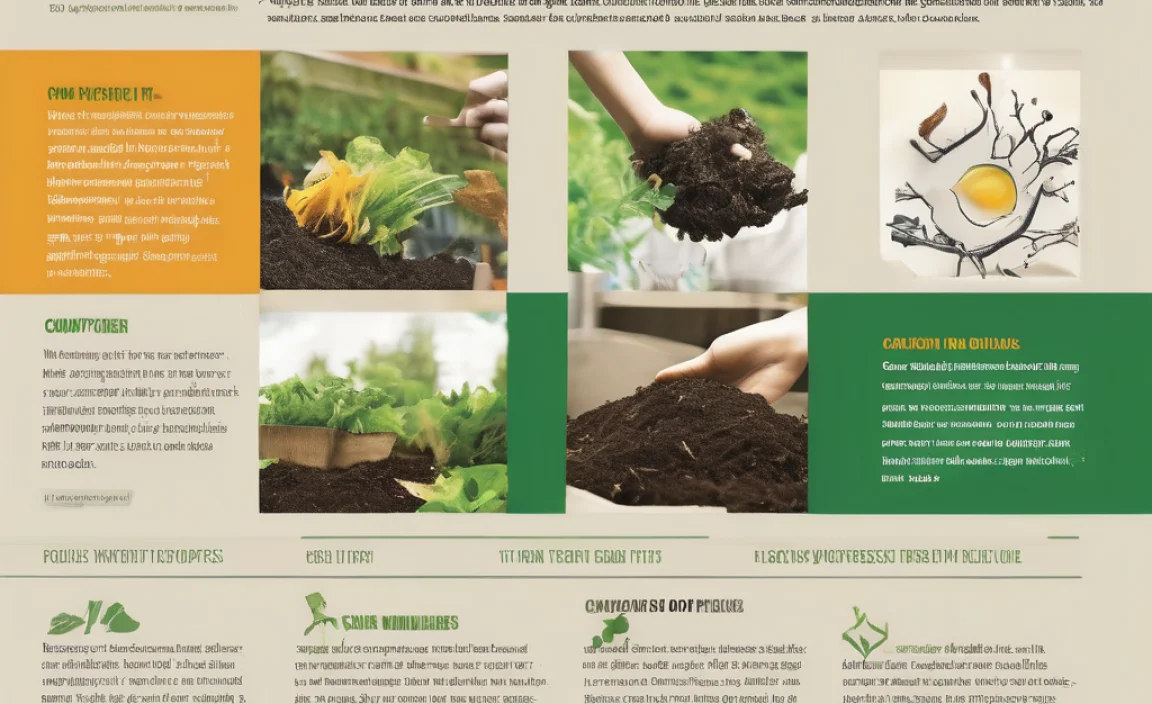
Compost Fertilizer Balcony: Your Essential Guide to a Greener Space
Hey there! Troy D Harn from TopChooser here. So, you’ve got a balcony, and you’re dreaming of growing some greens or bright flowers, right? One of the biggest boosts you can give your little patch of paradise is great fertilizer. And guess what? You can make the best stuff yourself, right there on your balcony, using things you’d normally toss. We’re talking about compost fertilizer!
It’s all about turning your kitchen scraps and yard waste into nutrient-rich goodness for your plants. This isn’t some complicated science project; it’s an easy, eco-friendly way to give your potted plants exactly what they need to thrive. Plus, it saves you money and reduces waste. Win-win-win!
Why Compost Fertilizer on Your Balcony?
Let’s chat about why balcony composting is such a game-changer:
- Supercharges Plant Growth: Compost is packed with essential nutrients that plants crave. It helps them grow stronger, bigger, and produce more flowers or fruits.
- Improves Soil Structure: Even in pots, compost helps improve drainage and aeration, making it easier for plant roots to breathe and access water.
- Reduces Waste: You’ll be amazed at how much food waste you can divert from the landfill. Your trash can become your garden’s treasure!
- Saves Money: Buying bags of fertilizer can add up. Making your own is incredibly budget-friendly.
- It’s Eco-Friendly: Composting is a natural process that helps the environment.
Balcony Composting: What You Need to Get Started
The beauty of balcony composting is that you don’t need a huge setup. The key is choosing a compost bin that fits your space and lifestyle. Here are the main options:
Types of Balcony Compost Bins
For balconies, we’re generally looking at smaller, contained systems. These keep things tidy and odor-free, which is crucial when you’re living in close quarters.
- Worm Composting Bins (Vermicomposting): These are super popular for small spaces. Red wiggler worms do the heavy lifting, breaking down food scraps into a nutrient-rich material called worm castings. They’re efficient and produce top-notch fertilizer.
- Bokashi Bins: This is a fermentation method. You add food scraps to a sealed container with a special Bokashi bran. It pickles your waste, breaking it down significantly and creating a nutrient-rich liquid fertilizer and a pre-compost material that’s ready to be buried (you can mix this into larger pots or donate it). It’s great for kitchen scraps, including meat and dairy, which are usually off-limits for traditional composting.
- Small Tumbler Bins: These are compact, sealed rotating bins. Tumblers speed up the composting process as you can easily mix the contents. They are great for containing odors and pests.
- DIY Stacking Bins: Using plastic totes or buckets, you can create your own simple composting system. This is a budget-friendly option if you’re handy.
Essential Tools and Materials
Beyond the bin, you’ll need a few things:
- Kitchen Caddy: A small container with a lid to collect food scraps from your kitchen before taking them to your main compost bin.
- Scraping Tool: A small trowel or spatula to help move materials in your bin.
- Watering Can or Spray Bottle: To keep your compost moist.
- Balancing Materials (Greens & Browns): More on this below!
- Gloves: To keep your hands clean.
- Optional: A Thermometer: For larger systems, helps monitor temperature, but less critical for smaller balcony bins.
The Science of Composting: Greens and Browns
Composting is all about creating the right balance of “greens” and “browns.” Think of it like feeding your compost’s tiny microbe army. They need a mix of nitrogen-rich stuff (greens) and carbon-rich stuff (browns) to work their magic.
- Greens (Nitrogen-Rich): These are typically wet materials that provide nitrogen. They heat up the compost pile and provide the microbes with energy.
- Fruit and vegetable scraps
- Coffee grounds and tea bags
- Grass clippings (in small amounts)
- Eggshells (crushed)
- Browns (Carbon-Rich): These are dry materials that provide carbon. They add bulk, allow air to circulate, and prevent the compost from becoming a soggy, smelly mess.
- Shredded newspaper and junk mail (avoid glossy paper)
- Cardboard (torn into small pieces)
- Dry leaves
- Sawdust (from untreated wood)
- Straw or hay
For balcony composting, especially with worm bins or Bokashi, the “greens” are what you’ll be adding most from your kitchen. Browns are essential for traditional bins to maintain airflow and balance. With Bokashi, you’re primarily adding “greens” and the fermented bran, and then “burying” the result in soil.
Step-by-Step: Setting Up Your Balcony Compost System
Let’s get practical! We’ll cover setting up a common balcony-friendly method: a worm bin. If you choose a different type, refer to its specific instructions, but the core principles are similar: balancing materials, moisture, and aeration.
Method 1: Setting Up a Worm Composting Bin
Worm bins are fantastic for balconies. They’re compact, odorless when managed correctly, and produce amazing fertilizer (worm castings).
- Choose Your Bin: You can buy a pre-made worm bin or create a DIY one using opaque plastic totes (light can stress worms). They usually have at least two stacking trays and a collection tray for liquid. Ensure good airflow with drilled holes.
- Prepare the Bedding: Worms need a cozy place to live. Shred newspaper, cardboard, or coconut coir into strips. Moisten this bedding until it’s like a wrung-out sponge – damp, but not dripping. Fill your first tray about 2/3 full. This is where your worms will live.
- Introduce Your Worms: Get “red wigglers” (Eisenia fetida), not regular garden earthworms. You can buy them online or from local composting suppliers. Gently place them on top of the bedding. They’ll burrow down, seeking darkness. Let them settle for a day or two before feeding.
- Start Feeding: In a small section of the bin, dig a little trench and bury your first batch of food scraps (veggies, fruits, coffee grounds, crushed eggshells). Avoid meat, dairy, oily foods, and citrus in large amounts, as they can upset the worms or the pH. Cover the food scraps completely with bedding or compost from an established bin if you have it.
- Add More Bedding: As you add food scraps, bury them in different spots each time. Always cover them well. This prevents odors and fruit flies. You can add shredded browns like paper or cardboard regularly to maintain a good balance and absorb moisture.
- Manage Moisture: The bin should feel like a wrung-out sponge. If it’s too dry, lightly spray with water. If it’s too wet, add more dry brown materials. Worms need moisture to breathe.
- Aeration: Gently stir the top layer of bedding every week or two. Be careful not to disturb the worms too much. The stacking trays in commercial bins help with this, or you can manually aerate.
- Harvesting Worm Castings: After 3-4 months, your first tray will be full of dark, crumbly worm castings. Many bins have migration methods where worms move to a new feeding tray, leaving the castings behind. Or, you can manually separate them.
- Liquid Gold (Worm Tea): The liquid that collects in the bottom tray is called “worm tea” or leachate. Dilute this with water (about 1 part tea to 10 parts water) for a potent liquid fertilizer. Use it immediately, as it loses its potency quickly.
Method 2: Bokashi Composting (Quick Overview)
Bokashi is a bit different. It’s an anaerobic fermentation process.
- Get a Bokashi Bin: Usually a lidded bucket with a spigot at the bottom.
- Add Food Scraps: Chop them up small. Add a layer of scraps, then sprinkle with Bokashi bran. Repeat. You can add most food scraps, including meat and dairy.
- Seal Tightly: Close the lid each time. This keeps oxygen out.
- Drain Liquid: Regularly drain the “Bokashi tea” (a different liquid than worm tea) from the spigot. Dilute this (1:100 with water) for a powerful liquid fertilizer.
- “Pickling”: After 2-3 weeks, the contents will be fermented and ready. They won’t look like compost yet, just pickled scraps.
- Bury the Pre-Compost: This is the crucial step for Bokashi. You need to bury the fermented material in soil to finish the decomposition. Mix it into a large planter, a garden bed, or add it to a larger compost pile. It will break down quickly afterwards.
For balconies, you might mix the fermented Bokashi into large pots or contribute it to a community compost program if available. The liquid fertilizer is fantastic for immediate use!
Using Your Homemade Compost Fertilizer
Congratulations, you’ve made plant food! Now, how do you use it?
Worm Castings (Solid Fertilizer)
- Top Dressing: Sprinkle a layer (about 1/2 inch) of worm castings on top of the soil in your pots. Gently work it into the top inch of soil, or just let the rain/watering naturally incorporate it.
- Amending Potting Mix: Mix castings into your potting soil at a ratio of about 1 part castings to 3-4 parts potting mix. This enriches the soil from the start.
- Making Compost Tea: While less common from worm castings than from traditional compost, you can steep a handful in water for a day (don’t aerate like traditional compost tea) to create a mild liquid feed.
Bokashi Tea (Liquid Fertilizer)
- Dilution is Key: Always dilute Bokashi tea with water. A common ratio is 1 part Bokashi tea to 100 parts water.
- Feeding Your Plants: Water your plants with the diluted Bokashi tea. It’s packed with nutrients and beneficial microbes.
Bokashi Pre-Compost
After the fermentation stage, the Bokashi material needs to be buried in soil to fully decompose. Mix it into large pots or containers, or add it to a larger compost pile or garden bed. It will break down rapidly, enriching the soil.
Troubleshooting Common Balcony Composting Issues
Even the best plans hit a snag now and then. Here are common issues and how to fix them:
| Problem | Cause | Solution |
|---|---|---|
| Bad Odor (Ammonia/Rotten Eggs) | Too many “greens” (nitrogen) or not enough “browns” (carbon), too wet, lack of air. For Bokashi, lid not sealed. | Add more brown materials (shredded paper, cardboard, dry leaves). Gently aerate. Ensure good drainage. For Bokashi, ensure the lid is sealed and drain liquid regularly. |
| Fruit Flies or Gnats | Exposed food scraps, bin not sealed properly. | Bury food scraps completely under bedding. Ensure a tight-fitting lid. You can also place a layer of dry leaves or shredded paper on top. A sticky trap nearby can help catch existing flies. |
| Worms Trying to Escape (for worm bins) | Conditions are wrong: too wet, too dry, too acidic (lots of citrus), not enough food, or bin is too new and they feel unsafe. | Check moisture levels (should be like a wrung-out sponge). Add more bedding if too wet, a little water if too dry. Reduce very acidic foods. Ensure they have enough to eat. Patience is key for new bins. |
| Compost Too Dry | Not enough moisture, too many “browns,” too much airflow. | Lightly spray with water. Add more “green” materials. Cover exposed areas with bedding. |
| Compost Too Wet | Too many “greens,” not enough “browns,” poor drainage, overwatering. | Add more brown materials (shredded cardboard, dry leaves). Ensure drainage holes are clear. Stir to aerate and help it dry out. |
| Little to No Activity | Temperature too cold, too dry, or not enough food for microbes/worms. | Ensure bin is in a suitable location (not too hot, not too cold). Check moisture. Add a bit more “green” material to kickstart decomposition or feed the worms. |
Tips for Success on Your Balcony
Balconies have unique challenges and advantages:
- Location, Location, Location: Place your compost bin in a spot that gets some shade to prevent overheating in direct sun, but also some sun if you’re using a worm bin (indirect warmth helps activate them). Consider wind protection.
- Odor Control is Key: Always bury food scraps and use enough brown material. A well-managed balcony compost bin shouldn’t smell bad. If it does, something needs adjusting. Refer to the troubleshooting table!
- Pest Prevention: Keep the lid on tightly. Avoid composting meat and dairy in open systems. For worm bins, ensure they are properly managed to prevent escapes and attract pests.
- Know Your Bin Type: Follow the specific instructions for your chosen bin. Worm bins, Bokashi, and tumblers all have slightly different needs.
- Start Small: Don’t overwhelm yourself. Begin with a manageable amount of scraps and gradually increase as you get comfortable.
- Rainwater Harvesting: If you get a lot of rain, consider how it might affect your bin’s moisture levels. A tarp can offer protection if needed.
Balcony Gardening with Your Compost
Once you have your compost, it’s time to make those balcony plants sing! Here’s how to integrate it:
- For Existing Plants: As a top dressing or mixed into the top layer of soil.
- For New Plantings: Mix compost into your potting soil. A common good ratio is 3 parts potting mix to 1 part compost. This provides a nutrient-rich base.
- Herbs: Herbs like basil, mint, and parsley do spectacularly well with compost. It enhances their flavor and growth.
- Vegetables: Compact veggies like cherry tomatoes, peppers, leafy greens (lettuce, spinach), and radishes will love the nutrient boost.
- Flowers: Brighten your balcony with colorful blooms! Composted soil helps create vibrant, long-lasting flowers.
Remember, compost acts as a slow-release fertilizer. It feeds your plants over time, unlike synthetic fertilizers that can give a quick, short-lived boost and potentially harm your plants if overused. For more on soil health, resources like the EPA’s composting guide offer excellent foundational knowledge.
When to Supplement
While homemade compost is fantastic, some fast-growing plants or those that are heavy feeders might benefit from occasional supplementary feeding. This is where your diluted worm tea or Bokashi tea comes in handy! Use them every 2-4 weeks during the growing season, depending on your plant’s needs.
Conclusion: Your Balcony, Your Fertile Frontier
See? Composting for your balcony garden isn’t some daunting chore reserved for folks with acres of land. It’s an accessible, rewarding, and incredibly practical way to nourish your plants and get more joy from your outdoor space. Whether you opt for a busy worm bin churning out castings or a Bokashi system pickling your scraps into future soil enhancers, you’re taking a positive step towards a greener, more sustainable hobby.
Remember, managing a compost system is a learning process, much like gardening itself. Don’t be discouraged by minor hiccups; they’re just part of the journey. With a little practice, you’ll develop a feel for what your compost needs, and your balcony plants will thank you with abundant growth and beauty. So, grab a bin, start collecting those scraps, and get ready to transform your balcony into a thriving, fertile haven.
Frequently Asked Questions (FAQ)
Q1: Can I really compost on a small balcony?
Absolutely! Compact systems like worm bins or Bokashi are designed for small spaces and produce minimal odor when managed correctly. They are perfect for apartment dwellers.
Q2: What kind of food scraps can go into a balcony compost bin?
For worm bins, focus on fruit and vegetable scraps, coffee grounds, and crushed eggshells. For Bokashi, you can add most food scraps, including meat, dairy, and oils, as it ferments rather than decomposes.
Q3: My compost smells. What am I doing wrong?
Bad smells usually mean an imbalance. It’s often too wet, has too much “green” (nitrogen-rich) material, or lacks air. Add more “browns” (carbon-rich materials like shredded paper or cardboard) and ensure good airflow. For Bokashi, ensure the lid is sealed and drain the liquid.
Q4: How often do I feed my worms or Bokashi bin?
For worm bins, feed roughly once a week, or when the previous food is mostly gone. For Bokashi, you add scraps and bran every time you have new kitchen waste. The key is balancing the “greens” and “browns” or using the specific Bokashi bran.
Q5: How long does it take to get usable compost?
Worm castings can be harvested after about 3-4 months. Bokashi is “ready” after about 2-3 weeks of fermentation, though the picked material needs further decomposition in soil. Traditional composting takes longer but balcony systems are generally faster.
Q6: Can I compost meat and dairy on my balcony?
It’s generally not recommended for open or worm composting systems as it can attract pests and cause odors. However, Bokashi composting is designed to handle these materials due to its anaerobic fermentation process.

I am passionate about home engineering. I specialize in designing, installing, and maintaining heating, ventilation, and air conditioning systems. My goal is to help people stay comfortable in their homes all year long.