Why Compost Fertilizer in Canada is a Game-Changer
So, why all the fuss about compost fertilizer, especially here in Canada? It’s pretty simple, really. Imagine giving your plants a slow-release, nutrient-rich meal that also helps your soil act like a super sponge, holding onto water and nutrients. That’s exactly what compost does!
For us Canadians, this is even more important. Our growing seasons can be short, and our soils might need a little extra love to thrive. Using compost fertilizer builds healthier soil, which means healthier, happier plants, and ultimately, a more beautiful and productive garden, whether you’ve got a sprawling backyard or a tiny balcony. Plus, it’s a fantastic way to reduce what goes into our landfills!
Getting Started: What You Need to Know
Before we jump into the “how-to,” let’s cover the basics. Think of compost fertilizer as nature’s recycling program. You’re basically helping speed up the natural process of decomposition to create a rich, dark, soil-like material that’s packed with goodness for your plants.
Key Benefits of Using Compost Fertilizer:
- Boosts Soil Health: It improves soil structure, making it easier for roots to grow and access air and water.
- Adds Nutrients: Compost is a natural source of many essential plant nutrients.
- Improves Water Retention: Your soil will thank you by holding onto moisture, meaning less watering for you.
- Reduces Waste: It’s a fantastic way to divert food scraps and yard waste from landfills.
- Suppresses Diseases: Healthy soil fostered by compost can help plants resist certain diseases.
- Environmentally Friendly: It’s a sustainable way to improve your garden.
Your Canadian Compost Shopping List (or What to Look For!)
When you’re starting out, you don’t need a whole lot of fancy gear. Think practical and efficient. Here’s a rundown of what’s helpful:
Composting Bin Options
This is where you’ll build your compost. There are a few popular choices:
- Open Piles: The simplest method. Just a heap in a corner of your yard. Great if you have space and don’t mind a more rustic look.
- Closed Bins: These are enclosed containers. They can be plastic tumblers that you spin, or stationary bins that you add materials into from the top and collect finished compost from the bottom. They tend to be tidier and can help retain heat and moisture, speeding up the process.
- Worm Composting (Vermicomposting): Perfect for smaller spaces, like balconies or indoors. Uses specific types of worms to break down food scraps.
Essential Tools
You won’t need a toolbox filled with gadgets, but a few items will make your composting life much easier:
- Pitchfork or Compost Aerator: For turning and mixing your compost pile. This helps provide oxygen, which is crucial for decomposition.
- Shovel: For moving finished compost or turning larger piles.
- Gloves: To keep your hands clean and protected.
- Kitchen Compost Caddy: A small bin with a lid to collect kitchen scraps before you take them out to your main compost bin.
- Watering Can or Hose: To keep your compost pile moist.
Don’t feel pressured to buy the most expensive items. Often, DIY solutions or even second-hand tools can work just as well. The goal is to get started!
What Can You Compost? The “Greens” and “Browns” Breakdown
This is the heart of composting! Think of it like a recipe. You need a good mix of “greens” and “browns”. This balance is key to successful composting in any climate, including Canada’s.
“Greens” (Nitrogen-Rich Materials)
These are generally moist materials that provide nitrogen, which helps the microorganisms that do the composting work. They tend to break down quickly.
- Fruit and vegetable scraps (peels, cores, rinds)
- Coffee grounds and tea bags (remove staples!)
- Grass clippings (in moderation; can clump if too much is added at once)
- Plant trimmings (fresh, non-diseased)
- Eggshells (crushed)
“Browns” (Carbon-Rich Materials)
These are typically drier, bulkier materials that provide carbon, which is the energy source for the decomposers. They help keep the pile light and airy.
- Dry leaves
- Straw or hay
- Shredded newspaper (avoid glossy paper)
- Cardboard (torn into small pieces, remove tape and labels)
- Twigs and small branches (chopped or shredded)
- Sawdust or wood chips (from untreated wood)
What to AVOID in Your Compost Bin
Some things just shouldn’t go in your compost pile. They can attract pests, create unpleasant odours, or spread disease.
Items to leave out:
- Meat, fish, and dairy products (attract pests, smell bad)
- Oily or greasy foods
- Diseased plants or weeds that have gone to seed
- Pet waste (dog and cat feces can contain harmful pathogens)
- Treated wood or sawdust
- Coal or charcoal ashes
- Synthetic materials
The Magic Ratio: Balancing Greens and Browns
Getting the “greens” and “browns” ratio right is crucial for efficient composting. Aim for roughly two to three parts “browns” for every one part “greens” by volume. This might seem like a lot of browns, but trust me, it helps prevent your compost from becoming a smelly, slimy mess.
If your compost pile is too wet and smelly, you probably have too many greens. Add more browns! If it’s too dry and seems like nothing is happening, you might need more greens or some water.
It’s not an exact science, and you’ll get a feel for it as you go. Don’t stress if it’s not perfect from day one!
Step-by-Step: How to Build Your Compost Pile
Let’s get down to business! Here’s how to assemble your compost pile, step-by-step. This guide is for a basic outdoor compost bin or pile.
Step 1: Choose Your Spot
Find a convenient spot in your yard. It should be:
- Easily accessible for adding materials and turning.
- Level ground.
- Partially shaded is ideal to prevent it from drying out too quickly in the summer sun. Avoid areas that get constantly waterlogged.
Step 2: Start with a Base Layer
Begin by adding a layer of coarse “brown” materials, like twigs or straw, at the bottom. This helps with drainage and aeration from the start.
Step 3: Layer Your Materials
Now, start adding your kitchen scraps (“greens”) and yard waste (“browns”). It’s best to layer them, alternating between greens and browns, almost like making a lasagna. Aim for layers of about 4-6 inches of browns, then a thinner layer of greens.
Tip: Chop up larger materials into smaller pieces. This helps them break down faster.
Step 4: Moisten the Layers
As you build your layers, give them a good watering. The goal is for the compost to be as moist as a wrung-out sponge – damp, but not soaking wet.
Step 5: Build it Up
Continue layering greens and browns, moistening as you go, until your bin is full or you’ve reached a comfortable working height. Try to finish with a layer of “browns” on top to help deter pests and reduce odours.
Step 6: Turn and Aerate
This is where your pitchfork or aerator comes in! Aim to turn or mix your compost pile every 1-2 weeks. This introduces oxygen, which the helpful microorganisms need to break down the materials efficiently and without creating foul odours. When you turn it, try to bring the material from the outside into the centre, and vice-versa.
Step 7: Be Patient!
Composting takes time. Depending on the materials you use, the temperature (warmer is faster!), and how often you turn it, finished compost can take anywhere from 2 months to a year. You’ll know it’s ready when it looks and smells like dark, crumbly earth. You shouldn’t be able to recognize the original materials anymore.
Troubleshooting Common Composting Hiccups in Canada
Even with the best intentions, you might run into a few issues. Here are some common problems and how to fix them:
| Problem | Cause | Solution |
|---|---|---|
| Foul Odour (e.g., ammonia or rotten eggs) | Too much “green” material, too wet, or lack of air (anaerobic conditions). | Add more “brown” materials (leaves, shredded cardboard). Turn the pile to aerate it. Ensure good drainage. Chop large items if needed. |
| Pile is not heating up or decomposing slowly | Too dry, not enough “greens” (nitrogen), or too many large pieces. | Moisten the pile (if dry). Add more “green” materials. Turn the pile to mix materials. Chop or shred larger items. |
| Attracting Pests (flies, rodents) | Presence of meat, dairy, or greasy foods. Pile is too exposed. | Remove prohibited items immediately. Bury food scraps deep within the pile. Ensure your bin has a lid if pests are a significant issue. Use more “browns” as a top layer. |
| Pile is too wet and slimy | Too much “green” material or excessive rain. Poor drainage. | Add plenty of dry “brown” materials. Turn the pile regularly. If it’s in a bin, ensure it has drainage holes. Consider covering the pile during heavy rain. |
Remember, most composting issues stem from an imbalance in greens vs. browns, moisture levels, or aeration. A little adjustment usually does the trick!
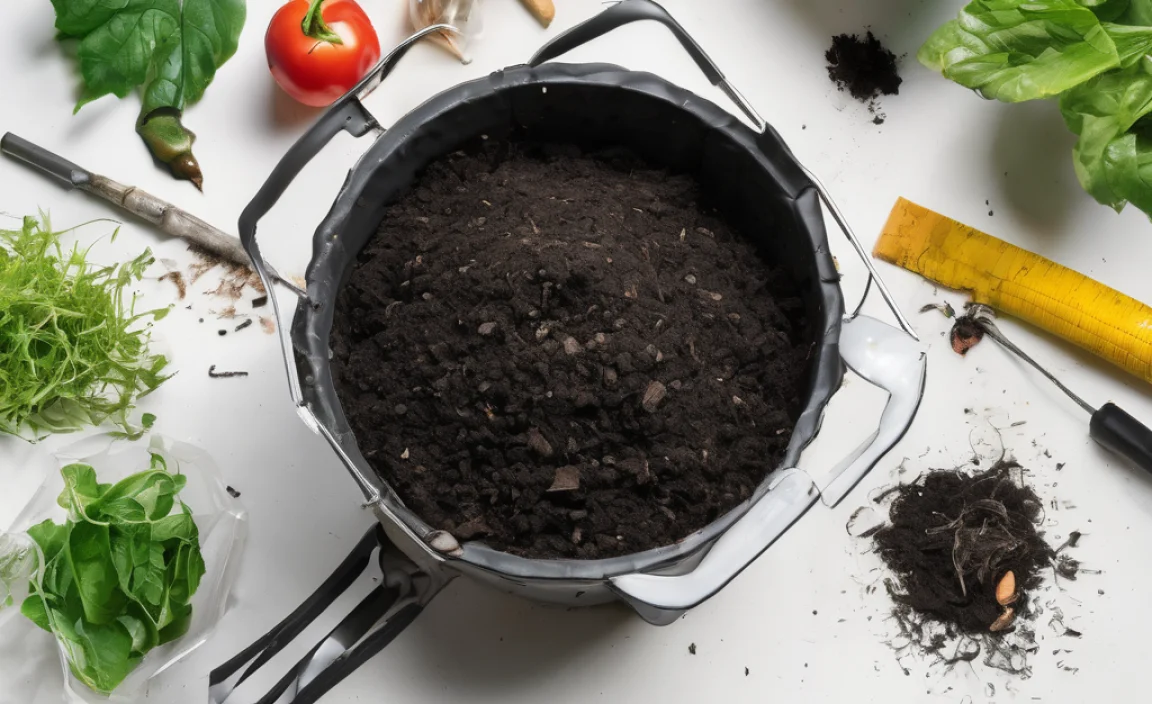
Using Your Finished Compost Fertilizer
Congratulations! You’ve successfully created your own compost fertilizer. Now, what do you do with this black gold?
When is it Ready?
Finished compost is dark brown, crumbly, and smells earthy, like a forest floor after rain. You shouldn’t be able to identify the original food scraps or yard waste.
How to Use It
- Soil Amendment: Mix compost into your garden beds before planting. A layer of 2-4 inches worked into the top 6-8 inches of soil is great for most gardens. This improves soil structure, drainage, and nutrient content.
- Top Dressing: Spread a layer of compost around existing plants, shrubs, and trees. This helps retain moisture, suppress weeds, and provides a slow release of nutrients as it breaks down further.
- Potting Mix: You can mix compost with other ingredients like peat moss or perlite to create a rich potting mix for containers and hanging baskets. A common mix is 1/3 compost, 1/3 peat moss, and 1/3 perlite.
- Lawn Care: In the spring or fall, spread a thin layer of compost (about 1/4 to 1/2 inch) over your lawn and rake it in. This can significantly improve lawn health.
Composting Resources in Canada
If you’re looking for more specific regional advice or municipal programs, check out these resources:
- Your Municipal Website: Many Canadian cities and towns offer composting guides, workshops, or even subsidized compost bins. A quick search for “[Your City] composting” is a great start.
- Provincial Government Environmental Departments: Often have resources on waste reduction and composting. For example, the Government of Ontario provides useful information.
- Local Garden Centres and Nurseries: Staff can offer advice tailored to your local climate and soil conditions.
Conclusion
There you have it! Turning your kitchen scraps and yard waste into nutrient-rich compost fertilizer in Canada is not only achievable but incredibly rewarding. You’re not just feeding your plants; you’re contributing to a healthier environment and reducing waste, all while saving a bit of money. Remember the key is balance – the greens and browns, the moisture and air. Don’t be afraid to get your hands a little dirty and experiment. Your garden – and the planet – will thank you for it. Happy composting!
Frequently Asked Questions About Compost Fertilizer in Canada
Here are some common questions people ask when starting their composting journey:
Q1: How long does it take to make compost?
A1: It varies greatly! With regular turning and the right mix of greens and browns, you can have finished compost in as little as 2-3 months. If you’re less attentive, it might take 6-12 months or longer. Factors like temperature, moisture, and particle size all play a role.
Q2: My compost smells bad. What’s wrong?
A2: A bad smell, usually like ammonia or rotten eggs, typically means your compost is too wet or has too much “green” material (nitrogen). Try adding more “brown” materials like dry leaves or shredded cardboard and turn the pile to improve airflow.
Q3: Can I compost kitchen scraps all year round in Canada?
A3: Yes, you can add kitchen scraps year-round. However, the decomposition process will slow down significantly or even stop during the cold Canadian winter months, especially in an unfrozen outdoor bin. Your bin might freeze solid, and decomposition will resume in the spring. Indoor or insulated composters may continue working at a slower pace.
Q4: What are “greens” and “browns” again?
A4: “Greens” are nitrogen-rich, usually moist materials like fruit/vegetable scraps and grass clippings. “Browns” are carbon-rich, usually dry materials like dead leaves, straw, and shredded paper. You need a good balance of both for healthy composting.
Q5: Do I need a special bin?
A5: Not necessarily! You can start with an open pile. However, enclosed bins help deter pests, retain moisture and heat, and can look tidier. Tumbler bins are great for easier turning. Worm composting is ideal for small spaces.
Q6: How much compost should I use in my garden?
A6: For established beds, a layer of 1-2 inches worked into the soil is usually sufficient. For new gardens, you can incorporate more, up to 25-30% compost by volume. For containers, aim for about one-third compost in your potting mix. It’s hard to overdo compost, but a good starting point is key.

I am passionate about home engineering. I specialize in designing, installing, and maintaining heating, ventilation, and air conditioning systems. My goal is to help people stay comfortable in their homes all year long.