Hey there, fellow gardeners! So, you’re looking to whip up some super-rich compost to make your plants sing? That’s a fantastic idea! Compost is like the ultimate superfood for your garden. But sometimes, even with the best intentions, we can hit a few bumps in the composting road. This can lead to compost that’s not quite ready or, worse, something that smells a bit funky. Don’t sweat it! We’re going to walk through the most common compost fertilizer mistakes beginners make. We’ll tackle them one by one, so you can get back to creating that black gold your garden will love. Ready to compost like a pro?
Why Compost Matters (and Why Getting It Right Counts)
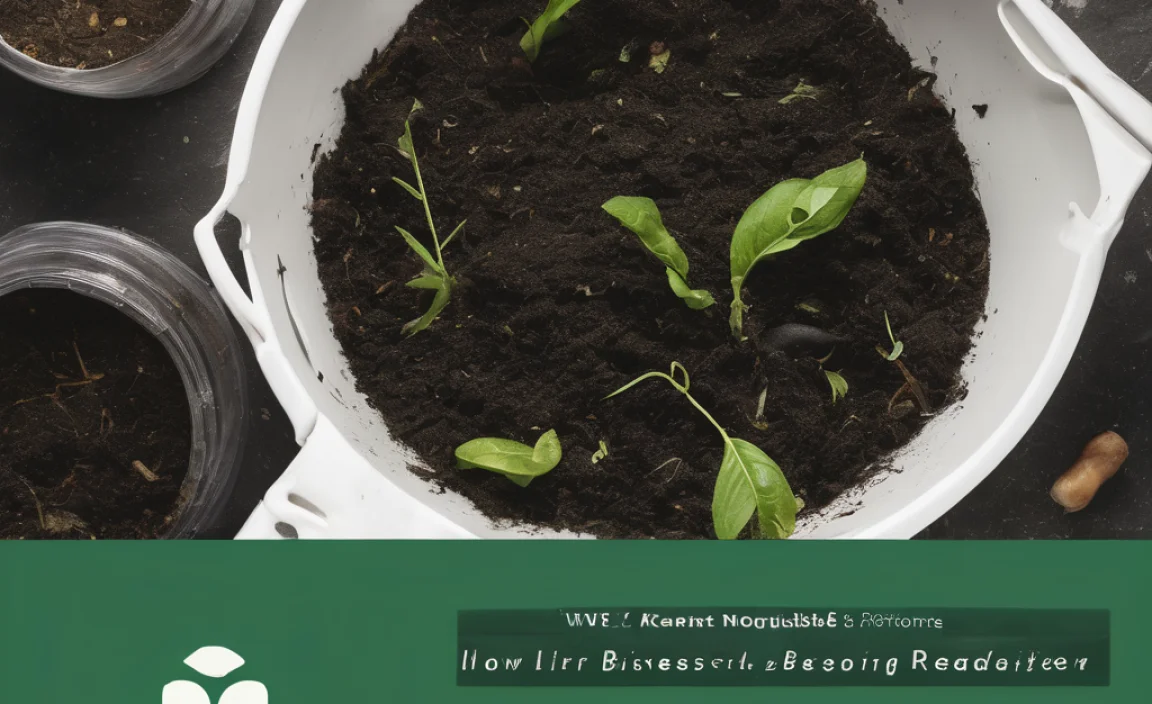
Compost fertilizer is basically decomposed organic material that enriches soil. It’s a gardener’s best friend because it improves soil structure, helps retain moisture, and provides essential nutrients for your plants. Think of it as giving your garden a healthy, balanced meal. When done correctly, your compost will be dark, crumbly, and smell earthy. When mistakes happen, you might end up with unfinished material that can actually harm your plants or attract unwanted pests.
Learning to compost effectively is a rewarding journey. It reduces waste, saves money on store-bought fertilizers, and is fantastic for the environment. By understanding and avoiding a few common pitfalls, you can ensure your compost-making efforts are successful and yield the best results for your garden.
The Top Compost Fertilizer Mistakes to Sidestep
Let’s dive into the nitty-gritty. These are the most frequent slip-ups that can turn your composting dreams into a smelly reality. But don’t worry, for every mistake, there’s a simple fix!
Mistake 1: The Imbalanced Blend – Too Much Green, Not Enough Brown
This is probably the most common mistake. Compost piles need a good mix of “greens” (nitrogen-rich materials) and “browns” (carbon-rich materials). Greens are wet and break down quickly, while browns are dry and provide the structure and air pockets. If you have too many greens, your pile can become a slimy, anaerobic (lacking oxygen) mess that smells like rotten eggs. If you have too much brown, your pile will break down very slowly, or not at all.
Think of it like a campfire. You wouldn’t just throw wet leaves on; you need dry wood to get it going and keep it burning. Compost is similar!
The Ideal Ratio:
- Greens: Fresh grass clippings, vegetable scraps, fruit peels, coffee grounds, tea bags, fresh manure.
- Browns: Dried leaves, straw, shredded newspaper (not glossy), cardboard (torn into small pieces), twigs, wood chips.
A good starting point for the ratio is about 2 parts browns to 1 part greens (by volume). It’s not an exact science, and you’ll learn to eyeball it. Don’t stress if it’s not perfect initially; just keep these categories in mind.
Fix It:
If your pile is looking too wet and slimy, it’s likely too green. Bury some fresh brown materials like dried leaves or shredded cardboard. If your pile is dry and not breaking down, it’s probably too brown. Add some kitchen scraps (greens) or a bit of water. Consider using a compost aerator or turning the pile to help mix things up.
Mistake 2: Forgetting the Air – The Anaerobic Nightmare
Composting microbes, the tiny workers that break down your organic scraps, need oxygen to do their job efficiently. When a compost pile is too compacted or sits too wet, air pockets disappear. This creates an anaerobic environment. Anaerobic decomposition produces foul odors (think sulfur and ammonia) and is much slower. Plus, the microbes that thrive in these conditions aren’t the most effective composters.
Fix It:
Turn your compost regularly! This is key. Aim to turn your pile every week or two, especially if you’re in a hurry to get finished compost. Use a garden fork or a specially designed compost aerator to fluff things up. If you have a bin, you might need to manually mix the contents. Even just poking holes with a stick can help if turning the whole pile is too much work.
For more information on getting started with composting, the Environmental Protection Agency (EPA) offers a great guide on home composting basics.
Mistake 3: The Wrong Stuff – What NOT to Compost
Not everything belongs in your compost bin! While it’s tempting to toss everything organic into the pile, some items can cause problems. These problems include attracting pests, spreading diseases, or containing substances that are harmful to your garden and potentially your health.
Items to Avoid:
- Meat, fish, and dairy products: These can attract pests like rats and raccoons and create unpleasant odors.
- Oily or greasy foods: Similar to meat products, these can slow down decomposition and attract pests.
- Diseased plants: If you compost diseased plants, you risk spreading those diseases back into your garden when you use the finished compost.
- Weeds that have gone to seed: Unless your compost pile gets very hot (which is hard for beginners to achieve), weed seeds can survive the composting process and then sprout in your garden.
- Pet waste (from cats and dogs): This can contain harmful pathogens that may not be killed during typical home composting.
- Chemically treated wood or yard waste: Pesticides and herbicides can linger and contaminate your compost.
- Glossy or coated paper/cardboard: These often don’t break down well and can contain plastics or inks that aren’t ideal.
When in doubt, it’s often best to leave it out. Stick to the basics: kitchen scraps (no meat or dairy), yard waste, and paper products.
Mistake 4: Not Enough Moisture (or Too Much!)
Water is essential for the microbes to do their work. A compost pile needs to be moist, but not soaking wet. Think of a wrung-out sponge. If it’s too dry, decomposition will slow down significantly. If it’s too wet, you’ll run into the anaerobic problems we discussed earlier.
Fix It:
Check the moisture regularly. Stick your hand into the pile. If it feels dry, add some water, ideally while you’re turning the pile to distribute it evenly. If it feels soggy, add more brown materials (like dry leaves or shredded cardboard) to absorb the excess moisture and help with aeration.
Using a compost thermometer can also help. A consistent temperature between 130°F and 160°F (54°C to 71°C) usually means good moisture and aeration. You can find affordable compost thermometers online or at garden centers.
| Moisture Level | Signs | Solution |
|---|---|---|
| Too Dry | Pile feels dusty, things aren’t breaking down. | Add water while turning the pile. |
| Just Right | Feels like a wrung-out sponge, slightly damp. | Maintain this level by adding water or browns as needed. |
| Too Wet | Pile is soggy, slimy, smells bad (rot). | Add dry brown materials and turn the pile to aerate. |
Mistake 5: Not Chopping Materials Small Enough
Think about it: the smaller the pieces of organic matter, the more surface area there is for those compost-eating microbes to munch on. Large items like whole zucchini or thick branches will take a very, very long time to break down. This can lead to a compost pile that’s full of large chunks even after months.
Fix It:
Chop, shred, or tear your bigger kitchen scraps and yard waste into smaller pieces, ideally no larger than a few inches. You can use scissors, a spade, or even a wood chipper for larger yard debris. This makes a huge difference in how quickly your compost decomposes!
Smaller pieces mean faster breakdown and more uniform compost. It’s a small step that yields big results.
Mistake 6: Not Being Patient (The “Is It Ready Yet?” Syndrome)
Composting is a natural process, and nature doesn’t (usually) operate on a rushed schedule. Many new composters get impatient. You might dig through your pile after only a few weeks, expecting perfectly finished compost. This leads to frustration and often, the use of premature compost, which isn’t ideal.
How to Tell When It’s Ready:
- Appearance: It should look dark brown or black and crumbly, like rich soil. You shouldn’t be able to distinguish the original materials (like potato peels or leaves).
- Smell: It should smell earthy and pleasant, like a forest floor after rain. No sour, ammonia, or rotten egg smells.
- Texture: It should feel crumbly, not slimy or mushy.
- Temperature: A finished compost pile will typically be at ambient (outside) temperature. If it’s still heating up, it’s still actively decomposing.
Depending on your method, materials, and how often you turn it, compost can take anywhere from a couple of months to a year to finish. Be patient! Your plants will thank you for it.
Mistake 7: Not Actively Managing the Pile
Composting isn’t a “set it and forget it” kind of deal, especially when you’re learning. Simply layering materials into a bin and walking away will eventually result in compost, but it will take a very long time and might not be the highest quality. Active management means paying attention to the balance of greens and browns, moisture levels, and aeration.
Think of it like tending a garden. You don’t just plant seeds and expect a harvest without any watering or weeding. Composting requires a bit of attention to thrive.
Fix It:
Regularly check your pile. A quick check every few days to a week can tell you a lot. Is it too dry? Too wet? Does it need turning? Addressing issues early prevents them from becoming big problems. Even a few minutes of attention can make a significant difference to the speed and quality of your finished compost.
Mistake 8: Using the Wrong Type of Bin or Pile Setup
While you can technically compost in a simple heap on the ground, the type of bin you use can significantly impact your success. Some bins can trap moisture, prevent airflow, or make turning difficult. Likewise, not having a designated composting area can lead to a messy yard and discouragement.
Types of Compost Systems:
- Open Piles: Simple, but can be messy and slower without good management.
- Enclosed Bins: These can be plastic, wood, or wire. They help retain heat and moisture and keep pests out. Look for bins with good ventilation. Many have lids and doors for easy access and turning.
- Tumblers: These are rotating drums that make turning super easy and speed up the composting process significantly. They are great for smaller spaces.
- Worm Composting (Vermicomposting): This is a specific type of composting using red wiggler worms. It’s great for kitchen scraps and produces a very nutrient-rich compost called “worm castings.” It’s often done indoors or in protected outdoor spaces.
For beginners, an enclosed bin or a tumbler is often the easiest way to go. They strike a good balance between ease of use and efficient composting. For more on bin types, the University of New Hampshire Extension offers detailed information on various composting methods.
Mistake 9: Adding Materials That Are Too Treated
This ties back to “what not to compost,” but is worth highlighting on its own. Many conventionally grown fruits and vegetables are sprayed with pesticides and herbicides. While some of these might break down, others can persist and contaminate your compost. This means you’d be adding chemical residues to your garden soil, which is the opposite of what good organic gardening aims for.
Fix It:
Prioritize using kitchen scraps from organic food or produce that you know hasn’t been heavily treated with chemicals. If you’re unsure, err on the side of caution and stick to known safe materials. Also, avoid using grass clippings from lawns treated with herbicides, as these can harm your future garden plants.
Mistake 10: Not Using Your Finished Compost!
This might sound silly, but sometimes people get so focused on the making of compost that they forget the best part: using it! Once your compost is dark, crumbly, and smells earthy, it’s ready to be incorporated into your garden. Don’t let it sit unused in a pile.
Ways to Use Your Compost:
- Soil Amendment: Mix it into garden beds before planting. This improves soil structure and fertility. A common recommendation is to mix in 1-3 inches of compost into the top 6-8 inches of soil.
- Top Dressing: Spread a layer of compost around existing plants, shrubs, and trees. This adds nutrients and helps retain moisture.
- Potting Mix: Mix compost with other ingredients like perlite or coco coir to create a nutrient-rich potting mix for containers and hanging baskets.
- Lawn Care: Rake a thin layer of compost over your lawn in the spring or fall to improve soil health and grass vitality.
Using your finished compost is the ultimate reward for your composting efforts. It’s the final step in closing the loop and enriching your garden with nature’s best.
Quick Summary Table: Common Compost Mistakes & Fixes
Let’s do a quick recap of those common compost fertilizer mistakes and their simple remedies. Handy to keep this in mind!
| Mistake | Problem | Easy Fix |
|---|---|---|
| Imbalanced Greens/Browns | Smelly, slimy pile or slow decomposition. | Adjust ratio: add browns for too many greens, or greens/water for too many browns. |
| Lack of Air | Anaerobic conditions, bad smells, slow breakdown. | Turn the pile regularly with a fork or aerator. |
| Wrong Materials | Pests, odors, disease spread, chemical contamination. | Avoid meat, dairy, oils, diseased plants, pet waste, treated items. |
| Incorrect Moisture | Too dry = slow breakdown; too wet = rot & smells. | Check moisture like a wrung-out sponge; add water or browns as needed. |
| Large Materials | Very slow decomposition, chunky compost. | Chop or shred materials into smaller pieces. |
| Impatience | Using unfinished compost, frustration. | Wait until compost is dark, crumbly, and smells earthy. |
| No Management | Slow, poor-quality compost. | Pest, check moisture, and turn your pile regularly. |
| Wrong Bin/Setup | Poor airflow, moisture issues, pests. | Choose an appropriate bin (enclosed, composter, tumbler) or manage open piles well. |
Frequently Asked Questions About Compost Fertilizer Mistakes
Q1: My compost smells really bad, like rotten eggs. What did I do wrong?
A1: That strong, sulfuric smell usually means your compost pile is too wet and lacks oxygen (anaerobic). You likely have too many “green” materials and not enough “browns.” To fix it, add plenty of dry brown materials like shredded newspaper, cardboard, or dried leaves. Then, turn the pile thoroughly to introduce air. This helps those important aerobic microbes get back to work!
Q2: How long does compost usually take to be ready?
A2: It really depends on what you put in, how often you turn it, and the temperature. A well-managed, actively turned pile can be ready in as little as 2-3 months. A more slowly decomposing pile might take 6 months to a year. The best indicator isn’t time, but what the compost looks and smells like – dark, crumbly, and earthy.
Q3: Can I put citrus peels in my compost?
A3: Yes, you can usually put citrus peels in your compost. However, they are acidic and take longer to break down. If you have a lot of them, it’s a good idea to balance them with other materials and make sure your pile has plenty of “browns” to

I am passionate about home engineering. I specialize in designing, installing, and maintaining heating, ventilation, and air conditioning systems. My goal is to help people stay comfortable in their homes all year long.