“`html
Compost Fertilizer – Your Garden’s Secret Superfood!
Ever feel like your garden plants are a bit… meh? Wish they were bigger, greener, and bursting with flowers or veggies? You’re not alone! The secret to a thriving garden often lies right under your nose, in your kitchen scraps and yard waste. Turning that ‘waste’ into amazing compost fertilizer can seem a bit tricky, but I’m here to show you it’s totally doable.
Think of compost as a super-rich, homemade food for your soil. It’s packed with nutrients that plants adore, and it’s a fantastic way to be kind to the planet by reducing waste. This guide will walk you through everything you need to know, making compost fertilizer easy and effective for your home garden.
Ready to get your hands a little dirty and grow something amazing? Let’s dig in!
What Exactly is Compost Fertilizer?
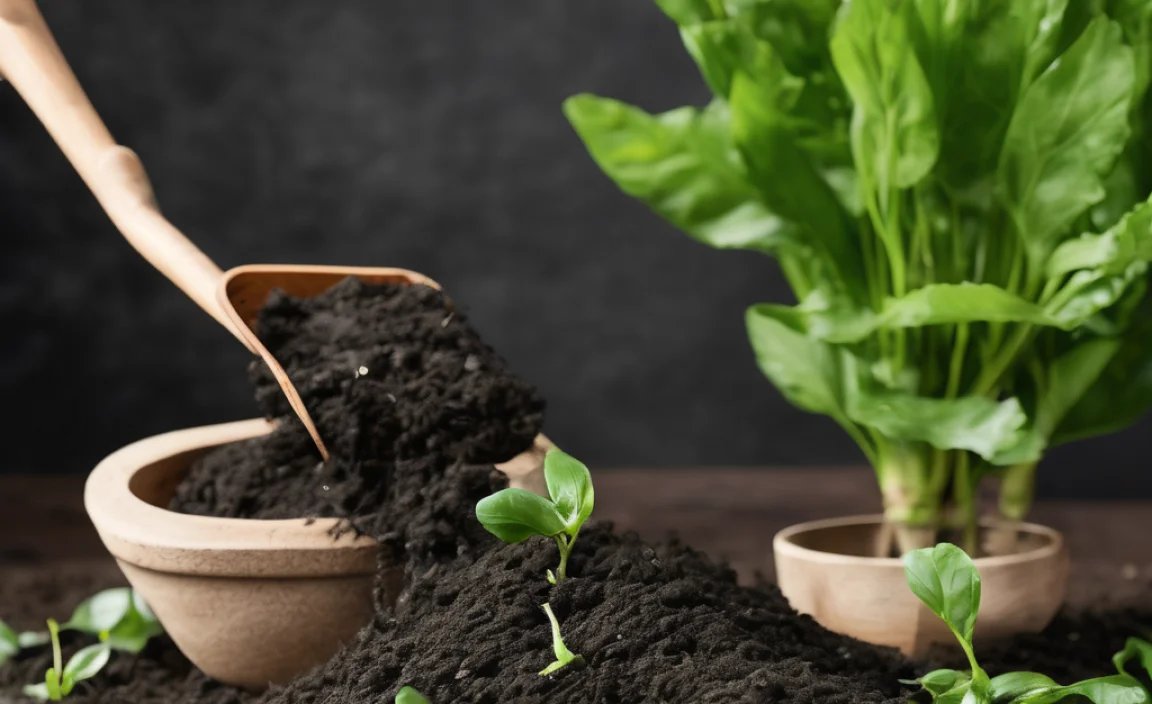
Compost fertilizer, often just called compost, is essentially decomposed organic material. It’s what happens when kitchen scraps, yard trimmings, and other natural stuff break down over time. This finished product looks and feels a lot like rich, dark soil.
Why is it so great for your garden? Well, as the organic matter breaks down, it releases valuable nutrients that plants need to grow strong. It also improves soil structure, which helps with water drainage and aeration – basically, it makes your soil a much happier place for roots to grow.
Why You Should Start Composting Today
There are so many fantastic reasons to turn your trash into garden treasure. It’s not just about better plants; it’s also about smarter living.
- Boosts Plant Health: Compost is loaded with essential nutrients that feed your plants, leading to healthier growth, more blooms, and tastier vegetables.
- Improves Soil Structure: It helps sandy soil hold more water and nutrients, and it loosens up heavy clay soil so roots can breathe and grow.
- Reduces Waste: A huge amount of what we throw away is compostable. Composting keeps this out of landfills, where it can produce harmful greenhouse gases.
- Saves You Money: Why buy expensive fertilizers and soil amendments when you can make your own for free?
- Environmentally Friendly: It’s a natural way to recycle and enrich your soil, promoting a healthier ecosystem in your backyard.
Getting Started with Compost Fertilizer: The Essentials
The beauty of composting is that you don’t need a lot of fancy equipment. You can start small and scale up as you get more comfortable. Here are the key things you’ll need:
1. A Compost Bin or Pile
This is where the magic happens! You have a few options:
- Open Pile: The simplest method. Just choose a corner of your yard and start layering your materials. You’ll need a bit more space for this.
- DIY Bin: You can build a bin from wooden pallets, chicken wire, or even old plastic bins. It helps keep things tidy and contained.
- Purchased Bin: Many types are available, from simple plastic bins to tumblers that make turning easier. Tumblers are great if you want faster compost and have limited space.
No matter which you choose, aim for a space that gets some sun but isn’t baking hot all day, and has decent drainage.
2. Your “Greens” and “Browns”
This is the heart of good composting! You need a balance of nitrogen-rich materials (greens) and carbon-rich materials (browns) for your compost to break down effectively. Too much of one can lead to a smelly, slimy mess or a pile that just sits there.
Think of it like a recipe: a good ratio helps everything work together.
“Greens” (Nitrogen-Rich): These materials are generally moist and help heat up the pile.
- Fruit and vegetable scraps (peels, cores, rinds)
- Coffee grounds and tea bags
- Grass clippings (in thin layers to avoid matting)
- Plant trimmings and garden waste (non-woody)
- Eggshells (crushed)
- Manure from herbivores (like rabbits, chickens, cows – avoid pet waste)
“Browns” (Carbon-Rich): These materials are drier and help provide air and structure to the pile.
- Dry leaves
- Straw and hay
- Shredded newspaper and cardboard (avoid glossy or colored inks)
- Wood chips and sawdust (use sparingly, especially from treated wood)
- Pine needles
- Twigs and small branches (chopped up)
What NOT to Compost:
- Meat, fish, and dairy products (attract pests, can smell)
- Oily or greasy foods
- Diseased plants (can spread disease)
- Weeds that have gone to seed (might sprout later)
- Pet waste (can contain harmful pathogens)
- Chemically treated wood or yard waste
- Coal or charcoal ash
3. Water
Compost needs moisture to work. Think of it like a wrung-out sponge – damp, but not soaking wet. Too dry, and decomposition slows down. Too wet, and it can get anaerobic (stinky!).
4. Air
Decomposers (like bacteria and fungi) need oxygen. Turning your compost pile or bin regularly helps introduce air and speeds up the process. If you have a closed bin, it might have built-in vents.
The Step-by-Step Guide to Making Compost Fertilizer
Ready to assemble your compost? It’s simpler than you might think. Follow these steps:
- Choose Your Location: Pick a convenient spot that’s easy to access, preferably with good drainage and a little bit of sun.
- Start with a Layer of Browns: Begin with a base layer of twigs or wood chips. This helps with airflow from the bottom.
- Add Greens and Browns: Aim for about a 50/50 mix of greens and browns, or slightly more browns (around 60% browns, 40% greens is a good starting point). Layer them like a lasagna, alternating between green and brown materials. Chop or shred larger items to speed up decomposition.
- Moisten as You Go: Lightly water each layer as you add it. The goal is for the material to be damp, like a wrung-out sponge.
- Keep Adding Materials: Continue adding your kitchen scraps and yard waste. Bury fresh kitchen scraps in the center of the pile to deter pests and reduce odors. Always try to cover greens with browns.
- Turn Your Pile: This is crucial for aeration and faster composting. Ideally, turn the pile every 1-2 weeks. Use a pitchfork or shovel to mix the outer layers into the center and vice versa. If you have a tumbler, just give it a spin!
- Monitor Moisture: Check the moisture level regularly. If it’s dry, add water. If it seems too wet, add more browns and turn it.
- Be Patient: Depending on the materials, temperature, and how often you turn it, compost can be ready in anywhere from a few months to a year. You’ll know it’s ready when it’s dark, crumbly, and smells earthy.
Signs Your Compost is Ready to Use
How do you know when that pile of scraps has transformed into black gold? It’s pretty straightforward:
- Appearance: It should look like dark, rich soil. You shouldn’t be able to identify the original materials (like banana peels or leaves).
- Texture: It will be crumbly and uniform.
- Smell: It should smell fresh, earthy, and pleasant – like a forest floor after rain. If it smells like rotten eggs or ammonia, it’s not ready. Likely it’s too wet or needs more browns and aeration.
Compost Fertilizer Tips for Success
Here are some pro tips to help you create fantastic compost fertilizer:
- Chop It Up: Smaller pieces break down much faster. So, chop veggies, shred paper, and break up twigs.
- Layering is Key: Don’t just dump everything in a heap. Alternating greens and browns helps create the right environment.
- Don’t Overload with Greens: Too many grass clippings or kitchen scraps without enough browns can lead to a smelly, matted pile.
- Bury Food Scraps: Always cover fresh food scraps with a layer of browns to keep pests away and manage odors.
- Keep It Moist: A dry pile won’t decompose. A soggy pile will stink and won’t break down. Aim for that “wrung-out sponge” feel.
- Turn, Turn, Turn: Regular turning speeds up the process significantly by introducing oxygen.
- Be Patient: Good compost takes time. Don’t get discouraged if it’s not ready in a month.
- Avoid Certain Items: Remember the “what not to compost” list to prevent problems. You can learn more about safe composting practices from resources like the U.S. Environmental Protection Agency (EPA) on Composting.
Table: What Goes Where – Greens vs. Browns
This handy table helps you quickly identify whether an item is a “green” or a “brown” material for your compost pile.
| Greens (Nitrogen-Rich) | Browns (Carbon-Rich) |
|---|---|
| Fruit and Vegetable Scraps | Dry Leaves |
| Coffee Grounds and Tea Bags | Straw and Hay |
| Grass Clippings | Shredded Newspaper/Cardboard |
| Plant Trimmings (non-woody) | Wood Chips/Sawdust |
| Eggshells (crushed) | Pine Needles |
| Herbivore Manure | Twigs and Small Branches |
How to Use Your Compost Fertilizer
Once your compost is ready, you can use it in so many ways to give your garden a boost!
- As a Soil Amendment: Mix compost directly into your garden beds before planting. About 2-4 inches worked into the top 6-8 inches of soil is a great amount. This is perfect for vegetable gardens and flower beds.
- As a Top Dressing: Spread a 1-2 inch layer of compost around existing plants, shrubs, and trees. This feeds them slowly and helps retain moisture.
- In Potting Mix: Mix compost with other materials like perlite or coco coir to create a nutrient-rich potting mix for containers and houseplants. A common ratio is 1/3 compost, 1/3 peat moss or coco coir, and 1/3 perlite or vermiculite.
- For Lawns: Rake a thin layer of compost over your lawn, especially after aerating. It helps improve soil health and turf density.
- Seed Starting: A small amount of compost can be added to seed-starting mixes to give seedlings a healthy start.
Using compost is much gentler on plants than synthetic fertilizers, reducing the risk of “burning” them with too many nutrients.
Troubleshooting Common Composting Problems
Even with the best intentions, you might run into a snag. Here are some common issues and how to fix them:
Problem: My compost pile smells bad (like ammonia or rotten eggs).
Cause: Usually too many greens, too much moisture, or lack of air.
Solution:
- Add more “brown” materials (leaves, shredded cardboard) to balance the nitrogen.
- Turn the pile thoroughly to introduce air.
- If it’s very wet, try adding more browns and turning it to help it dry out.
Problem: My compost pile is not heating up or breaking down.
Cause: Too many browns, not enough greens, or it’s too dry.
Solution:
- Add more “green” materials (kitchen scraps, grass clippings).
- Moisten the pile if it’s dry.
- Turn the pile to mix materials and encourage decomposition.
Problem: There are flies or other pests in my compost pile.
Cause: Exposed food scraps or improper materials.
Solution:
- Bury all food scraps in the center of the pile and cover them with browns.
- Make sure you are not adding prohibited items like meat, dairy, or oily foods.
- If using an open pile, consider adding a wire mesh to the bottom and sides to deter burrowing animals.
- A compost tumbler can also be very effective at keeping pests out.
Problem: My compost is taking too long.
Cause: Pile is too small, materials are too large, not enough turning, or incorrect moisture/air balance.
Solution:
- Ensure your pile is at least 3 feet by 3 feet by 3 feet, as larger piles insulate better and heat up more effectively.
- Chop or shred materials into smaller pieces.
- Turn the pile more frequently (e.g., weekly).
- Check and adjust moisture levels regularly.
Table: The Compost Quick Check Guide
| Issue | Possible Cause | Solution |
|---|---|---|
| Smells Bad (Ammonia/Rotten Eggs) | Too many greens, too wet, not enough air | Add browns, turn pile, check moisture |
| Not Heating Up/Decomposing | Too many browns, too dry, not enough greens | Add greens, add water, turn pile |
| Pests (Flies, Rodents) | Exposed food scraps, unapproved materials | Bury food scraps, cover with browns, avoid forbidden items |
| Taking Too Long | Small pile, large materials, infrequent turning, wrong moisture/air | Increase pile size, chop materials, turn often, monitor moisture |
Frequently Asked Questions About Compost Fertilizer
Q1: How long does it take to make compost?
A1: It can take anywhere from 2 months to a year, depending on the materials used, the size of the pile, how often you turn it, and the climate. Tumblers and actively managed piles decompose faster.
Q2: Can I compost disease-ridden plants?
A2: It’s best to avoid composting diseased plants. While high heat in a very well-managed compost pile can kill some pathogens, there’s a risk of spreading diseases if the compost isn’t hot enough or if certain diseases are resistant.
Q3: How do I know if my compost is too wet or too dry?
A3: The “wrung-out sponge” test is the best guide. Grab a handful of compost. If water drips out easily, it’s too wet. If it feels dry and crumbly and doesn’t hold together, it’s too dry. It should feel damp and form a loose ball when squeezed.
Q4: What are the benefits of compost for my soil?
A4: Compost improves soil structure, increases water retention in sandy soils, improves drainage in clay soils, provides essential nutrients for plants, and encourages beneficial microbial activity in the soil.
Q5: Can I use compost fertilizer on houseplants?
A5: Yes, but usually in a diluted form or mixed with other potting media. Straight compost can be too dense for houseplants and might contain weed seeds or pathogens that aren’t suitable for indoor environments. A good mix is often 1 part compost to 2 or 3 parts potting soil or coir.
Q6: Do I need to buy a special compost bin?
A6: Not at all! You can start with a simple open pile, build your own bin from readily available materials like pallets or wire mesh

I am passionate about home engineering. I specialize in designing, installing, and maintaining heating, ventilation, and air conditioning systems. My goal is to help people stay comfortable in their homes all year long.