Ever look at your kitchen scraps – those apple cores, banana skins, and citrus rinds – and wonder if they’re just junk? Well, good news! They’re actually treasure in disguise, especially for your garden. It’s surprisingly easy to turn fruit peels into fantastic compost. We’ll walk through exactly how to do it, so your garden can get a super boost from your kitchen waste. Let’s get started on making some garden gold!
How to Compost Fruit Peels: Your Genius Essential Guide
Hey there, garden enthusiasts and eco-minded folks! Troy D Harn here, your go-to guy for making home and garden projects simple and rewarding. You know those fruit peels you toss after enjoying a juicy apple or a sweet orange? Don’t let them go to waste! They’re packed with nutrients and are some of the best “green” materials you can add to your compost bin. Composting fruit peels is not only great for your garden, but it’s also a fantastic way to reduce what goes into your trash. It might sound complicated, but I promise you, it’s a straightforward process. We’re going to break it down step-by-step, just like sharing a cup of coffee on the porch. By the end of this guide, you’ll be a fruit peel composting pro!
Why Compost Fruit Peels? The Sweet Benefits
Composting fruit peels sounds like a small thing, but the impact is pretty big. Think of it as giving your garden a healthy, homemade superfood smoothie. Here’s why it’s such a smart move:
- Rich in Nutrients: Fruit peels are loaded with essential vitamins and minerals that your plants crave. When they break down in your compost, they release these goodies, creating a nutrient-dense soil amendment.
- Reduces Waste: The average household throws away a significant amount of food waste. Composting diverts a good chunk of this, heading towards a more sustainable lifestyle and reducing landfill burden.
- Improves Soil Health: Compost made from fruit peels adds valuable organic matter to your soil. This helps improve soil structure, drainage, and aeration, making it easier for plant roots to grow and access water and nutrients.
- Saves Money: Good quality compost can be expensive to buy for your garden. Making your own from scraps means you get top-notch soil enricher for free!
- Environmentally Friendly: Composting is a natural process that recycles organic materials. It’s a simple yet powerful way to contribute positively to the environment.
Understanding Compost Ingredients: Greens and Browns
Before we dive into the fruit peel specifics, it’s helpful to understand the two main types of ingredients that make compost work: “Greens” and “Browns.” Think of them as the dynamic duo of composting.
Greens (Nitrogen-Rich): These are typically moist materials that provide nitrogen. They tend to break down quickly and generate heat, which speeds up the composting process.
- Fruit and vegetable scraps (this is where our peels come in!)
- Coffee grounds and tea bags
- Grass clippings
- Manure (from herbivores like cows, horses, rabbits)
Browns (Carbon-Rich): These are usually dry materials that provide carbon. They add bulk to your compost pile, allow for air flow, and prevent the pile from becoming too wet and smelly.
- Dry leaves
- Shredded newspaper and cardboard
- Straw and hay
- Wood chips and sawdust
- Twigs and small branches
The magic happens when you get the right balance. Too many greens, and your compost can get slimy and smelly. Too many browns, and it will break down very slowly. A good rule of thumb is to aim for a ratio of about 2 parts Browns to 1 part Greens by volume, but don’t stress too much about perfection, especially when starting out. Fruit peels are definitely greens!
Which Fruit Peels Are Compost Champions?
Most fruit peels are fantastic additions to your compost bin. They break down relatively quickly and add loads of beneficial microbes and nutrients. Here are some of the best ones:
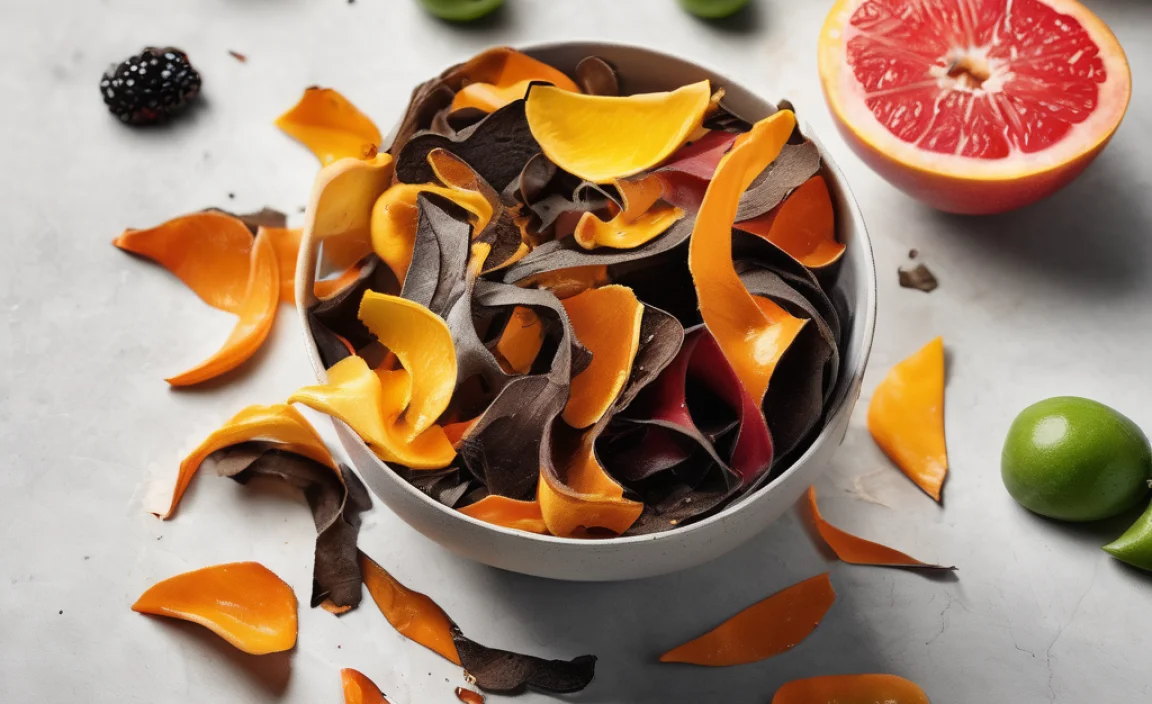
- Citrus Peels (Oranges, Lemons, Grapefruits): Packed with oils that can deter some pests and add a nice fragrance. However, use them in moderation as citrus oils can be a bit tough on worms in a worm bin.
- Banana Peels: A powerhouse of potassium and magnesium, which are great for plant growth and flowering. They break down quite quickly.
- Apple and Pear Cores/Peels: Full of natural sugars and fiber, they break down easily and contribute to the overall compost mix.
- Melon Rinds (Watermelon, Cantaloupe, Honeydew): High in water content, which helps keep your compost moist. Chopping them up speeds up decomposition.
- Stone Fruit Pits/Peels (Peaches, Plums, Cherries): These are great, but the pits themselves can take a very long time to break down. You might want to crack them open or just add the flesh and skin.
What to Avoid: The Compost Don’ts for Fruit Peels
While most fruit scraps are compostable gold, there are a few exceptions that can cause problems:
- Avocado Pits and Skins: These are generally fine, but the large pits can take an extremely long time to break down.
- Cooked Fruit or Fruit with Added Sugar/Oil: Plain fruit peels are best. If you’ve cooked fruit with lots of sugar, butter, or oil, it can attract pests and create an unbalanced compost.
- Diseased Fruit: If you have fruit that shows signs of disease or mold (unless it’s the healthy composting kind), it’s best to avoid putting it in your compost. You don’t want to spread plant diseases to your garden.
- Fruits You Don’t Want to Attract Pests: While fruit peels are natural, very large quantities of sweet, uncomposted fruits left exposed can attract unwanted visitors like rodents or flies. Burying them in the compost pile helps.
Getting Started: Your Fruit Peel Composting Toolkit
You don’t need a fancy setup to start composting fruit peels. Here are the basics:
1. A Composting Container:
- Compost Bin: These can be store-bought tumblers or stationary bins, or you can build your own from wood or wire mesh. For beginners, a simple enclosed bin is great for keeping things tidy and contained. For this guide, any bin will work!
- Worm Bin (Vermicomposting): If you have limited space, a worm bin is an excellent option. Red wiggler worms chow down on fruit scraps and produce nutrient-rich worm castings.
- Pile Composting: If you have a larger yard, you can simply create an open pile. This is the most basic method.
2. A Scrap Collector:
- Kitchen Countertop Bin: A small, lidded container you keep on your kitchen counter or sink to collect fruit peels and other scraps.
- Lidded Bucket: Any sturdy bucket with a lid will do.
3. A Chopping Tool:
- Kitchen Shears/Scissors: Good for snipping up peels into smaller pieces.
- Knife and Cutting Board: For chopping larger peels or rinds.
- Gardening Shears: If you’re processing larger items like melon rinds.
4. A Turning Tool (Optional but Recommended):
- Compost Aerator: A specialized tool designed to turn and aerate compost.
- Pitchfork or Garden Fork: Perfectly fine for turning your compost pile.
- Sturdy Stick: For smaller bins or worm bins, vigorous stirring can work.
Step-by-Step: How to Compost Fruit Peels
Ready to turn those peels into garden gold? Follow these simple steps:
Step 1: Set Up Your Compost System
Choose your composting method: a bin, a worm bin, or an open pile. Place it in a convenient location—somewhere easily accessible, with good drainage, and ideally a mix of sun and shade. If using enclosed bins or tumblers, make sure the lid is secure.
Step 2: Start Collecting Your Fruit Peels
Keep your kitchen scrap collector handy. Every time you finish a piece of fruit, toss the peel, core, or skin into the collector. Don’t forget about those smaller bits like apple cores or the ends of bananas!
Step 3: Chop Them Up!
This is a key step for faster composting. Larger items like watermelon rinds or thick citrus peels benefit most from being chopped into smaller pieces. The smaller the pieces, the more surface area is exposed to microbes, and the quicker they’ll break down. You don’t need to pulverize them, just make them bite-sized for your compost critters.
For example:
- Orange peels: Cut into 1-2 inch squares.
- Apple cores: Chop into halves or quarters.
- Banana peels: Slice into 2-3 pieces.
Step 4: Add to Your Compost Bin (The “Green” Layer)
When your kitchen scrap collector is full, or every few days, take it out to your compost bin. Sprinkle the chopped fruit peels into the bin. These are your “green” materials.
Step 5: Bury Your Greens with Browns
This is crucial for preventing odors and deterring pests. After adding your fruit peels, cover them completely with a layer of “brown” materials. This could be dry leaves, shredded newspaper, or straw. Think of it like tucking your greens into a cozy brown blanket.
Pro Tip: If you don’t have many brown materials handy, you can also use a small amount of finished compost or even a bit of garden soil to cover your fresh scraps.
Step 6: Maintain Moisture Levels
Your compost pile needs to be about as damp as a wrung-out sponge. Fruit peels, being moist, contribute to this. If your pile seems too dry, add some water. If it’s too wet (and potentially smelly), add more brown materials to absorb the excess moisture.
Step 7: Aerate and Turn Your Compost
Compost needs air to do its magic! The bacteria and microbes that break down the organic matter need oxygen. Every week or two, use your turning tool to mix the compost. Turn the outer layers into the center and the inner layers to the outside. This also helps distribute moisture and heat.
For tumblers, give them a few spins. For worm bins, gently stir the top layer. For open piles, use your pitchfork to turn everything over.
Step 8: Wait and Watch It Transform
The decomposition process takes time. Depending on the size of your pile, the materials you add, and how often you turn it, it can take anywhere from a few weeks to a few months for compost to be ready. You’ll know it’s ready when it’s dark, crumbly, and smells earthy—like rich soil.
Step 9: Harvest and Use Your Compost
Once your compost is ready, you can screen out any larger, undecomposed pieces (which can go back into the active compost pile) and use the finished compost. Mix it into your garden beds, use it as a top dressing for lawns and plants, or add it to potting soil for containers. Your fruit peel compost is now ready to nourish your plants!
Composting Fruit Peels in Different Systems
The basic principles of composting fruit peels apply across different systems, but there are a few nuances:
Compost Bins (Stationary and Tumbler)
These are great all-arounders. Fruit peels are excellent “greens.” Just remember to chop them and bury them under “browns” to manage moisture and prevent odors. Tumblers are convenient for turning, while stationary bins require more manual effort but can often handle larger volumes.
Worm Bins (Vermicomposting)**
Worms love fruit scraps! They are a primary food source in a worm bin.
Chop finely: Worms process food more efficiently when it’s in small pieces.
Avoid citrus in excess: While a few citrus peels are okay, too many can make the bin too acidic for the worms. Consider composting them elsewhere or using them sparingly.
Bury them: Dig a small pocket in the bedding, add your chopped fruit peels, and then cover them with bedding. This prevents odors and fruit flies.
Don’t overfeed: Start with small amounts to see how quickly your worms consume them.
For more detailed guidance on worm composting, the EPA provides excellent resources on this method.
Open Pile Composting
If you have the space, an open pile is simple. Layer your fruit peels (chopped and buried under browns) just like in a bin. The key is to build a good balance of greens and browns to manage moisture and air flow. Turning a larger pile is more labor-intensive but very effective. A good mix of layers is essential here to prevent a smelly, compacted mess.
Troubleshooting Common Fruit Peel Composting Issues
Even with the best intentions, you might run into a few snags. Don’t worry, these are usually easy to fix!
| Problem | Possible Cause | Solution |
|---|---|---|
| Bad Odors (Ammonia or Rotten Egg Smell) | Too many “greens” (fruit peels) and not enough “browns.” Pile is too wet. Lack of aeration. | Add a generous layer of brown materials (leaves, cardboard) to balance the nitrogen. Turn the pile to introduce air. If too wet, add browns and turn. Ensure good drainage. |
| Fruit Flies or Pests are Attracted | Fruit peels are exposed on the surface. Pile is too wet. | Always bury fruit peels completely under a layer of brown materials. Ensure your compost bin has a secure lid or barrier. Turn the pile regularly. Add more browns if it’s wet. |
| Compost Isn’t Breaking Down (or is too slow) | Pile is too dry. Not enough “greens” (nitrogen). Pile is too small and not generating heat. Lack of turning. | Add water until damp but not soggy. Add more nitrogen-rich materials (fruit peels are great for this!). Chop materials smaller before adding. Turn the pile more frequently. Ensure your pile is at least 3×3 feet for good heat generation. |
| Citrus Peels Still Sitting There After a Long Time | Citrus oils can slow decomposition for some microbes and earthworms. Large pieces. | Chop citrus peels into smaller pieces. Use them in moderation, especially in worm bins. Ensure the overall compost environment is healthy and active. They will break down with patience. |
Can I Compost Fruit Peels in Winter?
Yes, you can compost fruit peels in winter, but the process will slow down significantly. Microbes work much slower in cold temperatures. If you have a well-insulated compost bin and continue to add materials regularly, it will still decompose, just at a glacial pace. For outdoor piles, freezing temperatures can even be helpful by killing some weed seeds and pests. If your bin is completely frozen, decomposition will halt until it thaws. For worm bins, it’s crucial to keep them in a temperature-controlled environment (like a garage or basement) during winter to protect the worms.
The Balance of Greens and Browns: A Quick Reference
Getting the right mix is key to happy composting. Here’s a simple chart to keep handy:
| Greens (Nitrogen – Moisture) | Browns (Carbon – Dryness) | Ratio Recommendation (by volume) |
|---|---|---|
| • Fruit peels | • Dry leaves | Approximately 1 part Greens to 2 parts Browns |
| • Vegetable scraps | • Shredded newspaper/cardboard | (Adjust as needed based on material dryness and wetness) |
| • Coffee grounds | • Straw/hay | |
| • Grass clippings | • Small twigs/wood chips | |
| • Manure (herbivore) | • Sawdust |
Remember, this is a guideline, not a strict rule. Nature is quite forgiving in the compost bin. Don’t be afraid to experiment a little!
For more information
.lwrp.link-whisper-related-posts{
margin-top: 40px;
margin-bottom: 30px;
}
.lwrp .lwrp-title{
}.lwrp .lwrp-description{
}
.lwrp .lwrp-list-container{
}
.lwrp .lwrp-list-multi-container{
display: flex;
}
.lwrp .lwrp-list-double{
width: 48%;
}
.lwrp .lwrp-list-triple{
width: 32%;
}
.lwrp .lwrp-list-row-container{
display: flex;
justify-content: space-between;
}
.lwrp .lwrp-list-row-container .lwrp-list-item{
width: calc(25% – 20px);
}
.lwrp .lwrp-list-item:not(.lwrp-no-posts-message-item){
max-width: 150px;
}
.lwrp .lwrp-list-item img{
max-width: 100%;
height: auto;
object-fit: cover;
aspect-ratio: 1 / 1;
}
.lwrp .lwrp-list-item.lwrp-empty-list-item{
background: initial !important;
}
.lwrp .lwrp-list-item .lwrp-list-link .lwrp-list-link-title-text,
.lwrp .lwrp-list-item .lwrp-list-no-posts-message{
}@media screen and (max-width: 480px) {
.lwrp.link-whisper-related-posts{
}
.lwrp .lwrp-title{
}.lwrp .lwrp-description{
}
.lwrp .lwrp-list-multi-container{
flex-direction: column;
}
.lwrp .lwrp-list-multi-container ul.lwrp-list{
margin-top: 0px;
margin-bottom: 0px;
padding-top: 0px;
padding-bottom: 0px;
}
.lwrp .lwrp-list-double,
.lwrp .lwrp-list-triple{
width: 100%;
}
.lwrp .lwrp-list-row-container{
justify-content: initial;
flex-direction: column;
}
.lwrp .lwrp-list-row-container .lwrp-list-item{
width: 100%;
}
.lwrp .lwrp-list-item:not(.lwrp-no-posts-message-item){
max-width: initial;
}
.lwrp .lwrp-list-item .lwrp-list-link .lwrp-list-link-title-text,
.lwrp .lwrp-list-item .lwrp-list-no-posts-message{
};
}

I am passionate about home engineering. I specialize in designing, installing, and maintaining heating, ventilation, and air conditioning systems. My goal is to help people stay comfortable in their homes all year long.