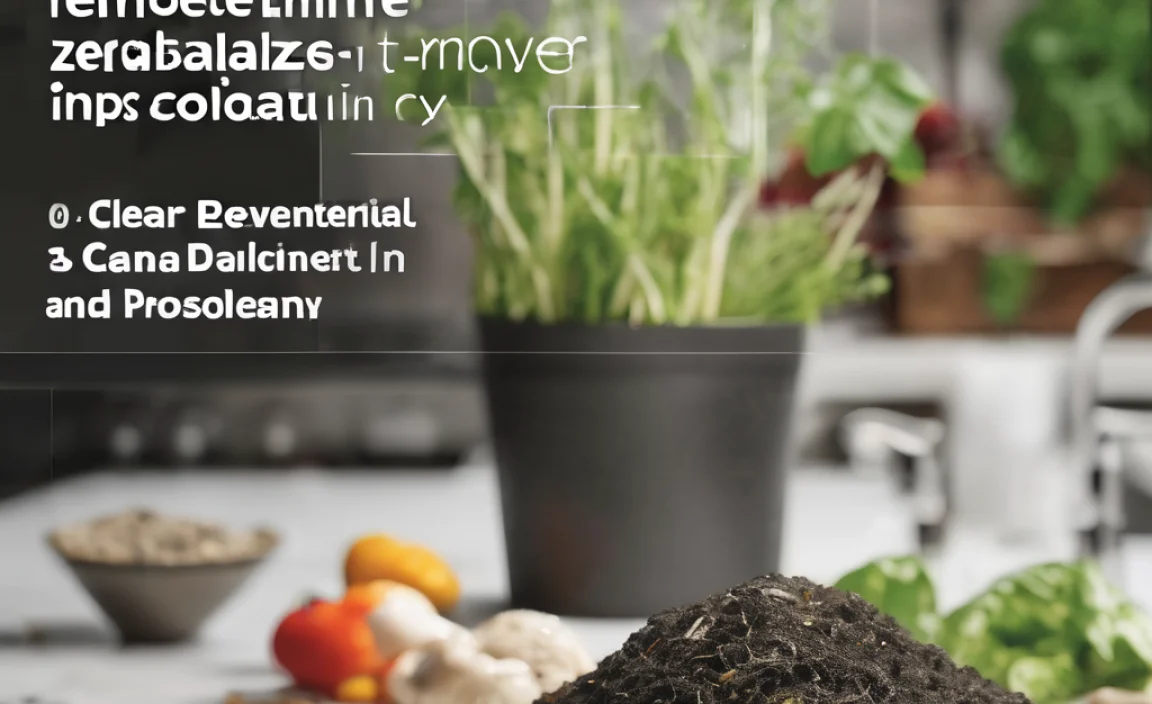
Want to supercharge your greenhouse plants without buying expensive fertilizers? Good news! Making your own compost is easier than you think. It’s like a secret superpower for healthy, happy plants. This guide will show you exactly how to get started. Let’s dig in and give your plants the best meal they’ve ever had!
You might be thinking, “Composting sounds complicated, is it really for me?” Don’t worry! I’m Troy D Harn, and my goal is to make things simple. We’ll go through this step-by-step, just like I’d show a neighbor. You’ll see how compost is a total game-changer for your greenhouse. We’ll cover what compost is, why your greenhouse loves it, and the super-simple ways to make it right at home. Ready to grow some amazing plants?
What Exactly is Compost and Why Greenhouse Plants Love It
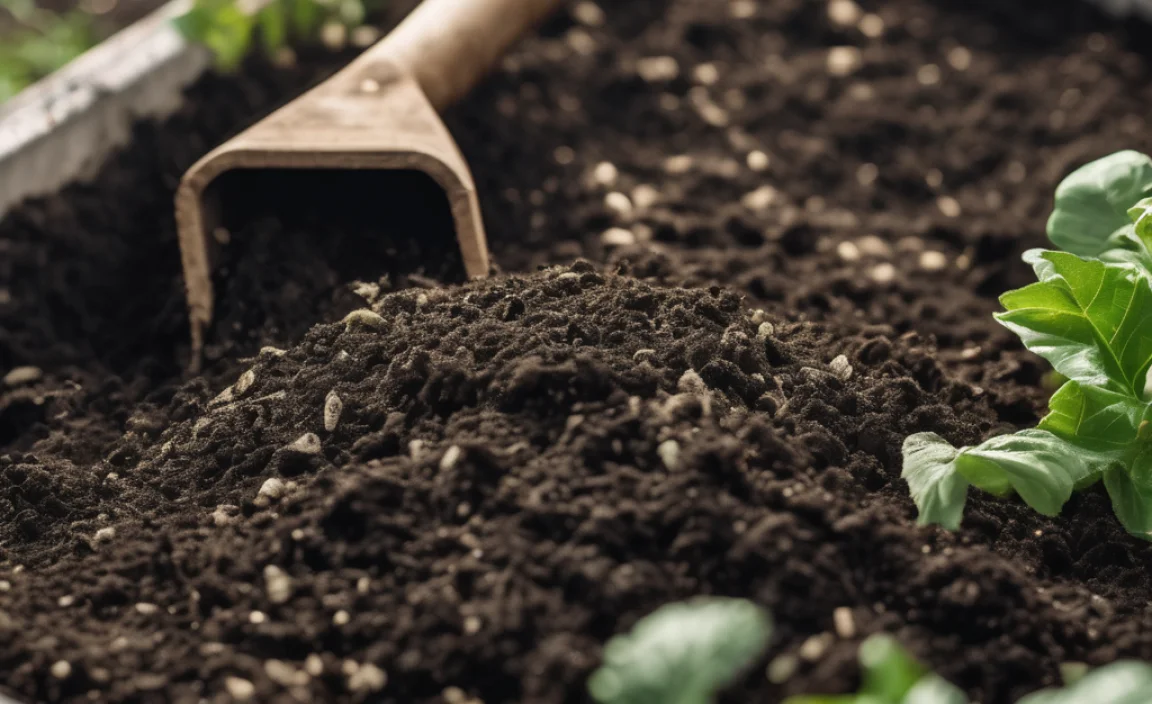
Think of compost as nature’s way of recycling. It’s decomposed organic matter – like kitchen scraps and yard waste – all broken down into a rich, dark, crumbly material. It’s sometimes called “black gold” by gardeners, and for good reason!
For your greenhouse plants, compost is like a super-charged multivitamin. Here’s why they go absolutely wild for it:
- Nutrient Powerhouse: Compost is packed with essential nutrients that plants need to grow strong, produce more flowers, and yield tastier fruits and veggies. It releases these nutrients slowly, meaning your plants get a steady, consistent supply of food.
- Improved Soil Structure: Good soil lets roots breathe and water drain properly. Compost acts like a sponge, helping sandy soils hold more moisture and helping clay soils become lighter and less compacted. This means happier roots!
- Beneficial Microbes: Compost is teeming with tiny living organisms – bacteria, fungi, and other microbes. These little helpers break down nutrients further, make them available to plants, and can even help protect them from some soil-borne diseases.
- pH Balance: Most compost is pretty neutral, which is fantastic for many plants. It can help to buffer soils that are too acidic or too alkaline, creating a more stable environment for growth.
- Water Retention: Especially in greenhouse settings where watering can be tricky, compost helps your soil hold onto moisture. This can reduce watering frequency and ensure your plants don’t dry out, a common greenhouse problem.
Basically, compost gives your soil better structure, more nutrients, and a healthier ecosystem for your plants to thrive in. It’s the ultimate natural fertilizer and soil conditioner rolled into one.
Composting Basics: What Goes In, What Stays Out

Before we get to the “how-to,” it’s important to know what makes good compost. It’s all about balancing two main ingredients: “Greens” and “Browns.”
Greens (Nitrogen-Rich): These are usually wet and provide nitrogen, which helps the microorganisms break everything down. Think of them as the “fuel” for your compost pile.
- Fruit and vegetable scraps
- Coffee grounds and tea bags
- Grass clippings (in thin layers to avoid matting)
- Plant trimmings (non-diseased)
- Manure from herbivores (like chickens, rabbits, cows – avoid dog or cat manure)
Browns (Carbon-Rich): These are usually dry and provide carbon, which is the energy source for those hardworking microbes. They also help with airflow, preventing your compost from getting too soggy and smelly.
- Dry leaves
- Shredded newspaper (avoid glossy paper)
- Cardboard (torn into small pieces)
- Straw or hay
- Twigs and small branches (chopped up)
- Sawdust from untreated wood
What NOT to Compost
Some things just don’t belong in your compost bin, especially if you’re aiming for high-quality compost for your greenhouse. These can attract pests, spread diseases, or simply not break down well.
- Meat, dairy, and oily foods: These attract pests and can create foul odors.
- Diseased plants: You don’t want to spread plant sickness.
- Weeds that have gone to seed: These can sprout in your garden.
- Pet waste (dog, cat): Can contain harmful pathogens.
- Treated wood: Contains chemicals that are bad for your plants.
- Coal or charcoal ash: Can harm plant growth.
Aim for a good mix of greens and browns. A common recommendation is about a 1:2 or 1:3 ratio of greens to browns by volume. Don’t stress too much about perfection; nature is pretty forgiving!
Choosing Your Composting Method for Your Greenhouse
There are several ways to compost, and the best one for you depends on your space, how much waste you produce, and how quickly you want compost. Here are a few beginner-friendly options:
1. The Simple Pile (Open Composting)
This is the most basic method. You just create a pile of organic materials in a designated spot in your yard. It’s best if you have a bit more space.
How it works:
- Choose a spot that’s level, well-drained, and gets some sun.
- Start layering your green and brown materials.
- Keep the pile moist, like a wrung-out sponge.
- Turn the pile every few weeks to aerate it.
Pros: Easiest to start, can handle large volumes of material.
Cons: Takes longer to break down, can look a bit messy, might attract pests more easily if not managed well.
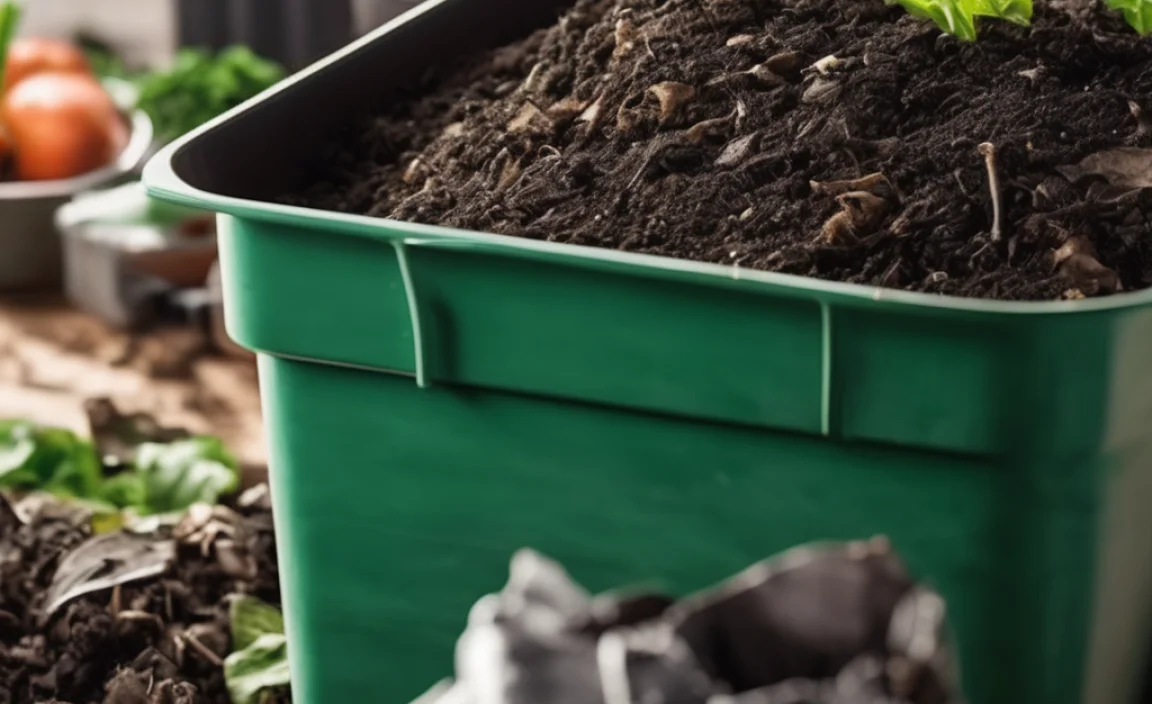
2. The Compost Bin (Enclosed Composting)
These are commercially available bins or DIY structures that contain your compost materials. They help keep things tidy and can speed up the process.
Types of Bins:
- Stationary Bins: These are usually plastic bins with lids and access doors at the bottom. You add materials from the top and harvest finished compost from the bottom.
- Tumblers: These are barrel-like bins mounted on a stand that you can easily turn or “tumble.” This makes aeration much simpler.
How it works:
- Assemble your bin according to instructions.
- Start layering greens and browns inside.
- Keep it moist.
- Turn the compost regularly (less often for stationary bins, frequently for tumblers).
Pros: Neater appearance, better pest control, often breaks down faster than open piles.
Cons: Can have a higher upfront cost (for commercial bins), might have capacity limits.
For a great DIY compost bin, check out resources from organizations like the U.S. Environmental Protection Agency (EPA), which offers excellent guidance on various methods.
3. Vermicomposting (Worm Composting)
This method uses specific types of composting worms (like Red Wigglers) to process food scraps. It’s excellent for smaller spaces and produces a very nutrient-rich compost called “worm castings.”
How it works:
- Get a worm bin (can be purchased or made from plastic tubs).
- Add bedding (shredded newspaper, coconut coir).
- Introduce your composting worms.
- Feed them kitchen scraps (avoiding citrus and onions for some worm species).
- Harvest the castings periodically.
Pros: Highly nutrient-rich output (worm castings), great for apartment dwellers, fast processing of kitchen scraps.
Cons: Requires specific worms, can’t handle large volumes of yard waste, temperature sensitive (needs to be kept indoors or in a protected area).
For a greenhouse, a good quality compost from a bin or a pile is usually the most practical. If you have a small greenhouse or just want to super-boost your potting mixes, vermicomposting is a fantastic option.
Step-by-Step: Building and Maintaining Your Greenhouse Compost System
Let’s get practical! We’ll focus on building a good quality compost pile or using a bin, as these are most common for greenhouse users. Following these steps will get you well on your way to “black gold.”
Step 1: Choose Your Location
If you’re using a bin, a spot near your greenhouse is ideal. This makes it easy to add materials and to access the finished compost when you need it.
- Accessibility: You should be able to easily bring kitchen scraps and yard waste to the compost area and get finished compost to your greenhouse.
- Drainage: The spot should be on level ground that drains well so your compost doesn’t become waterlogged.
- Sun/Shade: Some sun helps heat the pile, but too much intense sun can dry it out quickly. A spot with partial shade is often best.
- Water Source: Being near a hose or water spigot is helpful for keeping your compost pile moist.
Step 2: Gather Your Materials
Start collecting your kitchen scraps (in a small kitchen caddy) and yard waste. Aim to have a good mix of greens and browns ready before you start adding them to your main compost system. You’ll want more browns on hand than you might initially think, as they help balance out the wet greens.
Tip: Shredding or chopping up larger items (like cardboard or branches) will help them decompose much faster.
Step 3: Set Up Your System
Option A: The Compost Bin (Recommended for Neatness & Speed)
- Assemble your bin: Follow the manufacturer’s instructions. Ensure it’s placed on bare soil or a permeable surface to allow drainage and access for beneficial organisms.
- Add a base layer: Start with a few inches of coarse brown material, like small twigs or straw. This helps with drainage and airflow.
Option B: The Open Pile
- Clear a space about 3 feet wide and 3 feet deep.
- Build up a base layer of coarse browns, similar to the bin method.
Step 4: Start Layering
Now it’s time to add your greens and browns. Think of this like making a lasagna!
- Start with browns: Add a layer of brown materials (dried leaves, shredded paper).
- Add greens: Follow with a layer of green materials (kitchen scraps, grass clippings). Try not to add large clumps of grass clippings; spread them thinly.
- Add more browns: Cover the green layer with another layer of brown material. This helps prevent fruit flies and odors.
- Water lightly: Sprinkle each new layer with water, especially the brown ones, until it’s about as damp as a wrung-out sponge.
Step 5: Maintain Your Compost
Composting is a process, and it needs a little care. Here are the key things to monitor:
Moisture:
- Your compost pile should feel damp to the touch, like a well-wrung-out sponge.
- If it’s too dry, add water. If it’s too wet, add more brown materials and turn it.
Aeration (Turning):
- This is crucial for healthy decomposition and preventing smells.
- For bins: Turn the compost with a pitchfork or compost aerator every 1-2 weeks.
- For tumblers: Rotate the tumbler every few days.
- For open piles: Turn the entire pile with a pitchfork every 2-4 weeks.
Turning introduces oxygen, which is essential for the aerobic bacteria doing the work. Think of it as “fluffing up” the compost.
Temperature:
- A healthy compost pile will heat up in the center as the microorganisms work. This heat helps to kill weed seeds and pathogens.
- The ideal temperature is between 130-160°F (55-70°C). You can get a compost thermometer if you’re interested!
Step 6: Harvesting Your Compost
Compost is ready when it’s dark, crumbly, smells earthy (like a forest floor), and you can no longer recognize the original materials. This usually takes anywhere from 2 to 6 months, depending on your method and how often you turn it.
Harvesting from a bin:
- Open the access door at the bottom.
- Scoop out the dark, finished compost.
- Any larger, unfinished pieces can be thrown back into the top of the bin to continue decomposing.
Harvesting from a pile:
- You can either dig out the finished compost from the bottom of the pile, or pitch the entire pile onto a tarp and separate the finished material from the unfinished.
- Unfinished material goes back into a new pile.
Troubleshooting Common Composting Issues

Even with the best intentions, sometimes your compost pile might act up. Don’t get discouraged! Most problems are easy to fix with a little adjustment.
Issue: My compost smells bad (like rotten eggs or ammonia).
Cause: Too much green material, not enough airflow, or it’s too wet.
Solution:
- Add more brown materials (dried leaves, shredded cardboard).
- Turn the pile thoroughly to introduce air.
- If very wet, add a thick layer of browns to absorb excess moisture.
Issue: My compost pile isn’t heating up.
Cause: Not enough green material, too dry, or needs to be turned.
Solution:
- Add more green materials.
- Water the pile.
- Turn the pile to mix ingredients and introduce oxygen.
- Ensure the pile is large enough (at least 3x3x3 feet) to generate heat.
Issue: My compost is full of fruit flies or other insects.
Cause: Exposed food scraps, too wet.
Solution:
- Bury kitchen scraps deeper in the pile.
- Always cover green layers with a brown layer.
- Ensure the pile is not too wet; add browns if needed.
- Turning the pile can also help by burying insects and their eggs.
Issue: My compost is taking too long to break down.
Cause: Pile is too dry, too cold, not enough greens, or isn’t being turned enough.
Solution:
- Check moisture levels and add water if dry.
- Add more nitrogen-rich green materials.
- Turn the pile more frequently.
- Ensure the ambient temperature isn’t too cold for too long (cover in winter if needed).
- Chop or shred larger materials to speed up decomposition.
Remember, compost is a living system! These little adjustments will help it work efficiently.
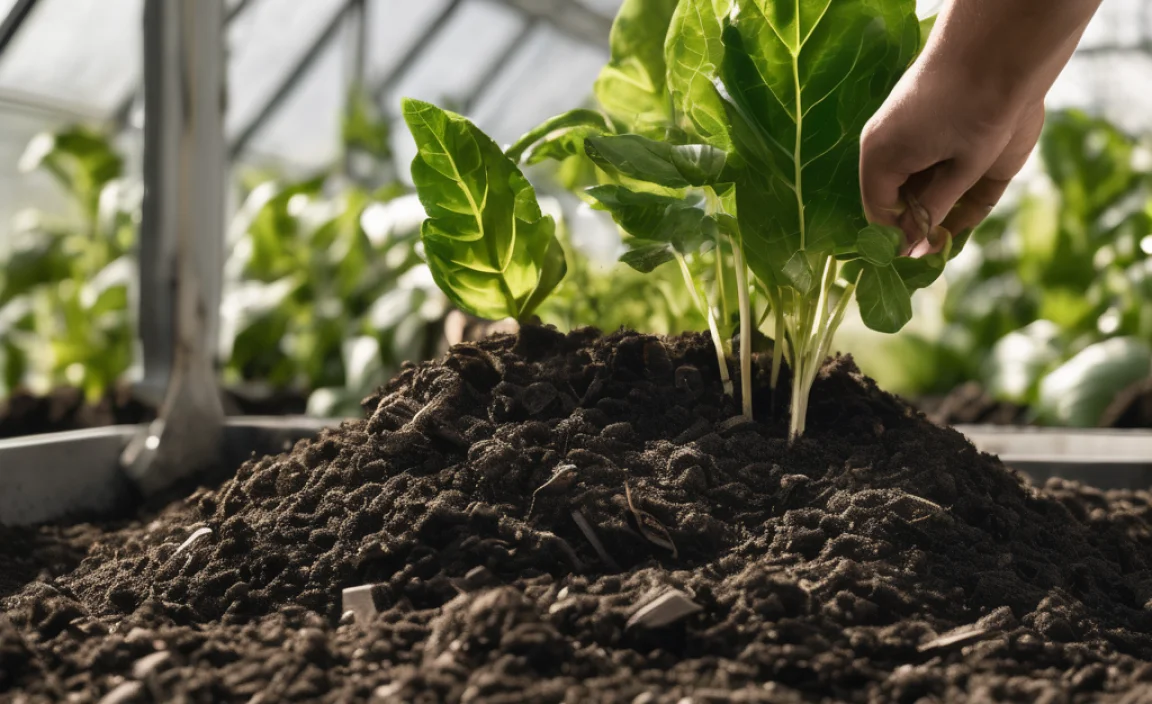
Using Your Compost in the Greenhouse
Once you have your finished compost, it’s time for the best part: using it to boost your greenhouse plants!
1. As a Soil Amendment
This is the most common way to use compost. Mix it directly into your existing potting soil or garden beds.
- For potting mixes: Mix 1 part compost with 2 to 3 parts of your regular potting soil. This creates a nutrient-rich, well-draining mix for your pots and containers.
- For garden beds: Spread a layer of compost (1-3 inches deep) over the soil surface and gently work it into the top few inches.
2. As a Top Dressing
If your plants are already in pots or beds and you want to give them a nutrient boost, compost makes a great top dressing.
- Simply spread a thin layer of compost (about 1/4 to 1/2 inch) over the surface of the soil, around the base of the plants, but not touching the stems.
- Water it in, and the nutrients will gradually leach down to the roots.
3. For Seed Starting
A good compost can make an excellent base for seed-starting mixes. You can use pure, fine
.lwrp.link-whisper-related-posts{
margin-top: 40px;
margin-bottom: 30px;
}
.lwrp .lwrp-title{
}.lwrp .lwrp-description{
}
.lwrp .lwrp-list-container{
}
.lwrp .lwrp-list-multi-container{
display: flex;
}
.lwrp .lwrp-list-double{
width: 48%;
}
.lwrp .lwrp-list-triple{
width: 32%;
}
.lwrp .lwrp-list-row-container{
display: flex;
justify-content: space-between;
}
.lwrp .lwrp-list-row-container .lwrp-list-item{
width: calc(25% – 20px);
}
.lwrp .lwrp-list-item:not(.lwrp-no-posts-message-item){
max-width: 150px;
}
.lwrp .lwrp-list-item img{
max-width: 100%;
height: auto;
object-fit: cover;
aspect-ratio: 1 / 1;
}
.lwrp .lwrp-list-item.lwrp-empty-list-item{
background: initial !important;
}
.lwrp .lwrp-list-item .lwrp-list-link .lwrp-list-link-title-text,
.lwrp .lwrp-list-item .lwrp-list-no-posts-message{
}@media screen and (max-width: 480px) {
.lwrp.link-whisper-related-posts{
}
.lwrp .lwrp-title{
}.lwrp .lwrp-description{
}
.lwrp .lwrp-list-multi-container{
flex-direction: column;
}
.lwrp .lwrp-list-multi-container ul.lwrp-list{
margin-top: 0px;
margin-bottom: 0px;
padding-top: 0px;
padding-bottom: 0px;
}
.lwrp .lwrp-list-double,
.lwrp .lwrp-list-triple{
width: 100%;
}
.lwrp .lwrp-list-row-container{
justify-content: initial;
flex-direction: column;
}
.lwrp .lwrp-list-row-container .lwrp-list-item{
width: 100%;
}
.lwrp .lwrp-list-item:not(.lwrp-no-posts-message-item){
max-width: initial;
}
.lwrp .lwrp-list-item .lwrp-list-link .lwrp-list-link-title-text,
.lwrp .lwrp-list-item .lwrp-list-no-posts-message{
};
}

I am passionate about home engineering. I specialize in designing, installing, and maintaining heating, ventilation, and air conditioning systems. My goal is to help people stay comfortable in their homes all year long.