Ever feel like your kitchen scraps and yard waste are just… waste? You know composting is good for your garden, but the thought of building a compost heap seems tricky and messy. Many folks feel the same way! It doesn’t have to be complicated. We’ll walk through building your very own compost heap, step-by-step, making it super simple. Get ready to turn that “trash” into garden gold. Let’s dig in!

Compost Heap DIY: Proven Effortless Results
Hey there, fellow home improvers and garden enthusiasts! Troy D Harn here, from TopChooser, ready to help you tackle another fantastic DIY project. Today, we’re talking about something that can seriously boost your garden’s health and slash your trash output: building a compost heap. I get it; “compost heap” might sound a bit daunting. Maybe you picture a smelly, messy pile that’s hard to manage. But trust me, with a few simple tips and the right approach, creating a compost heap can be surprisingly effortless and incredibly rewarding. You’ll be churning out nutrient-rich compost for your plants in no time.
This guide is designed for everyone, whether you’re a seasoned gardener or just starting to think about making your own fertilizer. We’ll break down exactly what you need and how to do it, keeping things practical and easy. Forget complicated instructions; we’re going for proven, effortless results!
Why Bother With a Compost Heap?
Before we get our hands dirty, let’s quickly chat about why a compost heap is such a gem. It’s not just about being eco-friendly (though it’s a big part of that!). Producing your own compost means:
- Healthier Plants: Compost is packed with nutrients that feed your soil, leading to stronger, more vibrant plants and better harvests.
- Reduced Waste: Think of all those kitchen scraps (fruit peels, veggie bits, coffee grounds) and yard trimmings (leaves, grass clippings) you’re tossing. Composting gives them a new life. Many municipalities offer incentives or resources for composting; check out your local government’s sustainability page for ideas.
- Improved Soil Structure: Compost helps sandy soil hold more water and nutrients, and it loosens up heavy clay soil, making it easier for plant roots to grow.
- Saving Money: Why buy expensive fertilizers and soil amendments when you can make your own for free?
Choosing Your Compost Heap Location
Location, location, location! Finding the right spot for your compost heap is key to making the process easier and more effective. You don’t need a huge yard, but a few things are important:
- Accessibility: You’ll be adding to it regularly and eventually digging out finished compost. Make sure you can easily get to it with a wheelbarrow or bucket.
- Drainage: Nobody wants a soggy compost pile. Choose a spot that doesn’t collect water after rain. A slightly sloped area is ideal.
- Sunlight: A balance is good here. Some sun helps heat the pile, which speeds up decomposition, but too much intense, direct sun can dry it out too quickly. Partial shade is often perfect.
- Ventilation: Compost needs air to break down properly. Avoid tucked-away corners with no airflow.
- Proximity to Water: You might need to moisten your pile occasionally, so being reasonably close to a water source is handy.
A good rule of thumb is to place it at the back of your garden, near a fence, or in a corner of your yard where it’s out of the way but still easy to reach. You can even learn more about effective composting practices from resources like the EPA’s composting guide.
What Kind of Compost Heap Structure Do You Need?
For a truly effortless compost heap experience, the structure matters. While you can just make a pile, a containment system makes it tidier, helps it heat up better, and keeps pests away. Here are a few beginner-friendly options:
Option 1: The Simple Bin (Easiest!)
This is your go-to for maximum ease. You can buy pre-made compost bins, or even better for DIY, make one yourself.
DIY Simple Bin: Wire Mesh Cylinder
This is incredibly simple and cheap to make, and it provides excellent aeration.
- What You’ll Need:
- A roll of hardware cloth or chicken wire (about 3-4 feet tall).
- Heavy-duty wire or zip ties.
- Wire cutters.
- Gloves (important for handling wire!).
- How to Make It:
- Cut a length of wire mesh about 8-10 feet long.
- Form it into a cylinder, overlapping the ends.
- Secure the overlapped ends with wire or heavy-duty zip ties, spacing them every 6 inches or so.
- This creates an open-topped, open-sided cylinder that’s perfect for holding your compost materials while allowing air to circulate freely.
Option 2: The Pallet Bin (Budget-Friendly & Sturdy)
If you have access to free or cheap wooden pallets, this is a fantastic way to build a sturdy, contained compost heap.
DIY Pallet Bin Steps:
- What You’ll Need:
- 3 or 4 wooden pallets (untreated is best).
- Zip ties, wire, or screws and a drill.
- Hinges and a latch (optional, for an access door).
- Gloves and safety glasses.
- How to Make It:
- Stand three pallets up on their edges to form three sides of a square or rectangle.
- Secure the pallets together at the corners using strong zip ties, wire twisted tightly, or screws.
- (Optional) Use the fourth pallet as a front gate. You can attach it with sturdy hinges on one side and a simple latch on the other, or just lean it against the opening.
- Leave gaps between the slats for airflow.
This bin is excellent for containing material and looks quite neat!
Option 3: The Tumbler (Effortless, but Purchased)
While not strictly a “DIY heap” in the building sense, a compost tumbler is the ultimate in effortless composting. These are sealed drums on a stand that you can rotate. They speed up composting and keep everything contained and pest-free. If your goal is truly zero fuss and you have a bit of a budget, a purchased tumbler is a great choice. They are available at most garden centers and online retailers.
What Goes Into Your Compost Heap? The Magic Mix
This is where the “effortless” part really kicks in – it’s all about balance. Compost heaps work best when you mix “greens” and “browns.” Think of it like a balanced diet for your compost microorganisms!
Greens (Nitrogen-Rich)
These materials are generally moist and break down quickly, providing nitrogen.
- Fruit and vegetable scraps (peels, cores, rinds)
- Coffee grounds and tea bags
- Grass clippings (in thin layers!)
- Plant trimmings (new growth, non-woody)
- Manure (from herbivores like chickens, rabbits, cows, horses – avoid pet waste)
Browns (Carbon-Rich)
These materials are drier and provide carbon, which helps prevent the pile from becoming slimy and smelly.
- Dried leaves
- Straw or hay
- Cardboard and paper (shredded, non-glossy)
- Wood chips or small twigs
- Eggshells (crushed)
- Sawdust (from untreated wood)
What NOT to Compost
To keep your compost healthy and avoid problems, steer clear of:
- Meat, fish, or dairy products (attract pests and can smell bad)
- Oily or greasy foods
- Diseased plants or weeds that have gone to seed
- Pet waste (dog or cat feces)
- Treated wood products
- Coal or charcoal ash
- Glossy paper or heavily inked materials
The Ideal Compost Heap Ratio
The magic number for effortless composting is roughly a 2:1 or 3:1 ratio of Browns to Greens by volume. Don’t stress about exact measurements; just aim for more Browns than Greens. If your pile gets wet and smelly, add more Browns. If it seems dry and is breaking down slowly, add more Greens.
A great way to visualize this is with a simple table. Think about how much you roughly contribute from each category:
| Category | Examples | Purpose | Approximate Volume Ratio |
|---|---|---|---|
| Greens (Nitrogen) | Fruit/Veggie Scraps, Grass Clippings, Coffee Grounds | Provide heat and nitrogen for decomposition | Aim for 1 part Greens to 2-3 parts Browns |
| Browns (Carbon) | Dried Leaves, Shredded Cardboard, Straw | Provide structure, aid aeration, prevent smell |
Building Your Compost Heap: Step-by-Step
Now that you have your location and structure, let’s build it!
Step 1: Start with a Base Layer of Browns
Begin by putting a 4-6 inch layer of coarse Browns (like twigs, straw, or shredded cardboard) at the bottom of your bin or chosen spot. This helps with drainage and aeration from the start.
Step 2: Add Your First Layer of Greens
On top of the Browns, add a layer of your kitchen scraps and other Green materials. Don’t put too much of any one thing at once, especially grass clippings, as they can mat down and get stagnant.
Step 3: Alternate Layers
Continue alternating layers of Greens and Browns. Make your Brown layers a bit thicker than your Green layers.
Step 4: Chop and Shred
For faster composting, break down larger items. Chop up fruit and vegetable scraps, shred cardboard and paper. Smaller pieces have more surface area for the microbes to work on.
Step 5: Introduce Microorganisms (Optional but Helpful)
You can add a shovelful of finished compost or garden soil to your new pile. This introduces the beneficial bacteria and fungi that will do the hard work of decomposition. Many compost activators are also available commercially.
Step 6: Moisten Your Layers
As you add layers, lightly water them. The compost pile should feel like a damp sponge – moist but not dripping wet. If you’re adding dry Browns, you’ll need more water. If you’re adding wet kitchen scraps, you might need less.
You can check out resources from your local University Extension services for detailed horticultural advice tailored to your region.
Step 7: Continue Adding Materials
As you generate more kitchen scraps and yard waste, add them to the heap. Always try to “bury” your fresh kitchen scraps under a layer of Browns to prevent odors and deter pests. Continue to maintain the balance of Greens and Browns.
Maintaining Your Compost Heap for Effortless Results
This is where the “effortless” truly shines. Once you’ve built your heap, minimal intervention is usually needed, especially if you’ve got a good balance and decent airflow.
Moisture Control
Check the moisture level periodically. Stick your hand into the pile – if it feels dry, give it a good watering. If it’s too wet, add more dry Browns and turn it to help it dry out.
Aeration (Turning)
This is the most labor-intensive part, but it’s crucial for speeding up decomposition and preventing anaerobic (stinky) conditions. You don’t need to do it every day, or even every week. Turning once a month is often sufficient for a home compost heap. Use a pitchfork or compost aerator tool to mix the materials so air can get in and different parts of the pile can heat up and cool down.
Tip for Effortless Turning: If you’re using a wire mesh bin or a pallet bin with one side open or hinged (like the optional door), turning becomes much easier. You can simply fork the material from one side to the other, or onto the ground and then back into the bin.
Even More Effortless: The “No-Turn” or “Cold” Compost Method
This method takes longer but requires almost no effort. Simply add your materials as they become available, maintaining the Brown/Green balance. Nature will eventually break it down, although it might take 6-12 months or longer. It’s less active but still yields great compost!
Temperature
An active compost pile will heat up in the center, often reaching 130-160°F (55-70°C). This heat is great for killing weed seeds and pathogens. However, for a beginner heap, don’t worry too much about this! As long as you’re balanced with Greens and Browns, decomposition will occur, just maybe at a slower pace without the intense heat.
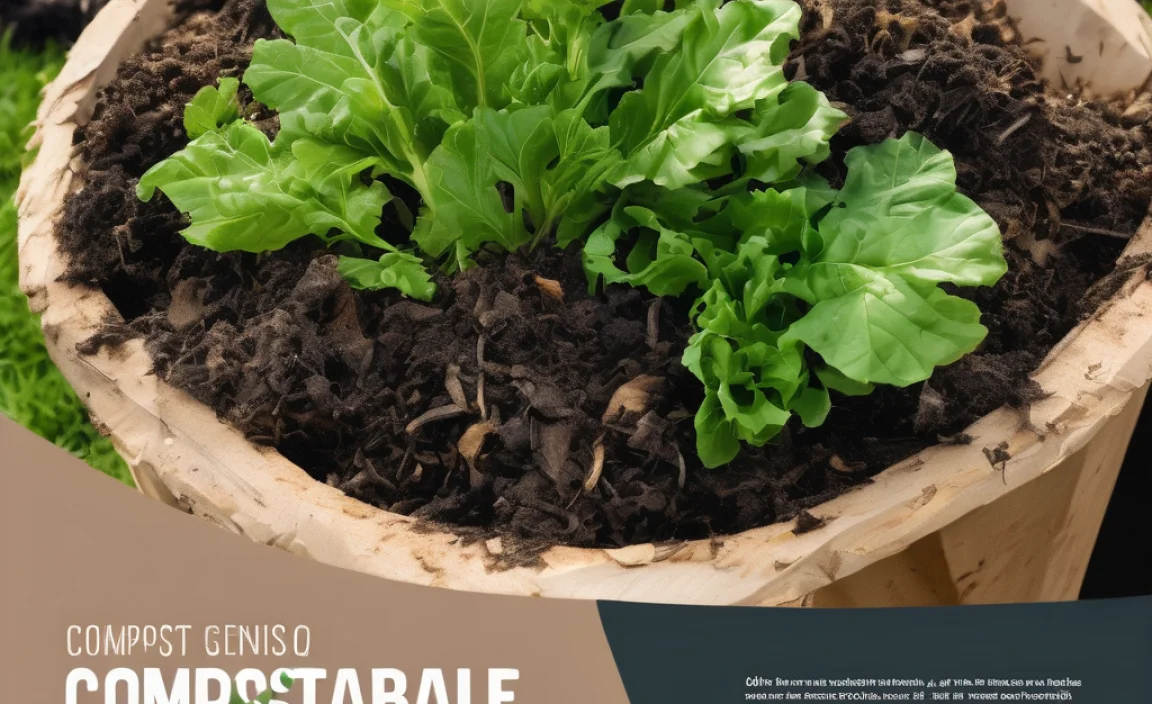
When is Compost Ready?
The most rewarding part! Finished compost is dark, crumbly, and smells earthy, like a forest floor. You shouldn’t be able to recognize the original materials (though an occasional recognizable bit is fine). This process can take anywhere from a couple of months (with active turning and ideal conditions) to a year or more (with no-turning methods).
To harvest, you can either dig from the bottom of a well-established heap, or fork the entire contents onto a tarp and sift through it, separating the finished compost from any unfinished material. The unfinished material goes back into your active heap.
Troubleshooting Common Compost Heap Issues
It’s normal to run into a few hiccups. Here are some common problems and their simple fixes:
| Problem | Cause | Solution |
|---|---|---|
| Bad Odor (Ammonia/Rotting Eggs) | Too wet, not enough air (too many Greens) | Add more Browns (leaves, cardboard). Turn the pile to aerate. |
| Pile is Dry and Not Decomposing | Too dry, not enough moisture, too many Browns | Add water until it’s like a damp sponge. Add more Greens. |
| Pile is Not Heating Up | Too small, not enough Greens, not enough moisture, needs turning | Make the pile larger (at least 3x3x3 feet is ideal for heat). Add more Greens. Add water. Turn the pile. |
| Attracting Pests (Rodents, Flies) | Exposed food scraps, non-compostable items | Always bury fresh kitchen scraps under a layer of Browns. Ensure no meat, dairy, or greasy foods are added. Use a bin with a lid or screen. |
Tools You Might Find Handy (But Aren’t Essential!)
While you can get by with just a pitchfork and your hands, a few tools can make the process even more efficient:
- Pitchfork: For turning and moving materials.
- Shovel: For moving larger volumes and digging finished compost.
- Garden Gloves: Essential for keeping your hands clean and protected.
- Compost Aerator Tool: Specifically designed to introduce air into compost piles without heavy turning.
- Watering Can or Hose with a Spray Nozzle: For moistening the pile.
- Wheelbarrow: For transporting materials and finished compost.
Remember, the goal is effortless results. Start simple, and add tools as you feel you need them. Many people find that the basic pitchfork and a bit of know-how are all they ever need!
Frequently Asked Questions About Compost Heap DIY
How long does it take to make compost?
It varies! With a well-managed, actively turned compost heap, you can get finished compost in 2-4 months. If you’re using a no-turn method, it can take 6-12 months or even longer. Patience is key!
Do I really need a special bin?

I am passionate about home engineering. I specialize in designing, installing, and maintaining heating, ventilation, and air conditioning systems. My goal is to help people stay comfortable in their homes all year long.