Hey there! Are you tired of tossing kitchen scraps and yard waste into the trash? It feels like a waste, doesn’t it? Well, guess what? You can turn that “waste” into black gold for your garden. Composting might sound complicated, but it’s actually pretty simple. We’ll walk through easy ways to get started. Ready to make your plants super happy and reduce landfill waste? Let’s dig in!
Compost Methods: The Proven Way to Nurture Your Garden
Hello, neighbors! Troy D Harn here, your go-to guy for making home, garden, and DIY projects feel less like a chore and more like a home run. Today, we’re talking about something truly magical: composting. You know, turning your everyday kitchen scraps and yard trimmings into rich, nutrient-filled “black gold” that your plants will absolutely adore. It’s one of the best things you can do for your garden, and honestly, it’s not nearly as complicated as it might sound. Whether you’ve got a sprawling backyard or a tiny balcony, there’s a compost method that’s perfect for you. We’ll break it all down, step-by-step, so you can start nurturing your garden the natural way, right from home.
Why bother with composting? Besides the sheer satisfaction of turning “garbage” into garden treasure, composting significantly enriches your soil. It improves soil structure, helps retain moisture (meaning less watering for you!), and feeds the beneficial microorganisms that keep your plants healthy and strong. It’s a win-win: you get healthier plants, and you send less waste to the landfill. Plus, it’s a fantastic way to connect with nature and understand the cycles of growth.
Why You Should Be Composting
Let’s think about what happens when we just throw away our food scraps and yard waste. Most of it heads to a landfill. There, it decomposes without enough oxygen, a process called anaerobic decomposition. This creates methane, a potent greenhouse gas. When you compost, you’re encouraging aerobic decomposition – decomposition with oxygen. This process is much cleaner and produces valuable fertilizer. It’s a simple change that makes a big environmental difference, right from your own backyard.
Here’s a quick rundown of the fantastic benefits:
- Boosts Soil Health: Composed material, often called humus, is packed with nutrients that plants need to thrive. It acts like a superfood for your soil.
- Improves Soil Structure: Compost helps sandy soils retain water and nutrients, and it loosens up clay soils, making them easier for plant roots to navigate.
- Reduces Waste: You’ll be amazed at how much kitchen and yard waste you divert from landfills. It’s a simple, impactful way to be more eco-friendly.
- Saves Money: High-quality compost can be expensive to buy. Making your own means saving cash on fertilizers and soil amendments.
- Healthier Plants: With better soil, your plants are stronger, more disease-resistant, and produce more flowers or vegetables.
- Water Conservation: Healthy, compost-rich soil acts like a sponge, holding more moisture and reducing the need for frequent watering.
Understanding the Basics: Greens and Browns
The secret to successful composting, no matter which method you choose, lies in balancing two main ingredients: “greens” and “browns.” These aren’t just colors; they refer to the nutrient content of your compostable materials. Getting this balance right is key to making sure your compost pile heats up, breaks down efficiently, and doesn’t smell funky.
Think of it like a recipe for your compost pile. You need both types of ingredients to feed the microorganisms that do all the hard work of decomposition. Too much of one, and your compost can become a soggy, smelly mess or a dry, inactive pile.
What are ‘Greens’?
Greens are materials that are rich in nitrogen. They tend to be moist and break down quickly. These are the things that provide the “fuel” for the composting process. When your pile is lacking greens, it will cool down and decomposition will slow to a crawl.
Examples of ‘Greens’:
- Fruit and vegetable scraps (peels, cores, rinds)
- Coffee grounds and tea bags
- Grass clippings (in thin layers to avoid matting)
- Plant trimmings (fresh, non-diseased)
- Manure from herbivores (cow, horse, rabbit, chicken – avoid pet waste)
What are ‘Browns’?
Browns are materials that are rich in carbon. They tend to be dry and provide bulk and airflow to the compost pile. Greens are the fuel, and browns are like the insulation and structure that keep things working. Without enough browns, your compost can become dense, wet, and potentially start to smell bad.
Examples of ‘Browns’:
- Dry leaves
- Shredded newspaper or cardboard (avoid glossy prints)
- Straw or hay
- Wood chips or sawdust (use in moderation)
- Twigs and small branches
- Eggshells (technically a source of calcium, but act like browns structurally)
The Ideal Ratio: A good rule of thumb is to aim for a ratio of about 2 to 3 parts browns to 1 part greens by volume. This can vary, but it’s a great starting point. Don’t stress too much about exact measurements; it’s more about observing your compost pile. If it’s too wet and smelly, add more browns. If it’s dry and not breaking down, add more greens and some water.
Choosing Your Compost Method
Now that you understand the ingredients, let’s talk about the different ways you can actually make compost. The best method for you depends on your space, how much time you have, and how quickly you want finished compost. Here are some of the most popular and effective methods for homeowners and renters:
1. The Open Pile Method
This is probably the simplest and most traditional way to compost. It’s perfect if you have plenty of space in your yard. You simply create a pile of your green and brown materials directly on the ground.
How to do it:
- Choose a Spot: Select a well-drained area in your yard that gets some sun and some shade. It should be convenient to access with your materials.
- Build Your Pile: Start by layering materials. Begin with a base of coarse browns like twigs for airflow, then alternate layers of greens and browns. As you add kitchen scraps (greens), always cover them with a layer of browns to deter pests and prevent odors.
- Maintain It: Aim for that 2-3 parts browns to 1 part greens ratio. Turn the pile occasionally with a pitchfork or shovel – maybe once a week or every couple of weeks. This aerates the pile, speeds up decomposition, and helps everything break down evenly.
- Moisture: The pile should feel like a wrung-out sponge. If it’s too dry, add water. If it’s too wet, add more browns and turn it.
Pros:
- Very easy to set up.
- Can handle large volumes of material.
- No cost for a bin.
Cons:
- Can look messy if not maintained.
- May attract pests if not managed properly.
- Can take longer to break down than contained methods.
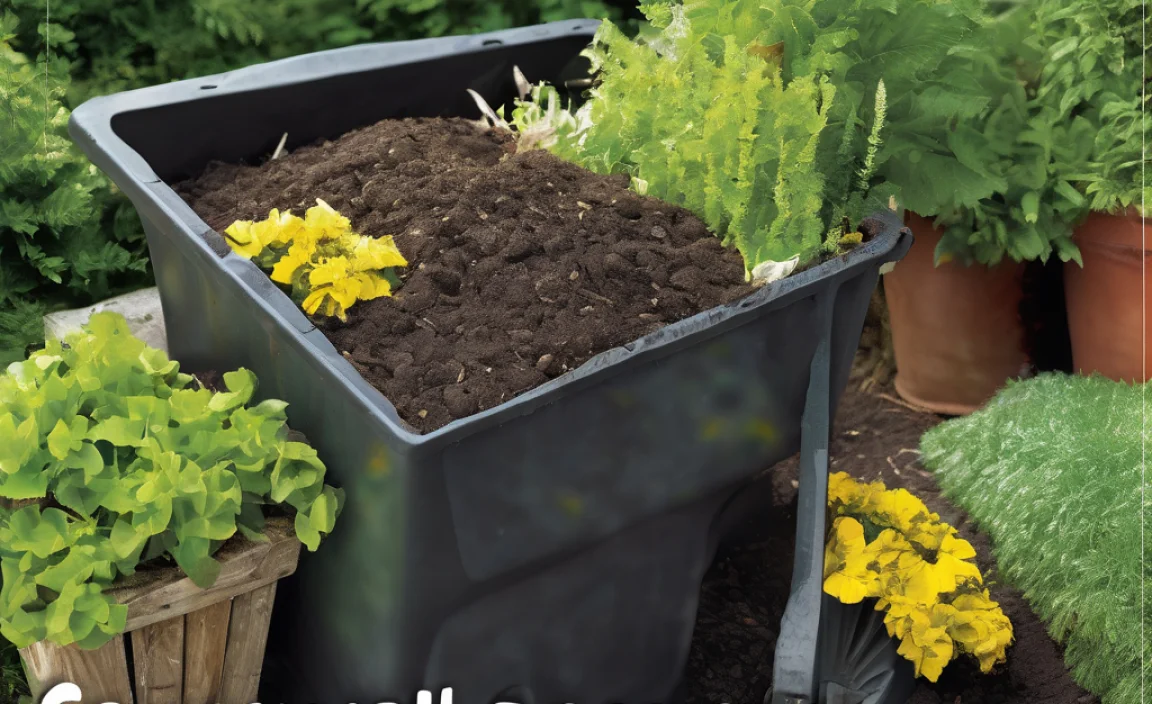
2. The Bin/Tumbler Method
Compost bins and tumblers are great for keeping things tidy and can speed up the composting process. Bins contain the materials, reducing mess and deterring pests. Tumblers are enclosed drums that you can easily spin, making turning the compost effortless.
How to do it (Bin):
- Get a Bin: You can buy plastic compost bins, build one from wood pallets, or even use wire mesh. Many bins have doors at the bottom for easy access to finished compost.
- Layer Materials: Similar to the open pile, start with browns, then alternate greens and browns. Ensure you cover fresh kitchen scraps with browns.
- Aeration: Some bins have built-in aeration holes. If yours doesn’t, you may need to manually turn the contents with a compost aerator tool or a small shovel every week or two.
- Moisture: Check moisture levels regularly and add water or browns as needed.
How to do it (Tumbler):
- Choose a Tumbler: These come in various sizes. Pick one that suits the amount of kitchen and yard waste you generate.
- Fill It Up: Add your greens and browns, again keeping that ratio in mind and covering food scraps. Don’t overfill it; leave some space for tumbling.
- Tumble Regularly: The main advantage here is easy turning. Spin the tumbler a few times every day or every other day. This provides excellent aeration.
- Moisture: Moisture management is crucial in tumblers. Too much water and it gets stagnant; too little and it dries out.
Pros (Bins/Tumblers):
- Neater and more contained than an open pile.
- Often speeds up decomposition due to better heat retention and aeration (especially tumblers).
- Helps deter pests more effectively.
Cons (Bins/Tumblers):
- Can be an upfront cost to purchase or build.
- Capacity might be limited compared to open piles.
- Some tumblers can be heavy to turn when full.
3. The Worm Composting (Vermicomposting) Method
This method uses special composting worms (like Red Wigglers) to break down organic matter. It’s fantastic for people with limited space, like apartment dwellers with balconies, or for anyone who wants to compost exclusively kitchen scraps.
How to do it:
- Get a Worm Bin: You can buy a kit or build your own. It’s usually a shallow, multi-layered container with specific bedding material.
- Prepare Bedding: Worms need a cozy home. Shredded newspaper, cardboard, coconut coir, or peat moss are common bedding materials. Moisten this bedding so it’s like a damp sponge.
- Add Worms: Introduce your Red Wiggler worms to the bedding. They are the stars of the show! You can purchase these online or from local suppliers.
- Feed Your Worms: Start by adding small amounts of kitchen scraps (avoiding meat, dairy, oily foods, and citrus in large quantities). Bury the food scraps in the bedding to avoid odors and pests. Worms eat their weight in food every day, so adjust quantities.
- Harvest: After a few months, the worms will have processed a good portion of the material into nutrient-rich worm castings (vermicompost). You can then easily harvest the castings from the bottom layer of the bin.
Pros:
- Excellent for small spaces.
- Produces incredibly rich compost (worm castings).
- Relatively odorless when managed correctly.
- Can compost year-round indoors.
Cons:
- Requires specific types of worms.
- Cannot handle large volumes of yard waste.
- Needs careful management of temperature and moisture.
- Can be sensitive to overfeeding or the wrong types of food.
For more detailed information on setting up a worm farm, check out resources from university extensions. For instance, the NC State University Extension on Vermicomposting offers great insights.
4. The Trench/In-Ground Method
This is another low-effort, space-saving method that’s great for those who don’t want a visible compost pile or bin. You essentially bury your compostable materials directly in your garden beds.
How to do it:
- Dig a Trench or Hole: Choose a location in your garden. Dig a trench about 2 feet deep and 1 foot wide, or a hole of similar dimensions.
- Add Materials: Fill the trench or hole with your kitchen scraps and yard waste. You can add greens and browns here, but it’s less critical than in a hot compost pile.
- Cover It Up: Bury the materials by backfilling the trench or hole with soil.
- Wait: The materials will decompose slowly underground. You can plant in areas above the trench after a few weeks, or simply let it break down over a few months to a year.
Pros:
- Very simple, no turning or active management required.
- No smell or pests visible.
- Adds nutrients directly to your garden soil.
- Excellent for small spaces or even urban gardens.
Cons:
- Takes longer to break down than active composting methods.
- Not suitable for large volumes of waste.
- You can’t harvest compost to use elsewhere; it fertilizes the spot where it’s buried.
What NOT to Compost
While composting is incredibly forgiving, there are a few things you should keep out of your compost pile to avoid problems like pests, odors, disease transmission, or contamination. It’s better to be safe than sorry!
Here’s a quick list of items to avoid:
- Meat, fish, and bones: These attract rodents and other scavengers and can create strong odors.
- Dairy products: Similar to meat, they attract pests and can smell.
- Oily or greasy foods: These can slow down decomposition and create an anaerobic (smelly) mess.
- Diseased plants: If you compost diseased plants, you risk spreading the disease back into your garden.
- Weeds that have gone to seed: The seeds might survive the composting process and sprout in your garden.
- Pet waste (dog and cat feces): These can contain pathogens that are harmful to humans.
- Treated wood or coal ash: These can contain harmful chemicals.
- Synthetic materials: Only compost organic matter.
- Inorganic materials: Rocks, metal, glass will not decompose.
Troubleshooting Common Composting Problems
Even with the best intentions, sometimes your compost pile might act up. Don’t get discouraged! Most issues have simple solutions. Here are a few common problems and how to fix them:
Problem: My compost pile smells bad (like rotten eggs or ammonia).
Cause: Too much nitrogen (too many greens) or not enough airflow, leading to anaerobic conditions.
Solution: Add more brown materials (dry leaves, shredded cardboard) and turn the pile thoroughly to incorporate air. If it’s very wet, add more browns and spread it out a bit.
Problem: My compost pile is not heating up or breaking down.
Cause: Not enough nitrogen (too many browns), too dry, or the pile is too small.
Solution: Add more green materials (kitchen scraps, grass clippings), a shovel-full of finished compost or garden soil to introduce microbes, OR add water if it’s dry. Make sure your pile is at least 3 feet x 3 feet x 3 feet for most active methods to generate heat.
Problem: My compost pile is attracting pests (flies, rodents).
Cause: Exposed food scraps, or inappropriate items being added.
Solution: Always bury kitchen scraps deep within the pile and cover them with a layer of brown material. Ensure you are not adding meat, dairy, or oily foods. If pests persist, consider a more enclosed bin or tumbler system.
Problem: My compost is too wet and soggy.
Cause: Too many greens, too much rain, or poor drainage.
Solution: Add a generous amount of brown materials to soak up excess moisture. Turn the pile to help with aeration. If it’s in an uncovered bin, try to shield it from heavy rain.
Problem: My compost is too dry.
Cause: Not enough moisture added, too many browns, or hot, dry weather.
Solution: Sprinkle water into the pile while turning it. Aim for the consistency of a wrung-out sponge. Add more green materials, which have higher moisture content.
It’s also helpful to remember that composting is a natural process, and a little bit of trial and error is normal. The key is to observe your pile and adjust as needed.
Tables: A Quick Comparison of Compost Methods

I am passionate about home engineering. I specialize in designing, installing, and maintaining heating, ventilation, and air conditioning systems. My goal is to help people stay comfortable in their homes all year long.