Hey there, gardeners! Ever marvel at how something as simple as food scraps can transform into rich, dark soil that makes your plants sing? It’s not magic; it’s a tiny, bustling world of compost microbes right in your backyard, working hard to create garden gold.
Many folks think composting is complicated, but understanding these microscopic helpers is the key to unlocking your garden’s true potential. Let’s dive into the fascinating world of compost microbes across the USA and see how they can give your garden an amazing boost. Get ready to turn trash into treasure – your plants will thank you!
Compost Microbes in the USA: Your Garden’s Secret Heroes
When you think about your garden, you probably picture colorful blooms and lush vegetables. But beneath the surface, an incredible, invisible army is hard at work: compost microbes. These tiny organisms are the unsung heroes of composting, breaking down organic matter and enriching your soil. In the USA, we have a fantastic diversity of these microbes, all ready to lend a hand to your garden. Think of them as nature’s recyclers, turning kitchen scraps and yard waste into a nutrient-rich superpower for your plants.
As Troy D Harn of TopChooser, I believe that understanding these natural processes makes gardening more rewarding and, frankly, a lot easier. You don’t need fancy equipment or a PhD in microbiology to harness the power of compost microbes. All you need is a little know-how, and that’s exactly what we’ll cover. We’ll demystyify these microscopic marvels and show you how to encourage them to thrive, no matter where you are in the USA. So, let’s get started on making your soil the best it can be!
What Exactly Are Compost Microbes?
Before we get too deep, let’s get a handle on what these “compost microbes” actually are. In simple terms, they are the minuscule living things that break down dead plant and animal material. The main players fall into a few categories:
- Bacteria: These are the most abundant microbes in compost. They are the workhorses, kicking off the decomposition process, especially in the early, hotter stages of composting. They love nitrogen-rich materials (your greens!).
- Fungi: Think of mushrooms and yeasts. Fungi are excellent at breaking down tougher materials that bacteria struggle with, like woody materials (your browns). They are super important for creating that crumbly texture in finished compost.
- Actinomycetes: These are a type of bacteria that look a bit like fungi. They are also brilliant at breaking down tough organic matter and are responsible for that wonderful, earthy smell of healthy compost.
- Protozoa and Other Micro-animals: While not technically microbes (they are larger single-celled organisms), they play a vital role too. They eat bacteria and fungi, helping to regulate populations and further break down materials.
These organisms work together in a fantastic ecosystem. When you create the right conditions – moisture, air, and the right mix of food scraps (greens) and carbon-rich materials (browns) – you create a paradise for them. This is the essence of successful composting anywhere in the USA.
Why Are Compost Microbes So Important for Your Garden?
So, why all the fuss about these tiny critterS? Because they are absolutely essential for creating healthy, fertile soil. Here’s how they give your garden a massive boost:
- Nutrient Cycling: Microbes break down complex organic matter into simpler forms that plants can actually absorb. This releases vital nutrients like nitrogen, phosphorus, and potassium directly into the soil.
- Improved Soil Structure: As microbes break down materials, they create stable compounds called humus. Humus is like a sponge, helping soil retain moisture and air, and preventing compaction. This makes your soil easier to work with and better for plant roots.
- Disease Suppression: A healthy population of compost microbes can outcompete harmful pathogens in the soil, giving your plants a better chance to thrive and resist diseases.
- Water Retention: Rich, compost-amended soil acts like a sponge, holding onto water more effectively. This means you’ll need to water your garden less often, which is a huge win for busy gardeners and during dry spells.
- Reduced Need for Chemical Fertilizers: By creating your own nutrient-rich compost, you can significantly reduce or even eliminate the need for synthetic fertilizers, saving you money and creating a more environmentally friendly garden.
Essentially, when your compost is teeming with active microbes, you’re creating a living soil that supports vigorous plant growth. It’s a win-win for your garden and the environment.
Creating a Microbe Motel: The Art and Science of Composting
The good news is that getting these microbes to do their thing is surprisingly straightforward. Composting is all about providing the right environment for them to multiply and work. Think of it as building a cozy hotel for your microscopic helpers.
The key to a thriving compost pile is balance. Microbes need a few things to survive and do their best work:
- Food: A mix of nitrogen-rich “greens” and carbon-rich “browns.”
- Water: They need moisture, but not too much.
- Air: They need oxygen to breathe.
- Temperature: Ideal temperatures encourage rapid breakdown.
The Green and Brown Balance: What to Compost
This is perhaps the most crucial aspect of composting. The ratio of “greens” to “browns” is vital for feeding your microbial army. A good starting point is roughly 2 parts browns to 1 part greens by volume. Here’s a breakdown:
Greens (Nitrogen-Rich): These materials are often wet and provide protein for the microbes.
- Fruit and vegetable scraps (peels, cores, wilted lettuce)
- Coffee grounds and tea bags
- Grass clippings (in thin layers to avoid matting)
- Plant trimmings and spent flowers
Browns (Carbon-Rich): These materials are drier and provide energy for the microbes.
- Dry leaves
- Shredded newspaper and cardboard (avoid glossy paper)
- Straw and hay
- Small twigs and wood chips
- Sawdust (use sparingly)
What to Avoid (Generally):
- Meat, dairy, and oily foods (can attract pests and create odors)
- Diseased plants (can spread disease)
- Weeds that have gone to seed (can sprout in your garden)
- Pet waste (can contain harmful pathogens)
- Chemically treated wood or yard waste
Making compost is a cycle. By composting, you’re diverting waste from landfills and creating a valuable soil amendment. According to the U.S. Environmental Protection Agency (EPA), composting is a great way to reduce household waste and produce nutrient-rich material for your garden, reducing the need for chemical fertilizers.
Getting the Moisture Just Right
Microbes need water to live and multiply. Your compost pile should feel like a wrung-out sponge – damp, but not soaking wet. If it’s too dry, decomposition slows to a crawl. If it’s too wet, it can become anaerobic (lacking oxygen), leading to foul odors and a less efficient process.
Tip: If your pile is too dry, add water and mix it in. If it’s too wet, add more dry brown materials and turn the pile to help it dry out.
Airflow is Key: The Oxygen Requirement
Just like us, most of the beneficial microbes in compost need oxygen to survive. This is why turning your compost pile regularly is so important. Turning introduces air, prevents compaction, and helps speed up the decomposition process. It also helps distribute moisture and heat.
You can turn your compost with a pitchfork or a compost aerator tool. For simpler systems, like tumblers, the turning is built-in. Aim to turn your pile every one to two weeks, especially during the active composting phase.
Managing Temperature for Supercharged Microbes
As microbes work, they generate heat. A hot compost pile (130-160°F or 54-71°C) is a sign of a healthy, active microbial population. High temperatures help kill weed seeds and pathogens, producing a more sterile and beneficial compost. This “thermophilic” stage is where rapid decomposition happens.
The heat comes from the microbial activity breaking down the nitrogen-rich “greens.” If your pile isn’t heating up, it usually means it needs more greens, more moisture, or it needs to be turned to introduce oxygen.
DIY Composters: Building a Microbe Home in Your Yard
You don’t need to buy fancy bins to start composting. Many effective composters can be made or bought affordably. Here are a few popular options for your composting journey across the USA:
1. Simple Piles/Bins
This is the easiest and cheapest option. You can simply create a large pile in a corner of your yard. For a neater appearance and to help keep moisture in, you can build a simple bin using materials like:
- Wooden pallets (often free from businesses)
- Wire mesh or chicken wire
- Concrete blocks
How-to:
- Choose a location: Select a level, well-drained spot that gets some sun (but not scorching all day) and is conveniently located.
- Build your enclosure: If using pallets, simply stand them up on end and wire or screw them together to form a three-sided or four-sided bin. For wire mesh, create a cylinder and secure the ends.
- Start adding materials: Begin layering your greens and browns.
Pros: Very affordable, easy to build, can accommodate large volumes of material.
Cons: Can look untidy, might attract pests if not managed well, requires manual turning.
2. Compost Tumblers
These are enclosed barrels mounted on a stand, allowing you to rotate or “tumble” the compost. They are usually made of durable plastic.
How-to: Purchase a compost tumbler from a garden center or online. Follow the manufacturer’s instructions for assembly and filling. Add your greens and browns, then simply turn or “tumble” the drum every few days.
Pros: Tends to compost faster due to easy aeration and heat retention, keeps pests out effectively, neat appearance, less manual labor for turning.
Cons: More expensive upfront, limited capacity, can sometimes become too wet if not managed correctly or too compact if not tumbled often.
3. Stationary Bins (Plastic or Wood)
These are pre-made bins, often found at garden centers, that sit in one place. They are usually made of plastic with ventilation holes or wood. Some have access doors at the bottom for removing finished compost.
How-to: Purchase the bin and assemble it according to instructions. Add your materials and turn them with a pitchfork or compost aerator when needed. You can access finished compost from the bottom.
Pros: Neater than a simple pile, good for smaller yards, keeps pests out better than open piles.
Cons: Can be more expensive than DIY options, requires manual turning, may not heat up as quickly as tumblers or well-managed open piles.
Choosing Your Composter Type
The best composter for you depends on your space, budget, how much time you want to spend, and how quickly you want compost. For beginners in the USA, a simple bin or even just a well-managed pile is a fantastic start. If you have more budget and want speed and fewer pests, a tumbler might be worth the investment.
A helpful resource for composting methods and bin designs can be found on university extension websites. For example, the University of New Hampshire Extension offers detailed guides on home composting.
Troubleshooting Your Compost: When Microbes Get Grumpy
Even with the best intentions, sometimes your compost pile might act up. Don’t get discouraged; these are common issues that are usually easy to fix. It often means your microbial friends are trying to tell you something!
Issue: Foul Odors (Rotten Egg or Ammonia Smell)
Cause: This usually means your pile is too wet and/or lacks oxygen (anaerobic conditions). The rotten egg smell comes from sulfur compounds, and ammonia indicates too much nitrogen and not enough carbon.
Solution:
- Add Browns: Mix in plenty of dry, carbon-rich materials like shredded newspaper, leaves, or sawdust.
- Turn the Pile: Aerate the pile by turning it thoroughly with a pitchfork or aerator.
- Check Moisture: Ensure it’s not waterlogged. If too wet, add dry browns and turn.
Issue: Pile Isn’t Heating Up
Cause: Lack of nitrogen, insufficient moisture, or not enough volume. Microbes need food and hydration to generate heat.
Solution:
- Add Greens: Mix in more nitrogen-rich materials like kitchen scraps or grass clippings.
- Add Moisture: Water the pile if it feels dry.
- Build it Bigger: Compost piles need a certain mass to generate and retain heat. If it’s too small, you might need to add more materials.
- Turn it: Sometimes, turning the pile can help create better aeration and conditions for heating.
Issue: Pests (Rodents, Flies)
Cause: Usually attracted by exposed food scraps or meat/dairy products accidentally added.
Solution:
- Bury Food Scraps: Always cover fresh kitchen scraps with a layer of brown material.
- Avoid Problematic Items: Do not add meat, dairy, oily foods, or pet waste.
- Use a Closed Bin: A compost tumbler or a bin with a lid and screened bottom can deter pests effectively.
- Maintain Aeration: A healthy, active compost pile that heats up correctly is less attractive to pests.
Issue: Slow Decomposition
Cause: Pile is too dry, lacks nitrogen, is too cold, or materials are too large.
Solution:
- Add Moisture: Water if dry.
- Add Greens: Add nitrogen-rich materials.
- Chop Materials: Smaller pieces break down faster.
- Turn the Pile: Introduce air and mix materials.
- Insulate: In colder months, cover the pile with a tarp or more browns to retain warmth.
Remember, composting is a natural process. A little observation and adjustment go a long way. Your microbial partners will thank you!
The Science of Speedy Composting: Tips & Tricks
While nature takes its course, you can certainly give your compost microbes a nudge to speed things up. The goal is to create the optimal environment for them to work their magic.
1. Chop It Up!
Microbes can only work on surfaces. The smaller the pieces of organic matter, the more surface area is available for them to colonize and break down. Take a few extra seconds to:
- Shred your paper and cardboard.
- Chop up larger kitchen scraps (like melon rinds or broccoli stalks).
- Break up clumps of grass clippings.
This makes it much easier for bacteria and fungi to get to work.
2. Layering Matters
When building your compost pile, try to alternate layers of greens and browns. Don’t just dump all your grass clippings in one go – they’ll matt together and go anaerobic. Instead, add a layer of greens, then cover with browns, then more greens, and so on. This naturally helps with aeration and moisture balance.
3. Activating Your Compost
If you’re starting a new pile or want to give an older one a boost, consider using a compost starter. These products are usually a blend of beneficial microbes and nutrients that can kickstart the decomposition process. You can find these at garden centers or online. Alternatively, adding a shovel-full of finished compost from a friend or a healthy garden soil can introduce a good population of active microbes.
Gardening Know How offers insights into compost accelerators, explaining how they can help.
4. The Power of Turning
As mentioned before, regular turning is key. Aim for every 1-2 weeks during the active phase. This introduces oxygen, mixes materials, distributes moisture, and helps the pile heat up. A compost aerator tool is excellent for this, as it can reach deep into the pile without completely dismantling it.
5. Location, Location, Location
The placement of your compost bin can influence its performance:
- Sunlight: A spot that gets some sun can help warm the pile, especially in cooler climates. Too much intense sun can dry it out quickly, though.
- Drainage: Ensure the area drains well so water doesn’t pool around the base.
- Convenience: If it’s too far from your kitchen or garden, you’re less likely to use it.
When is Compost Ready?
Finished compost should be dark, crumbly, and smell earthy – like a forest floor after rain. You shouldn’t be able to recognize the original materials you put in. It typically takes anywhere from 3-12 months, depending on your method, materials, and how actively you manage it.
Compost Microbes Across the USA: Regional Considerations
While the fundamental principles of composting are the same everywhere, certain environmental factors in different regions of the USA might influence your compost pile.
Hot & Humid Climates (e.g., Florida, Texas, Gulf Coast)
Challenges: Quick drying out, potential for odor if decomposition becomes anaerobic due to excess moisture, attracting insects.
Tips:
- Use a tumbler or bin that offers better pest control and moisture retention.
- Ensure good airflow; don’t let the pile get waterlogged.
- Bury food scraps well under browns.
- Be extra diligent with the green-to-brown ratio to avoid odors. Consider adding fins or aeration tubes.
Dry & Arid Climates (e.g., Southwest USA)
Challenges: Compost drying out very quickly, slowing down microbial activity.
Tips:
- Choose a location with some shade to minimize sun exposure.
- Use a compost bin that retains moisture better, or cover your open pile.
- Water the pile more frequently, checking dampness daily.
- Add moisture-retaining materials like shredded newspaper or coir.
Cold Climates (e.g., Northeast, Midwest, Mountainous Regions)
Challenges: Slower decomposition rates in winter, materials may not break down quickly.
Tips:
- Start your compost early in the spring.
- Continue adding materials throughout the warmer months.
- Consider insulating your bin with straw bales or a tarp during winter to retain any residual heat.
- While active hot composting might halt in winter, the microbes will remain dormant and reawaken when temperatures rise.
- Keep adding materials to smaller bins in winter; they might still break down slowly.
Temperate Climates (e.g., Pacific Northwest, many Mid-Atlantic areas)
Challenges: Generally ideal, but can encounter periods of excessive rain or dry spells.
Tips:
- Follow the basic principles of a balanced green/brown ratio, moisture, and aeration.
- Monitor moisture levels, adding browns if too wet during rainy spells and watering if dry during heat waves.
- You’re likely to have the most consistent success here without major adjustments.
Regardless of your region, understanding the needs of your compost microbes – food, water, air, and temperature – will lead to great compost. A great resource for understanding composting specific to your area can often be found through your local Cooperative Extension office.
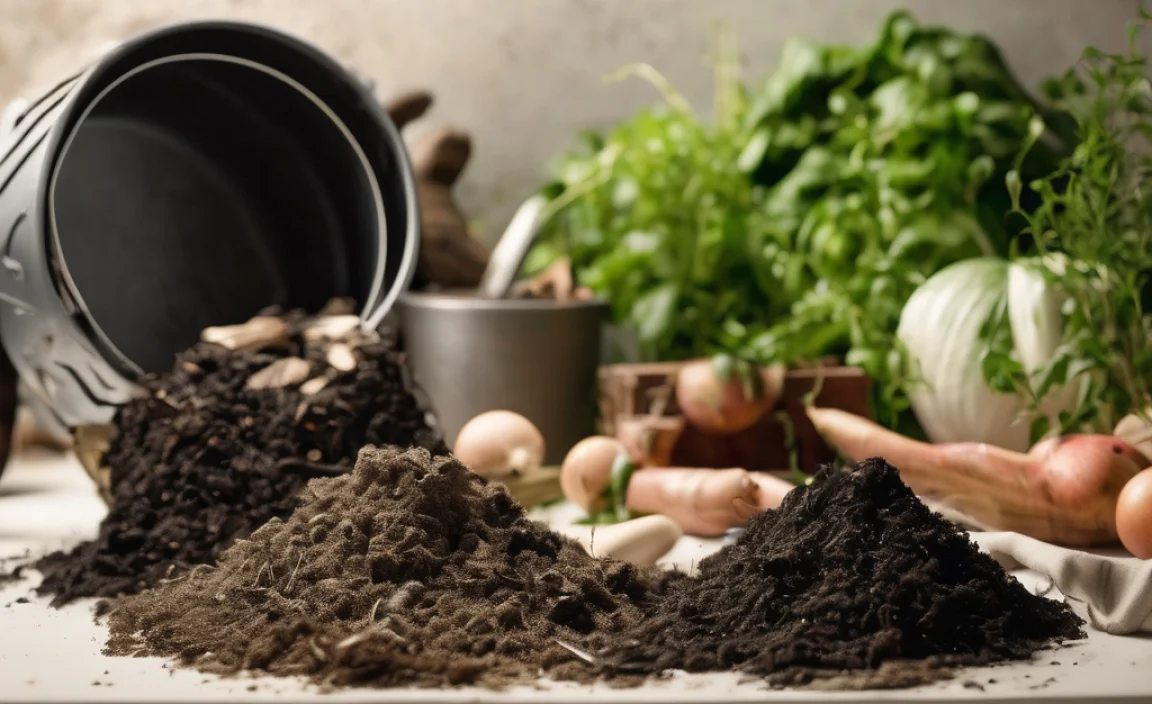
Using Your ‘Black Gold’: How to Apply Compost
Once your compost is ready, it’s time to reap the rewards! This nutrient-rich, microbe-laden material is often called “black gold” for good reason. Here’s how to use it in your garden:
As a Soil Amendment
This is the most common and perhaps the most beneficial way to use compost. Mix it into your garden beds before planting.
How-to:
- For new beds: Spread a layer of compost 2-4 inches deep over the entire bed.
- Gently work it into the top 6-8 inches of soil using a shovel or garden fork.
- For existing beds: You can top-dress beds by spreading a 1-2 inch layer around plants or over the soil surface.
Benefits: Improves soil structure, water retention, and provides slow-release nutrients.
As a Top Dressing
Apply a layer of compost around existing plants, shrubs, and trees. This provides a slow, steady stream of nutrients and moisture during the growing season.
How-to: Spread a 1-2 inch layer of compost around the base of plants, keeping it a few inches away from the stems to prevent rot or disease.
Benefits: Suppresses weeds, conserves moisture, and feeds plants.
In Planting Holes
When planting seedlings or transplants, adding a handful of compost to the planting hole can give them a great start.
How-to: Mix compost with the soil you excavate from the hole before backfilling around the plant’s roots.
Benefits: Provides immediate nutrients and encourages root development.
For Starting Seeds
A fine, sifted compost can be mixed with other materials (like perlite or vermiculite) to create a nutrient-rich seed-starting mix.
How-to: You can use pure compost if it’s very fine and well-aged, or mix it 1:1 with potting soil or coir. Ensure it’s free of large particles that can hinder tiny seedlings.
Benefits: Provides a balanced start for young plants.
Compost Tea
This is a liquid fertilizer made by steeping finished compost in water, often with the addition of air to encourage microbial life.
How-to: Place compost in a porous bag (like a burlap sack) and suspend it in a bucket of water. Aerate with an aquarium pump for 24-48 hours. Strain and use to water plants or as a foliar spray.
Benefits: Quickly delivers nutrients and beneficial microbes directly to plants and soil.
Using compost consistently will build healthier soil over time, making your garden more resilient and productive. It’s the most natural and effective way to boost your garden’s vitality!
Quick Summary: Compost Microbes & Your Garden
Compost microbes are the unsung heroes that transform kitchen scraps and yard waste into valuable garden gold. These tiny organisms—bacteria, fungi, and more—break down organic matter, releasing essential nutrients and improving soil structure. By providing them with the right balance of “greens” (nitrogen-rich) and “browns” (carbon-rich), adequate moisture, and plenty of air, you create an ideal environment for them to thrive. Whether you use a simple pile, a bin, or a tumbler, active composting leads to healthier plants, better water retention, and reduced need for fertilizers. Understanding regional differences in the USA can help you optimize your composting efforts. Ready to boost your garden the natural way?
Conclusion
Unlocking the power of compost microbes is one of the most effective and satisfying ways to enhance your garden’s health and productivity. By understanding what these tiny organisms need—a balanced diet of greens and browns, the right amount of moisture, and plenty of air—you can transform kitchen scraps and yard waste into nutrient-rich “black gold.” Don’t be intimidated by the microscopic world; it’s accessible to everyone, regardless of your gardening experience or location in the USA.
Whether you manage a sprawling backyard or a small balcony garden, a well-managed compost pile is an investment that pays dividends in vibrant flowers, bountiful vegetables, and healthier soil for years to come. So, get started, experiment, and watch your garden thrive thanks to the tireless work of your compost microbe allies!
Frequently Asked Questions (FAQ)
Question: What are the main types of compost microbes?
Answer: The primary compost microbes are bacteria, fungi, and actinomycetes. Bacteria are the fastest decomposers, fungi handle tougher materials, and actinomycetes contribute to the earthy smell.
Question: How can I tell if my compost has enough microbes?
Answer: A healthy, active compost pile will heat up (often reaching 130-160°F), show signs of decomposition, and have a pleasant, earthy smell. If it’s cold, smelly, or not breaking down, microbial activity might be low.
Question: Do I need to buy compost microbes to start my pile?
Answer: No, you don’t need to buy them! Microbes are naturally present in soil, on plant materials, and in the air. Simply adding organic matter with some moisture and air will attract and grow your own microbial population. You can speed things up with a shovel of finished compost.
Question: Can I compost in the winter in the USA?
Answer: Yes, you can continue adding materials, but decomposition will slow down significantly in very cold temperatures. The microbes become dormant rather than dying. You can insulate your bin or keep adding materials to your heap. Active hot composting typically resumes in spring.
Question: What does it mean if my compost smells like ammonia or rotten eggs?
Answer: Ammonia smell usually means there’s too much nitrogen (greens) and not enough carbon (browns). Rotten egg smell indicates anaerobic conditions (lack of oxygen), often because the pile is too wet or compacted. Turn the pile and add more brown materials.
Question: How do compost microbes benefit my plants directly?
Answer: Compost microbes break down nutrients in organic matter into forms plants can absorb. They also improve soil structure, help plants access water and nutrients, and can even help suppress soil-borne diseases, leading to healthier, more vigorous plant growth.

I am passionate about home engineering. I specialize in designing, installing, and maintaining heating, ventilation, and air conditioning systems. My goal is to help people stay comfortable in their homes all year long.