Compost Pile Mistakes: Essential Fixes

So, you’ve started a compost pile, which is awesome! But maybe it’s not quite smelling like a forest floor and more like… well, something less pleasant. Don’t worry, we’ve all been there. Composting is a natural process, and sometimes nature needs a little friendly guidance. It’s easy to make a few small slips when you’re just getting started. This guide will walk you through common compost pile mistakes and, more importantly, how to easily fix them. Let’s turn those composting oopsies into triumphs!

Common Compost Pile Mistakes and How to Easily Fix Them

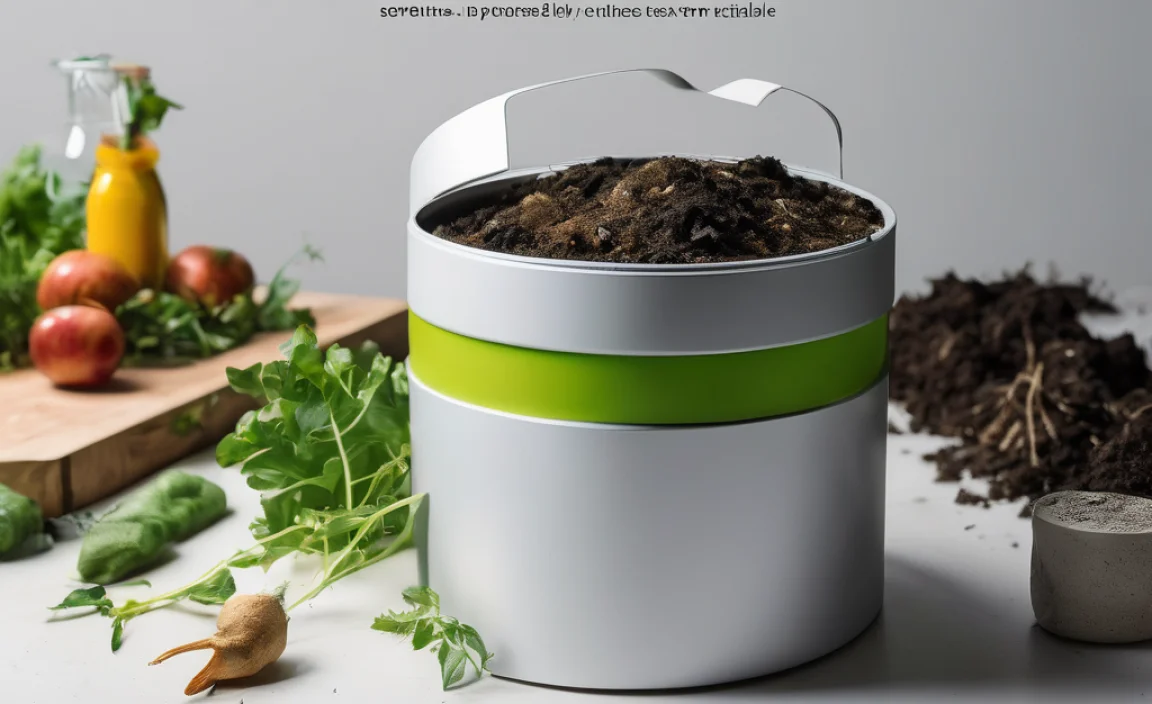
Starting a compost pile is a fantastic way to reduce kitchen scraps and yard waste while creating nutrient-rich “black gold” for your garden. But sometimes, things don’t go quite as planned. You might end up with a stinky mess, a pile that just won’t break down, or one that attracts unwanted guests. The good news is, most compost pile mistakes are super simple to fix. Let’s dive into the most common blunders and how to turn them around, so you can get back to making that amazing compost!

Mistake 1: The Smelly Pile – Too Much of a Bad Thing (or Not Enough Air!)

This is probably the most common and off-putting compost pile mistake. A stinky compost pile (think rotten eggs or ammonia) usually means one of two things: either you’ve packed it too tightly with too many “greens” (like food scraps and grass clippings) or it’s not getting enough air.

Why it Happens:

  • Anaerobic Decomposition: When organic matter breaks down without enough oxygen, it enters what’s called anaerobic decomposition. This process produces stinky gases like hydrogen sulfide (rotten egg smell) and ammonia.
  • Too Many “Greens”: “Greens” are nitrogen-rich materials (food scraps, grass clippings, coffee grounds). While essential for a healthy pile, too many without enough “browns” (carbon-rich materials) can create a dense, wet mat that suffocates the beneficial microbes.

How to Fix It:

Don’t panic! A smelly pile is usually salvageable.

  1. Aerate Your Pile: Grab a pitchfork or a compost aerator tool and turn the pile thoroughly. Aim to mix the outer layers into the center and vice versa. This introduces oxygen and helps dry things out a bit. You might need to do this every few days until the smell dissipates.
  2. Add “Browns”: If your pile looks or feels too wet and slimy, it’s time to add more carbon-rich “brown” materials. Think dry leaves, shredded cardboard (uncoated), straw, or sawdust. These materials don’t just balance the nitrogen from the greens; they also add air pockets, improving aeration. Aim for a ratio of roughly 2-3 parts browns to 1 part greens.
  3. Chop it Up: If you’ve been adding large items, they can mat together and reduce airflow. Breaking down your ingredients into smaller pieces speeds up decomposition and helps prevent these dense patches.

Mistake 2: The Slow-Moving Pile – Nothing’s Happening!

You’ve diligently added your kitchen scraps and yard waste, but weeks (or months!) later, your compost pile looks pretty much the same. Where’s the magic? This sluggishness often stems from an imbalance in the pile’s ingredients, lack of moisture, or insufficient aeration.

Why it Happens:

  • Too Many “Browns”: While browns are essential, an excess of carbon-rich materials without enough nitrogen can slow down microbial activity. Think of it like throwing gas on a fire, but forgetting the igniter.
  • Too Dry: Compost microbes need moisture to thrive. A dry pile is a dormant pile.
  • Lack of “Activators”: Sometimes, a pile needs a little nudge to get going. These are nitrogen-rich materials that provide the fuel for decomposition.
  • Large Material Size: Big chunks take a lot longer to break down than small ones.

How to Fix It:

Give your compost pile a boost!

  1. Add Nitrogen (“Greens”): If your pile is mostly dry leaves and twigs, it needs more “greens.” Toss in some fresh kitchen scraps (fruit and vegetable peels, coffee grounds, tea bags), fresh grass clippings, or even a bit of manure if you have access to it.
  2. Water It: The ideal moisture level for a compost pile is like a wrung-out sponge – damp but not dripping. If your pile feels dry, water it thoroughly while turning. Be careful not to overwater, as this can lead to Mistake 1!
  3. Turn It: Aerating your pile doesn’t just fix smells; it also redistributes moisture and activates dormant areas.
  4. Chop Materials: Before adding new items, or when turning, try to break down larger pieces into smaller ones. This dramatically increases the surface area for microbes to work on.

Mistake 3: The Uninvited Guests – Pests and Critters

A compost pile shouldn’t be an all-you-can-eat buffet for rodents, flies, or other unwanted visitors. If your pile is attracting more attention than you’d like, it’s likely due to what you’re putting in it or how you’re managing it.

Why it Happens:

  • Meat, Dairy, and Oily Foods: These items are highly attractive to pests and can also lead to foul odors, creating a real draw for critters.
  • Exposed Food Scraps: If fresh food scraps are left visible on the surface of the pile, they become an easy target for flies and other insects.
  • Improper Bin Design: Open bins or piles without barriers can be easy access for larger animals.

How to Fix It:

Make your compost pile less appealing to pests.

  1. Avoid Pungent Items: Steer clear of meat, fish, bones, dairy products, and greases. Generally, compost is for plant-based materials. Check out resources from your local EPA for a comprehensive list of what to compost.
  2. Bury Food Scraps: Always cover fresh kitchen scraps with a layer of “browns” (leaves, shredded paper, sawdust). This hides the food and helps to absorb odors.
  3. Use a Contained System: Consider using a compost bin with a lid. Tumbler composters are also excellent for keeping pests out effectively.
  4. Maintain the Pile: Keep your pile moist (but not too wet) and turn it regularly. A well-managed, actively composting pile generates heat that can deter some pests. A quick tip: if you notice a lot of fruit flies, it’s often a sign the pile is too wet or has too many exposed greens.

Mistake 4: The Wet & Soggy Mess – Too Much Moisture

We touched on this with the smelly pile, but excess moisture deserves its own spotlight. A soggy compost pile is unpleasant to work with, can lead to anaerobic conditions (and those dreaded smells), and significantly slows down the decomposition process.

Why it Happens:

  • Too Many “Greens”: High-nitrogen materials often contain a lot of water.
  • Rain or Overwatering: Compost bins without adequate drainage or piles left uncovered during heavy rain can become waterlogged.
  • Lack of “Browns”: The carbon-rich brown materials act like sponges, absorbing excess moisture and improving airflow.

How to Fix It:

Dry it out and balance it up!

  1. Add Dry “Browns”: This is your primary weapon against a soggy pile. Stir in generous amounts of dry leaves, straw, shredded cardboard, or sawdust. These materials will soak up excess water and add air pockets.
  2. Turn More Frequently: Aerating the pile helps trapped moisture to evaporate.
  3. Cover Your Pile: If you get a lot of rain, consider using a tarp or a compost bin with a lid to prevent it from becoming saturated. Ensure there’s still some airflow, though!
  4. Improve Drainage: If your bin sits directly on a solid surface, consider elevating it slightly or ensuring there are plenty of drainage holes at the bottom.

Mistake 5: The Dry & Dusty Pile – Not Enough Moisture

On the flip side, a compost pile that’s too dry simply won’t break down. The microorganisms responsible for composting need moisture to live and work. A dry pile might feel light and crumbly, with little signs of decomposition.

Why it Happens:

  • Too Many “Browns”: A pile dominated by dry materials like leaves or shredded paper will lack moisture.
  • Hot, Dry Weather: In arid climates or during heatwaves, piles can dry out quickly.
  • Poor Location: A compost pile located in direct, scorching sun with no shade can lose moisture rapidly.
  • Lack of Cover: Wind can also dry out the surface layers of a compost pile.

How to Fix It:

Hydrate and activate!

  1. Water Thoroughly: This is the most direct fix. Use a hose with a spray nozzle or a watering can to moisten the pile. Water it deeply as you turn it, aiming for that “wrung-out sponge” consistency throughout.
  2. Add “Greens”: Introduce more moisture-rich nitrogen materials. Food scraps, fresh grass clippings, or even a sprinkle of aged manure can help.
  3. Turn Regularly: Turning the pile helps distribute the moisture evenly.
  4. Consider Location: If possible, move your compost pile to a spot that gets some shade during the hottest part of the day.
  5. Cover Loosely: A loose cover or tarp can help retain moisture in very dry conditions, but make sure air can still circulate.

Mistake 6: The “What Can I Compost Anyway?” Confusion

Sometimes, the biggest mistake is simply not knowing what goes in the compost bin! Using the wrong materials can lead to smells, pests, or simply a pile that won’t break down effectively.

What to Compost (The “Greens” and “Browns”):

A healthy compost pile is a balanced mix of “greens” (nitrogen-rich) and “browns” (carbon-rich). Aim for a ratio of about 2-3 parts browns to 1 part greens by volume.

Greens (Nitrogen-Rich – Moist) Browns (Carbon-Rich – Dry)
Fruit and vegetable scraps Dry leaves
Coffee grounds and filters Shredded newspaper (non-glossy)
Tea bags Shredded cardboard (uncoated)
Fresh grass clippings Straw or hay
Plant trimmings (non-diseased) Wood chips or sawdust (use sparingly)
Eggshells (crushed) Paper towels (printed with soy-based ink)
Manure (from herbivores like chickens, cows, horses) Dried pine needles (use sparingly, can be acidic)

What to AVOID Composting:

  • Meat, fish, bones, and dairy products (attract pests, cause odors)
  • Oily or greasy foods (attract pests, cause odors)
  • Diseased plants (can spread disease back to your garden)
  • Weeds that have gone to seed (can spread weeds)
  • Treated wood or sawdust (can contain harmful chemicals)
  • Pet waste (from dogs and cats – can contain pathogens; herbivore manure like rabbit or chicken is fine)
  • Coal ash or charcoal briquette ash (can contain harmful chemicals)
  • Glossy or coated paper/cardboard (often contains plastics or chemicals)
  • Synthetic materials (plastics, polyester, etc.)

Mistake 7: Not Turning Your Compost Pile Enough (or Too Much!)

The balance of turning your compost pile is key. Too little turning means poor air circulation and slow decomposition. Too much aggressive turning can sometimes dry out the pile too quickly or disturb the beneficial microbial communities.

Why it Happens:

  • Forgetfulness or Laziness: Life gets busy! It’s easy to forget to turn the pile.
  • Over-Enthusiasm: You might think more turning equals faster compost, but sometimes nature needs a little quiet time.
  • Using the Wrong Tools: A heavy, packed pile can be intimidating to turn, leading to avoidance.

How to Fix It:

Find your rhythm!

  1. The Sweet Spot: A good rule of thumb for most backyard compost piles is to turn them every 2-4 weeks. If you’re aiming for faster compost (hot composting), you might turn more often, perhaps every 1-2 weeks, especially when the pile is actively heating up. For a more passive approach (cold composting), turning less frequently is fine, but decomposition will take longer.
  2. Observe Your Pile: The best indicator is your pile itself. If it’s smelling, it likely needs turning and aeration. If it’s not breaking down, turning can help introduce new materials and oxygen. If it’s dry, turn it while watering.
  3. Use the Right Tools: A sturdy garden fork or a dedicated compost aerator makes turning much easier. For smaller bins, even a garden trowel can work.
  4. Focus on Aeration: The primary goal of turning is to introduce oxygen. Imagine you’re fluffing a pillow; you want to break up compacted areas and mix the materials.

Mistake 8: The Immobile Pile – Not Building It Effectively

You might have a good pile of materials, but if they’re just sitting there without a proper structure or airflow, decomposition will be slow. Building your pile correctly from the start sets it up for success.

Why it Happens:

  • Just Piling Materials: Simply dumping greens and browns on top of each other without mixing or layering.
  • Lack of Base: Not starting with a good base of coarse browns for drainage and airflow.
  • Materials Too Fine: Piling up only very fine materials can lead to compaction and poor airflow.

How to Fix It:

Layer and mix for better results!

  1. Start with a Base: Begin any new compost pile or bin with a layer of coarse “browns” (like small twigs, straw, or wood chips). This helps with drainage and air circulation from the bottom up.
  2. Layer Greens and Browns: When adding fresh materials, alternate layers of “greens” and “browns.” A common practice is to have a layer of browns, then greens, then browns, and so on. This ensures a good mix from the outset.
  3. Mix as You Go: Instead of just dumping, mix your new materials into the existing pile somewhat. This helps introduce new ingredients to the active composting core. For example, if you have a bin, try to push old material to the center and add new material around the edges, then mix it in on your next turn.
  4. Consider the Size: For efficient hot composting, a pile needs to be at least 3 feet by 3 feet by 3 feet (1 cubic yard). This size helps it retain heat. For smaller gardens or less active composting, smaller piles or bins work fine, they just might break down more slowly.
  5. Follow the “Lasagna” Method: This popular technique involves creating distinct layers, much like making lasagna, ensuring a good mix of greens and browns for consistent decomposition. For more on this, check out guides from horticultural societies or university extensions, such as those often found on Purdue University’s Extension.

Quick Summary: Common Compost Pile Fixes at a Glance

Here’s a handy table to quickly reference your compost troubleshooting needs:

Leave a Comment

Compost Pile Mistakes: Avoid These Essential Flops

Hey there, green thumbs and aspiring composters! So, you’ve decided to give composting a whirl. That’s awesome! Turning your kitchen scraps and yard waste into rich, garden-loving compost is super rewarding. But sometimes, things don’t quite go as planned, right? Maybe your compost pile smells a bit funky, or it’s just not breaking down. Don’t worry, it happens to the best of us! I’m Troy D Harn, and I’m here to help you dodge those common compost pile mistakes. We’ll walk through the easy fixes so you can get back to making that black gold for your garden.

Compost Pile Mistakes: Avoid These Essential Flops

Starting a compost pile is one of the best things you can do for your garden and the planet. It recycles organic waste, reduces landfill contributions, and creates nutrient-rich soil amendment for free! However, as with any DIY project, there are a few common pitfalls that can leave you with a stinky, slow-composting mess instead of beautiful, crumbly compost. Let’s dive into the most frequent compost pile mistakes and how to fix them, so your composting journey is a success from the start.

The Three Pillars of Composting: Balance is Key

Think of composting like baking a cake. You need the right ingredients in the right proportions. For compost, these are Carbon (browns), Nitrogen (greens), Water, and Air. When any of these are off, your compost pile can become a smelly, slimy disaster or a dry, lifeless mound.

Here’s a simple breakdown:

  • Browns (Carbon): These are dry, woody materials like dead leaves, twigs, shredded cardboard, and straw. They provide the energy source for the microbes that break down your waste.
  • Greens (Nitrogen): These are moist, typically fresh materials like fruit and vegetable scraps, grass clippings, coffee grounds, and manure. They provide the protein and nutrients for the microbes.
  • Water: Compost needs to be moist, like a wrung-out sponge. Too dry and decomposition slows to a crawl; too wet and it can become anaerobic (lacking air) and smelly.
  • Air: Microbes need oxygen to do their work efficiently. Turning your compost pile provides this air.

Common Compost Pile Mistakes and How to Fix Them

Let’s tackle those common blunders head-on. Knowing what to look out for will save you a lot of frustration and help you create fantastic compost much faster.

Mistake #1: Too Much of One Thing (Improper Carbon-to-Nitrogen Ratio)

This is probably the biggest culprit behind stinky or slow compost piles. Many beginners toss in all their kitchen scraps (greens) without adding enough dry, carbon-rich materials (browns).

Why it’s a mistake: Too many greens create a wet, dense pile that suffocates the microbes, leading to anaerobic conditions and that rotten egg smell. Not enough greens means your compost might not heat up, and decomposition will be sluggish. The ideal ratio is roughly 25-30 parts carbon to 1 part nitrogen by weight, but as a beginner, thinking in terms of volume is easier. A good starting point is to aim for about two to three parts browns to one part greens.

How to fix it:

  • If it smells like ammonia or rotten eggs (too many greens): Stop adding greens immediately. Bury any new green additions within the pile. Actively mix in more brown materials like shredded cardboard, dry leaves, or straw.
  • If it’s not heating up and decomposition is slow (too many browns): Add Nitrogen-rich materials. More kitchen scraps, fresh grass clippings (in thin layers), or a sprinkle of manure can help. Ensure there’s enough moisture.

Mistake #2: The Pile is Too Wet or Too Dry

Water is essential for the microbial “party” happening in your compost, but too much or too little can kill the mood.

Too Wet: A waterlogged pile lacks air. The microbes can’t breathe, and they start to produce foul odors. Think swampy, slimy, and smelly.

  • Why it’s a mistake: Anaerobic decomposition is slow and produces unpleasant gases like hydrogen sulfide.
  • How to fix it: Turn the pile to help it dry out and aerate. Mix in plenty of dry brown materials (shredded paper, cardboard, dry leaves) to act like sponges and absorb excess moisture. If your compost bin has drainage issues or is in a spot that gets too much rain, consider moving it or adding a cover during heavy downpours.

Too Dry: Without enough moisture, the microbes can’t thrive or move around to break down materials. Decomposition grinds to a halt.

  • Why it’s a mistake: The microbes become dormant, and your pile stagnates.
  • How to fix it: Add water! Water the pile thoroughly as you turn it, aiming for the consistency of a wrung-out sponge. A good trick is to aim for the middle layers, as the outside often stays drier. You might need to cover your pile if you live in a very hot, dry climate to retain moisture.

Mistake #3: Lack of Airflow (Poor Aeration)

Just like us, the tiny microbes working in your compost pile need to breathe! Compacting materials and failing to turn the pile starves them of oxygen.

Why it’s a mistake: Without oxygen, the pile becomes anaerobic. This leads to slower decomposition and the production of methane and other smelly gases. You’ll notice a sour or rotten smell.

How to fix it: Regularly turn your compost pile! Aim to turn it every 1-4 weeks, depending on how quickly you want compost. When turning, try to fluff up the material. Make sure you’re not just turning the outer layer; get into the core of the pile. You can also improve airflow by adding coarser materials like twigs or wood chips to the mix. If you have a compost bin with solid sides, drilling extra holes can help. For more on effective turning, check out the EPA’s guide to home composting – they have great tips on managing your pile.

Mistake #4: Adding the Wrong Materials

Not everything belongs in a compost pile. Certain items can cause problems, attract pests, or are simply too slow to decompose.

What NOT to compost (generally):

  • Meat, fish, dairy products, and oily foods: These attract pests like rodents and raccoons, and can create foul odors.
  • Diseased plants: These can spread diseases to your garden if the compost isn’t hot enough to kill them.
  • Weeds that have gone to seed: The seeds might survive the composting process and sprout in your garden.
  • Pet waste (dog/cat feces): Can contain harmful pathogens.
  • Coal or charcoal ash: Can contain sulfur and heavy metals that are harmful to plants.
  • Treated wood: Contains chemicals that shouldn’t go back into your soil.
  • Glossy or plastic-coated paper/cardboard: These often contain plastics that don’t break down.

Why it’s a mistake: These materials can attract pests, create offensive smells, introduce diseases, or contaminate your finished compost.

How to fix it: Be selective about what you add. Stick to fruit and vegetable scraps, coffee grounds, tea bags, eggshells, yard waste (leaves, grass clippings), and shredded newspaper or cardboard. If you’re unsure, it’s safer to leave it out.

Mistake #5: Piling Materials Too Large or Too Small

The size of the pieces you add matters for how quickly they break down.

Materials are too large: Big chunks of branches or whole fruits will take a very long time to decompose.

  • Why it’s a mistake: Slow decomposition means you’ll be waiting much longer for your compost.
  • How to fix it: Chop or shred larger items. Break up branches into smaller pieces, shred cardboard and paper, and even chop up tough vegetable peels if you’re in a hurry. Think about sizes that would fit comfortably in your hand or smaller.

Materials are too fine and compacted: If everything is super fine, like pure sawdust or a thick layer of grass clippings without anything to fluff it up, it can become matted and prevent airflow.

  • Why it’s a mistake: Compacted fine materials can lead to anaerobic conditions and prevent water and air from circulating.
  • How to fix it: Mix finer materials with coarser browns like small twigs or shredded cardboard to create air pockets. Avoid dumping large amounts of fine materials all at once without mixing them in.

Mistake #6: Not Building the Pile Correctly (Ignoring Layers)

While strict layering isn’t always necessary for home composting, a good mix from the start helps immensely.

Why it’s a mistake: Dumping all your greens one week and then all your browns the next can lead to imbalances. A pile that’s just a solid block of wet grass clippings won’t breathe!

How to fix it: Try to add materials in a balanced way as you generate them. A common method is to start with a base of coarse browns (twigs), then alternate layers of greens and browns, finishing with a top layer of browns to deter pests and odors. Think of it like making a lasagna, but for microbes! Even if you’re just tossing things into a bin, try to mix your greens and browns together as you add them.

Mistake #7: Not Turning the Pile (or Turning Too Infrequently)

We touched on this with aeration, but it’s worth its own point because it’s so crucial.

Why it’s a mistake: An un-turned pile becomes compacted, leading to anaerobic conditions, foul smells, and very slow decomposition. Some parts might just rot rather than compost.

How to fix it: Make turning a regular habit. The more often you turn, the faster your compost will be ready. For faster results, aim to turn weekly. For a more relaxed approach, monthly turning is usually sufficient. Ensure you’re reaching the inner materials. Tools like a compost aerator or a pitchfork can make this job much easier.

Mistake #8: Expecting Too Much Too Soon

Composting is a natural process, and like any natural process, it takes time.

Why it’s a mistake: Impatience can lead to discouragement or to “cheating” by using chemical activators that aren’t necessary or by discarding a pile that just needs a little more time and attention.

How to fix it: Be patient and observe your pile. It can take anywhere from a few months to a year or more to get finished compost, depending on your methods, materials, and how often you turn it. Focus on the process and the health of your pile. You’ll know it’s ready when it’s dark, crumbly, and smells earthy, like a forest floor after rain. The original materials will be unrecognizable.

Mistake #9: Using the Wrong Type of Bin or Pile Setup

While you can compost perfectly well with just a simple heap, some setups can make things harder.

Why it’s a mistake:

  • Piles that are too small: Microbes generate heat through activity. A pile that’s too small might not be able to generate enough heat to break down materials effectively. A minimum size of about 3 feet x 3 feet x 3 feet is often recommended for hot composting.
  • Bins that don’t allow airflow: Many aesthetic compost bins look great but are designed without enough ventilation, leading to anaerobic conditions.
  • Bins that are too difficult to access: If it’s a hassle to add materials or turn the pile, you’re less likely to do it.

How to fix it: If you have a small pile that isn’t heating up, try adding more material to reach at least 3x3x3 feet, or consider a compost tumbler. For bins with poor airflow, open the lid, remove the front panel if possible, or drill more holes. Ensure your chosen method makes it easy to turn and access the compost. There are many types of composters, from simple bins to tumblers, so choose one that fits your space and effort level.

Mistake #10: Not Using a Compost Accelerant (When Needed)

While not strictly necessary, sometimes a little boost can help kickstart the process, especially in cooler weather or with tougher materials.

Why it’s a mistake: Starting a compost pile can sometimes be slow, especially if you don’t have a lot of fresh “green” nitrogen-rich material, or if the temperature is cool. This can lead to a sluggish pile that doesn’t heat up.

How to fix it: You can use natural compost activators. These are typically commercially produced products that contain beneficial microbes or a high-nitrogen source. Alternatively, a shovel-full of finished compost from a friend or a garden center, or a small amount of manure, can introduce the necessary microbes. A simple homemade activator can be made by mixing grass clippings with a bit of coffee grounds. Just remember, activators are helpers, not magic bullets. They work best when combined with the right balance of greens, browns, moisture, and air.

Quick Guide: Common Compost Issues & Solutions

Here’s a handy table to help you troubleshoot common problems:

Compost Problem Likely Cause Essential Fixes
Smelly Pile (Rotten Egg/Ammonia) Too wet, not enough air, too many greens Turn pile, add dry browns, ensure good aeration
Slow Decomposition (Not Breaking Down) Too dry, too many browns, large material size Add greens, water pile, chop materials, turn pile
Problem Possible Causes Solutions
Bad Odor (Ammonia, Rotten Eggs) Too many greens (nitrogen), too wet, lack of air Add browns (leaves, cardboard), turn frequently, add dry materials, ensure drainage
Pile is Not Heating Up (Cold) Too many browns (carbon), too dry, pile is too small, needs activators Add greens (kitchen scraps, grass clippings), add water, make pile larger (min 3x3x3 ft), add finished compost or manure
Decomposition is Very Slow Too dry, lack of nitrogen, materials too large, not enough air Add water, add greens, chop materials smaller, turn pile more often
Attracting Pests (Rodents, Flies) Composting meat, dairy, oily foods, or uncovered food scraps Stick to approved compostable materials, bury food scraps deep in the pile, turn regularly, cover completed piles with browns
Slimy Material Too wet, too many greens, lack of air Add lots of dry browns, turn the pile thoroughly, ensure good drainage

The Power of Observation: Your Compost’s Health

Your compost pile will communicate with you if you learn to read its signs. A healthy compost pile will:

  • Generate heat, especially in the center.
  • Smell earthy and pleasant, like damp soil or a forest floor.
  • Show signs of decomposition (materials breaking down).
  • Be moist but not soggy.

If your pile is exhibiting the opposite – cold, smelly, or just sitting there, it’s time to go back to the basics and check your balance of greens, browns, moisture, and air.
University Extension offices are also fantastic resources with local advice on composting best practices.

Frequently Asked Questions About Compost Pile Mistakes

Q1: How do I know if my compost is ready?

A1: Finished compost will be dark brown, crumbly, and smell like rich earth. You shouldn’t be able to recognize the original materials you added.

Q2: My compost pile smells awful. What did I do wrong?

A2: The most common cause is too much nitrogen (greens) and not enough air, leading to anaerobic conditions. Fix this by adding more brown materials (like shredded cardboard or dry leaves) and turning the pile to get air into it.

Q3: Will adding rocks to my compost pile help with drainage?

A3: While adding coarse materials like small twigs or wood chips can help with aeration and drainage, adding large rocks is generally not recommended for typical compost piles as they won’t break down and can make turning difficult.

Q4: Can I compost diseased plants from my garden?

Leave a Comment

Compost Pile Mistakes: Essential Tips Revealed

Hey there, fellow home improvers and garden enthusiasts! Troy D Harn from TopChooser here. We all want to turn kitchen scraps and yard waste into super soil, right? But sometimes, our compost piles don’t quite get the memo. Instead of that rich, earthy goodness, we might end up with a smelly mess or just a pile of dry leaves. It can be a bit frustrating when your efforts don’t pay off. But don’t worry! Making great compost is totally achievable. We’ll walk through the most common compost pile mistakes and how to fix them, so you can create that black gold for your garden with confidence.

So, You Want to Compost? Let’s Avoid the Pitfalls!

Composting is one of the most rewarding things you can do for your garden and the planet. It’s a fantastic way to reduce waste and create nutrient-rich food for your plants. But, like any new skill, there are a few common stumbles beginners often make. Think of this guide as your friendly neighbor sharing some hard-won wisdom, helping you skip the common compost calamities and get straight to the good stuff. We’ll break down what goes wrong and, more importantly, how to make it right. Ready to turn that pile of potential into garden gold?

What is Compost and Why Bother?

Before we dive into the mistakes, let’s quickly recap what compost actually is. It’s decomposed organic material – think food scraps, yard trimmings, leaves, and more – that has broken down into a dark, crumbly, nutrient-rich soil amendment. Why bother? Well, compost does wonders for your garden:

  • Improves Soil Structure: It helps sandy soils hold water and nutrients, and loosens heavy clay soils, making it easier for roots to grow.
  • Adds Nutrients: Compost slowly releases essential nutrients that plants need to thrive, reducing the need for synthetic fertilizers.
  • Boosts Soil Health: It introduces beneficial microbes and earthworms, creating a living, healthy soil ecosystem.
  • Reduces Waste: A huge chunk of household waste is compostable material. Composting keeps it out of landfills.
  • Conserves Water: Healthy, compost-rich soil acts like a sponge, holding moisture better and reducing your watering needs.

Basically, compost makes your garden happier and healthier, and it’s a win for the environment too. So, let’s get this right!

Common Compost Pile Mistakes and How to Fix Them

Alright, let’s get down to business. Here are the most frequent slip-ups folks make when starting or maintaining a compost pile, and my tried-and-true tips to steer clear of them (or fix them if they’ve already happened!).

Mistake 1: The Smelly Stink Bomb – Too Much of a Bad Thing (or Not Enough of a Good Thing)

This is probably the most common complaint: your compost pile smells like a rotten egg or a sour garbage dump. This usually points to an imbalance in your pile, specifically an excess of “greens” and not enough “browns,” or a lack of air.

What are “Greens” and “Browns”?

Composting works best when you have a good ratio of nitrogen-rich materials (greens) and carbon-rich materials (browns).

Greens (Nitrogen-Rich): These are usually moist and break down quickly. Think of them as the “fuel” for your compost.

  • Fruit and vegetable scraps
  • Coffee grounds and tea bags
  • Grass clippings (in thin layers)
  • Plant trimmings
  • Manure from herbivores (like chickens, cows, rabbits – NOT dogs or cats)

Browns (Carbon-Rich): These are dry and provide the “bulk” and air pockets. Think of them as the “insulation” and “air” for your compost.

  • Dry leaves
  • Straw or hay
  • Shredded cardboard or paper (avoid glossy print)
  • Wood chips or sawdust (use sparingly)
  • Twigs and small branches

The Fix: Balance is Key!

The ideal ratio is roughly 2 parts Browns to 1 part Greens by volume. If your pile stinks, it’s likely too “green.” Here’s what to do:

  1. Add More Browns: Bury those smelly green materials under a generous layer of dry leaves, shredded cardboard, or straw. This helps absorb odors and redirects the microbes towards a more aerobic (oxygen-using) decomposition process.
  2. Aerate Your Pile: The smell is often a sign of anaerobic conditions (lack of oxygen). Use a pitchfork or a compost aerator tool to turn and fluff up your pile. This introduces fresh air, which is crucial for the good bacteria that make compost without the stink. You want it to smell earthy, not awful.
  3. Check for Problematic Items: Are you adding meat, dairy, or oily foods? These can attract pests and contribute to foul odors, and are best avoided in a simple home compost system.

For more information on what you can and can’t compost, the Environmental Protection Agency (EPA) offers fantastic guidelines.

Mistake 2: The Sahara Desert – A Pile That’s Too Dry

On the flip side, sometimes your compost pile just sits there, looking sad and dry. The decomposition process grinds to a halt because the hardworking microbes and other organisms need moisture to survive and multiply.

The Fix: Give It a Drink!

Compost needs to be as damp as a wrung-out sponge.

  1. Water It Well: Use a garden hose or watering can to moisten the entire pile. If you’re adding new dry materials, water them as you go.
  2. Mix It In: While watering, gently turn the pile with a pitchfork to ensure the moisture penetrates evenly.
  3. Cover It Up: If you live in an extremely hot or dry climate, consider covering your compost pile with a tarp or some old carpet. This helps retain moisture. Make sure to leave some gaps for air circulation.

Remember, you’re aiming for consistently damp, not soggy. If water starts pooling or running off, you’ve gone too far – just add more browns to absorb the excess.

Mistake 3: The Unmoving Mound – Not Enough Action or the Wrong Kind of Action

Your compost pile might be the right moisture and have a decent mix of greens and browns, but it’s just not breaking down. This can happen for a few reasons:

Reasons for Slow Decomposition:

  • Too Many Browns: A pile that’s too heavy on carbon-rich materials will decompose very slowly.
  • Lack of Nitrogen: Not enough “greens” means the microbes don’t have enough nitrogen to fuel their work.
  • Massive Materials: Big chunks of vegetable peels or entire leaves take much longer to break down than smaller pieces.
  • Insufficient Aeration: If the pile is too compacted, air can’t get in, slowing things down.

The Fix: Chop It Up and Turn It Over!

  1. Chop It Down: The smaller the pieces, the faster they break down. Chop up large vegetable scraps, fruit rinds, and tough plant stems. Shred cardboard and paper.
  2. Add More Greens: If your pile is mostly browns (like dry leaves), add a good portion of nitrogen-rich materials like fresh grass clippings, kitchen scraps, or coffee grounds.
  3. Turn It Regularly: Aim to turn your compost pile at least once every week or two. This ensures good air circulation, mixes materials, and generally kickstarts the decomposition process. Use a garden fork or a specialized compost aerator. Think of it as giving your compost a good massage!
  4. Layering Matters: When adding new materials, try to layer greens and browns. This helps with the overall balance.

Mistake 4: The Pests’ Paradise – Attracting Unwanted Critters

Seeing rodents, flies, or other critters investigating your compost pile can be unsettling. While some insects are beneficial decomposers, you don’t want a full-blown invasion.

The Fix: Be Picky and Burrow Deep!

Most pest problems are preventable:

  1. Avoid Meat, Dairy, and Oils: As mentioned, these are big attractants. Stick to plant-based materials.
  2. Bury Food Scraps: Always cover fresh kitchen scraps with a layer of brown material (leaves, straw, shredded paper). This hides the tempting food source.
  3. Maintain Aeration: A well-aerated, actively decomposing pile is less attractive to pests. They prefer stagnant, easy-to-access food.
  4. Hot Composting: If your pile gets hot enough internally (around 130-160°F or 55-70°C), it can kill off weed seeds and pathogens, and it’s too hot for most pests. This requires a larger pile and careful management of the green-to-brown ratio and moisture. For beginner piles, focus on the other steps.
  5. Use a Bin: A good quality compost bin, especially one with a lid and sturdy sides, can deter larger animals. Look for bins designed to promote airflow and keep pests out.

If you do have a persistent rodent problem, consider consulting resources from your local extension office or university agricultural department for pest-specific advice for your region.

Mistake 5: The Giant, Undecipherable Lumps – Using the Wrong Materials

Sometimes, the issue isn’t with the process but with what you’re putting into the pile. Some materials just don’t break down well in a typical backyard compost system, or they can cause problems.

Materials to Approach with Caution or Avoid:

Here’s a quick rundown of things to think twice about:

  • Diseased Plants: If you compost plants infected with diseases, you risk spreading those diseases back into your garden when you use the compost.
  • Weeds with Seeds: Similar to diseases, weed seeds can survive the composting process, especially in cooler piles, and end up sprouting in your garden.
  • Pet Waste: Dog and cat feces can contain pathogens that are harmful to humans and do not break down easily in home compost systems.
  • Treated Wood: Chemicals used in treated lumber can leach into your compost.
  • Coal or Charcoal Ash: These can contain sulfur and other compounds that can be harmful to plants.
  • Glossy or Coated Paper/Cardboard: The inks and coatings may not break down or could introduce unwanted chemicals.

The Fix: Know Your Compost Ingredients!

When in doubt, leave it out! Focus on known compostables like fruit and veggie scraps, coffee grounds, tea bags, leaves, grass clippings, and plain paper/cardboard. For a definitive list, your local municipality or waste management service often has excellent composting guides.

Mistake 6: Too Much of a Good Thing – Over-Composting or Under-Composting

This might sound a little odd, but there’s a sweet spot for finished compost.

What Happens?

  • Under-Composted: If you pull materials out too early, you’ll have a pile that still looks like recognizable food scraps and yard waste. It might smell, contain weed seeds, or not have the full nutrient boost.
  • Over-Composted: While less common, if you let compost sit for too long after it’s finished, it can start to lose some of its valuable nutrients as they break down further or get leached out by rain.

The Fix: Look for the Signs!

Finished compost is:

  • Dark and Crumbly: It should look like rich, dark soil.
  • Earthy Smelling: It should have a pleasant, forest-floor aroma, not be sour or offensive.
  • Uniform: You shouldn’t be able to recognize the original materials you put in.
  • Cool: A finished compost pile will no longer be generating significant heat.

As a beginner, aim for compost that looks and smells good. Don’t stress too much about perfect timing. If it looks ready, feels right, and smells good, it’s likely ready to use in your garden!

Mistake 7: The Wrong Location for Your Pile

Where you build your compost pile actually matters! Placing it in a spot that’s too extreme can make your composting efforts harder.

The Fix: Seek the Sweet Spot

When choosing a location:

  • Partial Shade is Best: Too much direct sun can dry out your pile really quickly, especially in warmer months. Too much deep shade might keep it too cool and slow decomposition in cooler climates. A spot that gets morning sun and afternoon shade is often ideal.
  • Good Drainage: You don’t want your compost pile sitting in a puddle after a rainstorm. Choose a level spot that drains well.
  • Convenient Access: Make sure you can easily get to your pile with a wheelbarrow to add materials and, more importantly, to turn it.
  • Away from Structures (Generally): While not always a hard rule, some people prefer to keep compost piles a reasonable distance from wooden decks or the house itself, especially if they’re prone to moisture or pests.

Compost Pile Troubleshooting Table

Sometimes, a quick reference is super helpful. Here’s a table to help you diagnose common issues:

Problem Likely Cause Solution
Smelly (Rotten Egg/Ammonia) Too many greens, not enough browns, lack of air Add browns (leaves, cardboard), turn the pile, ensure good airflow
Dry and Not Decomposing Lack of moisture Water the pile thoroughly, mix it in, cover if needed
Doesn’t seem to be heating up or breaking down Too many browns, not enough greens, materials too large, needs turning Add greens, chop materials smaller, turn the pile regularly
Attracting Pests (Rodents, Flies) Adding meat/dairy/oils, exposed food scraps Avoid prohibited items, bury food scraps, cover pile, maintain good aeration
Slimy or Soggy Too much moisture, not enough browns/airflow Add browns, turn the pile to aerate, consider improved drainage

Tips for Ensuring Reliable Results

Beyond avoiding mistakes, here are a few extra tips to make your composting journey smooth and successful:

  • Start Small: Don’t feel pressured to build a massive pile right away. A small bin or a modest pile is perfectly fine for beginners.
  • Observe Your Pile: Get to know how your compost pile behaves. Does it heat up? Does it retain moisture? Your observations will guide your adjustments.
  • Be Patient: Composting is a natural process. It takes time! Depending on the materials, your method, and the climate, it can take anywhere from a few months to a year to get finished compost.
  • Use a Lid or Cover: A lid or cover can help regulate moisture, retain heat, and deter pests. Just ensure it doesn’t completely block airflow.
  • Consider a Tumbler: For those who want faster compost and less turning effort, a compost tumbler is an excellent option. They are designed for easy turning and can speed up the process.

Frequently Asked Questions About Compost Piles

Here are some common questions I get from folks just starting out:

Q1: How often should I turn my compost pile?

A: For faster composting, turning it once a week or every two weeks is great. If you’re less concerned about speed, turning it once a month or even just a few times during the process is still effective, just slower.

Q2: My compost smells okay, but it’s mostly just dried leaves. Is that a problem?

A: Not necessarily a problem, just slow! If it’s mostly browns, it will break down, but very gradually without enough nitrogen from greens. Add some kitchen scraps or fresh grass clippings to give it a boost.

Q3: Can I use my garden hose to water my compost pile?

A: Yes, absolutely! Just be careful not to overwater. You want it damp like a wrung-out sponge, not soggy. Aim the hose into the center of the pile and water evenly.

Q4: What if I don

Leave a Comment