Want a garden that’s bursting with life but worried about the cost of fancy soil amendments? You’re not alone! Many gardeners think rich, healthy soil is expensive. But guess what? It doesn’t have to be. With a little know-how and some everyday materials, you can create fantastic compost right in your backyard for practically pennies. This guide will show you exactly how to make your own affordable compost soil, transforming your garden without breaking the bank. Get ready to learn simple, effective ways to feed your plants the good stuff!
Why Your Garden Needs Compost (And Why DIY is the Way to Go)
Think of compost as the ultimate superfood for your garden. It’s not just “dirt”; it’s a living, breathing mix packed with nutrients and beneficial microbes that your plants absolutely love. Adding compost to your soil does wonders:
- Improves Soil Structure: It helps sandy soil hold onto water and nutrients, and it loosens up heavy clay soil, making it easier for roots to grow.
- Adds Essential Nutrients: Compost slowly releases vital nutrients that plants need to thrive, leading to healthier growth and more abundant flowers and veggies.
- Boosts Beneficial Microorganisms: It introduces good bacteria and fungi that help plants resist diseases and pests.
- Increases Water Retention: Compost acts like a sponge, helping your soil hold moisture, which means you’ll water less often – a big win for busy gardeners and your water bill.
- Reduces Waste: You’ll be amazed at how much kitchen and yard waste can be transformed into something valuable, diverting it from landfills.
Now, you could go to the garden center and buy bags of compost, but let’s be honest, that can add up quickly, especially if you have a large garden. Making your own compost is incredibly cost-effective. You’re essentially recycling materials you already have or can get for free. It’s a double win: a healthier planet and a healthier wallet!
What Can You Compost to Save Money? The “Greens” and “Browns”
The secret to great compost is a balanced mix of nitrogen-rich materials (often called “greens”) and carbon-rich materials (called “browns”). Getting this balance right is key to fast, effective composting. Don’t worry, it’s easier than it sounds!
Your “Green” Composting Materials (Nitrogen Rich)
These are typically moist materials that break down quickly. They provide the nitrogen that microbes need to do their work.
Kitchen Scraps:
- Fruit and vegetable peels and scraps
- Coffee grounds and paper filters
- Tea bags (staples removed)
- Eggshells (crushed)
- Old, stale bread and grains
Yard Waste:
- Grass clippings (in thin layers to avoid matting)
- Fresh, green leaves
- Plant trimmings from the garden (avoid diseased plants or weeds that have gone to seed)
- Weeds (before they have seeded)
Your “Brown” Composting Materials (Carbon Rich)
These are drier, bulkier materials that provide carbon and help with aeration, preventing your compost pile from getting too slimy or smelly.
Yard Waste:
- Dry leaves (fall is your best friend here!)
- Straw or hay
- Small twigs and branches (chopped or shredded)
- Pine needles
- Shredded paper (non-glossy newspaper, paper bags, cardboard)
Household Items:
- Shredded cardboard (non-glossy, tape removed)
- Paper towel and toilet paper rolls (torn up)
- Sawdust (from untreated wood)
- Vacuum cleaner bag contents (dust and debris, from non-synthetic carpets/floors)
Pro Tip: Aim for a ratio of about 2 parts browns to 1 part greens. This isn’t an exact science, and your compost will still break down if it’s not perfect, but this guideline helps speed things up!
What NOT to Compost (To Keep Your Pile Healthy)
Some things just don’t belong in your compost bin. They can attract pests, introduce diseases, or simply won’t break down properly.
- Meat, bones, and dairy products: These attract rodents and can create unpleasant odors.
- Oily or greasy foods: Similar to dairy, these can smell bad and attract pests.
- Diseased plants or weeds gone to seed: You don’t want to spread these issues around your garden.
- Pet waste (dog and cat feces): These can contain harmful pathogens.
- Treated wood or sawdust from treated wood: The chemicals can be harmful.
- Coal or charcoal ash: It can contain sulfur and other compounds that can harm plants.
- Glossy or plastic-coated paper and cardboard: These won’t break down.
- Synthetic materials: Plastics, metals, synthetic fabrics won’t decompose.
Affordable Composting Methods: Pick Your Style!
You don’t need fancy bins to make great compost. Here are some budget-friendly options:
1. The Simple Pile (The Free-for-All)
What it is: Just a heap of composting materials in a corner of your yard. No bin, no fuss, just composting in action!
Pros:
- Absolutely free.
- Easy to start – just pile it up!
- Great for large volumes of yard waste.
Cons:
- Can look a bit messy.
- May take longer to break down as it doesn’t retain as much heat.
- More exposed to weather.
How to do it affordably: Find a convenient, out-of-the-way spot in your yard. Start piling your greens and browns. Turn it occasionally with a pitchfork to aerate. Moisture is key, so if it gets dry, give it a sprinkle with the hose.
2. DIY Bin from Pallets (The Upcycler’s Dream)
What it is: Using discarded wooden pallets to build an enclosure for your compost. Many businesses give these away for free!
Pros:
- Very low cost, often free if you can source pallets.
- Sturdy and keeps your compost contained neatly.
- Good aeration through the pallet slats.
Cons:
- Requires a little bit of DIY skill to assemble.
- Pallets can be heavy to move.
How to do it affordably: Search online for “free pallets” or ask local businesses (like garden centers, hardware stores, or small retail shops) if they have any they’re looking to get rid of. You can stand them upright and wire or screw them together to form a three or four-sided bin. For easier turning, consider using just three sides and leaving one open, or using hinges on one side.
3. Wire Mesh Bin (The Speedy Assembler)
What it is: A cylinder or square made from hardware cloth or chicken wire and stakes. You can often find rolls of wire mesh affordably at hardware or farm supply stores.
Pros:
- Relatively inexpensive.
- Easy to assemble with minimal tools.
- Good aeration.
- Easy to lift off the pile to harvest finished compost.
Cons:
- Less aesthetically pleasing than a wooden bin for some.
- May not retain moisture as well in very dry climates.
How to do it affordably: Purchase a roll of hardware cloth (1/2-inch to 1-inch mesh is good). Cut a length (around 8-10 feet is common) and form it into a circle, securing the ends with wire or zip ties. You can also create a square by using four short lengths. Drive stakes into the ground around it for stability if needed. Check out resources like University of Maryland Extension for more DIY bin ideas. Many extension offices offer excellent, free advice on gardening and composting.
4. Tumbler (The Faster Turner – Can be Affordable!)
What it is: A sealed bin that rotates, making it easy to mix and aerate your compost. While new ones can be pricey, you can sometimes find them used or on sale.
Pros:
- Speeds up decomposition significantly.
- Keeps pests out and moisture contained.
- Easy to turn by hand.
Cons:
- Can be more expensive upfront, even used.
- Batch composting – you often fill it, let it finish, then empty it.
How to do it affordably: Keep an eye on online marketplaces (Craigslist, Facebook Marketplace) for used compost tumblers. Garage sales and local gardening groups can also be good places to look. Sometimes, stores have end-of-season sales.
Step-by-Step: How to Build Your Compost Pile
No matter which method you choose, the basic steps for building your compost are similar:
Step 1: Choose Your Location
Find a spot that’s:
- Easily accessible for adding materials and tending to it.
- Partially shaded is ideal to help retain moisture, but full sun or shade can also work.
- On bare earth if possible, so beneficial organisms can get in and excess moisture can drain out.
Step 2: Start with a Layer of Browns
Begin your pile with a 4-6 inch layer of coarse brown materials like twigs, straw, or shredded cardboard. This helps with drainage and aeration from the start.
Step 3: Add Alternating Layers of Greens and Browns
Now, start adding your kitchen scraps (greens) and yard waste (browns). Aim for a mix. A good practice is to add a layer of greens, then cover it with a layer of browns. If you’re burying kitchen scraps directly into a pile, it helps deter pests and odors.
Step 4: Chop or Shred Larger Items
Smaller pieces break down much faster. Chop up large vegetable stalks, shred cardboard, and break up twigs. This significantly speeds up the composting process.
Step 5: Add Water (The Compost Needs a Drink!)
Your compost pile should be about as damp as a wrung-out sponge. If it’s too dry, decomposition slows way down. If it’s too wet, it can get anaerobic and smelly. Add water as you build your layers, especially to the browns, and check moisture levels regularly.
Step 6: Aerate or Turn Your Pile
Oxygen is crucial for the microbes that do the composting work. Turning your pile with a pitchfork or shovel every week or two (or more often for faster results) introduces air and mixes the materials.
If you’re using a tumbler, just give it a few spins every few days.
Step 7: Be Patient!
Composting is a natural process. Depending on the materials, the weather, and how often you turn and water it, compost can be ready anywhere from two months to a year.
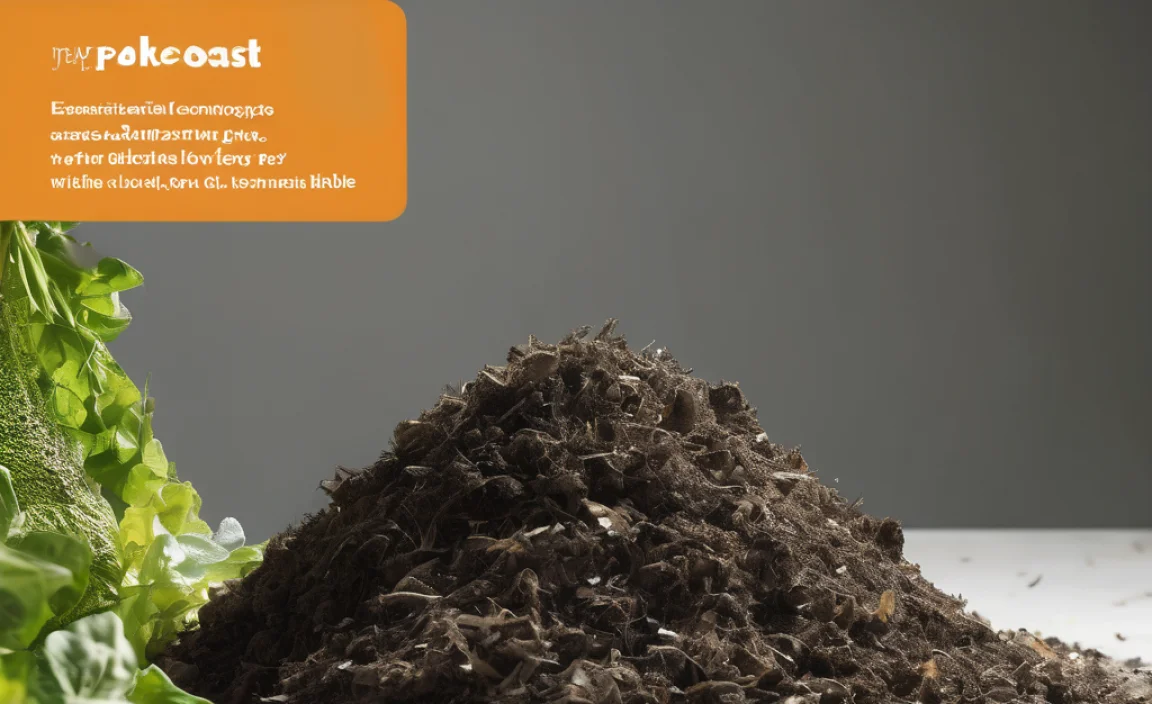
What Does “Finished” Compost Look Like (And How to Tell When It’s Ready)
Your homemade compost is ready when it:
- Looks dark and crumbly, like rich soil.
- Smells earthy and pleasant – no ammonia or sour odors.
- The original materials are no longer recognizable.
You might still see a few larger twigs or eggshells, and that’s okay! You can sift out any larger pieces and throw them back into a new compost pile to break down further.
Troubleshooting Common Composting Problems (The Easy Fixes)
Don’t get discouraged if your compost pile isn’t perfect right away. Here are some common issues and their simple solutions:
| Problem | Cause | Solution |
|---|---|---|
| Smelly Pile (Ammonia/Rotten Egg Smell) | Too many green materials (excess nitrogen), or pile is too wet and lacks air. | Add more brown materials (carbon-rich like dry leaves, shredded cardboard). Turn the pile thoroughly to aerate it. Ensure good drainage. |
| Pile Isn’t Heating Up/Decomposing Slowly | Too many brown materials (not enough nitrogen), or pile is too dry. | Add more green materials (kitchen scraps, grass clippings). Water the pile, ensuring it’s moist like a wrung-out sponge. Turn the pile to distribute moisture and air. |
| Attracting Pests (Rodents, Flies) | Exposed food scraps, meat/dairy/oily items. | Bury fresh kitchen scraps deep within the pile and cover with brown materials. Avoid adding meat, dairy, or oily foods. Ensure your bin is enclosed or covered if pests are a persistent problem. For DIY bins, consider a lid or a finer mesh wire. Resources on pest management from educational institutions, like UC IPM (University of California Integrated Pest Management) offer detailed advice. |
| Slimy or Soggy Pile | Too wet, not enough aeration. | Add plenty of dry brown materials (shredded cardboard, dry leaves, straw). Turn the pile frequently to help it dry out and mix it with the browns. |
| Pile is Too Dry | Lack of moisture, especially in hot/windy weather. | Water the pile thoroughly. You can cover it with a tarp to help retain moisture, especially during dry spells. |
Using Your Affordable, Homemade Compost
Once your compost is ready, you’ve got a treasure trove for your garden! Here’s how to put it to good use:
- In the Garden Beds: Mix a few inches of compost into your existing garden soil before planting. This is a fantastic way to enrich beds for vegetables, flowers, or shrubs.
- As a Top Dressing: Spread a layer of compost an inch or two thick around the base of established plants, shrubs, and trees. The nutrients will slowly leach into the soil.
- For Container Plants: Mix compost with potting soil or coir for an excellent, nutrient-rich potting mix for your pots and hanging baskets. A good ratio is about 1 part compost to 2 or 3 parts other potting mix ingredients.
- For New Lawns: Rake a layer of compost into the top few inches of soil before seeding or laying sod.
The beauty of homemade compost is its versatility. It’s the perfect all-around soil amendment that benefits almost any plant you grow.
FAQs: Your Compost Soil Affordable Questions Answered
Q1: How long does it take for compost to be ready?
A1: It can vary widely, from 2 months to over a year. Factors include the materials used, the size of your pile, how often you turn it, and the weather. A well-managed, frequently turned pile with a good mix of greens and browns will be ready much faster.
Q2: What’s the ideal ratio of greens to browns?
A2: A common recommendation is about 2 parts browns to 1 part greens by volume. This means more dry, carbon-rich materials than wet, nitrogen-rich materials. Don’t stress too much; just aim for a good mix!
Q3: Can I compost all my kitchen scraps?
A3: Most fruit and vegetable scraps, coffee grounds, and tea bags are great. However, avoid meat, dairy, bones, and oily foods, as they can attract pests and create odors.
Q4: My compost smells bad. What did I do wrong?
A4: A bad smell (like ammonia or rotten eggs) usually means there’s too much nitrogen (too many greens) or the pile is too wet and has no air. Try adding more brown materials and turning the pile to aerate it.

I am passionate about home engineering. I specialize in designing, installing, and maintaining heating, ventilation, and air conditioning systems. My goal is to help people stay comfortable in their homes all year long.