Hey there, fellow home improvers and garden enthusiasts! Troy D Harn here, ready to dive into something truly fantastic for your garden: compost soil. Ever feel a bit lost when it comes to turning kitchen scraps and yard waste into black gold for your plants? You’re not alone! Many folks find composting a bit confusing. But don’t worry, I’ve got your back. We’re going to break down how to make amazing compost soil, step-by-step. Think of this as your super-simple, friendly guide to composting success. We’ll cover everything you need to know to start creating nutrient-rich compost that your plants will absolutely love. Get ready to transform your garden!
What is Compost Soil? Your Garden’s Superfood
So, what exactly is compost soil? In simple terms, it’s decomposed organic material. Think of it as nature’s way of recycling. When you compost, you’re speeding up this natural process. You’re taking things like fruit peels, coffee grounds, leaves, and grass clippings, and through heat, moisture, and tiny little helpers (microorganisms!), you break them down into a dark, crumbly, nutrient-rich material. This finished product is commonly called compost, and when mixed with your garden soil, it becomes compost soil. It’s like giving your garden a healthy, delicious meal that promotes vigorous growth and richer blooms.
Why Bother with Composting? The Amazing Benefits
You might be wondering, “Why go through the trouble of composting?” Well, the benefits are huge, both for your garden and for the planet! Here’s a quick rundown of why it’s such a worthwhile endeavor:
- Boosts Soil Health: Compost improves the structure of your soil. If you have clay soil, it helps loosen it up. If you have sandy soil, it helps it retain moisture and nutrients. It’s a win-win for pretty much any soil type!
- Feeds Your Plants: It’s packed with essential nutrients that plants need to grow strong and healthy. This means less need for synthetic fertilizers, which can be costly and sometimes harmful to the environment.
- Improves Water Retention: Compost acts like a sponge, holding onto water. This means you’ll need to water your garden less often, saving water and time.
- Reduces Waste: A significant portion of household waste is organic material that can be composted. By composting, you divert this waste from landfills, reducing methane gas emissions and conserving landfill space.
- Suppresses Plant Diseases and Pests: Healthy soil leads to healthy plants, and healthy plants are more resistant to diseases and pests.
- It’s Economical: Making your own compost is far cheaper than buying bags of soil amendments. Your initial investment is minimal, and the ongoing cost is essentially zero once you’re set up.
Getting Started: What You Need to Compost
Excited to start? Great! The good news is that composting doesn’t require a lot of fancy equipment. You can even start with just a small pile in your yard. However, having a few basic things can make the process smoother and more efficient. Let’s look at what you’ll need. Don’t feel pressured to get everything at once; start with what you have or can easily obtain!
Compost Bin Options: Choose Your Champion
The first big decision is where you’ll host your composting party. You’ve got a few popular choices:
- Open Pile: The simplest method! Just designate a spot in your yard (at least 3x3x3 feet is ideal for proper heating) and start layering your materials. It’s free and easy to manage, but can look a bit untidy and might attract pests if not managed carefully.
- Enclosed Bins: These can be purchased or made from materials like wood pallets or chicken wire. They help contain the compost, retain heat and moisture better, and can look neater. Many types are available, including tumblers which make turning easier.
- Tumblers: These are enclosed bins that you rotate or “tumble” to mix the compost. They speed up the process and make turning a breeze, but they can be more expensive and have a smaller capacity than open piles.
For beginners, a simple enclosed bin or a well-managed open pile is usually a great starting point. You can always upgrade later if you get hooked on composting (and trust me, you probably will!).
Essential Tools for Your Composting Journey
While you can technically compost with just your hands and a shovel, a few tools will make your life much easier:
- Pitchfork or Shovel: For turning your compost pile. This is crucial for aeration and helps the materials break down faster.
- Gardening Gloves: To keep your hands clean and protected.
- Watering Can or Hose: To maintain the right moisture level.
- Kitchen Compost Pail: A small container with a lid to collect kitchen scraps before taking them out to the main compost bin. Many have charcoal filters to reduce odors.
- Optional: Thermometer: A compost thermometer can help you monitor the internal temperature of your pile, ensuring it’s hot enough to kill weed seeds and pathogens.
The Magic Recipe: What to Compost (and what to avoid!)
Composting is all about balance. You need a good mix of “greens” and “browns.” Think of greens as nitrogen-rich materials that provide moisture and heat, and browns as carbon-rich materials that provide bulk and allow air to circulate. Getting this ratio right is key to a fast, stink-free compost pile.
The “Greens” (Nitrogen-Rich)
These materials are typically moist and nitrogen-heavy. Add them in moderation:
- Fruit and vegetable scraps
- Coffee grounds and tea bags
- Grass clippings (in thin layers to avoid matting)
- Plant trimmings (non-woody)
- Eggshells (crushed)
- Manure from herbivores (like rabbits, chickens, cows – avoid pet waste from carnivores)
The “Browns” (Carbon-Rich)
These materials are typically dry and carbon-heavy. Chop them up to speed decomposition:
- Dry leaves
- Straw or hay
- Shredded newspaper or cardboard (avoid glossy or colored ink)
- Small twigs and branches (chopped)
- Sawdust (from untreated wood)
- Paper towels and napkins (unsoiled)
What NOT to Compost: Important Exclusions
It’s just as important to know what to leave out of your compost bin. These items can cause problems like attracting pests, creating odors, or spreading disease:
- Meat, fish, and bones
- Dairy products
- Oily or greasy foods
- Diseased plants
- Weeds that have gone to seed
- Pet waste (from dogs and cats)
- Treated wood scraps
- Coal or charcoal ash
- Synthetic materials
Generally, if it was once alive and isn’t meat, dairy, or oil, it can likely be composted. If you’re ever in doubt, it’s better to leave it out.
The Step-by-Step Guide to Building Your Compost Pile
Ready to get your hands dirty? Building a compost pile is straightforward. We’ll aim for a good balance of greens and browns, around a 2:1 or 3:1 ratio of browns to greens by volume. This ratio is a good starting point, and you can adjust it as you go based on how your compost is looking and smelling.
Step 1: Choose Your Location
Find a convenient spot that’s well-drained, gets some sun (but not scorching all day), and is close enough to your kitchen and garden, but not so close it becomes a nuisance. If you’re using an open pile, make sure it has space to breathe. If you have an enclosed bin, place it on bare soil if possible to allow beneficial organisms to enter.
Step 2: Start with a Base Layer
Begin by laying down a 4-6 inch layer of coarse brown material at the bottom of your bin or pile. This could be twigs, straw, or chopped-up cardboard. This layer is crucial for aeration and drainage, preventing your compost from becoming a soggy, anaerobic mess.
Step 3: Layer Your Greens and Browns
Now, start adding your materials in alternating layers. Aim for a mix that’s roughly two or three parts browns to one part greens. For instance, add a layer of leaves, then a layer of kitchen scraps, then another layer of shredded newspaper, and so on. Aim for brown layers to be somewhat thicker than the green layers.
Tip: Chop or shred larger items like cardboard, twigs, and even large vegetable scraps. Smaller pieces break down much faster!
Step 4: Add Water
As you build your layers, lightly water each new layer. Your compost pile should be moist, like a wrung-out sponge – damp, but not soaking wet. Too dry, and decomposition slows down significantly. Too wet, and it can become anaerobic and smelly.
Step 5: Turn Your Compost Regularly
This is where your pitchfork or shovel comes in handy! Turning your compost pile introduces oxygen, which is essential for the aerobic bacteria that break down the material. It also helps distribute moisture and heat evenly. Aim to turn your compost every 1-3 weeks. If you have a compost tumbler, give it a few turns every few days.
What to look for when turning: If it smells strong and sulfuric, it might be too wet or compacted. Add more browns and turn it. If it’s dry and not decomposing, add water and more greens, then turn.
Step 6: Be Patient and Monitor
Composting takes time. Depending on the materials you use, the size of your pile, and how often you turn it, it can take anywhere from a couple of months to a year to produce finished compost. You’ll know it’s ready when it’s dark, crumbly, smells earthy like a forest floor, and you can no longer recognize the original materials.
Troubleshooting Your Compost: Common Issues and Fixes
Even with the best intentions, you might encounter a few bumps in the composting road. Don’t get discouraged! Most common problems have simple solutions.
Problem: The Pile Smells Bad (Rotten Eggs or Ammonia)
Cause: Too much nitrogen (greens) or the pile is too wet and compacted, leading to anaerobic conditions.
Solution: Add more brown, carbon-rich materials like dry leaves, straw, or shredded cardboard. Turn the pile thoroughly to introduce air and help it dry out. If it’s very wet, you might need to mix in extra dry browns.
Problem: The Pile Isn’t Heating Up or Decomposing
Cause: Not enough nitrogen (greens), too dry, or insufficient volume. A minimum size of about 3x3x3 feet is needed for the pile to heat up effectively.
Solution: Add more nitrogen-rich “green” materials like kitchen scraps or grass clippings. Moisten the pile if it’s too dry (remember, like a wrung-out sponge). If your pile is too small, consider adding more materials or combining it with another pile. Turn the pile to mix things up.
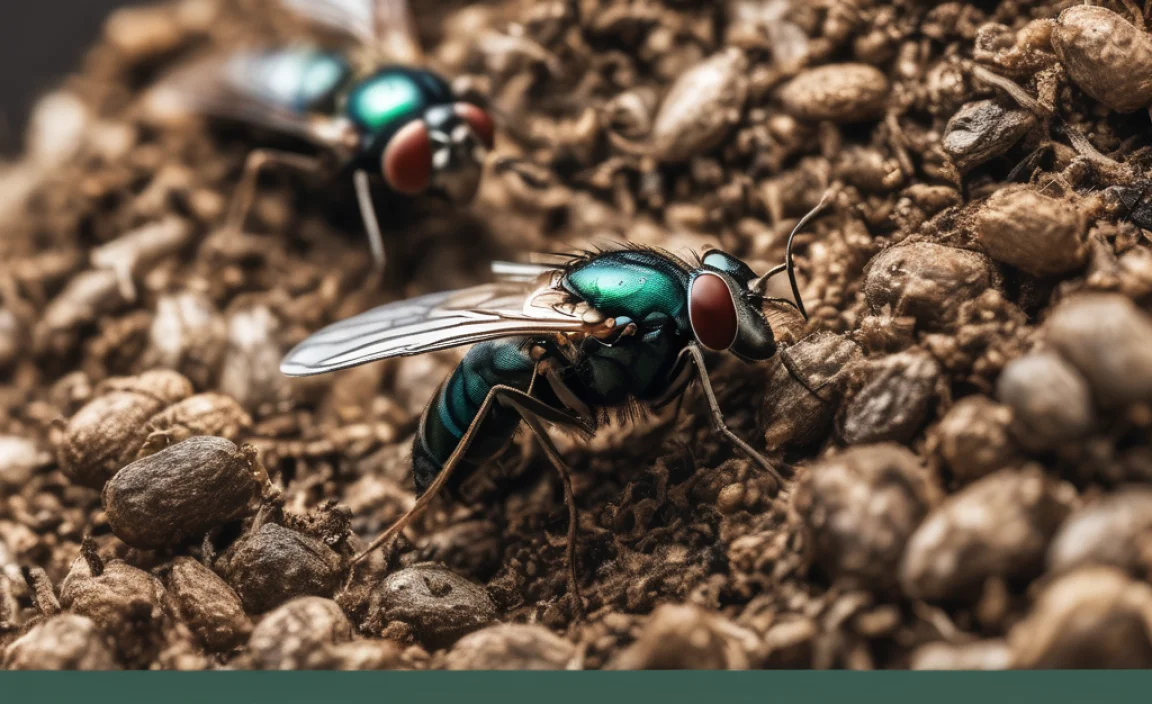
Problem: Pests (Flies, Rodents) are a Problem
Cause: Exposed food scraps, or including prohibited items like meat and dairy.
Solution: Bury all fresh kitchen scraps deep within the pile, covering them with a layer of brown material. Ensure you are not adding meat, dairy, or greasy foods. Consider using an enclosed bin or a tumbler, which are generally more pest-resistant.
Problem: The Compost is Too Wet
Cause: Too many wet green materials, excessive rain, or poor drainage.
Solution: Add plenty of dry brown materials like shredded cardboard, leaves, or straw. Turn the pile frequently. If it’s in an open pile, consider covering it during heavy rain, but ensure it still gets some air. Proper drainage at the base is also important.
The Science Behind the Magic: What’s Happening in Your Pile?
It might look like magic, but it’s really science! Composting is a biological process driven by microorganisms. These tiny helpers – bacteria, fungi, and actinomycetes – feast on your organic materials. When conditions are right (warmth, moisture, oxygen), these microbes work incredibly fast to break down complex organic matter into simpler compounds. This process generates heat, which is why active compost piles can reach temperatures between 130-160°F (54-71°C). This heat is great because it helps kill off weed seeds and pathogens. As the materials break down, they form humus, the stable, nutrient-rich component of compost. A great resource for understanding the scientific principles of composting is the U.S. Environmental Protection Agency (EPA) composting page. You can find detailed information on their composting resources.
When is Compost Ready? Harvesting Your Black Gold
Patience is a virtue, especially when it comes to composting. You’ll know your compost is ready to harvest and use when:
- It has a dark brown, crumbly texture.
- It smells earthy and pleasant, like a forest floor after rain.
- You can no longer identify the original materials you put in (no recognizable banana peels or newspaper scraps!).
- The temperature of the pile has cooled down to ambient temperature.
If you have a bin, you can usually remove finished compost from the bottom. For open piles, you can dig out the finished compost from the bottom sides or fork the entire pile over. You may need to screen your compost to remove any larger, unfinished bits. These can be thrown back into a new compost pile to continue breaking down.
How to Use Your Finished Compost
Congratulations, you’ve made compost! Now, what do you do with this wonderful, nutrient-rich material? There are many ways to put your compost soil to work in your garden:
- As a Soil Amendment: Mix compost directly into your garden beds. For established beds, spread a 1-3 inch layer on top and lightly fork it in. For new beds, mix it in more thoroughly (a 2-4 inch layer) to improve the soil structure and fertility.
- As a Top Dressing: Sprinkle a thin layer of compost around the base of plants, shrubs, and trees. This provides a slow-release of nutrients and helps retain moisture.
- In Potting Mixes: Mix compost with other ingredients like peat moss, perlite, or vermiculite to create your own rich potting soil for containers and hanging baskets. A common ratio is 1 part compost to 2 parts soilless potting mix.
- For Lawns: Spread a thin layer of compost (about 1/4 to 1/2 inch) over your lawn, especially after aeration. Rake it lightly to even it out. It will improve soil structure and feed your grass.
- For Seed Starting: While mature compost is great, some people prefer to use a finer, screened compost, or a specialized seed-starting mix. If using compost, ensure it’s well-aged and screened to avoid any potential issues with young seedlings.
Using compost is a fantastic way to give your garden a natural boost and encourage healthier, more robust plant growth. It’s all about feeding the soil that feeds your plants!
Composting vs. Other Soil Amendments: A Quick Comparison
Compost is amazing, but it’s good to know how it stacks up against other things you might use to “amend” your soil. Here’s a quick look: