Ever look at your compost pile and wonder why it’s not quite… happening? Maybe it smells funny, or it’s just a soggy mess. Often, the culprit is a tricky balance: too much of one thing and not enough of another. Getting this balance right, especially when you’re just starting, can feel like decoding a secret recipe. But don’t you worry! We’re going to break down the “compost starter ratio” so it makes sense. It’s simpler than you think, and once you get it, your compost bin will be a well-oiled machine, churning out that black gold for your garden.
This guide is all about making composting easy. We’ll cover what you need, how to mix it, and why it matters. Let’s get your compost cooking!
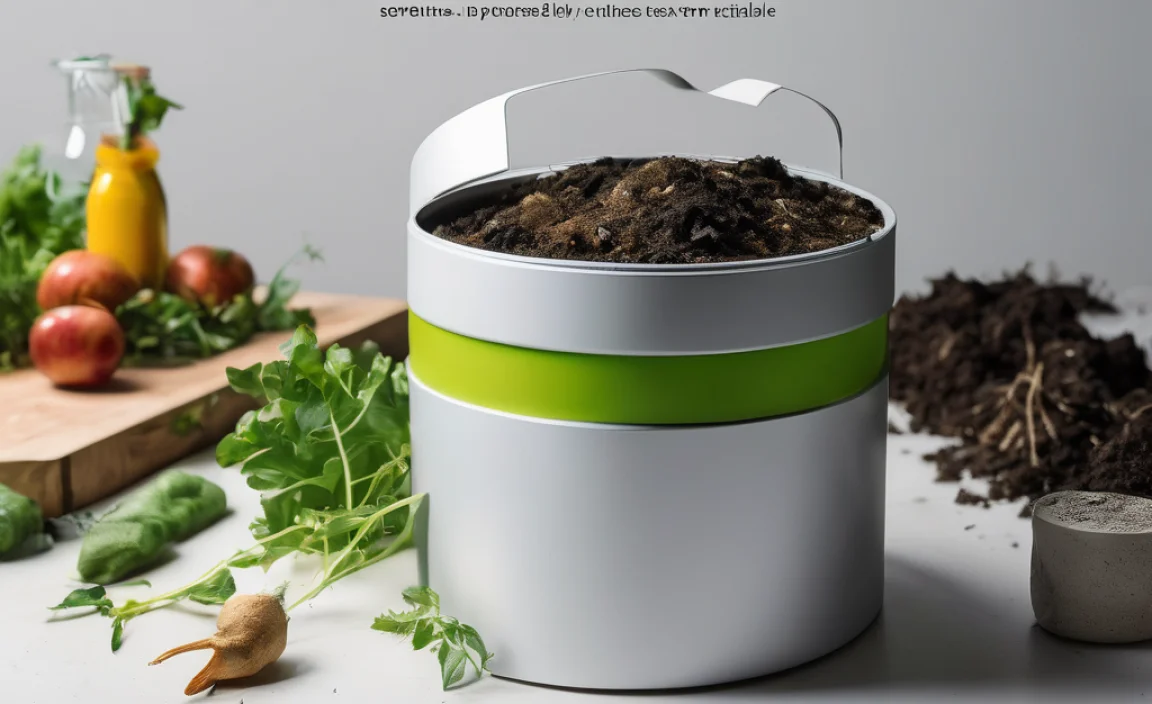
What is the Compost Starter Ratio, Anyway?
Think of your compost pile like a balanced meal for tiny microorganisms. These little helpers are what break down your kitchen scraps and yard waste into nutrient-rich compost. To do their best work, they need a mix of two main types of ingredients: “greens” and “browns.”
The compost starter ratio is all about the right proportion of these greens and browns. It’s the secret sauce to a fast, healthy, and stink-free compost pile.
Why Does the Compost Starter Ratio Matter So Much?
Getting the ratio right is key for a few big reasons:
- Speed: A well-balanced pile heats up faster. Heat is crucial because it speeds up the decomposition process and helps kill weed seeds and pathogens.
- Smell: Piles that are too wet or have too many greens can turn anaerobic (meaning they lack oxygen) and start to smell like rotten eggs or ammonia. The right ratio helps prevent this.
- Texture: The goal is fluffy, dark compost that crumbles easily. An unbalanced pile can become slimy and dense, or just dry and uncooperative.
- Efficiency: When the microbes have what they need, they work efficiently, turning your waste into valuable garden soil much quicker.
Understanding Your Ingredients: Greens and Browns
Before we dive into the ratio itself, let’s get to know our compost buddies: greens and browns.
Greens (Nitrogen-Rich Materials)
Greens are typically moist, nitrogen-rich materials. They provide the ‘fuel’ for your compost pile, providing the nitrogen that microorganisms need to multiply rapidly. These are usually the fresh, wet components.
Examples of Greens:
- Fruit and vegetable scraps (peels, cores, leftover bits)
- Coffee grounds and tea bags
- Grass clippings (use in thin layers to avoid matting)
- Plant trimmings (fresh, non-diseased leaves and stems)
- Manure from herbivores (like cows, horses, chickens, rabbits – avoid pet waste)
- Eggshells (crushed for faster decomposition)
Browns (Carbon-Rich Materials)
Browns are usually dry, carbon-rich materials. They supply the energy for the microorganisms and, importantly, provide the air pockets that keep your compost pile from becoming a dense, smelly mess. Think of them as the ‘energy bars’ and ‘air conditioners’ of your compost.
Examples of Browns:
- Dried leaves (a composters best friend!)
- Shredded newspaper and junk mail (avoid glossy paper)
- Cardboard (torn into small pieces, remove tape and labels)
- Straw and hay
- Wood chips and sawdust (use sparingly, as they break down slowly)
- Twigs and small branches (chopped up)
- Paper towels and toilet paper tubes (unsoiled)
The Ideal Compost Starter Ratio: A Simple Formula
The most common and effective compost starter ratio is approximately 2 parts Browns to 1 part Greens by volume.
Why “by volume”? Because it’s the easiest way for us home composters to measure. You don’t need a scale or fancy equipment. Just eyeball it as you add materials to your bin.
Imagine you’re filling your compost bin. For every two shovelfuls of brown material you add, you’d add one shovelful of green material. This volume-based approach ensures you’re getting a good balance of carbon and nitrogen.
Important Note: This is a starting point! Composting is a living process, and you’ll learn to adjust based on what you see and smell. But this 2:1 brown-to-green ratio is a fantastic foundation for beginners.
Why This Ratio Works (The Science, Simplified!)
This 2:1 ratio is a sweet spot because:
- Nitrogen from Greens: Microorganisms (like bacteria and fungi) need nitrogen to build their bodies and reproduce quickly. This is their protein shake! Too much nitrogen without enough carbon can lead to ammonia smells as nitrogen gas is released into the air.
- Carbon from Browns: Microorganisms need carbon for energy. It’s their carbohydrate source. Carbon also provides the bulk of the material, creating air pockets that are essential for aerobic decomposition (decomposition that requires oxygen). Too much carbon and not enough nitrogen will slow down the composting process considerably, as the microbes won’t have enough nitrogen to go forth and multiply.
- Moisture Balance: Browns tend to be drier, while greens are wetter. The 2:1 ratio helps create a pile that holds moisture without becoming waterlogged. A good compost pile should feel like a damp sponge – moist but not dripping.
- Airflow: The bulk of the brown materials creates spaces for air to circulate. Oxygen is vital for the aerobic microbes that break down material quickly and without odor.
When to Start Your Compost Pile: Building the Foundation
Starting a compost pile is like laying the foundation for a house. A good start makes everything else easier. When you set up your compost bin or pile for the very first time, or when you have a large amount of new material, it’s the perfect time to consciously aim for that 2:1 brown-to-green ratio.
Here’s a simple way to begin:
- Start with Browns: Begin with a thick layer (4-6 inches) of brown materials at the bottom of your bin. This could be straw, shredded leaves, or small twigs. This layer helps with drainage and aeration right from the start.
- Add Greens: Now, add a layer of your green materials – kitchen scraps, grass clippings, etc. Try to remember your aiming for roughly half the volume of the browns you just added.
- Mix and Repeat: Continue layering greens and browns, always trying to maintain that 2:1 brown-to-green volume ratio.
- Moisten: Lightly water each layer as you add it, especially the brown materials, until the entire pile is as damp as a wrung-out sponge.
- Cover: If you have them, a thin topping of browns can help deter pests and reduce odors.
Common Compost Starter Ratio Mistakes and How to Fix Them
Even with the best intentions, your compost pile can get out of whack. Here are common issues and how to troubleshoot them using your ratio knowledge:
Problem 1: It Smells Like Ammonia (Too Much Green/Nitrogen)
Why it happens: You’ve added too many food scraps, grass clippings, or other nitrogen-rich materials without enough carbon-rich browns. The excess nitrogen is escaping as ammonia gas.
The Fix:
- Stop adding greens for a while.
- Dig in a generous amount of brown materials. Shredded newspaper, dry leaves, or straw are great. Aim to add more browns than you think you need, perhaps a 3:1 or 4:1 brown-to-green ratio for your next few additions until the smell dissipates.
- Turn or aerate your pile. This helps release trapped gases and mix the materials.
Problem 2: It Smells Like Rotten Eggs (Too Wet & Anaerobic)
Why it happens: The pile is too wet, and air can’t get in. This creates anaerobic conditions where different, smelly bacteria take over. Often caused by too many wet greens and not enough bulky browns for airflow.
The Fix:
- Add plenty of dry brown materials. This will absorb excess moisture and create air pockets. Think of adding a 3:1 or 4:1 ratio of browns to whatever greens you might be adding now.
- Turn and aerate the pile thoroughly. Break up any matted areas and mix the wet and dry components.
- If it’s very wet, you might need to remove some of the soggy material and replace it with dry browns.
- Ensure your compost bin has drainage and ventilation.
Problem 3: Nothing is Happening (Too Much Brown / Too Dry / Not Enough Nitrogen)
Why it happens: Your pile is mostly browns, is too dry, or the microbes don’t have enough nitrogen to get the party started. The decomposition process is slow or has stalled.
The Fix:
- Add more green materials. Bring your green additions closer to a 1:1 ratio with browns for a few cycles.
- Add some moisture. Water the pile until it feels like a damp sponge.
- Turn the pile. Aeration provides oxygen, which is essential for microbial activity.
- If you have finished compost, adding a shovelful can introduce active microbes to kick things off.
Problem 4: It’s a Slimy Mess
Why it happens: Usually, this is a sign of too many greens and not enough browns, leading to excess moisture and a dense, slimy texture that prevents aeration.
The Fix:
- Add a significant amount of brown materials to absorb moisture and create air pockets. Think of adding 3 parts browns to 1 part greens for a few turns.
- Thoroughly aerate the pile to break up the slime and introduce oxygen.
- Ensure your bin has good drainage and airflow.
The Role of Turning in Compost Management
Turning your compost pile is like giving it a good shake-up. It mixes ingredients, redistributes moisture, and most importantly, introduces oxygen, which is like fresh air for your microbes. Regularly turning your compost, ideally every 1-2 weeks, helps maintain the aerobic conditions needed for fast, odor-free composting.
When you turn, you’re essentially remixing the materials and re-establishing:
- Aeration: The essential ingredient for aerobic decomposition.
- Moisture Distribution: Helps ensure all parts of the pile are optimally damp.
- Heat Distribution: Moves cooler outer materials to the hotter interior, and vice-versa, keeping the pile active.
Frequent turning is especially helpful if you’re adding a lot of materials at once or if you suspect your ratio might be a bit ‘off.’ For more information on effective composting techniques, the North Carolina Cooperative Extension offers excellent, research-based guidance.
Tools to Help You Get the Ratio Right
You don’t need fancy gadgets, but a few simple tools can make managing your compost ratio much easier:
- Pitchfork or Compost Aerator Tool: Essential for turning and fluffing your pile, ensuring good aeration.
- Shovel: For moving materials into and out of the pile.
- Gloves: For hygienic handling of compostable materials.
- Watering Can or Hose: To add moisture as needed.
- Optional: A “Compost Thermometer” (like those available from gardening supply stores) can help you monitor the pile’s temperature, which is a good indicator of microbial activity.
Measuring Your Compost Ingredients: Volume vs. Weight
As we’ve discussed, the 2:1 compost starter ratio is generally measured by volume. This is because it’s much easier for home gardeners to estimate how much space materials take up than to weigh them. For example, a bin full of dry leaves (browns) versus a bin full of kitchen scraps (greens).
While weight is more precise scientifically, volume is practical for everyday composting. Think of it this way:
- A large volume of dry leaves (browns) might weigh less than a smaller volume of wet kitchen scraps (greens), but the volume measurement is what helps ensure good airflow and prevents a soggy, dense pile.
A Quick Reference Table for Your Compost Blend
Keeping this table handy can help you quickly identify what goes where. Remember, the goal is about two-thirds browns to one-third greens by volume.
| Category | Examples | Purpose | Approximate Volume % Needed (Target) |
|---|---|---|---|
| Browns (Carbon-Rich) | Dried leaves, shredded newspaper/cardboard, straw, sawdust, twigs, brown paper bags | Energy source, provides air pockets, absorbs moisture | ≈ 66% (2 parts) |
| Greens (Nitrogen-Rich) | Fruit/vegetable scraps, coffee grounds, tea bags, grass clippings, plant trimmings, herbivore manure | “Fuel” for microbes, helps heat up the pile | ≈ 33% (1 part) |
Composting Beyond the Basics: Advanced Tips
Once you’ve mastered the basic ratio, you can explore a few more advanced techniques:
- “Hot” Composting: This method aims to get your pile up to temperatures of 130-160°F (54-71°C). It requires a very precise brown-to-green ratio (often closer to 30:1 carbon to nitrogen by weight, which translates to a specific volume mix), regular turning, and a good moisture level. Hot composting breaks down material much faster – sometimes in as little as 4-6 weeks!
- “Cold” Composting: This is the more passive method where you just add materials and let nature take its course. It requires less effort but takes much longer (6 months to 2 years). The ratio still matters for preventing bad smells, but it’s more forgiving.
- Size Matters: Chop or shred larger materials into smaller pieces. Smaller pieces have more surface area, which means microbes can access them more quickly, speeding up decomposition.
- Balance is Key: Even with hot composting, if your ratio is off, your pile won’t heat up properly. Too many greens can lead to a smelly mess, and too many browns will simply sit there.
For those interested in the science behind composting, the Environmental Protection Agency (EPA) provides excellent resources on composting basics, including the importance of carbon-to-nitrogen ratios.
Conclusion: Your Path to Perfect Compost
So there you have it! The mystery of the compost starter ratio is demystified. It boils down to a simple, practical idea: balance your greens and browns. By aiming for roughly two parts browns to one part greens by volume, you give your compost pile the ideal conditions to thrive. This balance is your best defense against smelly, slow, or soggy compost.
Don’t be afraid to experiment and observe. Your compost pile is a living system, and learning to read its cues is a rewarding part of the process. With this guide, you’re well-equipped to start building a healthy, active compost pile that will reward your garden with rich, nutrient-filled soil. Happy composting!
Frequently Asked Questions About Compost Starter Ratios
Q1: What’s the BEST compost starter ratio for beginners?
A: The easiest and most effective ratio to start with is approximately 2 parts Browns to 1 part Greens by volume. This is a forgiving mix that helps prevent common composting problems like bad smells and sogginess.
Q2: Can I just throw anything into my compost bin?
A: Almost! You’ll want to avoid meat, dairy, oily foods, diseased plants, and pet waste (dog/cat). These can attract pests, create foul odors, or spread pathogens. For everything else, focus on maintaining that Green/Brown balance.
Q3: My compost pile smells bad. What did I do wrong with the ratio?
A: A bad smell (like ammonia or rotten eggs) usually means your pile is either too wet, lacks airflow, or has too much nitrogen from greens. Try adding more brown materials and turning your pile to aerate it thoroughly.
Q4: How do I know when my compost is ready?
A: Finished compost will be dark brown, crumbly, and smell earthy and pleasant, like forest soil. You shouldn’t be able to recognize the original materials you put in. It’s often described as “black gold.”
Q5: Do I need to measure my greens and browns precisely?
A: Not really! For most home composters, using simple visual estimation (volume) is perfectly fine. Think “two scoops of browns for every one scoop of greens” as you add them. Don’t stress about perfection; observe your pile and adjust as needed.
Q6: What if I only have kitchen scraps (greens)?
A: You’ll need to supplement with plenty of brown materials. Collect dry leaves in the fall, save shredded newspaper, or ask neighbors if they have brown yard waste. Adding browns is crucial to balance out your greens.
Q7: Can I use grass clippings as a green?
A: Yes, grass clippings are excellent greens! However, they tend to mat together and can become slimy and anaerobic if added in large amounts all at once. It’s best to add them in thin layers or mix them well with browns to ensure airflow.

I am passionate about home engineering. I specialize in designing, installing, and maintaining heating, ventilation, and air conditioning systems. My goal is to help people stay comfortable in their homes all year long.