Hey there, fellow gardeners! Ever look at your plants and wish they had just a little extra boost? Like a super-drink just for them? Well, I’ve got some fantastic news that’ll make your green thumb even greener. We’re diving into the wonderful world of compost tea.
Don’t let the name fool you; it’s not for drinking, but it’s pure gold for your plants! It’s an easy, effective way to supercharge your garden. We’ll break down exactly what it is, why it’s so great, and how you can whip up some genius batches right at home. Stick around, and let’s make your garden the envy of the block!
What Exactly is Compost Tea & Why Should You Care?
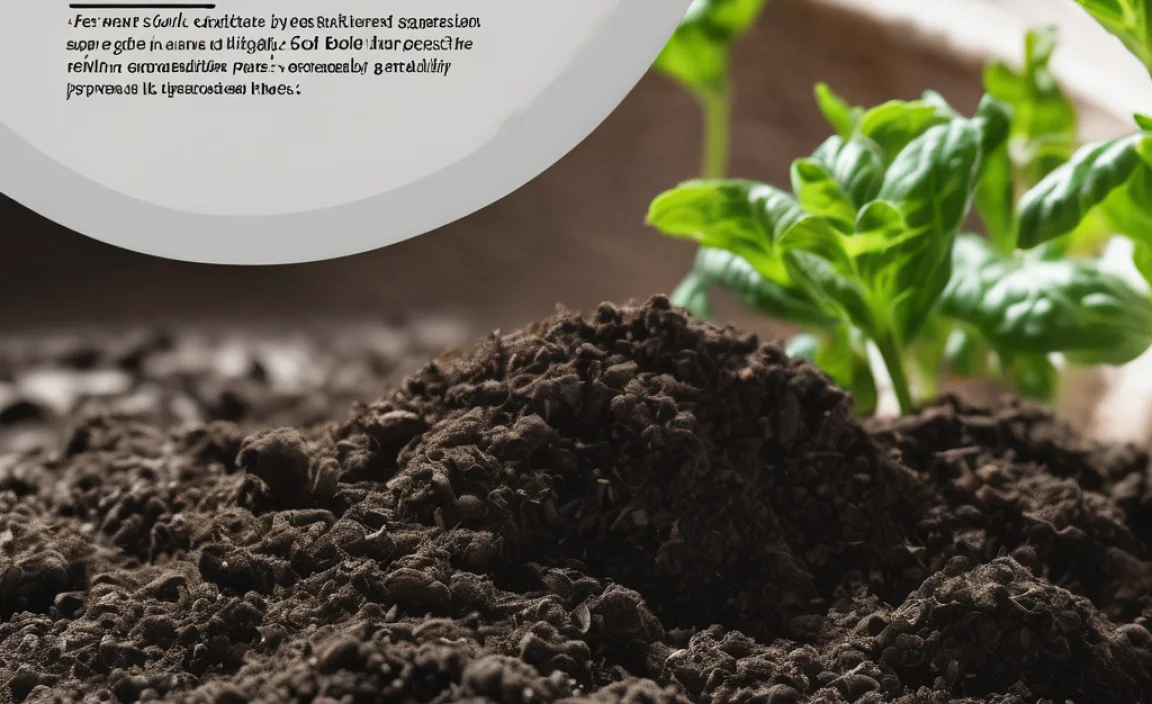
Think of compost tea as a brewed, liquid version of your best compost. Instead of just mixing compost into the soil, you’re extracting all those amazing beneficial microorganisms – the good bacteria, fungi, protozoa, and nematodes – and giving them a ride in water. When you water your plants with this “tea,” you’re delivering a live dose of these tiny helpers right to the roots and leaves.
So, why is this a big deal? Well, these microscopic buddies work wonders!
- Plant Power-Up: They help plants absorb nutrients more efficiently, meaning your veggies get bigger, your flowers bloom brighter, and your lawn becomes lusher.
- Disease Defense: A healthy population of beneficial microbes on leaf surfaces can actually crowd out or compete with harmful pathogens, acting like a natural shield against diseases.
- Soil Revival: The microbes also improve soil structure, helping it hold moisture and air better. It’s like giving your soil a probiotic boost!
- Compost Maximization: It’s a brilliant way to get even more bang for your buck from the compost you’ve worked hard to make.
For beginners, it sounds a bit science-y, but it’s really just about harnessing nature’s own systems. It’s a low-cost, eco-friendly way to give your garden a serious advantage, and that’s something we can all get behind!
The “Brewing” Basics: Getting Started with Compost Tea
Making compost tea is simpler than you might think. The core idea is to steep high-quality, mature compost in water, allowing the beneficial microbes to multiply. There are a couple of main ways to do it: passive brewing and actively aerated brewing.
Option 1: The Passive Brew (Simple & Easy)
This is the most straightforward method, perfect for absolute beginners. You don’t need any special equipment, just a few common items. It’s like making a giant cup of really good, earthy tea for your plants!
What You’ll Need:
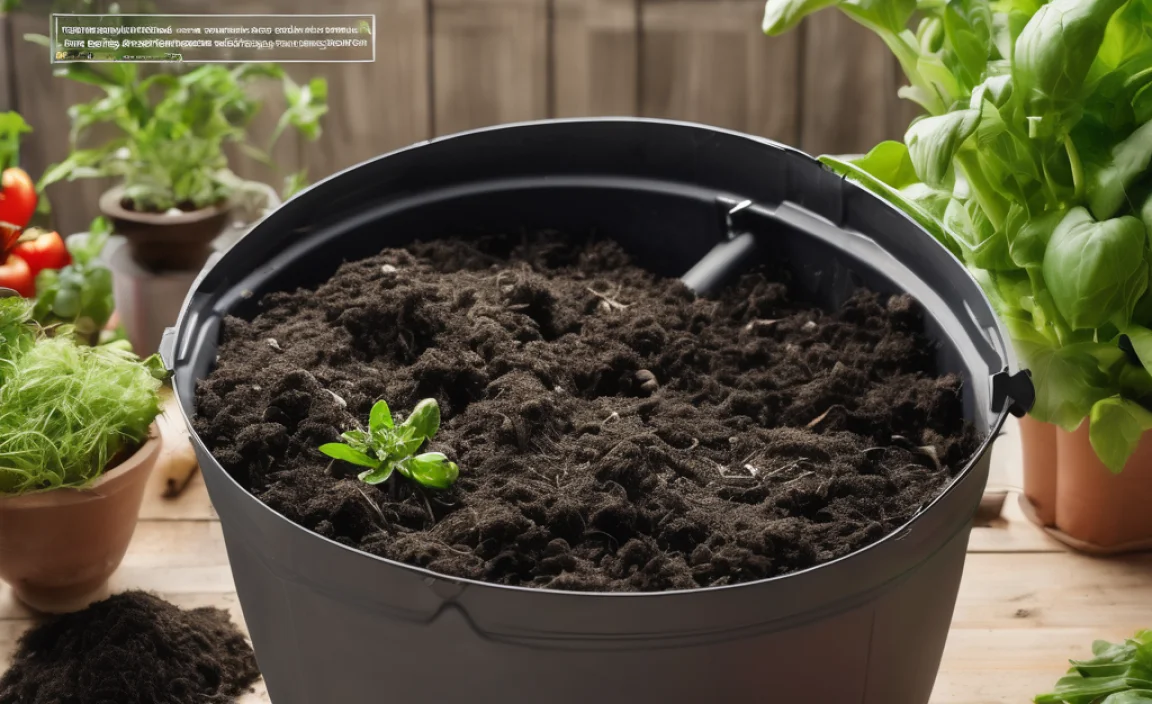
- A Bucket: A clean 5-gallon bucket or larger works perfectly.
- Compost: High-quality, finished compost. Worm castings are an excellent choice for supercharged tea!
- A “Tea Bag”: An old pillowcase, a stocking, or a large permeable fabric bag.
- Water: Dechlorinated water is best. More on that in a bit.
- A Stirring Stick: Any clean stick or paddle.
How to Make It (Passive Brew):
- Fill the Bucket: Fill your bucket about 1/3 full with your good compost or worm castings.
- Bag It Up: Place the compost inside your permeable bag (the “tea bag”). You want it loose enough for water to flow through and access the compost.
- Water Bath: Submerge the compost bag into the bucket of water. Make sure the bag is fully underwater.
- Let it Steep: Cover the bucket loosely (you don’t want bugs getting in, but you need air circulation). Let it sit for 24-48 hours.
- Stir It Up: Every 12 hours or so, give the bag a good stir and agitate the water. This helps release more of those helpful microbes.
- Strain and Use: After 24-48 hours, remove the compost bag. You’re ready to use your tea!
Option 2: The Active Brew (Supercharged Microbes!)
This method uses an aquarium air pump and airstone to constantly bubble oxygen into the water. Oxygen is crucial for beneficial aerobic microbes (the good ones!) to thrive and multiply rapidly, giving you a much more potent brew. It’s a bit more involved but seriously boosts the tea’s power.
What You’ll Need:
- A Bucket: Same as above, 5-gallon or larger.
- Compost: Again, high-quality compost or worm castings.
- “Tea Bag”: Permeable fabric bag.
- Water: Dechlorinated water.
- Aquarium Air Pump: Choose a pump rated for a 5-10 gallon tank or larger.
- Air Tubing: Standard aquarium tubing.
- Airstone: A porous airstone that connects to the tubing.
- Optional: Additives: Molasses (unsulfured), kelp meal, fish hydrolysate. These feed the microbes.
How to Make It (Active Brew):
- Setup the Pump: Place the air pump next to your bucket. Connect the air tubing to the pump and run the other end into the bucket. Attach the airstone to the end of the tubing inside the bucket.
- Add Water: Fill your bucket with dechlorinated water.
- Add Compost: Put your compost into the permeable bag and submerge it in the water.
- Optional – Add Food: If you’re using additives like unsulfured molasses (a great microbial food!), add about 1-2 tablespoons per 5 gallons of water. Dissolve it before adding the compost bag if you can. Kelp meal or fish hydrolysate work well too.
- Turn on the Pump: Plug in your air pump! You should see bubbles vigorously rising from the airstone. This keeps the water oxygenated and the microbes happy and multiplying.
- Brew Time: Let it brew for 12-36 hours. The ideal time depends on temperature and the quality of your ingredients. You’ll know it’s ready when it smells earthy and sweet, not sour or rotten. A good sign is seeing a significant foam or “head” on top, which indicates high microbial activity.
- Use Quickly: Compost tea, especially actively brewed, is a live product. Use it within 4-6 hours of turning off the pump for maximum benefit, as the oxygen levels will drop.
Dechlorinating Your Water: A Quick & Easy Step
Chlorine and chloramine, found in most tap water, can kill those precious microbes you’re trying to cultivate. No worries, though! It’s super easy to get rid of them.
- Let it Sit: Fill your bucket with tap water and let it sit uncovered for 24 hours. Chlorine will naturally evaporate. Chloramine is more stubborn and may require an extra step or a water dechlorinator (available at pet stores for fish tanks).
- Bubble It: Use your aquarium pump and airstone to bubble air through the water for an hour or two. This is a fast way to remove both chlorine and chloramine.
Using this treated water ensures your compost tea is a welcoming environment for your beneficial microbes.
Genius Compost Tea Ideas: Beyond the Basic Brew
Once you’ve got the hang of the basic brewing process, you can get creative and tailor your compost tea to specific plant needs or garden goals. Think of these as special “recipes” for different occasions!
Idea 1: The Worm Casting Powerhouse (For Intense Nutrient Boost)
Worm castings (vermicompost) are incredibly nutrient-rich and packed with beneficial microbes. Using them as your compost base creates a potent tea that’s fantastic for seedlings, stressed plants, or anytime you want to give things a serious kickstart.
- Base: Use 100% worm castings for your compost source.
- Additives (Optional but recommended): A small amount of unsulfured molasses for microbial food, and a tablespoon of kelp meal for micronutrients and growth stimulants.
- Brewing: Active brewing is best to maximize the worm castings’ benefits.
- Best For: Seed starting mix, transplanting shock, boosting fruiting/flowering plants.
Idea 2: The Soil Builder’s Blend (For Improving Soil Structure)
This focuses on encouraging a diverse range of fungi and bacteria that improve soil tilth, aeration, and water retention. It’s great for tired or compacted soils.
- Base: A mix of mature compost and about 10-20% finished hardwood mulch or biochar. These provide different microbial environments.
- Additives: A larger portion of kelp meal (for fungal stimulants) and very little to no molasses (as you want to feed a broad spectrum of microbes, not just sugar-lovers).
- Brewing: Active brewing is excellent for this, ensuring a diverse microbial population.
- Best For: Revitalizing vegetable beds, amending clay soil, improving sandy soil.
Idea 3: The Foliar Spray Formula (For Leafy Greens & Leaf Health)
Compost tea isn’t just for watering roots! When applied as a foliar spray (sprayed directly onto leaves), it can provide nutrients and a protective microbial layer to combat leaf diseases. For foliar application, you want a brew that’s very finely strained to avoid clogging your sprayer.
- Base: High-quality compost or worm castings.
- Straining: Use a very fine mesh strainer or multiple layers of cheesecloth after brewing to ensure no solids remain.
- Additives: Kelp meal is particularly good for foliar sprays as it provides plant hormones and micronutrients beneficial for leaf growth.
- Brewing: Active brewing is good, but passive brewing followed by meticulous straining also works.
- Dilution: You might want to dilute this tea slightly (1:1 with water) for foliar spraying to ensure it adheres well and doesn’t cause any leaf burn.
- Best For: Leafy vegetables, fruit trees, ornamental plants prone to fungal issues. Don’t spray during peak sun to avoid burn.
Idea 4: The Simple Garden “Tonic” (For General Garden Happiness)
This is your everyday, all-purpose compost tea. It’s less about a specific goal and more about consistent, general health for your entire garden. It’s your easy-go-to for regular feeding.
- Base: Good mature compost from your bin.
- Additives: A touch (1 tablespoon per 5 gallons) of unsulfured molasses.
- Brewing: Either passive or active brewing works well.
- Best For: Regular watering of vegetable gardens, flower beds, lawns, and potted plants.
Remember, the “genius” comes from understanding what you’re trying to achieve. Are your plants hungry? Stressed? Is your soil compacted? Tailor your brew accordingly!
When and How to Apply Your Compost Tea
You’ve brewed your potent elixir, now what? Applying it correctly is key to unlocking all those fantastic benefits.
Timing is Everything
The best times to apply compost tea are:
- Early Morning: This is usually ideal. Plants are waking up and ready to take up nutrients. The microbes have a cooler environment to establish themselves before the heat of the day sets in.
- Late Afternoon/Early Evening: This also works, especially if the morning isn’t feasible. The microbes have the night to colonize.
- On Overcast Days: Perfect for applying, as the microbial activity won’t be hindered by intense sun.
Avoid applying in the direct, hot sun of midday, as this can stress your plants and kill some of the beneficial microbes before they can work their magic. Also, try not to apply right before heavy rain, as much of your hard work could just wash away!
Application Methods
How you apply your tea depends on what you want to achieve:
1. Soil Drench (Root Zone Application)
This is the most common method. You’re watering the soil directly, delivering the microbes and nutrients straight to the plant’s roots.
- How-To: Use a watering can to apply the compost tea directly to the base of your plants, saturating the soil around the root zone.
- Dilution: For general soil drenching with a potent brew, you might dilute the tea with plain water at a 1:1 or even 1:4 ratio (tea to water), especially if you’re concerned about over-fertilizing or if you used strong additives. A full-strength brew can also be beneficial, particularly if you used less compost and no added fertilizers.
- Frequency: Every 2-4 weeks during the growing season is a good general guideline.
2. Foliar Spray (Leaf Application)
As mentioned before, spraying the tea directly onto the leaves can offer protection and absorb some nutrients. This is where a very finely strained tea is essential.
- How-To: Use a clean spray bottle or a garden sprayer. Ensure the tea is well-strained to prevent clogging. Cover both the top and undersides of the leaves.
- Dilution: A 1:4 or 1:10 ratio (tea to water) is often recommended for foliar sprays to avoid any potential leaf burn and to allow for better adhesion.
- Frequency: Can be done every 1-2 weeks, especially on vulnerable plants or during periods of disease pressure.
Important Considerations for Application
Smell Test: Your compost tea should smell earthy, sweet, or like mushrooms. If it smells foul, rotten, or like ammonia, something went wrong, and you should discard it. This usually happens if there wasn’t enough oxygen (in active brewing) or if the compost used was not mature.
Straining: Always strain your tea before using it, especially if you’re using a sprayer. For watering cans, a simple coarse mesh is usually enough to remove the bulk of the solids.
Compost Quality: The success of your compost tea hinges on the quality of your compost. Use compost that is fully decomposed and smells good. Using immature or “hot” compost can harm your plants.
- Resources on Compost Quality: For more on what makes good compost, check out the EPA’s composting at home guide.
Compost Tea Ingredients Table: What to Use & Why
Here’s a handy cheatsheet for common compost tea ingredients, whether you’re buying them or sourcing them from your garden:
| Ingredient | Source | Why Use It? |
|---|---|---|
| Finished Compost | Your compost bin, garden store | The foundation! Provides the base microbial population and organic matter. |
| Worm Castings (Vermicompost) | Worm farm, garden store | Extremely nutrient-dense, rich in beneficial microbes and worm enzymes. |
| Unsulfured Molasses | Health food store, grocery store | Excellent food source for beneficial bacteria, promoting rapid multiplication. Use organic and unsulfured. |
| Kelp Meal | Garden store | Rich in over 60 trace minerals, plant growth hormones (cytokinins, auxins), and stimulates fungal growth. |
| Fish Hydrolysate | Garden store | Provides nitrogen and other nutrients, also contains beneficial amino acids for plants and microbes. Can have a strong smell. |
| Biochar | Garden store | Increases microbial habitat, improves water and nutrient retention. Add in small amounts to compost before brewing. |
| Hardwood Biochar | Garden store | Good for soil structure and microbial colonization. |
When selecting ingredients, always aim for the highest quality you can find. Organic materials are preferred to avoid introducing any unwanted chemicals into your garden’s ecosystem.
Troubleshooting Common Compost Tea Issues
Even with the best intentions, sometimes things don’t go perfectly. Here are a few common problems and how to fix them:
Problem: My Compost Tea Smells Foul!

I am passionate about home engineering. I specialize in designing, installing, and maintaining heating, ventilation, and air conditioning systems. My goal is to help people stay comfortable in their homes all year long.