Is your garden looking a little sad? Do your plants seem to be struggling, no matter what you do? Many of us love a beautiful garden, but getting our plants to thrive can feel like a puzzle. It’s frustrating when you put in the effort and don’t see the vibrant growth you’re hoping for. But what if there was a simple, natural way to give your plants a powerful boost? This guide will show you exactly how to make compost tea, a fantastic liquid fertiliser that’s easy and affordable. We’ll walk through everything, step-by-step, so you can start seeing your garden flourish.
Compost Tea in South Africa: Your Essential Guide to a Greener Garden
Hey there, fellow gardeners! Troy D Harn here from TopChooser, your go-to friend for all things home and garden. Today, we’re diving into something magical for your plants: compost tea. If you’re in South Africa and want to give your garden a natural, powerful kickstart, you’ve come to the right place. We’re going to keep this super simple, just like chatting over the fence about our neighbourly gardening wins. Composting is great, but turning it into liquid gold for your plants? Even better! Stick around, and by the end of this, you’ll be brewing your own compost tea like a pro.
Why Compost Tea is Your Garden’s New Best Friend
Think of compost tea as a super-powered smoothie for your plants. It’s made by steeping compost in water, which extracts all the beneficial microorganisms and nutrients from the compost. These little helpers then get delivered directly to your plants’ roots and leaves, giving them a fantastic boost. In South Africa, where water can be a concern and soil quality varies, compost tea is a brilliant way to:
- Improve Soil Health: It introduces beneficial microbes that help break down organic matter, making nutrients more available to plants.
- Boost Plant Growth: The readily available nutrients help plants grow stronger, healthier, and more resistant to pests and diseases.
- Increase Nutrient Uptake: Plants can absorb the dissolved nutrients in liquid form more easily than from solid compost dug into the soil.
- Reduce the Need for Chemical Fertilisers: It’s an all-natural solution, keeping your garden eco-friendly and safe for you, your family, and local wildlife.
- Enhance Disease Resistance: A healthy population of beneficial microbes can help crowd out harmful pathogens, giving your plants a natural defence system.
What You Need to Brew Compost Tea
The beauty of compost tea is that you don’t need a lot of fancy equipment. You probably have most of what you need already, or they’re easy to find and not too expensive. Here’s a simple list:
Essential Gear for Brewing
- A Bucket: A clean 20-litre (5-gallon) bucket is perfect. Make sure it hasn’t been used for chemicals.
- Water: Approximately 15-20 litres of dechlorinated water is ideal. More on how to dechlorinate below!
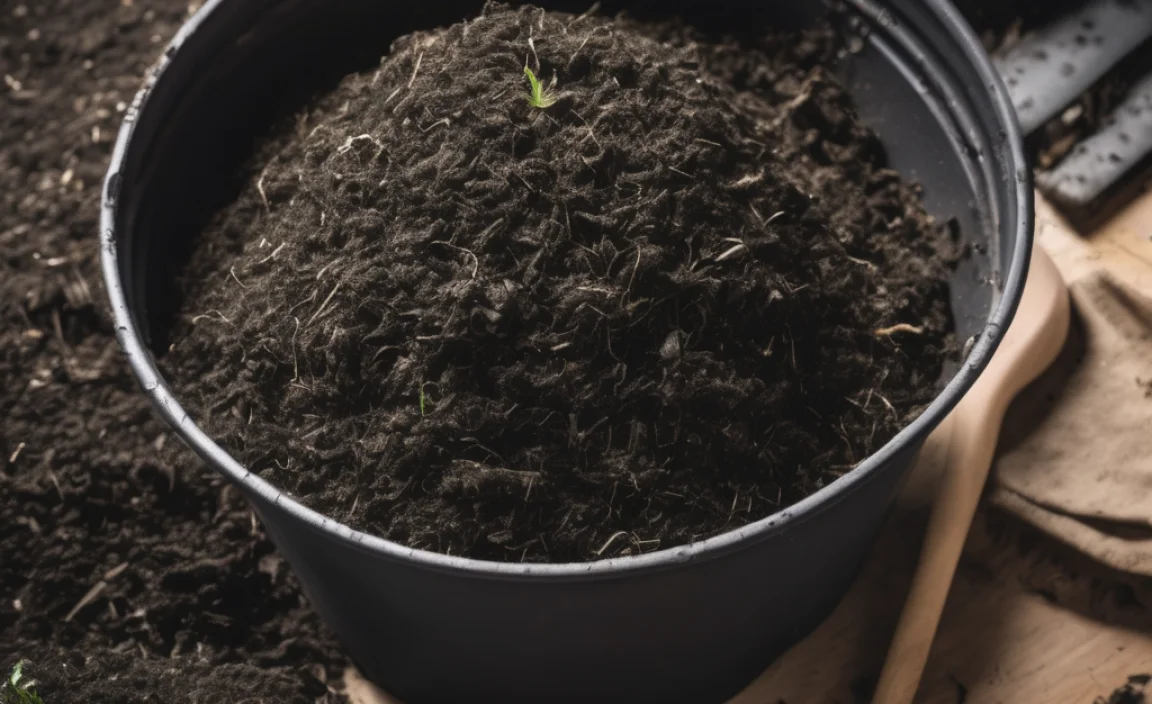
- Compost: High-quality, well-rotted compost is key. Worm castings are also excellent!
- Mesh Bag or Old Stocking: To hold the compost while it steeps.
- Aerator (Optional but Recommended): An aquarium pump with an air stone really makes a difference for “aerated” compost tea.
- Stirring Stick: For manually aerating if you don’t have a pump.
Understanding Your Ingredients: Compost Quality Matters!
The most important ingredient is your compost. It needs to be mature, meaning it’s fully broken down and doesn’t smell sour or unpleasant. Fresh, uncomposted material can actually harm your plants. If you’re using store-bought compost, ensure it’s good quality. Worm castings (vermicompost) are like the caviar of compost tea ingredients – packed with beneficial microbes!
For some excellent advice on making your own compost in South Africa, check out this guide from the Western Cape Government. It’ll help you get the best compost to start with!
Dechlorinating Your Water
Tap water often contains chlorine, which can kill the beneficial microbes you’re trying to cultivate. Don’t worry, it’s super easy to fix:
- Let the water sit in an open container (like your brew bucket) for at least 24 hours. The chlorine will evaporate naturally.
- Or, bubble air through the water using your aquarium pump for about an hour.
Rainwater is naturally chlorine-free and is the best option if you can collect it!
How to Brew Simple, Non-Aerated Compost Tea (The Easy Way!)
This is the simplest method and works well for many situations. It’s perfect for beginners who don’t want to invest in special equipment yet. Here’s how to do it:
Step-by-Step: Brewing Your First Batch
- Fill Your Bucket: Pour about 15-20 litres of your dechlorinated water into the clean bucket.
- Prepare Your Compost: Take about 1-2 litres of your best compost (or worm castings). If it’s a bit clumpy, break it up.
- Bag It Up: Place the compost into your mesh bag or old stocking. Tie the top securely so it doesn’t open up and spill compost everywhere.
- Submerge the Bag: Dunk the compost bag into the water. You want it to be fully underwater.
- Steep and Stir: Let the bag steep in the water for 24-48 hours. Stir the water vigorously with your stick at least once or twice a day. This helps release the goodness from the compost. Imagine you’re making a giant cup of tea for your plants!
- Check for Readiness: After 24-48 hours, the water should have a nice, earthy smell and a darker colour. If it smells bad or sour, your compost might not have been good enough, or it’s gone off. Discard it and try again with better material.
- Remove the Bag: Take the compost bag out of the water. You can usually hang it over the bucket to let it drip, then add the contents back to your compost bin.
- Dilute Your Tea: Most plants like their compost tea diluted. A good starting point is a 1:10 ratio – one part compost tea to ten parts water. So, if you have 1 litre of tea, mix it with 10 litres of water.
This non-aerated tea is great for watering your plants at the roots. It’s packed with dissolved nutrients and beneficial soluble compounds.
Brewing Aerated Compost Tea (ACT) – For Maximum Microbial Power
Aerated Compost Tea (ACT) takes things up a notch by actively pumping air into the brew. This encourages the growth of aerobic (oxygen-loving) beneficial microbes, resulting in a more potent brew. It sounds technical, but it’s quite straightforward.
Step-by-Step: Brewing Aerated Compost Tea
- Set Up Your Aerator: Place your aquarium pump and air stone at the bottom of your clean bucket. Fill the bucket with 15-20 litres of dechlorinated water.
- Add Compost: Place 1-2 litres of high-quality compost (or worm castings) into your mesh bag. You can add a tablespoon or two of unsulfured molasses or a bit of fish hydrolysate to give the microbes something to eat. This is optional but can boost microbial activity.
- Submerge and Brew: Submerge the compost bag in the water. Turn on your air pump. Ensure the air stone is bubbling vigorously, creating lots of movement in the water. Let it brew for 24-36 hours.
- Monitor and Stir (Optional): You can give the bag a gentle swish now and then, but the aeration does most of the work. The water should develop a rich, earthy smell and a frothy head.
- Smell Test: After 24-36 hours, turn off the pump. The tea should smell wonderfully earthy and alive. A foul or sour smell means something went wrong.
- Strain and Dilute: Remove the compost bag. You can strain the tea through a finer mesh if you plan to use a sprayer, to avoid clogging. Dilute your ACT at a 1:5 or 1:10 ratio with fresh, dechlorinated water.
ACT is fantastic for both soil drenching and foliar feeding (spraying on leaves). The increased microbial life is a real game-changer for plant health.
When and How to Apply Compost Tea
Timing and application are important to get the most out of your compost tea. Think of it as giving your plants a timely nutritional drink.
Best Times to Apply
- Early Morning or Late Evening: This is when plants are most receptive, and it reduces the risk of scorching leaves in direct sunlight.
- When Plants Are Establishing: Great for seedlings, newly transplanted plants, or plants that are flowering or fruiting.
- After Pest or Disease Outbreaks: A healthy plant is more resilient, so a boost after a scare can help it recover.
Application Methods
- Soil Drenching: Pour the diluted tea directly onto the soil around the base of your plants. This encourages strong root development and benefits the soil microbes. Use a watering can for this.
- Foliar Feeding: Spray the diluted tea onto the leaves of your plants using a garden sprayer. This provides nutrients directly to the leaves and can help protect against fungal diseases. Make sure to cover the undersides of the leaves too!
The general dilution for most applications is between 1:5 and 1:10 (Tea:Water). For a stronger boost, you might use 1:5. For regular feeding, 1:10 is a good bet. Always observe your plants; they’ll tell you what they like!
Compost Tea vs. Other Fertilisers in South Africa
It’s helpful to see how compost tea stacks up against other options you might find in South African garden centres.
| Feature | Compost Tea | Chemical Fertilisers | Solid Compost | Manure |
|---|---|---|---|---|
| Nutrient Availability | High (liquid form) | Variable (can be slow or fast release) | Lower (needs soil breakdown) | Variable |
| Microbial Activity | Very High (stimulates beneficial microbes) | Low to None (can harm microbes) | Moderate to High | Moderate to High |
| Ease of Application | Easy (watering can or sprayer) | Easy (spreading or dissolving) | Requires digging into soil | Requires digging into soil |
| Environmental Impact | Very Low (natural, organic) | Can cause runoff pollution, soil degradation | Low (improves soil structure) | Low (improves soil structure) |
| Cost | Very Low (using existing compost) | Moderate to High (ongoing purchase) | Low (if made at home) | Low to Moderate (can be free or purchased) |
| Risk of Over-fertilising | Low (especially when diluted) | High (can burn roots) | Low | Low to Moderate |
As you can see, compost tea offers a fantastic balance of plant nutrition and soil health benefits, all while being eco-friendly and budget-conscious. It’s an excellent complement to adding solid compost to your garden beds.
Troubleshooting Common Compost Tea Problems
Even with the best intentions, sometimes things don’t go perfectly. Here are a few common issues and their simple solutions:
- Foul Smell: This usually means the brew has gone anaerobic (lacked oxygen) or the compost was not fully decomposed.
- Solution: Ensure good aeration if making ACT. If it’s a non-aerated brew, stir more frequently. Use only well-rotted, mature compost. If it smells bad, don’t use it on your plants; return it to the compost bin.
- Clogged Sprayer: If you want to use a sprayer and it keeps blocking.
- Solution: Strain the tea more thoroughly before putting it into the sprayer. You can use a fine sieve or even a old piece of cloth or finer mesh bag. Consider a soil drench if straining is too much hassle.
- No Visible Froth/Foam: Sometimes the brew doesn’t look as active as expected.
- Solution: Don’t worry too much about the froth alone. The smell and colour are better indicators. Adding a small amount of molasses can help feed the microbes and encourage some foam.
- Plants Don’t Seem to Respond: You’ve made the tea, applied it, but don’t see a difference.
- Solution: Be patient! Natural solutions often take a little time to work their magic. Ensure your compost quality is high and you’re using it consistently. Check other factors like sunlight, watering, and pests.
- Brown Spots on Leaves After Foliar Feeding: Sometimes, especially with undiluted or strong brews, leaf scorch can occur.
- Solution: Always dilute your tea, especially for foliar feeding (start with 1:10). Apply in the cooler parts of the day (early morning/late evening). If it happens, rinse the leaves with plain water and try a weaker dilution next time.
Frequently Asked Questions (FAQs) About Compost Tea in South Africa
Q1: How often should I use compost tea?
For regular feeding, once every 2-4 weeks is great. You can apply it more frequently, like weekly, when plants are establishing or recovering. For a quick boost, a single application can help.
Q2: Can I use any type of compost?
It’s best to use well-rotted, finished compost. Worm castings are superb. Avoid using partially composted material or anything that smells sour or like ammonia, as it can harm your plants.
Q3: What is the best water to use in South Africa?
Rainwater is ideal as it’s naturally chlorine-free. If using tap water, make sure to dechlorinate it by letting it stand for 24 hours or by aerating it.
Q4: Can I make compost tea when it’s cold outside?
Yes, you can, but microbial activity slows down in cooler temperatures. It might take longer for the tea to brew properly (longer steeping times). Aim for warmer temperatures if possible for best results.
Q5: What happens to the leftover compost from the tea bag?
You can simply add the contents of the bag back to your compost bin or pile. It’s already partially broken down, so it will continue to decompose nicely.
Q6: Can I store brewed compost tea?
It’s best to use compost tea within a few hours of brewing (especially aerated tea), as the beneficial microbes are most active then. If you must store it, keep it in a cool, dark place in a covered container for no more than 24-48 hours. It will lose some of its potency.
Q7: Will compost tea attract pests?
No, a properly brewed compost tea is made from beneficial microbes and nutrients that support plant health. In fact, healthy, resilient plants are less susceptible to pests. A foul smell, however, might indicate an issue with the brew itself.
Conclusion: Brew Your Way to a Thriving South African Garden
There you have it! Making compost tea in South Africa is much simpler than you might have thought. Whether you’re a seasoned gardener or just starting out, this natural liquid fertiliser is a game-changer for your plants and your soil. You’ve learned how to prepare your ingredients, brew both simple non-aerated and more potent aerated versions, and apply it effectively.
By using compost tea, you’re not just feeding your plants; you’re nurturing a living ecosystem in your soil. It’s a cost-effective, eco-friendly way to achieve that lush, vibrant garden you’ve always wanted. So, grab that bucket, get brewing, and watch your plants thrive. Happy gardening!

I am passionate about home engineering. I specialize in designing, installing, and maintaining heating, ventilation, and air conditioning systems. My goal is to help people stay comfortable in their homes all year long.