Ever thought about a compost toilet? Maybe you’re living in an apartment with limited space or a tiny house and space is a premium. Or perhaps you’re just curious about sustainable living. Whatever your reason, setting up a compost toilet on a balcony can be a fantastic idea. It might sound a bit…unusual, at first. But with the right knowledge and a few simple steps, it’s totally doable and can be a real game-changer for your eco-friendly efforts. We’ll walk through it all, making it super straightforward.
Compost Toilet Balcony: Your Essential Guide to Going Green Up High
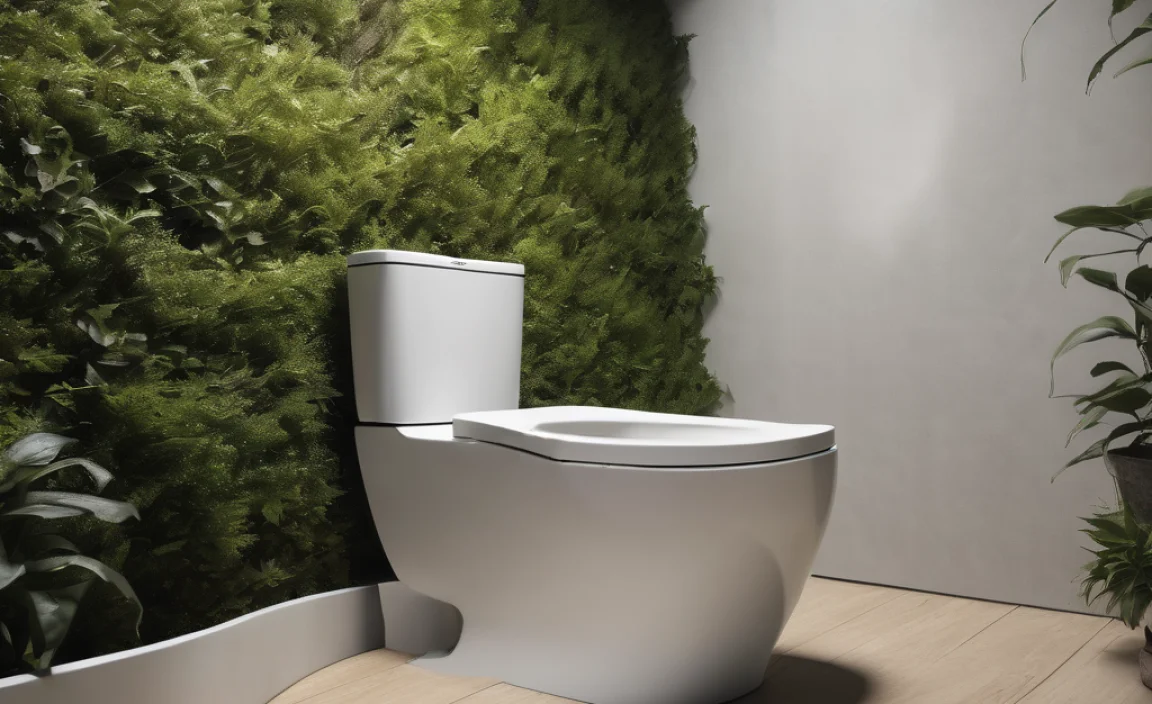
Hey there, home improvers and eco-warriors! Troy D Harn here, from TopChooser, ready to tackle another home project that’s not as complicated as it sounds. Today, we’re talking about something a bit different, but incredibly practical for certain living situations: the compost toilet on a balcony. If you’ve got a balcony and a desire to reduce your environmental footprint, or if you’re living space is cozy, this guide is for you. We’re going to break down exactly how to approach this, no fuss, no jargon, just solid advice.
Why a balcony, you ask? For apartment dwellers, those in tiny homes, or anyone wanting a supplementary eco-friendly toilet solution without major plumbing, a balcony offers an accessible outdoor space. It allows for natural ventilation and easy access for managing the compost process. It’s a brilliant way to embrace sustainable practices, even when traditional composting methods might seem out of reach. We’ll cover everything from choosing the right toilet to managing the compost, all in easy-to-follow steps.
Why Consider a Compost Toilet on Your Balcony?
Let’s dive into the good stuff. Having a compost toilet on your balcony isn’t just a quirky trend; it’s a practical choice with several benefits, especially for urban living or smaller spaces.
- Water Conservation: Traditional flushing toilets use a significant amount of water. Compost toilets, on the other hand, use little to no water. This can be a huge win for your water bill and the environment.
- Reduced Waste: You’re diverting waste from sewage systems, which often require a lot of energy and infrastructure to process. Composting turns waste into a valuable resource.
- Off-Grid Living & Sustainability: Perfect for those looking to reduce their reliance on municipal services or embrace a more sustainable lifestyle.
- Space-Saving: In small apartments or tiny homes where extra bathroom space is non-existent, a balcony can be repurposed effectively.
- Gardening Benefits: The end product of composting is nutrient-rich fertilizer for your plants. Imagine fertilizing your balcony garden with what was previously waste!
- Educational Opportunity: It’s a hands-on way to learn about the natural cycles of decomposition and resource management.
Choosing the Right Compost Toilet for Your Balcony
Not all compost toilets are created equal, and when you’re thinking about a balcony, a few key factors come into play. You want something that’s compact, easy to manage, and odor-free. Most balcony setups will involve a “dry” toilet system, meaning it doesn’t use water to flush.
There are two main types you’ll likely consider:
Compost Toilet Model Comparison for Balcony Use
| Type | How it Works | Pros for Balcony | Cons for Balcony | Typical Cost | Best For |
|---|---|---|---|---|---|
| Self-Contained Unit (e.g., portable camping toilets modified) |
Often uses a bucket system with a solid separator. Liquids are collected separately, and solids are mixed with cover material. | Simple, no complex parts, relatively inexpensive, easy to set up and move. | Requires frequent emptying, might have less aesthetic appeal, odor control relies heavily on cover material. | $50 – $500 | Occasional use, very budget-conscious, learning the ropes. |
| Composting Toilet Systems (e.g., urine-diverting dry toilets – UDDTs) |
Separates liquid and solid waste from the start. Solids go into a composting chamber or bin, while liquids are collected or diverted for other uses. | Excellent odor control due to separation, more efficient composting, often better designed for long-term use. | Can be more expensive, might require more space for the unit and composting bin, needs a plan for liquid management. | $500 – $2,000+ | Regular use, maximizing efficiency, serious about composting. |
When selecting, consider these questions:
- Size: How much space do you actually have on your balcony? Measure carefully!
- Capacity: How often are you prepared to empty it?
- Ventilation: Does it have a vent pipe to manage odors? This is crucial for balcony use.
- Material Separation: Do you want to separate liquids and solids? Urine diverting systems dramatically reduce odor and make composting easier.
- Budget: How much are you willing to spend upfront?
For a balcony, a urine-diverting dry toilet (UDDT) is generally the preferred option. The separation of urine from solids is key to minimizing odors and making the composting process much more effective and pleasant in a residential setting. You can find dedicated UDDT units specifically designed for small spaces, or adapt simpler systems.
Setting Up Your Balcony Compost Toilet: A Step-by-Step Approach
Alright, let’s get this set up! Don’t worry, we’ll take it one step at a time. Safety and good ventilation are our top priorities here on the balcony.
Step 1: Choose the Perfect Spot
This is vital for comfort and managing the composting process. You’ll want a spot on your balcony that:
- Is Private: For obvious reasons.
- Is Well-Ventilated: Crucial for odor control. A spot exposed to fresh air is best.
- Has Easy Access: You’ll need to get to it regularly.
- Is Protected from Extreme Weather: While some units are weather-resistant, constant direct sun or heavy rain might affect them over time.
- Considers Neighbors: Be mindful of where the vent pipe will direct any expelled air.
If your balcony is enclosed, ensure there’s an opening or good airflow. If you’re using a vented system, position it so the vent pipe can run up outside your balcony, ideally to above the railing or roof line, without causing a nuisance to neighbors. Check local regulations for any rules on vents or waste disposal.
Step 2: Assemble Your Compost Toilet
Follow the manufacturer’s instructions precisely. Most compost toilets come with:
- The main housing/tank
- A seat and lid
- A vent pipe kit
- (For UDDTs) A diversion insert
- (For UDDTs) A separate container for urine
Ensure all connections are secure. If you’re using a UDDT, correctly installing the urine diversion mechanism is key. The urine runs down into a separate jug or hose, while solids fall directly into the compost chamber.
Step 3: Connect the Ventilation System
This is non-negotiable for a balcony setup. A good vent pipe system expels any potential odors from the toilet, drawing fresh air in. Most systems come with a fan, either battery-powered or solar. You’ll need to run the vent pipe:
- From the toilet unit, usually through a specially designed port.
- Upwards, following the path of least resistance.
- Ideally, extending above the balcony railing or to the roofline to diffuse air away from living spaces and neighbors.
Secure the pipework with brackets or ties to prevent it from moving. Many units come with a screen over the opening to keep pests out. For more on ventilation principles, you can check resources from organizations like the U.S. Environmental Protection Agency which discusses composting and decomposition, highlighting the importance of air flow.
Step 4: Prepare Your Composting Material (Cover Material)
This is what you’ll add after each use to cover the solid waste. It helps absorb moisture, control odor, and provides the carbon needed for healthy composting. Excellent cover materials include:
- Sawdust: Best option, fine and absorbent.
- Coconut Coir: Great alternative, also very absorbent and sustainable.
- Peat Moss: Works well but can be less sustainable if sourced poorly.
- Shredded Paper/Cardboard: Use sparingly and ensure it’s finely shredded.
Keep a generous supply of your chosen cover material in a container near the toilet. You’ll need a scoop for adding it.
Step 5: Manage Urine Collection (for UDDTs)
If you’re using a urine-diverting toilet, managing the collected urine is important. It can be:
- Diluted and Used as Fertilizer: Urine is rich in nitrogen. Dilute it with water (usually a 1:10 ratio) and use it to fertilize established plants. Do this carefully and avoid direct contact with leaves.
- Disposed of Down a Drain: If you have access to a standard drain, you can pour the collected urine into it.
- Composted Separately (less common for balcony setups): In some larger systems, urine can be composted, but this is usually more complex.
For balcony use, diluting and fertilizing plants or pouring it down a drain is the most practical. Always empty the urine container regularly to prevent odors and overflow. You might need a hose or funnel to easily transfer it.
Maintaining Your Balcony Compost Toilet
Consistency is key. A little bit of maintenance goes a long way to keeping your balcony setup pleasant and effective.
Daily Tasks
- Add Cover Material: After every solid waste deposit, add enough cover material to completely cover it. This is the most critical step for odor control.
- Empty Urine Container: If using a UDDT, empty the urine collection jug as needed.
- Keep the Area Clean: Wipe down the toilet seat and surrounding area regularly.
Weekly Tasks
- Check Ventilation: Ensure the fan is running and the vent pipe is clear.
- Top Up Cover Material: Make sure you always have enough on hand.
- Inspect for Pests: Check around the unit and vent for any signs of unwanted visitors.
Periodic Tasks (Solids Management)
This is where the “composting” really happens. The frequency depends on your toilet’s capacity and how much solids it holds. For most apartment-sized units, you’ll have an inner bucket or chamber for the solids.
When the Solids Chamber is Full:
- Empty the Solids: Carefully remove the solids bucket or chamber.
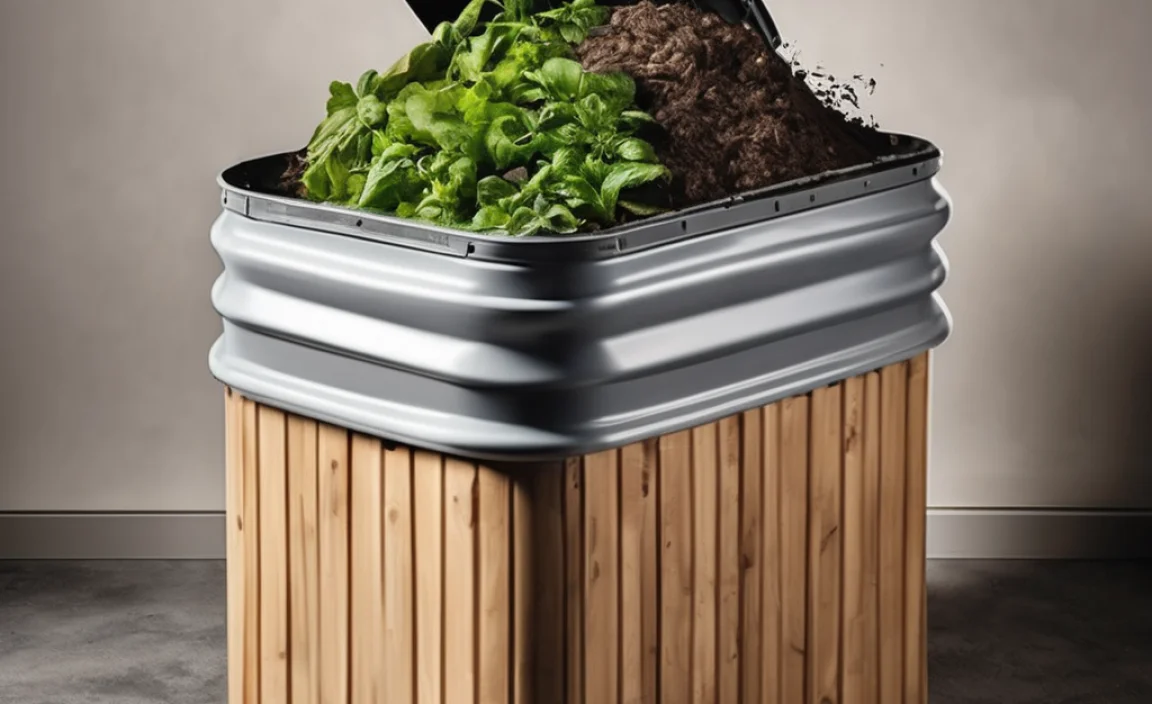
- Transfer to Composting Bin: You’ll need a separate, dedicated composting bin for this. This bin should be well-ventilated and ideally outdoors, perhaps an additional section of your balcony (if space and regulations allow) or a small bin you can manage.
- Mix and Manage: Add more carbon-rich cover material to the solids in the bin. You can also mix in “browns” like dry leaves or shredded cardboard. The goal is to create a balanced mix for decomposition.
- Allow to Compost: This process takes time. Depending on the temperature, moisture, and your management, it can take several months for the solids to fully compost. The end product should be a dry, crumbly, earth-like material, with no recognizable waste.
Important Note on Composting: For safety and to ensure the waste is sanitized, the composted material should ideally reach temperatures of 131°F to 170°F (55°C to 75°C) for several days. This kills pathogens. For home composting, especially on a balcony, achieving and maintaining these temperatures can be challenging. If you are unsure, or if local regulations require it, you may need to dispose of the unfinished compost material or seek professional advice on how to manage it safely. Some modern compost toilets have integrated composting processes within the unit that take longer but are more contained.
A well-managed compost bin is crucial. You can find simple tumblers or static bins. A good rule of thumb is to maintain a reasonable moisture level—not too wet, not too dry—and ensure good aeration.
For those interested in the science of composting, resources like the Composting Council of New Zealand offer excellent guidance on carbon-to-nitrogen ratios and temperature monitoring, which can be adapted even for small-scale composting.
Troubleshooting Common Balcony Compost Toilet Issues
Even with the best intentions, you might run into a few snags. Here’s how to address them:
Issue: Odors
- Cause: Insufficient cover material, poor ventilation, urine backing up, or chamber too full.
- Solution: Add more cover material (especially after solids), ensure the fan is running, check and empty the urine diverter/container more frequently, and empty the solids chamber sooner. Make sure the vent pipe isn’t blocked.
Issue: Pests
- Cause: Openings in the system, exposed waste, or improperly stored cover material.
- Solution: Ensure all access points are sealed, use a fine mesh on the vent pipe, keep cover material in a sealed container, and empty solids regularly.
Issue: Slow Composting (in the secondary bin)
- Cause: Too much moisture, not enough carbon material, or lack of aeration.
- Solution: Add more dry cover material or “browns” (like shredded paper or dry leaves) to absorb excess moisture. Turn or aerate the compost pile regularly. If it’s too dry, add a little water.
Issue: Liquid Pooling in the Solids Chamber
- Cause: Clogged diversion insert or a faulty UDDT system.
- Solution: Clean the urine diversion insert thoroughly. Ensure it’s correctly positioned. If the problem persists, the unit might need repair or replacement.
Balcony Compost Toilet: Pros and Cons at a Glance
Let’s lay out the good and the not-so-good points to help you decide if this is the right choice for your balcony.
Pros
- Eco-Friendly: Saves water, reduces landfill waste, creates fertilizer.
- Cost-Effective (Long-Term): Saves on water bills.
- Ideal for Small Spaces: Turns an underutilized area into functional space.
- Off-Grid Solution: Great for flexibility and reducing utility reliance.
- Nutrient for Plants: Compost can feed your balcony garden.
Cons
- Requires Active Management: This isn’t a “set it and forget it” solution.
- Odor Control is Crucial: Needs constant attention to ventilation and cover material.
- Composting Process Time: Full composting takes months and needs a separate system.
- Initial Cost: Some units can be an investment.
- Regulations: Local rules might restrict their use or disposal of compost.
- Neighborly Considerations: Venting and appearance need to be thought through.
Legal and Neighborly Considerations
Before you get started, it’s wise to check!
- Local Ordinances: Some cities or apartment complexes have rules about waste disposal, composting, and even the types of structures you can have on a balcony. A quick call to your landlord or local council can save a lot of hassle.
- HOA Rules: If you have a Homeowners Association, review their regulations.
- Neighbor Impact: Always try to position any vents to minimize potential odors or visual impact on your neighbors. Good communication can go a long way if you think it might be an issue.
Disposing of composted material might also have local guidelines. Ensure you understand how to legally and safely manage the finished compost.
Frequently Asked Questions (FAQs)
Q1: Is a compost toilet on a balcony safe?
A1: Yes, when set up and maintained correctly. Proper ventilation is key for odor control, and following composting guidelines is essential for safe management of waste. Always follow manufacturer
.lwrp.link-whisper-related-posts{
margin-top: 40px;
margin-bottom: 30px;
}
.lwrp .lwrp-title{
}.lwrp .lwrp-description{
}
.lwrp .lwrp-list-container{
}
.lwrp .lwrp-list-multi-container{
display: flex;
}
.lwrp .lwrp-list-double{
width: 48%;
}
.lwrp .lwrp-list-triple{
width: 32%;
}
.lwrp .lwrp-list-row-container{
display: flex;
justify-content: space-between;
}
.lwrp .lwrp-list-row-container .lwrp-list-item{
width: calc(25% – 20px);
}
.lwrp .lwrp-list-item:not(.lwrp-no-posts-message-item){
max-width: 150px;
}
.lwrp .lwrp-list-item img{
max-width: 100%;
height: auto;
object-fit: cover;
aspect-ratio: 1 / 1;
}
.lwrp .lwrp-list-item.lwrp-empty-list-item{
background: initial !important;
}
.lwrp .lwrp-list-item .lwrp-list-link .lwrp-list-link-title-text,
.lwrp .lwrp-list-item .lwrp-list-no-posts-message{
}@media screen and (max-width: 480px) {
.lwrp.link-whisper-related-posts{
}
.lwrp .lwrp-title{
}.lwrp .lwrp-description{
}
.lwrp .lwrp-list-multi-container{
flex-direction: column;
}
.lwrp .lwrp-list-multi-container ul.lwrp-list{
margin-top: 0px;
margin-bottom: 0px;
padding-top: 0px;
padding-bottom: 0px;
}
.lwrp .lwrp-list-double,
.lwrp .lwrp-list-triple{
width: 100%;
}
.lwrp .lwrp-list-row-container{
justify-content: initial;
flex-direction: column;
}
.lwrp .lwrp-list-row-container .lwrp-list-item{
width: 100%;
}
.lwrp .lwrp-list-item:not(.lwrp-no-posts-message-item){
max-width: initial;
}
.lwrp .lwrp-list-item .lwrp-list-link .lwrp-list-link-title-text,
.lwrp .lwrp-list-item .lwrp-list-no-posts-message{
};
}
Related Posts
- What Does a Urine 4 Panel XM Test For? Powerful Insight
Compost Bin Buy: Essential Guide- Compost Heap Philippines: Essential Guide

Garden Compost Delivery: Essential Guide

I am passionate about home engineering. I specialize in designing, installing, and maintaining heating, ventilation, and air conditioning systems. My goal is to help people stay comfortable in their homes all year long.