Hey there, neighbor! Ever looked at your kitchen scraps and thought, “This could be good for something”? If you’re living in a smaller space, like an apartment or a townhouse, you might think composting is out of reach. But what if I told you there’s a neat, tidy, and surprisingly fast way to turn that food waste into garden gold? It’s called a compost tumbler, and it’s a game-changer for urban gardeners. Let’s dive in and see how you can easily get started!
Compost Tumbler Urban: Your Essential Guide to Speedy, Apartment-Friendly Composting
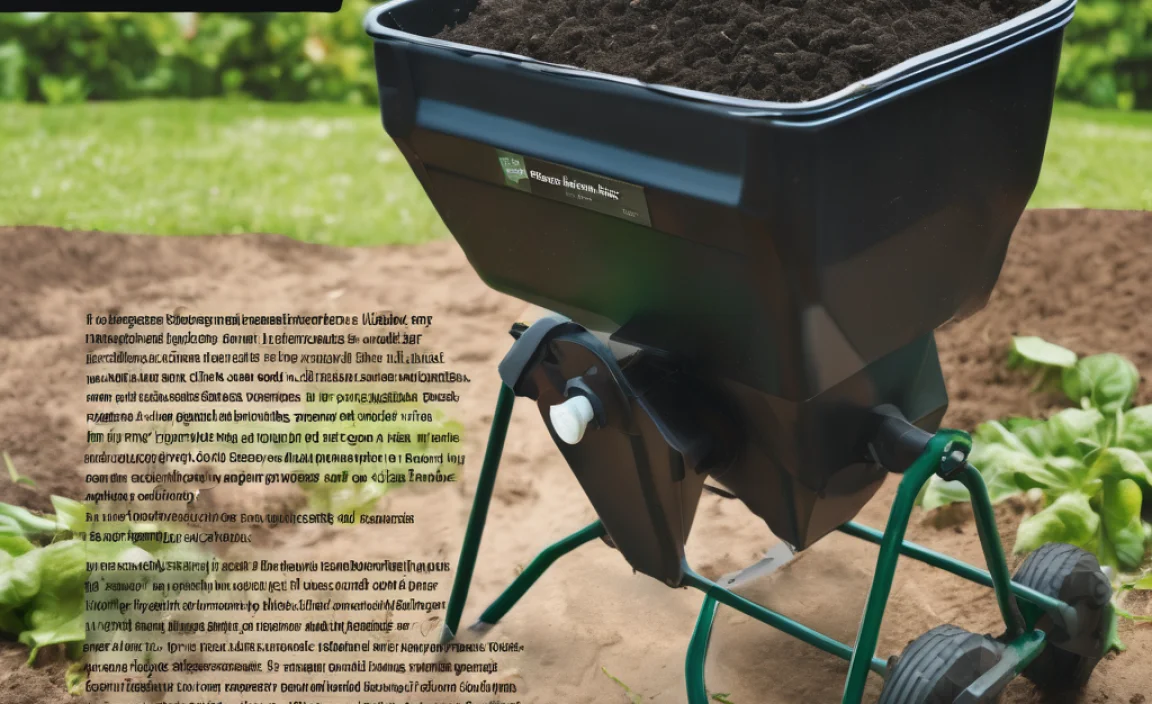
Living the urban life often means cozy spaces, and sometimes that makes us think big projects like composting are off the table. But that’s not true! A compost tumbler urban is perfect for city dwellers. It’s a sealed bin that you can spin, which speeds up the composting process and keeps smells and pests away. This guide will walk you through everything you need to know, from picking the right tumbler to using your finished compost. No green thumb required, just a willingness to give it a whirl!
Why Choose a Compost Tumbler for Your Urban Space?
Traditional compost piles can take up a lot of yard space and sometimes attract unwanted visitors. A compost tumbler solves these problems. It’s compact, usually fitting neatly on a balcony, patio, or even a small corner of a yard. Plus, its enclosed design means less fuss with critters and fewer smells wafting into your living space. It makes composting accessible and enjoyable, even when you don’t have acres to spare. Think of it as a mini composting factory, right outside your door.
The Big Benefits of Tumbling Your Compost
Here’s a quick look at why a compost tumbler is a fantastic choice:
- Speed: Tumbling mixes the contents, introducing oxygen that microbes love. This helps your compost break down much faster than in a static pile, sometimes in as little as a few weeks to a couple of months.
- Cleanliness: The enclosed design keeps pests like rodents and insects out. It also contains any odors, making it ideal for close living quarters.
- Efficiency: Tumblers churn and aerate your compost, ensuring all parts break down evenly. This means less turning by fork and more by spin!
- Space-Saving: They are designed to be compact and can often be placed on hard surfaces, making them perfect for balconies, patios, or small decks.
- Easy to Use: Most tumblers are designed for simple operation. You add your materials, latch it up, and give it a good spin every few days.
Choosing the Right Compost Tumbler for Your Urban Needs
Not all compost tumblers are created equal. When you’re looking for an compost tumbler urban solution, consider these factors:
Types of Urban Compost Tumblers
There are a few main styles:
Single Chamber Tumblers: These are great for beginners. You add materials, let them compost, and then empty the whole batch once it’s ready. This is simple but means you can’t add new scraps while the current batch is finishing.
Dual Chamber Tumblers: These are super handy for continuous composting. They have two separate compartments. You fill one side, and while that’s composting, you can start adding new materials to the other side. Once the first side is done, you empty it and can then start filling it again. This provides a steady supply of compost.
Batch vs. Continuous: As mentioned above, single-chamber tumblers are typically batch systems, while dual-chamber tumblers allow for continuous composting. For busy urban dwellers, continuous systems often feel more practical.
What to Look For in a Quality Tumbler
When shopping, keep these features in mind:
- Capacity: Think about how much kitchen waste and yard trimmings you generate. Tumblers range from about 10 gallons to over 50 gallons. For most urban households, a 20-30 gallon tumbler is a good starting point.
- Material: Most durable tumblers are made from UV-resistant, recycled plastic. This holds up well to sun and weather. Metal tumblers can also be found but may rust over time.
- Ease of Turning: Look for models with sturdy handles and a design that makes spinning easy, even when full. Some have internal mechanisms that break up clumps.
- Ventilation: Good airflow is crucial for composting. Check that the tumbler has sufficient vents to allow oxygen in.
- Durability: You want a tumbler that will last. Read reviews to see how well others have held up over time, especially in different weather conditions.
- Pest Resistance: A well-sealed lid and smooth surfaces (no easy entry points) are key to keeping critters out.
Here’s a quick comparison to help you decide:
| Feature | Single Chamber Tumbler | Dual Chamber Tumbler |
|---|---|---|
| Best For | Beginners, smaller households, those who compost in batches | Continuous composting, larger households, steady compost production |
| Compost Process | Add all at once, let it finish, then empty | Fill one side, then start on the other while the first cures |
| Speed (generally) | Can be fast, but requires patience for the whole batch to finish | Provides fresh compost more regularly |
| Cost (typically) | Lower | Higher |
| Ease of Setup | Very easy | Easy |
What Can You Compost in an Urban Tumbler?
The great thing about tumblers is they are pretty forgiving with what you put in, but there are some guidelines to keep your compost cooking and smelling fresh. The key is to get a good mix of “greens” (nitrogen-rich materials) and “browns” (carbon-rich materials).
The “Greens” (Nitrogen-Rich):
These materials add moisture and nitrogen, which helps the microbes do their work. Think of them as the fuel.
- Fruit and vegetable scraps
- Coffee grounds and paper filters
- Tea bags (staples removed if metal)
- Grass clippings (in moderation, can get slimy if too much)
- Fresh plant trimmings
- Eggshells (crushed)
The “Browns” (Carbon-Rich):
These materials provide carbon and create air pockets, which helps prevent your compost from getting too wet and smelly. Think of them as the structure.
- Dry leaves
- Shredded newspaper (black and white ink only)
- Cardboard (torn into small pieces, no glossy parts)
- Twigs and small branches (chopped up)
- Sawdust (from untreated wood, in moderation)
- Paper towels and napkins (if not greasy)
What to Avoid (Mostly):
While some composters can handle these, it’s best to steer clear in an urban tumbler setting. This helps prevent odors and pests and ensures a nicer finished product.
- Meat, fish, and dairy products: These can attract pests and create foul odors.
- Oily or greasy foods: They break down slowly and can make your compost slimy and smelly.
- Diseased plants: You don’t want to spread plant diseases back into your garden.
- Pet waste (dog and cat): These can contain pathogens harmful to humans.
- Weeds that have gone to seed: You might end up re-seeding your garden with them.
- Chemically treated yard waste: Pesticides and herbicides can harm beneficial microbes and contaminate your compost.
- Coal or charcoal ash: Can be toxic.
Getting Started: Setting Up Your Urban Compost Tumbler
Setting up your tumbler is straightforward. Here’s a step-by-step approach:
- Choose Your Location: Find a spot that’s convenient to access from your kitchen and has some sunlight. Sunlight can help heat the tumbler, speeding up decomposition, but too much direct, intense sun can dry it out quickly. A spot that gets morning sun and afternoon shade is often ideal. Make sure the ground is level.
- Assemble Your Tumbler: Follow the manufacturer’s instructions. Most are pretty intuitive, often just requiring you to snap or screw parts together.
- Add Your First Layer: Start with a layer of browns. This helps with drainage and airflow from the bottom. Dry leaves or shredded cardboard work well.
- Begin Adding Materials: Start adding your greens and browns. Aim for a good balance! A common recommendation is about 2-3 parts browns to 1 part greens by volume. This might seem like a lot of browns, but they are bulky.
- Chop Materials for Faster Composting: Smaller pieces break down much faster. So, chop up larger fruit peels, vegetable stalks, and cardboard.
- Keep it Moist: The compost should feel like a damp sponge. If it’s too dry, add a little water. If it’s too wet, add more browns.
- Start Tumbling! Once you’ve added materials and it’s a bit full, start giving it a spin.
The Art of Tumbling: Making Your Compost Go
This is where the “tumbler” part comes in! Regular tumbling is what makes this system so effective.
How Often to Turn
Aim to turn your compost tumbler every 2-3 days. When you turn it, give it 5-10 full rotations. This mixes everything, introduces oxygen, and breaks up clumps. If you have a dual-chamber tumbler, you’ll be turning the side you are actively filling.
Maintaining the Right Balance
Remember the “greens” and “browns” ratio? This is key. Too many greens can lead to a smelly, slimy mess. Too many browns will slow down decomposition. Watch your compost:
- Smells like ammonia? Too many greens. Add more browns.
- Smells rotten? Not enough air or too wet. Add browns and turn more frequently.
- Dry and not breaking down? Needs moisture. Add a little water.
- Too wet and compacted? Needs browns and better aeration. Add browns and turn.
What to Expect During the Process
As your compost breaks down, you’ll notice changes:
- Heat: A healthy compost pile will heat up. This is the microbes working hard! Your tumbler may feel warm to the touch.
- Shrinking: As materials decompose, the volume will decrease.
- Texture Change: Food scraps will start to disappear and turn into a dark, crumbly material.
When is Urban Compost Ready?
You’ll know your compost is ready to use when it:
- Looks dark brown and crumbly.
- Smells earthy and pleasant, like a forest floor.
- You can no longer recognize the original food scraps or yard waste.
- It feels cool or is at ambient temperature (the initial heat from decomposition has passed).
This process can take anywhere from 4 weeks to 3 months, depending on what you put in, how often you turn it, and the temperature.
Using Your Finished Urban Compost
Hooray! You’ve successfully made compost. Now what?
- Soil Amendment: Mix it into your potting soil for containers or raised beds. It adds nutrients, improves soil structure, and helps retain moisture. A good general mix is about 1 part compost to 2-3 parts soil.
- Top Dressing: Spread a thin layer (about 1 inch) on top of established potted plants or garden beds. This slowly releases nutrients and helps retain moisture.
- Seed Starting: While not ideal on its own, you can mix a small amount of compost into your seed-starting mix to give young seedlings a nutrient boost.
Finished compost is amazing for improving container garden soil. For tips on urban vegetable gardening, check out resources from Better Homes & Gardens, which often feature container-friendly advice.
For those with limited space, a compost tumbler is a fantastic way to enrich the soil for your potted herbs, balcony tomatoes, or rooftop greens.
Troubleshooting Common Issues with Compost Tumblers
Even with a tumbler, you might run into a snag here and there. Don’t worry, these are usually easy to fix!
1. The Tumbler Smells Bad.
Cause: Usually too many “greens” (nitrogen-rich materials) or not enough air. This leads to anaerobic decomposition, which creates foul odors.
Solution: Add a generous amount of “browns” (carbon-rich materials) like shredded paper, leaves, or wood chips. Turn the tumbler more frequently and ensure it has adequate ventilation. If it’s very wet, add more dry browns.
2. Nothing Seems to Be Happening (No Heat, Slow Decomposition).
Cause: Could be too dry, not enough “greens,” or not being turned enough.
Solution: Check the moisture level; it should feel like a damp sponge. Add water if it’s dry. Add more “greens” if the ratio is heavily biased towards browns. Ensure you’re turning it at least every few days to introduce oxygen.
3. There Are Fruit Flies or Other Insects.
Cause: Exposed food scraps are an open invitation! This is more common with fresh additions before they’ve started to break down.
Solution: Always bury fresh kitchen scraps (greens) under a layer of browns. Ensure the lid is closed securely. If it persists, consider a tumbler with smaller aeration holes or more effective pest-proofing. A layer of dry leaves on top can also help.
4. The Compost is Too Wet and Slimy.
Cause: Too many “greens,” not enough “browns,” or excessive moisture (rain getting in, or adding too much wet material).
Solution: Add more “browns” to absorb excess moisture. Shred them finely. Turn the tumbler more often to aerate. If it’s a tumbler that sits in the rain, consider covering it during prolonged wet spells.
5. It’s Too Hard to Turn.
Cause: The tumbler might be overloaded, or the contents are compacted and dry.
Solution: If overloaded, try to remove some material. If contents are dry and compacted, add a little water and turn. Some tumblers can feel heavy when full; this is normal. Ensure the turning mechanism is clean and free of debris.
Conclusion: Start Tumbling Towards a Greener Urban Lifestyle
See? Composting in the city is totally doable and incredibly rewarding! An compost tumbler urban setup is your ticket to reducing household waste while creating nutrient-rich food for your plants. Whether you’re tending a few pots on a balcony or a small raised bed, this homemade compost will make a noticeable difference. It’s a simple, clean, and efficient system that fits right into urban living. So, gather your scraps, grab a tumbler, and get ready to spin your way to a more sustainable and fruitful urban garden. Happy composting!
Frequently Asked Questions about Urban Compost Tumblers
Q1: How much compost can I realistically make in an urban tumbler?
A1: It depends on the size of your tumbler and the amount of material you add, but most urban composters can produce enough compost for a few containers or a small balcony garden every 1-3 months.
Q2: Do compost tumblers smell?
A2: A properly managed compost tumbler should not smell bad. A healthy compost pile smells earthy. Foul odors usually indicate an imbalance, like too much nitrogen or not enough air.
Q3: How often do I need to empty a dual-chamber tumbler?
A3: With a dual-chamber system, you’ll empty one chamber once the compost is mature, usually after a cycle of a few weeks to a couple of months. Then you start filling that chamber again while the other one finishes curing.
Q4: Can I compost in a tumbler during winter?
A4: Composting slows down significantly in cold weather. Some tumblers might still process slowly, especially if placed in a sunny spot or a sheltered location. For best results, many urban composters pause adding new material during the coldest months and let existing batches cure.
Q5: What is the ideal “green” to “brown” ratio?
A5: As a general guideline, aim for roughly 2 to 3 parts “browns” (carbon) to 1 part “greens” (nitrogen) by volume. This ratio can vary, so observing your compost is key.
Q6: My tumbler is full of worms. Is that bad?
A6: Earthworms can sometimes appear, especially if you have accidentally added some soil or if your compost is well-established and not too hot. They are usually beneficial and help with decomposition, though they are not the primary decomposers in a hot compost system. If you are aiming for hot composting, excessive worms might indicate it’s not heating up properly, but they generally won’t harm your compost.

I am passionate about home engineering. I specialize in designing, installing, and maintaining heating, ventilation, and air conditioning systems. My goal is to help people stay comfortable in their homes all year long.