Dreaming of composting but living in a cozy apartment? It might sound tricky, but it’s totally doable! Many apartment dwellers think composting is only for those with big backyards. But what if I told you there are super simple ways to turn your kitchen scraps into garden gold, right on your balcony or even in your kitchen? You’re not alone if this seems a bit confusing. But don’t worry! I’m Troy D Harn, and I’m here to show you the easiest methods. We’ll go through it step-by-step, so you can start composting without any hassle. Get ready to reduce waste and boost your plant game!
Why Compost in an Apartment?
Living in an apartment doesn’t mean you have to miss out on the amazing benefits of composting. It’s a fantastic way to shrink your household waste and take a little step towards a greener lifestyle. Think about all those food scraps – coffee grounds, veggie peels, eggshells – that usually end up in the trash. Composting gives these items a new life!
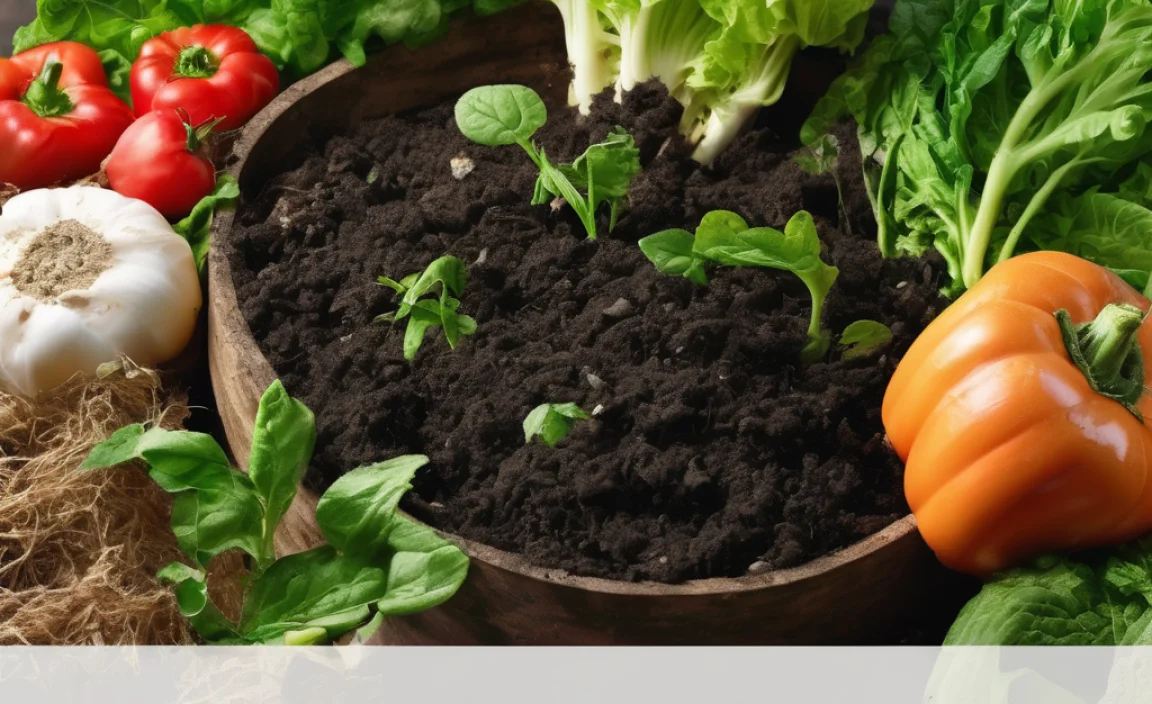
Beyond just reducing landfill contributions, composting creates nutrient-rich food for plants. Even if you only have a small balcony garden or a few houseplants, compost can make a huge difference. It improves soil health, helping your plants grow stronger and healthier. Plus, it’s a rewarding process to watch something seemingly useless transform into valuable soil amendment. It’s a small action with a big impact, and it fits perfectly into apartment living.
What Can You Compost? (Apartment Friendly Edition)
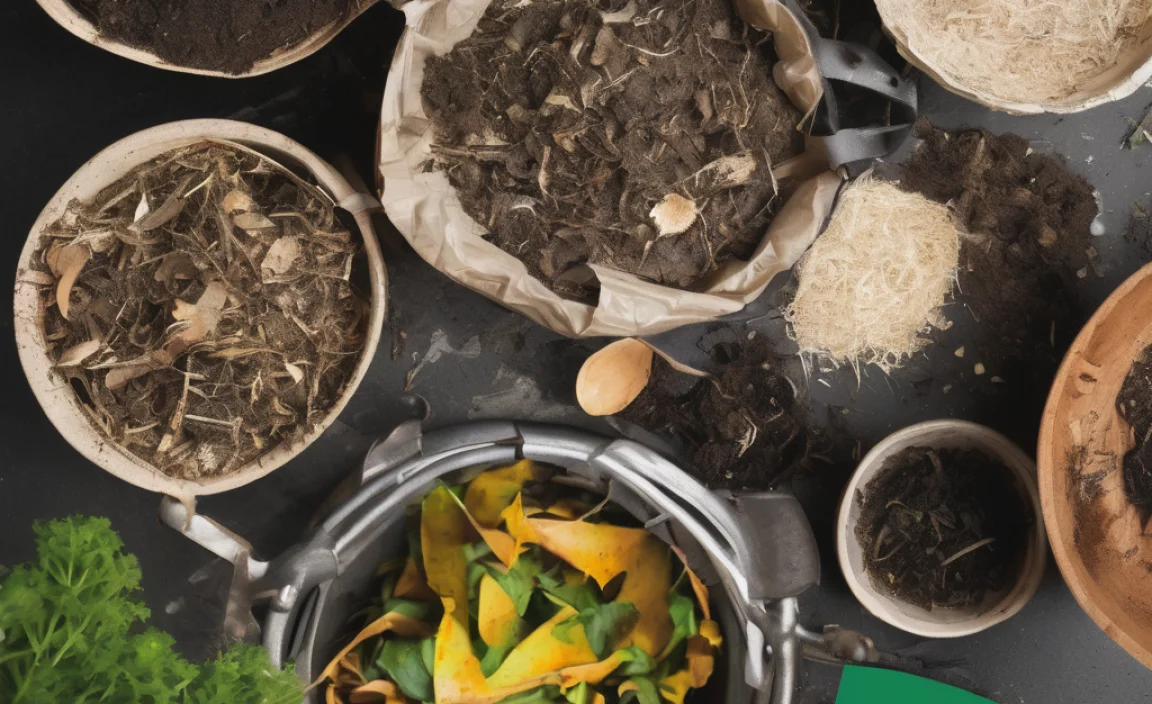
The good news is that many of the things you’d compost in a larger setting work just as well in an apartment. The key is to focus on items that break down relatively quickly and don’t create major odor issues when managed properly. Here’s a quick rundown of what to collect:
- Vegetable and Fruit Scraps: This includes peels, cores, rinds, and bits you don’t eat. Think banana peels, apple cores, carrot tops, and lettuce leaves.
- Coffee Grounds and Filters: A composting favorite! The grounds add nitrogen, which is great for the composting process.
- Tea Bags: Most tea bags are compostable (check the label to be sure). Remove any staples or synthetic strings.
- Eggshells: Rinse them and crush them before adding. They break down slower but add valuable calcium.
- Yard Waste (Small Scale): A few dead leaves or small plant trimmings from indoor plants can be added. Avoid large amounts.
- Cardboard and Paper (Shredded): Plain, uncolored paper and cardboard, like paper towel rolls or newspaper, can be torn or shredded. These are your “browns” and help balance the “greens.”
What to Avoid (Important for Apartment Composting):
- Meat, Fish, and Dairy Products: These can attract pests and create strong odors if not handled perfectly, which is best avoided in apartment settings.
- Oily Foods: Large amounts of cooking oils or greasy residues can slow down decomposition and cause smells.
- Diseased Plants: You don’t want to spread plant diseases to your compost or future plants.
- Pet Waste: Dog and cat waste can contain pathogens that are not suitable for compost used on edible plants.
- Chemically Treated Materials: Anything that has been treated with pesticides or herbicides should be kept out.
Choosing Your Apartment Composting Method
When you’re composting in a smaller space, the method you choose is crucial. You want something that is efficient, manageable, and odor-free. Thankfully, there are a few popular options that are perfect for apartment dwellers. Let’s break them down:
1. Worm Composting (Vermicomposting)
This is often the most popular and effective method for apartment composting. It uses special composting worms (like Red Wigglers) to break down food scraps. It’s fast, odor-free when done right, and produces incredible compost called “worm castings.”
How it Works: You set up a bin with bedding (like shredded newspaper or coconut coir), add your worms, and then feed them your kitchen scraps. The worms eat the scraps and their waste becomes nutrient-rich castings.
Great for: Apartment kitchens, balconies. Produces high-quality fertilizer.
Pros:
- Very efficient at breaking down food scraps.
- Produces nutrient-dense compost (worm castings).
- Minimal odor if managed correctly.
- Can be done indoors or on a balcony.
Cons:
- Requires purchasing special composting worms.
- Worms have temperature preferences (avoid extreme cold/heat).
- You need to harvest the castings periodically.
What You’ll Need:
- Worm Bin: Can be purchased or made from plastic bins. Look for bins with good ventilation and drainage.
- Composting Worms: Red Wigglers (Eisenia fetida) are the standard for vermicomposting. You can buy them online.
- Bedding: Shredded newspaper, cardboard, coconut coir, or peat moss.
- Food Scraps: Your compostable kitchen waste.
- Water: To keep the bedding moist.
Getting Started with Worm Composting:
- Prepare the Bin: Add your bedding material to the worm bin. Moisten it until it’s like a wrung-out sponge.
- Add the Worms: Gently place your composting worms on top of the moist bedding. They will burrow down.
- First Feeding: Wait a day or two, then add a small amount of food scraps, burying them under the bedding.
- Feed Regularly: Continue adding food scraps, burying them in different spots, and gradually increase the amount as the worm population grows.
- Harvest Castings: After a few months, you’ll have worm castings that can be collected and used for your plants.
For more in-depth guidance on setting up and maintaining a healthy worm bin, check out the U.S. Environmental Protection Agency’s composting resources. They offer great tips on managing composting systems effectively.
2. Bokashi Composting
Bokashi is a unique fermentation process that pickles your food waste rather than decomposing it through aerobic decomposition like traditional composting. It’s done in an airtight container and uses a special Bokashi bran sprinkled with effective microorganisms (EMs).
How it Works: You layer food scraps (including meat and dairy, which are usually avoided) in an airtight bucket, sprinkling Bokashi bran between layers. The EMs ferment the waste. The end product isn’t finished compost but a pre-compost that needs to be buried in soil to fully decompose (often in a larger pot or community garden).
Great for: Apartment kitchens. Can handle a wider range of food scraps than worm bins.
Pros:
- Can handle meat, dairy, and oily foods.
- Fast process (fermentation takes about two weeks).
- Airtight system means no odors and minimal pests.
- Produces a nutrient-rich liquid (“Bokashi tea”) that can be diluted and used as plant fertilizer.
Cons:
- Requires purchasing Bokashi bran and a specialized bucket.
- The fermented product still needs to be “digested” further in soil.
- Not technically compost until the second stage is complete.
What You’ll Need:
- Bokashi Bucket: An airtight bucket with a spigot at the bottom to drain the liquid.
- Bokashi Bran: Specially inoculated bran.
- Food Scraps: All types, including small amounts of meat, dairy, and cooked foods.
- Compostable Liner (Optional): To help with lifting out the fermented waste.
Getting Started with Bokashi Composting:
- Add Scraps: Place your food scraps into the Bokashi bucket. Chop larger items into smaller pieces for faster fermentation.
- Sprinkle Bran: Sprinkle a layer of Bokashi bran over the food scraps.
- Compact: Press down on the scraps to remove as much air as possible.
- Seal: Close the lid tightly to create an airtight seal.
- Repeat: Continue adding scraps and bran, compacting, and sealing until the bucket is full.
- Ferment: Once full, let the bucket sit sealed for about two weeks to ferment.
- Drain Liquid: Regularly drain the Bokashi tea from the spigot. Dilute 1:100 with water for fertilizer.
- Bury: Dig a hole in a large planter, community garden, or even in the ground if accessible, and bury the fermented material. Cover with soil and let it decompose for another 2-4 weeks.
3. Electric Kitchen Composter
This is a more modern, high-tech approach. Electric composters use heat and aeration to break down food scraps into a dry, soil-like material in a matter of hours. They are super convenient and often very compact.
How it Works: You put your food scraps into the appliance, close the lid, and press a button. The machine heats, grinds, and dries the waste, reducing its volume significantly.
Great for: Busy individuals who want a quick solution. Fits on a countertop.
Pros:
- Extremely fast — can process waste in hours.
- Significantly reduces volume of food waste.
- Odorless operation.
- Can handle most food scraps, including some meat and dairy.
- Very easy to use, minimal effort required.
Cons:
- High upfront cost.
- Requires electricity to run.
- The end product is more of a dried food material than true compost and may still benefit from further decomposition.
- Can be noisy during operation.
What You’ll Need:
- Electric Composter Unit: Various brands and models are available.
- Food Scraps: Most types of food waste.
- Electricity: To power the unit.
Getting Started with an Electric Composter:
- Add Scraps: Open the lid and add your food waste to the processing chamber.
- Close and Start: Secure the lid and select a cycle (usually a few hours).
- Empty: Once the cycle is complete, the material will be reduced and dry. Remove it and add to your plants or a larger compost pile.
Setting Up for Success: What You Need
No matter which method you choose, a little preparation goes a long way in making your apartment composting journey smooth and successful. Think of it as gathering your ingredients before cooking a meal!
Essential Tools by Method
Here’s a quick look at the specialized items you might need:
| Composting Method | Key Tools/Supplies | Where to Find |
|---|---|---|
| Worm Composting (Vermicomposting) | Worm bin, composting worms (Red Wigglers), bedding material (shredded newspaper/coir) | Online retailers, local garden centers, DIY for bin |
| Bokashi Composting | Airtight Bokashi bucket with spigot, Bokashi bran | Specialty online stores, some garden centers |
| Electric Kitchen Composter | Electric composter unit | Appliance stores, online retailers |
General Supplies for Any Method
Regardless of your chosen technique, having these handy will make collecting and managing your scraps much easier:
- Kitchen Countertop Caddy/Scrap Bin: A small, lidded container to collect scraps as you cook. Choose one with a filter to minimize odors if possible. Many have charcoal filters.
- Cutting Board and Knife: For chopping larger scraps into smaller pieces, which helps them break down faster no matter the method.
- Gloves (Optional): If you’re squeamish about handling food scraps, a pair of reusable kitchen gloves can be helpful.
- Water Source: For moistening bedding (vermicomposting) or diluting Bokashi tea.
- Small Shovel or Trowel: For burying Bokashi material or harvesting worm castings.
Location, Location, Location!
Where you place your composting system matters. For worm bins and Bokashi, consider:
- Indoors: Under the sink, in a pantry, or a corner of the kitchen can work well. Worm bins generally don’t smell, and Bokashi is airtight. Ensure it’s not in direct, hot sunlight.
- Balcony/Patio: This is ideal if you have the space. It keeps any potential (though usually minimal) smells out of your living area and provides a stable temperature. Protect worm bins from extreme heat or cold.
- Closet: A spare closet can also be a good, out-of-the-way spot, provided there’s decent ventilation.
Electric composters are usually countertop appliances, so they go where you have a bit of space and an electrical outlet.
Step-by-Step Guide: Getting Started with Worm Composting (The Apartment Favorite)
Let’s dive into the most popular apartment method: worm composting! It sounds a bit unusual at first, but it’s incredibly effective and rewarding. You’ll be amazed at how quickly these little critters work their magic.
Step 1: Get Your Worm Bin Ready
You can buy a worm bin or make one yourself using plastic storage containers. For DIY, you’ll need two opaque bins of the same size. Drill holes in the bottom of one bin for drainage and in the lid for air. Stack this inside the other solid bin (which will catch any liquid). Add a spigot near the bottom of the collection bin if you want to easily drain the “worm tea” (the liquid that can collect).
Step 2: Prepare the Bedding
Worms need a cozy home! Fill your bin about halfway to two-thirds full with moist bedding. Good options include shredded newspaper (avoid glossy ink), cardboard, coconut coir, or peat moss. Moisten it thoroughly with water, then squeeze out the excess until it feels like a damp sponge – not dripping wet.
Step 3: Introduce Your Worms
You’ll need composting worms like Red Wigglers (Eisenia fetida) or European Nightcrawlers. You can usually buy them online. Gently place the worms on top of the bedding. They are nocturnal and sensitive to light, so they will likely burrow down into the bedding on their own. Leave them be for a day or two to adjust.
Step 4: Start Feeding Your Worms
Wait a few days after introducing the worms before giving them their first meal. Start small! Bury about half a pound of food scraps per pound of worms under the bedding. Chop up the scraps into smaller pieces to make them easier for the worms to eat. Good beginner foods include fruit and vegetable scraps (avoid citrus in large quantities initially) and coffee grounds.
Step 5: Regular Feeding and Maintenance
As the worms finish their food, you can gradually increase the amount you give them. Bury food scraps in a different section of the bin each time. The worms will process the waste, and their castings (worm poop) will begin to accumulate. Keep the bedding moist but not waterlogged. You might get some liquid at the bottom of your bin; this is called “worm tea” and is a valuable liquid fertilizer when diluted.
Top Tip: Avoid overfeeding. If you see uneaten food after a week, reduce the amount. This can also help prevent odors. A healthy worm bin should smell earthy, not foul.
Step 6: Harvesting Your Worm Castings
After a few months, your bedding will be mostly transformed into dark, crumbly worm castings. There are a few ways to harvest:
- Migration Method: Stop feeding one side of the bin for a couple of weeks and only feed the other side. The worms will migrate to the food source, leaving one side mostly castings.
- Screening: Dump the bin contents onto a tarp under bright light. The worms will try to burrow away from the light, leaving the castings behind.
-

I am passionate about home engineering. I specialize in designing, installing, and maintaining heating, ventilation, and air conditioning systems. My goal is to help people stay comfortable in their homes all year long.