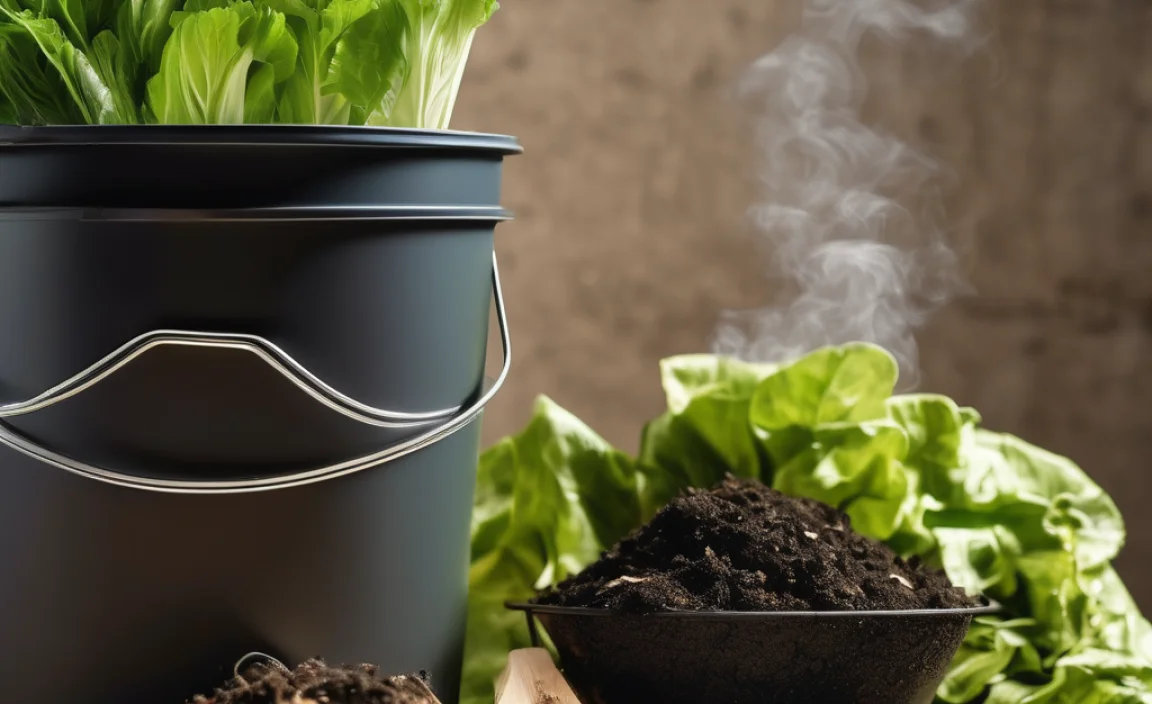
Thinking about composting but feeling a bit overwhelmed? You’re not alone! Many folks find the idea of turning kitchen scraps and yard waste into valuable garden food a little daunting at first. But here’s the good news: it’s much simpler than it looks, and I’m here to break it all down for you. We’ll go step-by-step, making it easy to get started. Get ready to transform your waste into garden gold!
Composting for Beginners: Your Essential How-To Guide
Hey there, I’m Troy D Harn from TopChooser, and I’m all about making home projects, gardening, and DIY tasks feel as easy as baking cookies. Composting is one of those fantastic things that helps your garden and the planet, and it’s way more approachable than you might think. Whether you’re looking to enrich your soil, reduce your trash, or just try something new, this guide is for you. We’ll cover everything from what composting is to how to build your own pile, so you can start making that rich, dark compost in no time. No fancy jargon, just friendly, practical advice to get you composting like a pro, right from the start.
What Exactly is Composting?
Simply put, composting is nature’s way of recycling. It’s the process of breaking down organic materials—like food scraps and yard clippings—into a nutrient-rich soil amendment called compost. Think of it as giving those materials a second life! Instead of ending up in a landfill, they become food for your plants. This “black gold” is fantastic for improving soil structure, water retention, and providing essential nutrients, giving your garden the best possible start.
Why Should You Start Composting?
Composting offers a heap of benefits, both for your garden and for the environment. It’s a win-win!
- Reduces Waste: A significant portion of household waste is compostable. Composting diverts this from landfills, where it can produce harmful greenhouse gases like methane.
- Enriches Soil: Compost is a natural fertilizer. It improves soil structure (making clay soil drain better and sandy soil hold more water) and adds vital nutrients that help plants grow strong and healthy.
- Saves Money: You’ll cut down on the need to buy expensive soil amendments and fertilizers. Plus, your plants will thrive, leading to better yields if you’re growing vegetables or fruits.
- Environmentally Friendly: By reducing landfill waste and creating a natural soil enhancer, you’re contributing to a healthier planet. It’s a small step that makes a big difference.
- Reduces Need for Chemical Fertilizers: Healthy soil built with compost means healthier plants that are less susceptible to pests and diseases, often negating the need for chemical interventions.
Getting Started: What You’ll Need
The beauty of composting is that you don’t need a lot of fancy equipment to start. You can begin with just a simple pile. However, having a few basics can make the process more organized and efficient. Let’s look at what basic setup options are available.
Compost Bin Options for Beginners
Choosing a bin is often the first decision. Here are some popular and beginner-friendly options:
- Open Piles: The simplest method! Just heap your compostable materials in a designated spot in your yard. It’s free and easy, but can look a bit messy and might attract critters if not managed well. Best for those with plenty of yard space.
- Enclosed Bins: These can be store-bought or DIY. They help contain the materials, retain heat and moisture, and keep pests out. Many come with lids and access doors for easy turning and harvesting. They come in plastic, wood, or metal varieties.
- Tumbler Bins: These are enclosed bins mounted on a stand, allowing you to easily rotate or “tumble” the compost. This aeration speeds up the composting process significantly and makes turning the pile effortless. They can be more expensive but are very convenient.
For beginners, a simple enclosed bin or a DIY setup is often ideal. It offers a good balance between ease of use, containment, and efficient composting. If you’re feeling handy, building your own can be a rewarding project! Resources like the EPA’s composting guide offer great DIY bin ideas.
Understanding “Greens” and “Browns”
The secret to successful composting lies in balancing two types of materials: nitrogen-rich “greens” and carbon-rich “browns.” Think of them as the fuel and the structure for your compost pile.
Greens (Nitrogen-Rich): These materials are typically moist and break down quickly, providing the nitrogen that microorganisms need to thrive.
- Fruit and vegetable scraps
- Grass clippings (in thin layers)
- Coffee grounds and tea bags
- Plant trimmings (soft green parts)
- Eggshells
Browns (Carbon-Rich): These materials are drier and provide the carbon that fuels the decomposition process. They also help with aeration, preventing your pile from becoming a soggy mess.
- Dry leaves
- Straw and hay
- Shredded newspaper and cardboard (avoid glossy paper)
- Small twigs and wood chips
- Sawdust (from untreated wood)
- Pine needles
The Ideal Ratio
The magic number for a healthy compost pile is roughly a 2:1 or 3:1 ratio of browns to greens by volume. This doesn’t have to be exact! If your pile seems too wet and smelly, add more browns. If it’s dry and not breaking down, add more greens and moisture.
Let’s look at what goes in and what stays out.
| What to Compost (Yes!) | What NOT to Compost (No!) |
|---|---|
| Fruit and vegetable scraps | Meat, fish, and bones (attract pests, smell bad) |
| Coffee grounds and tea bags | Dairy products (attract pests, smell bad) |
| Eggshells | Oily or greasy foods (slow decomposition, attract pests) |
| Grass clippings | Diseased plants (can spread disease to your garden) |
| Leaves and yard trimmings | Weeds that have gone to seed (can spread weeds) |
| Shredded newspaper and cardboard | Pet waste (dog/cat feces can contain pathogens) |
| Straw and hay | Coal or charcoal ash (can contain harmful substances) |
| Sawdust (from untreated wood) | Chemically treated wood or yard waste |
Step-by-Step: How to Build Your Compost Pile
Ready to get your hands dirty (but not too dirty)? Building your compost pile is straightforward. Follow these simple steps:
Step 1: Choose Your Location
Find a convenient spot for your bin or pile. It should be:
- Accessible: Easy to get to with your kitchen scraps and yard waste.
- Level: A flat surface is best for stability.
- Partially Shaded: Full sun can dry out the pile too quickly, while deep shade might keep it too wet. A little sun and a little shade is perfect.
- Well-Drained: Avoid areas that tend to get waterlogged after rain.
Step 2: Start with a Layer of Browns
Begin by placing a layer of coarse brown materials at the bottom of your bin or designated spot. This helps with drainage and airflow. Think small twigs, straw, or shredded cardboard. About 4-6 inches deep is good.
Step 3: Add Your Greens and Browns (Layering is Key!)
Now, start adding your compostable materials. The best way is to alternate layers of greens and browns, just like making a lasagna. A good rule of thumb is to add about an inch or two of greens, then cover it with a few inches of browns. This layering helps maintain the correct moisture and carbon-to-nitrogen balance.
- Add your kitchen scraps (greens) to one side of the bin or pile.
- Cover these scraps immediately with a layer of yard waste or shredded paper (browns).
- Continue this layering process as you add more materials.
Step 4: Chop It Up!
Smaller pieces break down much faster. Chop up large fruit and vegetable scraps, tear cardboard into smaller pieces, and mix in lawn clippings and leaves. The smaller everything is, the quicker you’ll have compost.
Step 5: Keep it Moist
Your compost pile should be as damp as a wrung-out sponge. If it feels dry, add water. If it’s too wet and smells like ammonia, add more browns and turn it to help it dry out. Rain will often provide enough moisture, but you might need to water it during dry spells.
Step 6: Aerate Your Pile (Turn it!)
Composting is an aerobic process, meaning it needs air. Turning the pile regularly — about once a week or every couple of weeks — introduces oxygen, which helps the microorganisms do their work and speeds up decomposition. You can use a pitchfork or a compost aerator tool for this. Tumbler bins make this step super easy!
If you have an open pile or an enclosed bin that doesn’t tumble, a pitchfork is your best friend. Aim to move the outer materials to the center and the inner materials to the outside. This ensures everything gets decomposed evenly.
Step 7: Be Patient!
Composting takes time. Depending on the materials you use, the weather, and how often you turn it, compost can be ready anywhere from a few weeks to several months. You’ll know it’s ready when it looks dark, crumbly, and smells earthy – like fresh soil.
Troubleshooting Common Composting Problems
Even with the best intentions, you might run into a hiccup or two. Don’t worry, these are common and easy to fix!
My compost pile smells bad (like ammonia or rotten eggs).
- Cause: Too much nitrogen (too many greens) or not enough air.
- Solution: Add more brown materials (leaves, shredded paper, straw) to balance the nitrogen. Turn the pile thoroughly to introduce air. Make sure it’s not too wet.
My compost pile isn’t breaking down.
- Cause: Too dry, not enough greens (nitrogen), or pieces are too large.
- Solution: Add water, turning the pile as you go. Add some nitrogen-rich green materials (like kitchen scraps or grass clippings). Chop larger items into smaller pieces.
My compost pile is attracting pests (flies, rodents).
- Cause: Exposed food scraps, presence of meat, dairy, or greasy foods.
- Solution: Always bury fresh food scraps under a layer of brown material. Avoid composting meat, dairy, and oily foods. An enclosed bin or tumbler can help deter pests. Ensure the pile is moist but not soggy.
My compost pile is too wet.
- Cause: Too many greens, not enough browns, or poor drainage.
- Solution: Add a generous amount of brown materials. Turn the pile to help it dry out. If it’s in an enclosed bin, ensure drainage holes are clear or consider adding a layer of straw or wood chips to the bottom.
How & When to Use Your Compost
Once your compost is dark, crumbly, and smells earthy, it’s ready to use! You’ll know it’s ready when you can no longer identify the original materials you put in. A fine-mesh sieve can be used to remove any larger, undecomposed bits if you desire a finer texture. These bits can go back into your new compost pile.
Here are some common ways to use your homemade compost:
- Soil Amendment: Mix compost into garden beds before planting. A layer of 2-4 inches is usually sufficient. This improves soil structure, adds nutrients, and helps retain moisture. The Royal Horticultural Society has excellent detailed guidance on using compost.
- Top Dressing: Spread a thin layer of compost around existing plants, shrubs, and trees. This provides a slow release of nutrients and helps suppress weeds.
- Potting Mix: Mix compost with other ingredients like perlite or vermiculite to create your own nutrient-rich potting soil for containers and houseplants. A good starting point is usually 1/3 compost, 1/3 peat moss or coir, and 1/3 perlite or sand.
- Lawn Care: Rake a thin layer of compost over your lawn in the spring or fall to enrich the soil and improve grass health.
Conclusion
See? Composting really isn’t as complicated as it might sound. By understanding the basics of balancing greens and browns, keeping your pile moist and aerated, and being patient, you’ll be well on your way to creating your own amazing compost. It’s a rewarding process that benefits your garden and the environment. You’re not just making dirt; you’re creating incredibly valuable food for your plants and reducing waste in the process. So grab a bin, or just a corner of your yard, and start building your pile today. Happy composting!
Frequently Asked Questions (FAQs)
What is the fastest way to compost?
To speed things up, chop materials into small pieces, maintain regular turning every 1-2 weeks, ensure a good balance of greens and browns, and keep the pile consistently moist but not waterlogged. Tumbler bins are also known for faster composting due to easy aeration.
How much kitchen waste can I compost?
You can compost most of your kitchen scraps! This includes fruit and vegetable peels, coffee grounds, tea bags (remove staples), and eggshells. Just remember to balance them with plenty of brown materials and avoid meat, dairy, and greasy items.
Do I need a special bin to compost?
No, you don’t absolutely need a special bin. An open pile in a corner of your yard works. However, an enclosed bin or tumbler can help manage moisture, heat, and discourage pests, making the process tidier and often more efficient.
How often should I turn my compost pile?
Ideally, turn your compost pile every one to two weeks. This introduces oxygen, which is vital for the microorganisms breaking down the organic matter. If you have a tumbler, give it a few spins every few days. Less frequent turning will still result in compost, but at a slower rate.
Can I compost yard waste like grass clippings and leaves?
Yes, absolutely! Grass clippings are great “greens” (nitrogen-rich), but add them in thin layers to avoid matting and anaerobic conditions. Dry leaves are your best “browns” (carbon-rich) and are essential for good aeration and balance. Mix them well!
What does “finished compost” look like?
Finished compost is dark brown or black, crumbly, and has an earthy smell, similar to rich forest soil. You shouldn’t be able to recognize the original materials anymore. If you see identifiable scraps, it needs a bit more time or might benefit from another turn.
Related Posts


I am passionate about home engineering. I specialize in designing, installing, and maintaining heating, ventilation, and air conditioning systems. My goal is to help people stay comfortable in their homes all year long.