Have you ever looked at your kitchen scraps and garden waste and thought, “There has to be a better way than just tossing this in the trash?” You’re not alone! Many of us want to be more eco-friendly, but composting can seem a bit… well, mysterious.
Where do you even start? Don’t sweat it! I’m Troy D Harn, author of TopChooser, and I’m here to break down composting into simple, manageable steps. We’ll explore easy methods perfect for anyone, whether you’re in a house with a big yard or a small apartment. Get ready to turn that “waste” into black gold for your plants!
Composting For Beginners Methods: Your Essential Guide to Turning Scraps into Garden Gold
Hey everyone, Troy here! So, you’re curious about composting? That’s fantastic! It’s one of the most rewarding and environmentally friendly things you can do right at home. Think of it as nature’s recycling program, and you’re the star operator. Instead of sending food scraps and yard trimmings to a landfill, you’re transforming them into incredibly rich soil amendment that your plants will absolutely love. And guess what? It’s way simpler than you might think. We’ll demystify the process, cover the best methods for beginners, and get you well on your way to becoming a composting pro.
Why compost? It’s a win-win-win. You reduce waste, create amazing fertilizer for your garden (which means healthier, happier plants!), and you cut down on greenhouse gas emissions from landfills. Plus, it’s a great way to connect with nature and understand the cycle of life. Ready to dive in? Let’s explore the best composting for beginners methods.
What Exactly IS Composting?
At its heart, composting is the natural process of breaking down organic materials—like food scraps and leaves—into a rich, dark, soil-like substance called compost. This happens thanks to tiny organisms like bacteria, fungi, and other beneficial critters that feast on the organic matter. They need a few key things to do their job: organic materials (what we put in), air, water, and the right temperature. When these come together, decomposition can happen efficiently, turning what you thought was waste into super-nutritious food for your soil.
Think of it like making a really good stew. You need the right ingredients, and you need to let them cook down to create something delicious and valuable. In composting, the “stewpot” is your compost bin or pile, the “ingredients” are your kitchen scraps and yard waste, and the “cooks” are the microbes.
Why You Should Start Composting Today
Before we get into the how, let’s reinforce the why. For beginners, understanding the benefits can be a huge motivator:
- Reduces Landfill Waste: A significant portion of household waste is organic material that could be composted. Keeping it out of landfills reduces methane emissions, a potent greenhouse gas.
- Creates Nutrient-Rich Soil Amendment: Compost is like a multivitamin for your soil. It improves soil structure, helps retain moisture, adds essential nutrients, and can even help suppress plant diseases. Your garden will thank you!
- Saves Money: By making your own fertilizer, you’ll buy less commercial compost and fertilizer for your garden, houseplants, or lawn.
- Helps the Environment: Composting reduces the need for chemical fertilizers, which can pollute waterways. It also helps sequester carbon in the soil.
- It’s Surprisingly Easy and Rewarding: Once you get the hang of it, the process is straightforward and seeing your scraps transform is incredibly satisfying.
Choosing Your Composting Method: The Best Approaches for Newbies
The world of composting can seem vast, but for beginners, the focus should be on simplicity and effectiveness. There are a few reliable methods that work wonders without requiring advanced knowledge or complicated setups. Let’s break them down.
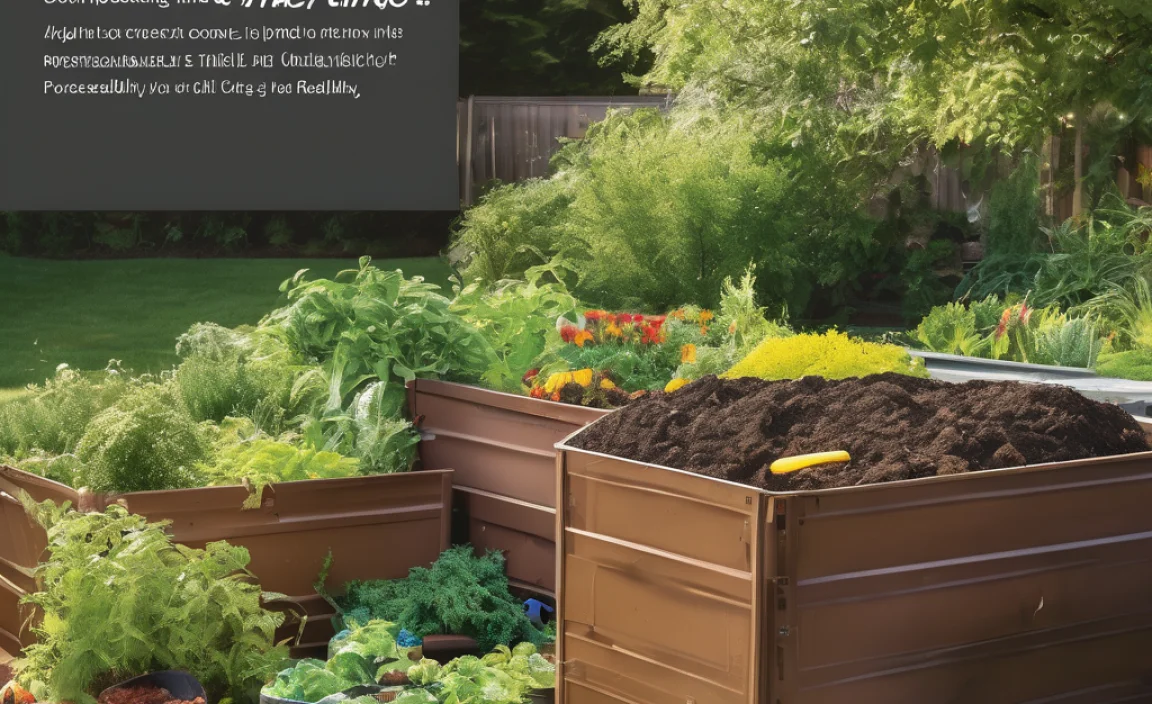
1. The Simple Compost Bin (Enclosed System)
This is probably the most common and beginner-friendly method. A compost bin is an enclosed structure—often made of plastic, wood, or wire—that holds your compost materials. This containment helps keep things tidy, retains heat and moisture efficiently, and can deter pests.
How it Works:
You layer your “greens” (nitrogen-rich materials like food scraps) and “browns” (carbon-rich materials like leaves and paper) inside the bin. Over time, with a little turning and moisture management, the organic matter decomposes into compost.
Pros:
- Neat and Tidy: Keeps your compost contained and looks attractive in the yard.
- Good for Small Yards: Many bin styles are compact.
- Retains Heat and Moisture: Speeds up decomposition.
- Pest Deterrent: Enclosed bins are great at keeping critters out.
Cons:
- Cost: You might need to buy a bin, though DIY options exist.
- May Require Turning: Some bins require you to manually mix the contents for aeration.
Getting Started with a Bin:
What you’ll need:
- A compost bin (store-bought or DIY)
- A kitchen compost caddy or bucket for collecting scraps
- A pitchfork or compost aerator tool (optional, for turning)
- Watering can or hose
Steps:
- Choose a Location: Find a level spot in your yard that gets some sun but isn’t constantly baked. Easy access to water and your garden is a plus.
- Start Layering: Begin with a base layer of coarse brown material (twigs, straw) for aeration. Then, alternate layers of greens and browns. Aim for roughly a 2:1 or 3:1 ratio of browns to greens by volume.
- Add Materials Regularly: As you generate kitchen scraps (greens) and have yard waste (browns), add them to the bin. Try to bury fresh kitchen scraps under a layer of browns to deter pests and odors.
- Moisture Check: Your compost should be as damp as a wrung-out sponge. If it’s too dry, add water. If it’s too wet, add more brown materials.
- Aeration (Turning): To speed things up and prevent odors, turn your compost pile every 1-4 weeks. Use a pitchfork to mix the materials from the outside into the center. If your bin has a tumbling mechanism, give it a few spins.
- Harvesting: Compost is usually ready when it’s dark, crumbly, and smells earthy. This can take anywhere from 2 months to a year, depending on your methods and how often you turn it. You can usually harvest from the bottom of the bin while continuing to add new materials to the top.
2. The Open Compost Pile (Heap Method)
This is the most basic form of composting and requires minimal investment—just space! It’s essentially a managed heap of organic materials in a corner of your yard.
How it Works:
You simply pile up your compostable materials in a designated spot. Like the bin method, it relies on layering greens and browns and periodic turning for aeration and moisture. It’s best suited for those with larger yards who generate a significant amount of yard waste.
Pros:
- Free and Simple: No need to buy anything! Just find a spot.
- Handles Large Volumes: Great for yards with lots of leaves and grass clippings.
- Easy to Add Material: Just toss it on top.
Cons:
- Can Look Messy: Less aesthetically pleasing than a bin.
- May Attract Pests: Less contained, so it’s more important to manage your green-to-brown ratio and bury food scraps.
- Can Dry Out or Get Too Wet: May require more frequent monitoring of moisture levels and potentially covering during heavy rain.
Getting Started with an Open Pile:
What you’ll need:
- Space in your yard!
- Pitchfork or garden fork for moving materials and turning
- Watering can or hose
- Optional: wire mesh or pallets to create a simple enclosure to keep it neater
Steps:
- Choose a Spot: Select a convenient, level area, preferably with good drainage.
- Start Building the Pile: Begin with a coarse layer of browns for airflow. Then, add alternating layers of greens and browns. Aim to make the pile at least 3 feet by 3 feet by 3 feet for effective heating.
- Maintain the Greens and Browns Balance: This is crucial for open piles. Too many greens can lead to a slimy, smelly mess. Too many browns will make decomposition very slow.
- Turn Regularly: Turn the pile weekly or bi-weekly. This introduces oxygen, which the decomposers need, and helps mix materials evenly. Work from the outside in, bringing the cooler outer layers to the hotter center.
- Monitor Moisture: Keep the pile as damp as a wrung-out sponge. Water if it feels dry, and add more browns if it’s soggy.
3. Tumbler Composting
Compost tumblers are rotating bins that make turning your compost a piece of cake—literally just a few spins! They are designed for faster composting and are often pest-proof.
How it Works:
You load your materials into a sealed drum, and then periodically rotate the drum using a crank or by simply pushing it. The tumbling action mixes and aerates the compost, speeding up the decomposition process.
Pros:
- Fast Composting: Tumbling provides excellent aeration, leading to quicker results (often 4-6 weeks).
- Pest-Proof: The sealed design keeps rodents and other critters out.
- Easy to Turn: Minimal physical effort required.
- Neat and Contained: Looks tidy and is suitable for smaller spaces.
Cons:
- Cost: Tumblers can be more expensive initially.
- Batch Composting: They work best when filled in batches, so you might need to wait until it’s full before starting the main composting cycle.
- Can Get Heavy: Once full, a large tumbler can be quite heavy to turn.
- Moisture Control: Can sometimes get too wet if not managed properly, or too dry if left too long between turns.
Getting Started with a Tumbler:
What you’ll need:
- A compost tumbler
- Kitchen compost caddy
- Watering can (if needed, though many have good internal moisture management)
Steps:
- Assemble and Place: Set up your tumbler in a convenient location.
- Add Materials: Start adding greens and browns. Many tumblers are designed to be filled, then sealed to begin the active composting phase.
- Tumble Regularly: Follow the manufacturer’s instructions, but generally, you’ll want to tumble 2-3 times a week. This mixes the contents and introduces air.
- Monitor Moisture: Check the moisture level. It should feel like a damp sponge. If too dry, add a little water. If too wet, add more dry brown material.
- Harvest: Once the material looks, smells, and feels like compost, empty the tumbler and let the compost cure for a week or two.
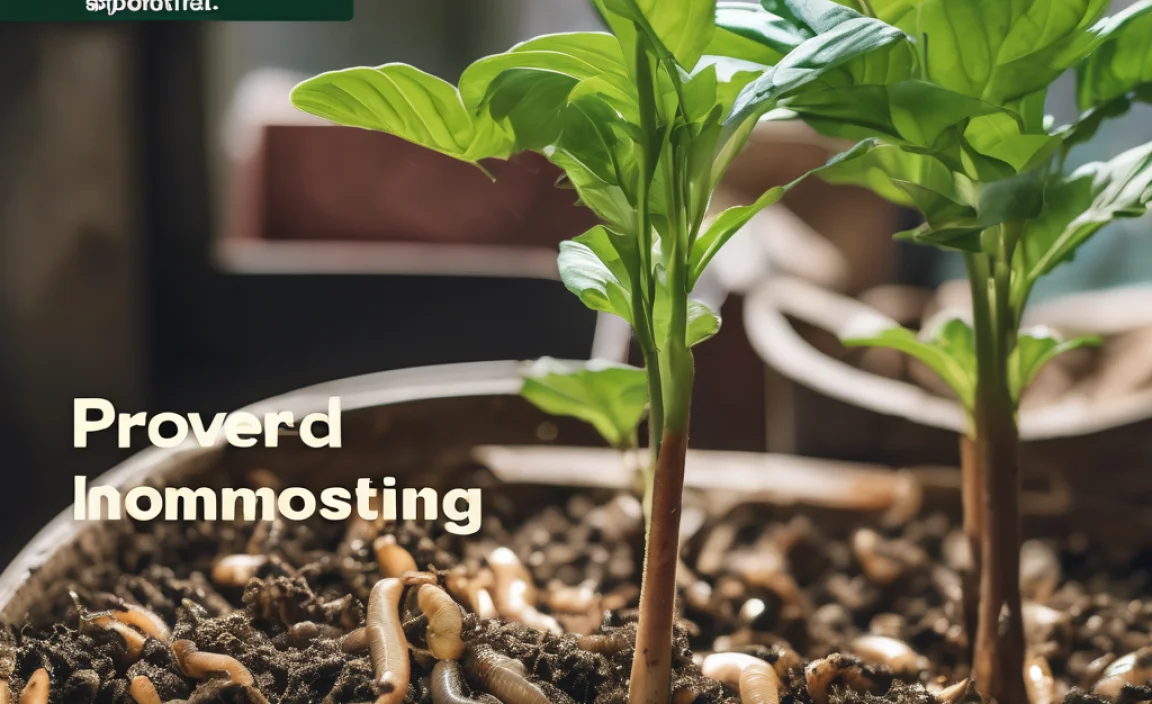
4. Vermicomposting (Worm Composting)
This method uses specific types of composting worms (like red wigglers) to break down organic materials, primarily kitchen scraps. It’s ideal for people with limited outdoor space, like apartment dwellers, as systems can be kept indoors or on a balcony.
How it Works:
Worms live in a special bin with bedding material (like shredded newspaper). You feed them your kitchen scraps, and they eat the material, producing nutrient-rich worm castings (worm poop!), which is an exceptional fertilizer.
Pros:
- Space-Saving: Perfect for small homes, apartments, or balconies.
- Fast Results: Worms are very efficient at breaking down food scraps.
- High-Quality Compost: Worm castings are packed with nutrients and beneficial microbes.
- Odor-Free: When managed correctly, vermicomposting systems have no unpleasant smells.
Cons:
- Requires Specific Worms: You can’t just use any earthworms; you need specific composting worms.
- Temperature Sensitive: Worms prefer cooler temperatures (60-80°F or 15-27°C), so indoor placement is often best.
- Certain Foods Forbidden: Meat, dairy, oily foods, and citrus peels in large quantities can harm the worms.
Getting Started with Vermicomposting:
What you’ll need:
- A worm bin (can be purchased or made from plastic tubs)
- Composting worms (red wigglers are common)
- Bedding material (shredded newspaper, coconut coir, or peat moss)
- Food scraps (vegetable peels, coffee grounds, tea bags, fruit scraps)
Steps:
- Set Up the Bin: Prepare your bin with drainage holes and ventilation. Add the moist bedding material.
- Introduce the Worms: Gently place your worms on top of the bedding. They will burrow down if they are comfortable.
- Start Feeding: Begin by feeding a small amount of food scraps buried in a corner of the bin. Avoid overfeeding worms, as uneaten food can rot and cause odors.
- Feed Regularly: As the worm population grows, you can increase the amount of food. Remember to chop up larger scraps for faster consumption.
- Harvest Castings: After a few months, you can harvest the worm castings by moving the material around. The worms will migrate away from the finished compost, leaving the castings behind.
What to Compost (The Do’s and Don’ts)
Understanding what goes into your compost bin or pile is key to success. It’s all about balancing nitrogen-rich “greens” and carbon-rich “browns.”
Greens (Nitrogen-Rich):
These materials are typically moist and provide nitrogen, which helps produce heat and activate the decomposition process.
- Fruit and vegetable scraps
- Coffee grounds and tea bags
- Grass clippings (in moderation)
- Plant trimmings (non-diseased)
- Eggshells (crushed)
- Manure from herbivores (cow, horse, rabbit)
Browns (Carbon-Rich):
These materials are usually dry and provide carbon, which is the energy source for decomposers and adds bulk for aeration.
- Dry leaves
- Shredded newspaper and cardboard (avoid glossy or colored ink)
- Straw and hay
- Sawdust (from untreated wood)
- Twigs and small branches
- Pine needles (in moderation)
What NOT to Compost:
These items can cause problems like attracting pests, creating foul odors, or introducing pathogens and weed seeds.
- Meat, fish, and bones
- Dairy products
- Oils, fats, and grease
- Diseased plants
- Weeds that have gone to seed
- Pet waste (from dogs and cats)
- Chemically treated wood or yard waste
- Glossy or heavily inked paper/cardboard
A good rule of thumb is to aim for roughly equal parts by volume between greens and browns, but many successful composters find a ratio of 2 or 3 parts browns to 1 part greens works even better for aerobic composting to prevent odors.
Understanding “C:N Ratio” (Without Getting Too Technical)
You’ll often hear about the Carbon-to-Nitrogen ratio, or “C:N ratio.” Don’t let the jargon scare you! Basically, composting organisms need both carbon (for energy) and nitrogen (for protein and reproduction). Browns provide the carbon (like fuel), and greens provide the nitrogen (like fertilizer for the microbes).
Perfect Ratio: The ideal ratio for rapid composting is around 25-30 parts carbon to 1 part nitrogen by weight. In practice, this translates to using more brown materials than green materials.
Why it Matters:
- Too many Greens: Your pile can get dense, wet, smelly (like ammonia), and slimy. Decomposition will be slow and anaerobic.
- Too many Browns: Your pile will be dry and decomposition will be very slow, as the microbes won’t have enough nitrogen to multiply.
For beginners, a simple visual guide is best: Aim for your pile to be consistently around 50-60% browns by volume. If it smells like ammonia, add more browns. If it’s not heating up and looks dry, add more greens and water.
The Composting Process: What to Expect
Once you’ve got your chosen method and materials, here’s a look at what happens and what you can do to help:
Layering Your Compost
Instead of just dumping everything in, think in layers. Start with a base of coarse browns (like twigs) for good airflow. Then alternate:
- Brown Layer: 4-6 inches of dry leaves, shredded paper, or cardboard.
- Green Layer: 2-4 inches of kitchen scraps, grass clippings, or plant trimmings. Cover the greens with more browns.
- Repeat: Continue layering as you add materials.
This layering helps provide the structure and balance needed for aerobic decomposition.
Moisture Management: The “Damp Sponge” Test
Water is crucial. It allows the microbes to move and do their work. Your compost pile should feel like a wrung-out sponge: moist but not dripping wet. If you pick up a handful and can squeeze water out easily, it’s too wet. Add more brown materials and turn the pile. If it feels dry and crumbly, it needs water. Water it thoroughly and mix it in.
Aeration: Giving Your Compost “Breathers”
Composting microbes need oxygen to thrive. This is why turning your compost is so important. For bins and piles, this means using a pitchfork to mix the materials every 1-4 weeks. For tumblers, it’s simply rotating the drum.
Regular turning:
- Introduces oxygen.
- Distributes moisture evenly.
- Mixes new materials with decomposing ones.
- Speeds up the process and reduces odors.
Temperature: The “Hot” vs. “Cold” Debate
An actively composting pile will heat up significantly in the center (sometimes up to 130-160°F or 55-70°C). This heat is great because it kills weed seeds and pathogens, and speeds up decomposition. To get a hot pile, you need a good balance of greens and browns, sufficient moisture, and regular turning. You also need a pile that’s at least 3x3x3 feet.
Don’t worry if your pile doesn’t get super hot! “Cold” composting still works; it just takes longer. Some people prefer cold composting because it’s more passive and requires less turning.
Compost Thermometer (Optional but Helpful)
For those who like to monitor, a compost thermometer can be a fun tool. It helps you track the temperature of your pile and know when it’s hot enough to kill weed seeds and pathogens, or when it’s cooling down, indicating it might be time to turn or add more materials.
Compost thermometers are readily available online and at garden centers.
Troubleshooting Common Composting Problems
Even with the best intentions, you might run into a few snags. Here are some common issues and how to fix them:
Problem: My compost pile smells bad (ammonia or rotten eggs).
Cause: Too many green materials (excess nitrogen) or the pile is too wet and compacted, leading to anaerobic conditions.
Solution:
- Add more brown materials (leaves, shredded paper) to absorb moisture and balance nitrogen.
- Turn the pile thoroughly to introduce air.
- If it smells like ammonia, you definitely have too many greens; bury them under browns.
- If it smells like rotten eggs, it’s likely too wet and anaerobic; turn it and add browns.
Problem: My compost pile isn’t heating up and decomposition is slow.
Cause: Not enough green materials (nitrogen), too dry, or the pile is too small.
Solution:
- Add more green materials (food scraps, grass clippings).
- Add water and mix thoroughly to ensure it’s damp like a sponge.
- If you have a small pile, consider looking into a tumbler or bin specifically designed for faster decomposition, or simply accept that cold composting will take longer.
- Ensure the pile is at least 3x3x3 feet if you’re aiming for hot composting.
Problem: I see flies or fruit flies.
Cause: Exposed food scraps or overly wet conditions.
Solution:
- Always bury fresh kitchen scraps under a layer of brown materials.
- Ensure the compost is not too wet; add browns if needed.
- If using a bin, make sure it’s well-sealed.
- For tumblers, ensure the lid is tight.
Problem: My compost pile is too dry.
Cause: Too many brown materials, not enough moisture, or too much airflow.
Solution:
- Add water using a hose or watering can while turning the pile.
- If you are primarily adding dry brown materials, make sure you are turning them in and adding adequate moisture.
- Consider covering the pile during very hot, dry weather.
Problem: My compost is taking forever to break down.
Cause: A combination of factors including insufficient greens, poor aeration, lack of moisture, cold temperatures, or not turning enough.
Solution:
- Review the basics: Are you balancing greens and browns? Is it moist enough? Are you turning it regularly?
- Chop or shred larger items into smaller pieces – they break down much faster.
- Ensure your pile is large enough (at least 3x3x3 feet for hot composting).
- Be patient! Cold composting can take 6-12 months or even longer, depending on the season and materials.
The Finished Product: What is Compost and How to Use It
After weeks or months of diligent (or less diligent!) effort, you’ll have a finished product that looks, smells, and feels like rich, dark soil. It should be loose and crumbly, with an earthy aroma—no trace of the original food scraps or lawn clippings.
Recognizing Finished Compost:
- Appearance: Dark brown, crumbly, with no recognizable food scraps or original materials.
- Smell: Earthy and pleasant, like a forest floor after rain.
- Feel: Moist but not wet, light and airy.
Ways to Use Your Compost:
Congratulations, you’ve made “black gold”! Here’s how to put it to good use:
- Soil Amendment: Mix a few inches of compost into your garden beds, especially before planting vegetables or flowers. This improves soil structure, drainage, and aeration.
- Top Dressing: Spread a thin layer (about 1 inch) of compost around the base of established plants, trees, and shrubs.
- Potting Mix: Mix compost with other ingredients like perlite and peat moss to create a nutrient-rich potting mix for containers and houseplants. A common recipe is 1/3 compost, 1/3 peat moss, and 1/3 perlite/vermiculite.
- Lawn Care: Rake a thin layer of screened compost over your lawn in the spring or fall to improve soil health and reduce the need for fertilizers.
- Seed Starting: Use a well-sifted compost as part of your seed-starting mix for healthy seedling growth.
Quick Summary: Composting Methods at a Glance
Here’s a quick look at the methods we’ve discussed, to help you pick the best one for you.
| Method | Best For | Pros | Cons |
|---|---|---|---|
| Enclosed Bin | Beginners, small to medium yards. | Neat, pest-resistant, retains heat/moisture. | Initial cost, may require manual turning. |
| Open Pile | Larger yards, lots of yard waste. | Free, simple, handles large volumes. | Can look messy, more pest-prone, needs more management. |
| Tumbler | Those wanting fast, easy composting; smaller spaces. | Fast, pest-proof, easy to turn. | Higher cost, batch composting, can get heavy. |
| Vermicomposting | Apartment dwellers, small spaces, indoor composting. | Space-saving, fast, high-quality castings, odorless. | Special worms needed, temperature sensitive, food restrictions. |
Conclusion: Start Your Composting Journey Today!
There you have it! Composting for beginners is absolutely achievable, and the rewards are immense—for your garden, your wallet, and the planet. Whether you choose a simple bin, an open pile, a handy tumbler, or even a worm bin for indoor composting, the core principles remain the same: balance your greens and browns, manage moisture, and provide aeration.
Don’t be afraid to experiment and learn as you go. Every pile is a little different, and that’s part of the fun! Start with what feels manageable, pay attention to your compost’s signs (smell, feel, appearance), and soon you’ll be turning waste into garden gold. Happy composting!
Frequently Asked Questions About Composting for Beginners
Q1: How long does it usually take to make compost?
A1: It varies! Hot composting methods (like tumblers or well-managed piles) can produce compost in as little as 4-6 weeks. More passive methods like cold composting or slower-managed bins can take 6-12 months or longer. Patience is key!
Q2: What’s the biggest mistake beginners make?
A2: The most common mistakes are either having too much wet material (greens) leading to smelly, anaerobic conditions, or having too much dry material (browns) leading to very slow decomposition. Getting the moisture and carbon-to-nitrogen balance is crucial.
Q3: Do I really need to turn my compost?
A3: For faster, hotter composting that kills weed seeds and pathogens, yes, turning is essential. If you’re doing cold composting, it’s less critical but still helps speed things up and prevent issues. Tumblers make turning very easy.
Q4: Can I compost in a small apartment?
A4: Absolutely! Vermicomposting (worm composting) is perfect for apartments, as are small compost bins designed for balconies or indoor use. Some compact electric composters are also available.
Q5: What if my compost pile is attracting rodents or other pests?
A5: This usually means exposed food scraps or inappropriate materials are being composted. Always bury food scraps deep within the pile or bin and cover them with brown material. Avoid adding meat, dairy, and oily products. Using an enclosed bin or tumbler offers the best protection.
Q6: How much compost will I get from my kitchen scraps?
A6: It’s hard to give an exact figure, but a significant portion of your kitchen and yard waste can be diverted from the trash. The volume will reduce greatly as materials break down, so you’ll end up with a much smaller amount of finished compost, but it’s highly concentrated in nutrients and beneficial to your soil.

I am passionate about home engineering. I specialize in designing, installing, and maintaining heating, ventilation, and air conditioning systems. My goal is to help people stay comfortable in their homes all year long.