Ever feel like your pet’s waste is just… waste? It doesn’t have to be! Composting pet waste might sound a little “out there” at first, but it’s a surprisingly easy and earth-friendly way to handle it. It can turn a potential problem into a valuable resource for your garden.
If you’re new to composting, especially with pet materials, you might feel a bit unsure. That’s totally normal! This guide is here to walk you through it, step by step. We’ll break down what you need, how to do it safely, and why it’s a great idea for both your home and the planet.
Let’s get started and turn that pet waste into garden gold!
Composting For Beginners: Your Essential Pet Waste Guide
Hey there, fellow home enthusiasts and garden lovers! Troy D Harn here from TopChooser. I know that when it comes to home projects, sometimes the most rewarding ones are the ones that help us live a little more sustainably. One area that often causes a bit of head-scratching is what to do with pet waste. Most of us scoop the poop, bag it up, and send it to the landfill. But what if I told you there’s a way to turn that everyday chore into an eco-friendly win? Yep, we’re talking about composting pet waste!
Now, I know what you might be thinking: “Composting poop? Is that even safe? Or, you know, sanitary?” Absolutely! With the right approach and a few simple steps, you can compost most common pet waste safely and effectively. It’s a fantastic way to reduce landfill contributions, create nutrient-rich compost for your plants, and feel good about doing your part for the environment. This guide is designed to be your go-to resource, making composting pet waste as easy as scooping the litter box.
We’ll cover everything from understanding what can and can’t be composted, to choosing the right composting method, and how to do it all safely. By the end of this, you’ll be equipped with the confidence and knowledge to start your own pet waste composting journey. Let’s dig in!
Why Compost Pet Waste? The Big Benefits
Let’s talk about why you’d even consider composting your pet’s droppings. It might seem like an extra step, but the rewards are definitely worth it.:
- Reduces Landfill Waste: Pet waste is a significant contributor to landfill volume. Composting diverts this waste, lessening the burden on landfills and reducing the production of methane, a potent greenhouse gas.
- Creates Valuable Fertilizer: Properly composted pet waste transforms into a nutrient-rich soil amendment. This “black gold” can significantly boost the health and vitality of your garden plants once it’s fully composted and safe.
- Environmentally Friendly: By composting, you’re closing the loop on waste. Instead of letting valuable organic matter go to waste and potentially pollute water sources, you’re recycling it back into the earth.
- Cost Savings: Over time, the compost you create can reduce or even eliminate the need to purchase commercial fertilizers and soil amendments for your garden.
- Reduces Odor and Pathogens: The composting process, when done correctly, heats up to temperatures that kill most harmful pathogens found in pet waste, making it safer.
What Pet Waste Can (and Can’t) Be Composted?
This is a crucial step! Not all pet waste is created equal when it comes to composting. Knowing the difference ensures you’re composting safely and effectively. Here’s a breakdown:
Compostable Pet Waste:
- Dog and Cat Feces: Yes, the most common types are compostable! However, there are caveats. It’s best to compost waste from healthy, herbivorous or omnivorous pets.
- Bedding Materials: For some smaller pets, their soiled bedding can also be a good addition to a compost pile, provided it’s made from natural materials.
What NOT to Compost (Generally):
- Carnivore Waste (especially raw fed): Waste from pets fed primarily raw meat diets (like some cats and dogs) can carry more potent pathogens and parasites. While it can be composted, it requires very high temperatures and careful management, often beyond beginner capabilities. Stick to cooked or kibble-fed pets for simpler composting.
- Diseased Animal Waste: If your pet has been sick, especially with intestinal issues, it’s best to avoid composting their waste. You don’t want to risk spreading pathogens.
- Bedding from Sick Animals: Similar to waste, soiled bedding from a sick pet should be disposed of in the trash.
- Non-Biodegradable Materials: Plastic bags, clumping cat litter (unless specifically marked as compostable), and other man-made materials will not break down and will contaminate your compost.
Choosing Your Pet Waste Composting Method
There are a few ways to go about composting pet waste, and the best method for you will depend on your space, the type of pet you have, and how much effort you want to put in. For beginners, simplicity and safety are key.
1. The Dedicated Pet Waste Composter (Recommended for Beginners)
This is often the easiest and safest method for beginners. These are specialized bins designed specifically for pet waste. They are usually contained, often buried in the ground, and have a secure lid.
How it Works:
- Choose a Location: Pick a spot in your yard that’s not too close to your house, vegetable garden, or water sources. It should be easily accessible for scooping but out of the way.
- Install the Bin: These bins typically have a bottom that allows beneficial microorganisms and insects from the soil to enter, while also letting the compost leachate drain away. You’ll usually dig a hole and set the bin into the ground.
- Add Waste Regularly: Dig your pet’s waste into the bin. You can also add a carbon-rich material like sawdust, dry leaves, or straw to help balance the nitrogen from the waste.
- Maintain Moisture: Keep the contents of the bin moist but not soggy.
- Let it Decompose: These systems are designed for slow decomposition. The buried nature and soil contact help break down the waste over time. The resulting compost is typically not recommended for direct use on edible plants but is great for ornamental flower beds or shrubs once fully decomposed.
Pros: Safe, contained, relatively odorless, specifically designed for purpose, good for beginners.
Cons: Requires purchasing a specialized bin, may take longer to break down, compost not suitable for food gardens.
2. Hot Composting (More Advanced)
This method involves creating a compost pile that reaches high temperatures (130-160°F or 55-70°C). These high temperatures are crucial for killing pathogens and weed seeds. It’s much more effective for composting pet waste, especially from omnivores or carnivores, but requires more active management.
How it Works:
- Build a Large Pile: You’ll need a substantial pile to generate heat efficiently, at least 3x3x3 feet. This can be in a bin or a free-standing pile.
- Balance Greens and Browns: Pet waste acts as a “green” (nitrogen-rich). You need to add plenty of “browns” (carbon-rich materials) like dry leaves, straw, sawdust, shredded cardboard, or newspaper. A good ratio is crucial, often around 25-30 parts carbon to 1 part nitrogen (pet waste). This is where it gets tricky for beginners with pet waste, as the nitrogen content is very high.
- Add Waste and Mix: Bury fresh pet waste within the pile, mixing it thoroughly with the brown materials.
- Monitor Temperature and Moisture: You’ll need a compost thermometer to track the heat. Turn the pile regularly (every few days to a week) to aerate it and ensure it heats up evenly. Keep it as damp as a wrung-out sponge.
- Cook Thoroughly: The pile needs to maintain high temperatures for several weeks, with regular turning, to break down waste and kill pathogens.
Pros: Kills pathogens effectively when done correctly, faster decomposition than passive methods, can handle a wider range of pet waste (with caution), compost is more likely to be safe for wider garden use.
Cons: Requires more effort, space, and active management; temperature monitoring is essential; improper management can lead to odors or ineffective pathogen kill.
3. Vermicomposting with Worms (Limited for Pet Waste)
Vermicomposting uses red wiggler worms to break down organic matter. While excellent for kitchen scraps, it’s generally not recommended for pet waste, especially from dogs and cats. The waste can be too acidic, or the worms may not tolerate it well, and the risk of pathogen transmission is higher in these less controlled systems.
Setting Up Your Beginner Pet Waste Composter
Let’s focus on the beginner-friendly method: the dedicated pet waste composter. These are readily available online or at garden stores.
What You’ll Need:
- Pet Waste Composter Bin: Look for sturdy, plastic or metal bins designed for this purpose. Many are designed to be buried partially in the ground.
- Scooper and Bag/Bucket: For daily collection of waste.
- Garden Shovel and Trowel: For burying the waste and mixing.
- Carbon-Rich “Brown” Material: Such as dry leaves, sawdust (untreated wood), straw, or shredded cardboard. This helps balance the nitrogen in the waste and reduces odors. Aim for a good supply!
- Water Source: A hose or watering can.
- Gloves: For hygiene.
Step-by-Step Setup and Use:
Step 1: Choose the Right Spot
Find a location in your yard that is:
- Out of the Way: Not a high-traffic area.
- Accessible: Easy to get to with your scooper.
- Away from Water: At least 10-20 feet from wells, streams, or storm drains to prevent contamination. Your local EPA offers guidance on protecting water sources.
- Sun or Shade: Most bins do well in either.
Step 2: Assemble and Install Your Bin
Follow the manufacturer’s instructions. This usually involves digging a hole and placing the bin so its lip is level with or slightly above the ground. Many have perforated sides or bottoms to encourage soil contact and drainage. If you’re not burying it, ensure it has good drainage.
Step 3: Add Your First Layer of Browns
Put a few inches of your carbon-rich material (leaves, sawdust, etc.) at the bottom of an empty bin. This helps absorb moisture and provides a good base.
Step 4: Start Adding Pet Waste
Scoop fresh pet waste directly into the bin. Aim to cover it immediately with another layer of brown material. A 1:1 or 2:1 ratio of browns to pet waste is a good starting point for odor control.
Step 5: Maintain Moisture
The compost needs to be like a damp sponge – moist but not dripping wet. If it’s too dry, add a little water. If it’s too wet, add more dry brown material.
Step 6: Aerate Occasionally
Even with these bins, a little aeration can help. Using a trowel or stick, gently poke holes into the material every week or two. This allows air to circulate, which is vital for decomposition. You don’t need to turn it like a hot compost pile.
Step 7: Continue Adding Waste and Browns
Keep scooping waste and adding brown material regularly. Always bury fresh waste under a layer of browns.
Step 8: Let It Decompose
These systems rely on microbial action and soil organisms to break down the waste over time. Depending on your climate and usage, it can take 6 months to a year (or more) for the material at the bottom to fully decompose. You can often harvest finished compost from the bottom opening if your bin has one, or simply let it continue to break down.
What to Expect: Odors, Pests, and Patience
Let’s be real for a second. Composting pet waste, even when done correctly, can sometimes raise concerns about smells and pests. Here’s how to manage that:
- Odors: The main culprit for bad smells is usually too much nitrogen (from the waste) and not enough carbon (browns), or the pile being too wet and anaerobic (lacking air). Always bury fresh waste under a good layer of brown material. If it smells ammonia-like, add more browns. If it smells rotten, it’s too wet and needs more browns and aeration.
- Pests: A well-covered, well-managed compost system is less likely to attract pests. Ensure your bin has a secure lid. Burying fresh waste immediately under browns also helps deter flies and other critters. Avoid adding meat scraps or dairy products to any compost, especially pet waste compost.
- Patience: Composting is a natural process. It takes time. Don’t expect finished, usable compost overnight. For dedicated pet waste composters, think of it as a long-term solution.
When is Dog or Cat Compost Ready?
This is a critical question! You absolutely must ensure the compost is fully broken down before considering using it. Incomplete composting can harbor pathogens that are harmful to people and pets.
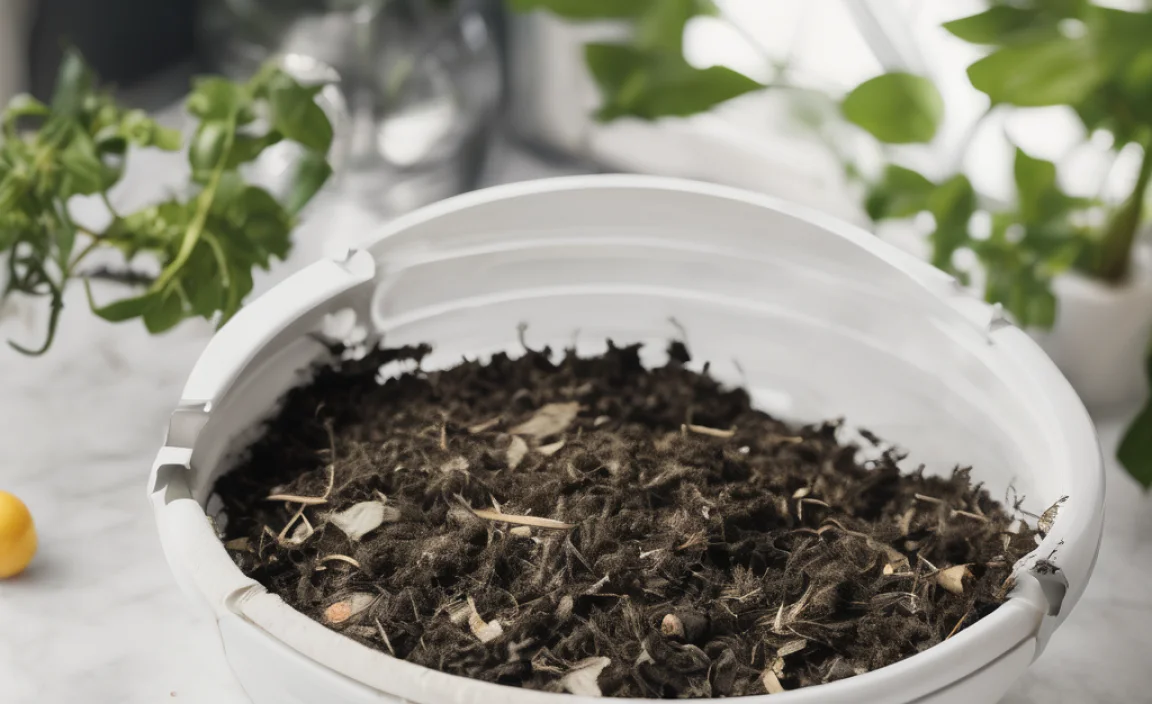
Signs of Finished Compost:
- Appearance: It should look dark, crumbly, and earthy, like rich soil. You shouldn’t be able to recognize the original waste material.
- Smell: It should smell earthy, not like ammonia or foul waste.
- Temperature: It should be at ambient temperature, no longer heating up.
Important Note: Even when fully composted, pet waste compost is generally not recommended for direct use on edible plants, especially root vegetables or leafy greens. The risk of pathogen transfer, however small, is still present. It’s best used on ornamental plants, shrubs, trees, or lawn areas where direct consumption is unlikely. Many local agricultural extension services can provide specific recommendations for your region.
Compostable vs. Non-Compostable Pet Waste: A Quick Table
To make things super clear, here’s a quick reference table.
| Item | Compostable? | Notes |
|---|---|---|
| Dog Feces (Kibble/Cooked Food Fed) | Yes (safest with dedicated methods) | Requires careful management, high heat or dedicated bin. |
| Cat Feces (Kibble/Cooked Food Fed) | Yes (with extreme caution and dedicated methods) | Cats are obligate carnivores, waste can be higher in pathogens. Best avoided if possible for beginners. |
| Dog/Cat Feces (Raw Food Fed) | No (for beginners) | High risk of pathogens. Requires very advanced hot composting. |
| Diseased Pet Waste | No | Dispose of in trash. |
| General Pet Bedding (Wood shavings, straw) | Yes (if clean) | Add as ‘browns’ to compost. |
| Non-Caking Cat Litter (Clay/Silica) | No | Dispose of in trash. |
| Compostable Cat Litter | Yes (check packaging) | Some litters made from corn, wheat, or paper are designed for composting. |
| Plastic Poop Bags | No | Dispose of in trash; opt for biodegradable bags if you must bag. |
| Biodegradable Poop Bags | Sometimes | Check certification. Even ‘biodegradable’ bags may not break down in a home compost. |
A Note on Smaller Pets
What about rabbits, hamsters, guinea pigs, or birds? Their waste can often be easier to compost. For instance, hamster and guinea pig bedding mixed with their waste is generally compostable. Rabbit droppings are often called “rabbit manure” and are considered excellent for gardens (though it’s still wise to compost them rather than use them fresh). Always ensure bedding is natural and free from dyes or chemicals.

I am passionate about home engineering. I specialize in designing, installing, and maintaining heating, ventilation, and air conditioning systems. My goal is to help people stay comfortable in their homes all year long.