Are you looking to start composting but worried about attracting unwanted guests like rats? It’s a common concern for aspiring composters, and understandably so! Nobody wants a vermin problem in their backyard. But here’s the good news: with the right setup and a few smart tips, you can compost effectively while keeping rats at bay. This guide will walk you through everything you need to know, step-by-step, so you can turn your kitchen scraps into garden gold safely and confidently. Let’s get started on your composting journey!
Composting for Beginners: The Rat-Proof Edition
Hey there, fellow home improvers and garden enthusiasts! Troy D Harn here, your go-to guide for making home projects, well, doable. Today, we’re tackling a topic that might seem a little intimidating at first glance: composting, specifically how to do it right when you’re a beginner and want to avoid attracting any unwanted rodent guests, like rats.
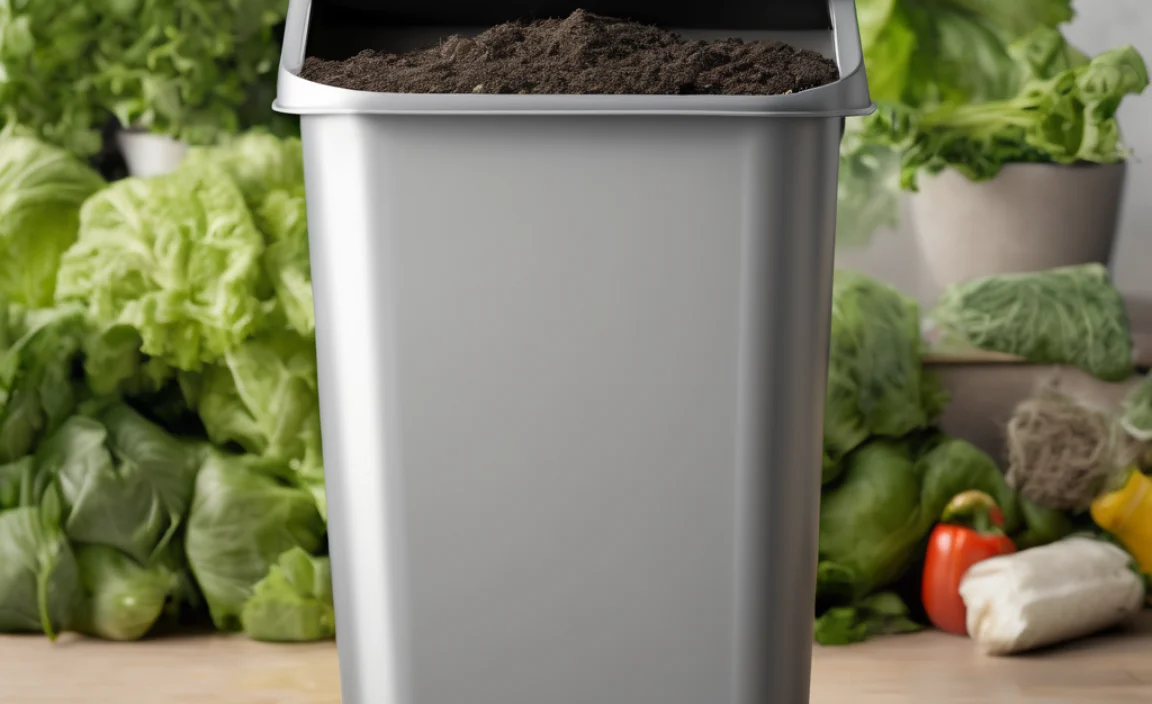
Composting is an amazing way to reduce waste and create nutrient-rich soil for your garden. It’s like giving your kitchen scraps and yard trimmings a second life! But if the thought of rats raiding your compost pile gives you the creeps, we’re going to set you up with the knowledge to compost without the worry. We’ll cover the best methods, the right materials, and simple strategies to build a compost system that works for you and keeps the critters out.
Think of this as your friendly neighborly chat about making compost. No super-technical jargon, just practical advice that makes sense. By the end of this guide, you’ll feel confident in starting your own compost pile and enjoying healthy plants without any furry freeloaders.
Why Compost? The Big Picture
Before we dive into the “how,” let’s quickly touch on the “why.” Composting is fantastic for several reasons:
- Reduces Landfill Waste: A huge portion of household waste is organic material that could be composted. Keeping it out of landfills reduces methane gas production, which is a powerful greenhouse gas.
- Creates Amazing Soil: Compost, often called “black gold,” is packed with nutrients. It improves soil structure, helps it retain moisture, and provides essential food for your plants.
- Saves Money: You can stop buying expensive soil amendments and fertilizers when you have your own compost.
- Connects You to Nature: It’s a satisfying process to watch waste transform into something beneficial for your garden.
Understanding the “Rat Problem” and How to Avoid It
Let’s be honest, rats and other rodents are attracted to easy food sources. If your compost pile is an open buffet of delicious scraps, they might see it as a free meal. They are resourceful and can dig or gnaw their way into many things.
The good news is that rats are more attracted to certain types of compost materials and certain types of compost bins. By making smart choices about what you compost and how you contain it, you can make your compost pile far less appealing to them.
The key is to make your compost bin a fortress and to manage the contents wisely. We’ll focus on methods and materials that are tough for rats to get into and less enticing to them.
Choosing the Right Composting Method for Beginners (and Rat-Averse Folks)
Not all composting methods are created equal when it comes to keeping rodents out. For beginners, and especially those concerned about rats, some options are much better than others. We want something that’s easy to manage but also secure.
Option 1: The Tumbler Composter – Your Best Bet
If you’re serious about deterring rats, a compost tumbler is often your best friend. These are enclosed bins that you can rotate or “tumble” to mix the compost. Why are they great for rat prevention?
- Fully Enclosed: The biggest advantage is that they are sealed. Rats can’t easily get in to access the food scraps because there are no large openings.
- Durable Materials: Most tumblers are made of sturdy plastic or metal that rats can’t chew through.
- Faster Composting: Tumblers often speed up the composting process because they are easy to mix, which aerates the compost and helps it heat up.
- Less Mess: They tend to be tidier than open piles.
Things to consider with tumblers:
- Cost: They can be more expensive upfront than a simple bin or pile.
- Capacity: Some tumblers have limited capacity, which might be an issue if you generate a lot of compost material.
- Manual Labor: You still need to do the work of adding materials and tumbling.
Where to find great tumblers: Look for reputable garden supply stores or online retailers that specialize in composting equipment. Brands like Suncast, Algreen, or Earth Machine often have well-regarded models.
Option 2: The Secure Stationary Bin
If a tumbler isn’t in the cards, a well-constructed, secure stationary bin is the next best thing. This is less of a “pile” and more of a contained system.
- Good for Larger Volumes: Stationary bins can often hold more material than most tumblers.
- Can Be DIY: You can build some types of stationary bins yourself, potentially saving money.
To make a stationary bin as rat-proof as possible, you need to focus on:
- Solid Construction: Opt for bins made of thick, durable plastic or rot-resistant wood.
- Hardware Cloth/Wire Mesh: Strong, small-gauge (1/2 inch) hardware cloth is essential. This is what you’ll use to line the bottom and sides of your bin.
- A Lid: A tightly fitting lid is crucial to keep out rain and deter pests.
- Elevated or Buried Base: To prevent burrowing, the bin should either be elevated off the ground or have hardware cloth buried well into the soil around its base.
DIY Bin Idea: You can buy a large plastic trash can with a lid, drill plenty of holes for aeration, and line the bottom with hardware cloth. Ensure the lid is secure!
Option 3: The Least Recommended (but still manageable with care) – Open Pile
Honestly, an open compost pile is the easiest for rats to access and is generally not recommended if you have a rat concern. However, if you’re determined, you need to be super vigilant about what goes in and how it’s managed.
If you do an open pile, a cold composting method is generally less attractive to rodents than hot composting, as it doesn’t generate the same heat that can signal an easy food source. However, you must avoid adding ingredients that are particularly appealing or that can attract pests directly.
What to Compost (and What to Absolutely Avoid)
This is where you can make a huge difference in deterring rats. Some food scraps are like magnets for rodents. Others are perfectly fine.
Good “Greens” & “Browns” for Your Compost
Composting works best with a good mix of “greens” (nitrogen-rich) and “browns” (carbon-rich). Here’s a breakdown:
Greens (Nitrogen-Rich)
These add moisture and nitrogen to your pile. Chop them up to help them break down faster.
- Fruit and vegetable scraps
- Coffee grounds and tea bags (paper filters are fine)
- Grass clippings (in moderation; can mat down if too much)
- Plant trimmings (non-diseased, non-woody)
- Eggshells (crushed)
Browns (Carbon-Rich)
These add bulk and structure, preventing your pile from getting too wet and smelly.
- Dry leaves
- Shredded newspaper (avoid glossy pages)
- Shredded cardboard (plain, not waxed)
- Straw or dried grass
- Small twigs and wood chips
- Sawdust (from untreated wood)
What NOT to Add (Especially if Rats are a Concern)
This list is critical for keeping rats away. If you’re unsure, it’s better to leave it out.
- Meat, fish, and bones: These are huge attractants for rodents and can also cause odors.
- Dairy products: Cheese, yogurt, milk, butter – anything with fat and dairy smells.
- Oily or greasy foods: Salad dressings, cooking oils, fatty scraps.
- Diseased plants: Avoid spreading plant diseases in your compost.
- Pet waste: Dog and cat feces can contain pathogens and are best composted in specialized systems, not your general compost bin.
- Weeds that have gone to seed: You don’t want to spread weeds.
- Cooked foods with sauces or fats: While some sources say small amounts of plain cooked grains are okay, it’s safer for rat prevention to avoid most cooked foods if you’re a beginner.
- Treated wood: Avoid sawdust or wood chips from pressure-treated or painted lumber.
Building Your Rat-Proof Compost System: A Step-by-Step Guide
Let’s get hands-on. We’ll focus on setting up a secure stationary bin, as this is a popular DIY option. If you’re using a tumbler, simply follow the manufacturer’s instructions for assembly!
For a Stationary Bin (DIY with Hardware Cloth)
What You’ll Need:
- A large, sturdy plastic trash can with a secure lid (20-35 gallons is a good start)
- Approx. 4-6 feet of 1/2-inch hardware cloth (galvanized steel mesh)
- Heavy-duty wire cutters or tin snips
- Work gloves and eye protection
- A drill with a 1/2-inch or larger drill bit
- Zip ties or sturdy wire
- Shovel (optional, for burying the base if desired)
Step 1: Prepare the Bin
Start with your clean plastic trash can. You need to create aeration holes. Drill holes all around the sides of the bin, from top to bottom. Aim for holes about every 4-6 inches. You can also drill a few holes in the lid for extra airflow.
Step 2: Prepare the Hardware Cloth Base
This is the most critical step for rat prevention. Measure the bottom of your trash can. Cut a circle of hardware cloth that is slightly larger than the base (about an inch or two wider all around). You want the mesh to extend up the sides a few inches to prevent burrowing.
Step 3: Secure the Hardware Cloth to the Bin
Carefully turn your bin upside down. Place the hardware cloth circle onto the drilled bottom. Use strong zip ties or sturdy wire to securely fasten the hardware cloth to the drilled holes around the base of the bin. Make sure it’s taut and there are no gaps.
For extra security, you can cut a few more strips of hardware cloth and zip-tie them around the exterior base of the bin, extending a few inches up the sides.
Step 4: (Optional) Elevate or Bury the Base
To further deter rats from digging under, you can either:
- Elevate: Place the bin on a few bricks or a sturdy, raised platform.
- Bury: Dig a shallow hole and place the bin so that the hardware cloth base is slightly buried into the surrounding soil (at least 6 inches deep). This makes it harder for rats to tunnel underneath.
Step 5: Place Your Bin
Find a suitable spot for your compost bin. It should be in a location that’s easy to access but not right next to your house if possible. Ideally, it gets some sun but is not in direct, scorching heat all day, which can dry it out too much.
Step 6: Start Composting!
You’re ready to add your greens and browns. Remember to aim for a good balance. A common starting ratio is about 2-3 parts browns to 1 part greens.
Maintaining Your Compost to Keep It Rat-Free
Setting up a secure bin is half the battle. The other half is what you do with it!
Layering is Key
When you add new materials, try to bury your kitchen scraps (greens) within a layer of browns (like dry leaves or shredded paper). This helps to contain odors and makes the food less accessible to opportunistic visitors.
Chop It Up
Smaller pieces break down faster. This means less chance of large, unappealing food scraps sitting around for too long.
Maintain Moisture Levels
Your compost should be as moist as a wrung-out sponge. Too dry and it won’t break down; too wet and it can become a stinky, slimy mess that attracts pests. If it’s too dry, add some water. If it’s too wet, add more browns.
Aeration is Important
Even in a tumbler, you need air. For stationary bins, you can use a compost aerator tool (like a crank or spear) to poke holes and turn the material occasionally. This helps the process and can disrupt any critter activity.
Tip: If you are uncomfortable with turning the bin, simply burying new additions well within the existing material and ensuring a good mix of greens and browns can still lead to successful composting over time.
Manage Your Additions
Stick diligently to the “what not to add” list. If you’re concerned about meat/dairy attractants, even small amounts, err on the side of caution and avoid them entirely, especially as a beginner.
Be Patient
Composting takes time. While tumblers can speed things up, a well-managed stationary bin will also produce compost. Don’t get discouraged if it’s not “ready” in a few weeks. The goal is healthy decomposition, not a miracle overnight.
Troubleshooting Common Issues
Even with the best intentions, you might run into a minor hiccup. Here’s how to handle them:
Problem: It’s Smelly!
Cause: Likely too many greens (nitrogen) or not enough air, or it’s too wet.
Solution: Add more browns (leaves, shredded paper). Turn your compost to introduce air. If it’s excessively wet, add more browns and consider a more open structure for airflow.
Problem: It’s Not Breaking Down
Cause: Too dry, not enough greens, or not enough air.
Solution: Add water if dry. Add more greens (kitchen scraps, grass clippings). Turn the compost to aerate it. Ensure your compost bin has enough holes for air circulation.
Problem: I Think I Saw a Rat (or Mouse)!
Cause: Your compost might be too accessible or contain attractive materials.
Solution: This is your signal to double-check your bin’s security. Ensure the lid is tight. If using a stationary bin, verify the hardware cloth is intact and secure, with no holes they can squeeze through. If you used less secure materials (like plain plastic bins without mesh), they might have chewed through. Review your “what to compost” list and ensure you haven’t accidentally added meat, dairy, or oily foods. Consider burying new kitchen scraps more deeply within brown materials.
If you’ve confirmed your bin is secure and you’re only adding appropriate materials, a single rodent sighting may not mean immediate disaster. However, continued sightings suggest an issue with your setup or management. Addressing it quickly by reinforcing your bin and reviewing your contents is key.
Composting Materials Breakdown Table
Here’s a quick reference table to help you decide what to add and what to avoid.