Hey there! Thinking about composting but stuck with a cozy balcony? Don’t let limited space cramp your eco-style. Composting on a balcony might sound tricky, but it’s totally doable and a fantastic way to reduce waste and nourish your plants. It’s a brilliant little solution for bringing a bit of nature and sustainability right outside your door.
This guide will walk you through everything you need to know, making balcony composting simple and successful. You’ll learn what you need, how to get started, and how to keep your little compost bin happy. Let’s dig in!
Composting for Businesses Balcony: A Genius Eco-Solution
So, you’re running a business, maybe a small shop, a studio, or even an office, and you’ve got a balcony. You’re also trying to be more sustainable, right? Good on you! One of the simplest yet most impactful ways to do this is by composting. But how do you compost when space is tight? The answer is a compact, well-managed balcony compost system. It’s a win-win: less waste going to landfill, and you get nutrient-rich compost for any potted plants you might have, or even to donate to a local community garden.
Many people think composting requires a big backyard and a giant pile. That’s a myth! With the right approach, balcony composting can be just as effective and far less intimidating. We’ll break down exactly how to set up and maintain a thriving compost bin right on your balcony, turning your kitchen scraps into black gold.
Why Compost on Your Balcony? The Big Benefits
Composting isn’t just about reducing trash; it’s a powerful act of environmental stewardship that you can do right from your urban oasis. Here’s why it’s such a smart move:
- Waste Reduction: The average household or business kitchen produces a surprising amount of food scraps. Composting diverts a significant portion of this from landfills, where it would otherwise produce methane, a potent greenhouse gas.
- Rich Soil Amendment: The end product of composting is a nutrient-dense material that’s amazing for plants. It improves soil structure, helps retain moisture, and provides essential nutrients, leading to healthier, happier greenery on your balcony or in any garden you support.
- Circular Economy in Action: You’re closing the loop by turning waste into a valuable resource. This embodies the principles of a circular economy, where materials are reused and recycled rather than discarded.
- Cost Savings: If you buy soil or plant food, using your own compost can save you money over time. Plus, reduced waste might mean lower waste disposal fees for your business.
- Educational Opportunity: For businesses, especially those with a public-facing element, a balcony compost system can be a visible commitment to sustainability, sparking conversations and inspiring others.
- Connect with Nature: Even in an urban setting, composting can provide a rewarding connection to natural processes and the satisfaction of growing something valuable.
Choosing Your Balcony Compost System: What Works Best?
When it comes to composting on a balcony, your primary concern is space and odor control. Luckily, there are several types of composters designed for smaller areas. Let’s look at the most popular and effective options:
1. The Tumbler Composter
A tumbler is essentially a barrel or bin that rotates on an axle. This makes it super easy to mix your compost without much effort. You just give it a good spin every few days.
- Pros: Speeds up the composting process significantly because of easy aeration and mixing. Usually has a lid to keep pests out and odors contained. Can look quite neat and tidy.
- Cons: Can be more expensive upfront. Some models might be a bit bulky for very small balconies. You need to ensure you have enough material to fill it adequately to start the process efficiently.
2. The Stationary Bin Composter (Small Scale)
These are enclosed bins with a lid and often a door at the bottom for removing finished compost. You’ll need to mix the contents manually with a compost fork or aerator.
- Pros: Generally more affordable than tumblers. Available in various sizes, so you can find one that fits your space. Good at keeping odors and pests at bay.
- Cons: Mixing requires manual effort, which can aerate the pile less effectively than a tumbler. The composting process might be a little slower.
3. Worm Composting (Vermicomposting)
This is a fantastic method for small spaces. Using a special worm bin and specific types of composting worms (like red wigglers), you can break down food scraps quickly and efficiently with minimal odor.
- Pros: Excellent for small spaces. Very fast at breaking down food scraps. Produces nutrient-rich worm castings, which are a super-fertilizer. Minimal odor if managed correctly.
- Cons: Requires specific worms. You need to be careful about what you feed the worms (no meat, dairy, oily foods, or citrus in large quantities). Needs to be kept within a certain temperature range.
4. Bokashi Composting
While not technically traditional composting (it’s a fermentation process), Bokashi is a great indoor/balcony solution. It uses a special bran inoculated with beneficial microbes to ferment food waste in an airtight bucket. The fermented material then needs to be buried to fully decompose, which can be done in containers or donated.
- Pros: Can compost almost all food scraps, including meat and dairy. Very compact and can be done indoors. Minimal odor during fermentation.
- Cons: Requires purchasing the Bokashi bran. The fermented material isn’t finished compost and needs a secondary decomposition stage.
For most businesses with a balcony looking for an easy start, a small tumbler or a compact stationary bin are excellent choices. If you’re keen on a truly compact and fast system, worm composting is a winner.
What You’ll Need to Get Started: Your Balcony Composting Toolkit
Setting up your balcony compost station is like preparing any DIY project – a few essential tools make the job much easier and more successful. Here’s a quick rundown of what you’ll likely need:
- A Compost Bin: As discussed above, choose based on your space and preference (tumbler, stationary bin, or worm farm).
- Kitchen Compost Caddy: A small, lidded container to collect food scraps in your office kitchen or break room. This makes it easy to gather materials without multiple trips. Look for one with a charcoal filter to help with odors.
- “Greens” and “Browns” Materials: These are the essential ingredients for compost.
- Greens (Nitrogen-rich): Fruit and vegetable scraps, coffee grounds, tea bags, fresh grass clippings (if you have any nearby), plant trimmings.
- Browns (Carbon-rich): Dried leaves, shredded newspaper or cardboard (uncoated ink is best), sawdust (untreated wood), straw.
- A Pitchfork or Compost Aerator (for stationary bins): To mix and aerate your compost pile, which is crucial for decomposition and preventing odors. You can find sturdy, lightweight garden tools that are easy to handle.
- Water Source: Your compost needs to be about as damp as a wrung-out sponge. You might need a watering can or a hose attachment.
- Gloves: To keep your hands clean.
- Optional: A Compost Thermometer: To monitor the temperature of your compost pile. Hotter piles break down faster, but it’s not essential for smaller balcony systems. For a refresher on composting basics, the US Environmental Protection Agency (EPA) also has great resources.
Setting Up Your Balcony Compost Bin: Step-by-Step
Ready to get your compost system up and running? Follow these simple steps. Remember, patience is key!
Step 1: Choose the Right Spot
Placement is crucial for a happy compost bin. Consider these factors:
- Sunlight: Most compost bins do well in a spot that gets partial sun. Too much direct, hot sun can dry it out, while full shade might keep it too cool and slow down the process.
- Accessibility: Make sure you can easily reach the bin to add materials, mix it, and eventually harvest your compost.
- Drainage: If your bin has drainage holes, ensure it’s placed where excess moisture won’t pool or cause issues for your building. A small tray underneath might be a good idea.
- Wind: In very windy areas, try to position the bin in a more sheltered spot.
Step 2: Understand the “Greens” and “Browns” Ratio
This is the secret sauce to successful composting! You need a good balance between nitrogen-rich “greens” and carbon-rich “browns.” A common guideline is about 2-3 parts browns to 1 part greens by volume.
- Too many greens: Can lead to a slimy, smelly compost pile.
- Too many browns: The decomposition process will be very slow.
It doesn’t need to be exact science, especially on a small scale. Just aim for a good mix. For example, if you add a lot of coffee grounds (green), throw in extra shredded newspaper or dried leaves (browns).
Step 3: Start Layering (or Tumbling!)
For Stationary Bins:
- Start with a base layer of “browns” – maybe some twigs or straw. This helps with aeration.
- Begin adding your “greens” (food scraps) and “browns” in alternating layers, keeping that 2-3:1 brown-to-green ratio in mind.
- If you have some finished compost or healthy garden soil, adding a small amount at the beginning can introduce beneficial microbes to speed things up.
For Tumbler Bins:
- You can start adding your greens and browns directly into the tumbler.
- It’s helpful to have a good initial mix of greens and browns to get the process going. Don’t overfill it right away; add materials as you collect them, ensuring a good balance with each addition.
Step 4: Maintain Moisture Levels
Your compost needs to be moist, but not soggy. Think of a damp sponge. If it feels dry, add a little water and mix. If it seems too wet, add more “brown” materials like shredded paper or sawdust to absorb excess moisture.
Step 5: Aerate Regularly
Oxygen is vital for the microorganisms that break down your compost.
- For stationary bins: Use your compost fork or aerator to mix the contents every 1-2 weeks. Turn the material from the outside to the inside.
- For tumblers: Simply give the tumbler a good spin every few days. This is much easier!
Regular turning and mixing prevent the compost from becoming compacted and anaerobic, which causes foul odors.
Step 6: Adding New Materials
Continue adding your kitchen scraps (food waste) and other compostable materials. Always try to bury fresh food scraps in the center of the pile, especially in stationary bins, and cover them with a layer of browns. This helps deter pests and contain any potential odors. For tumblers, just add them in and give the tumbler a few spins.
Step 7: The Waiting Game (and what to watch for!)
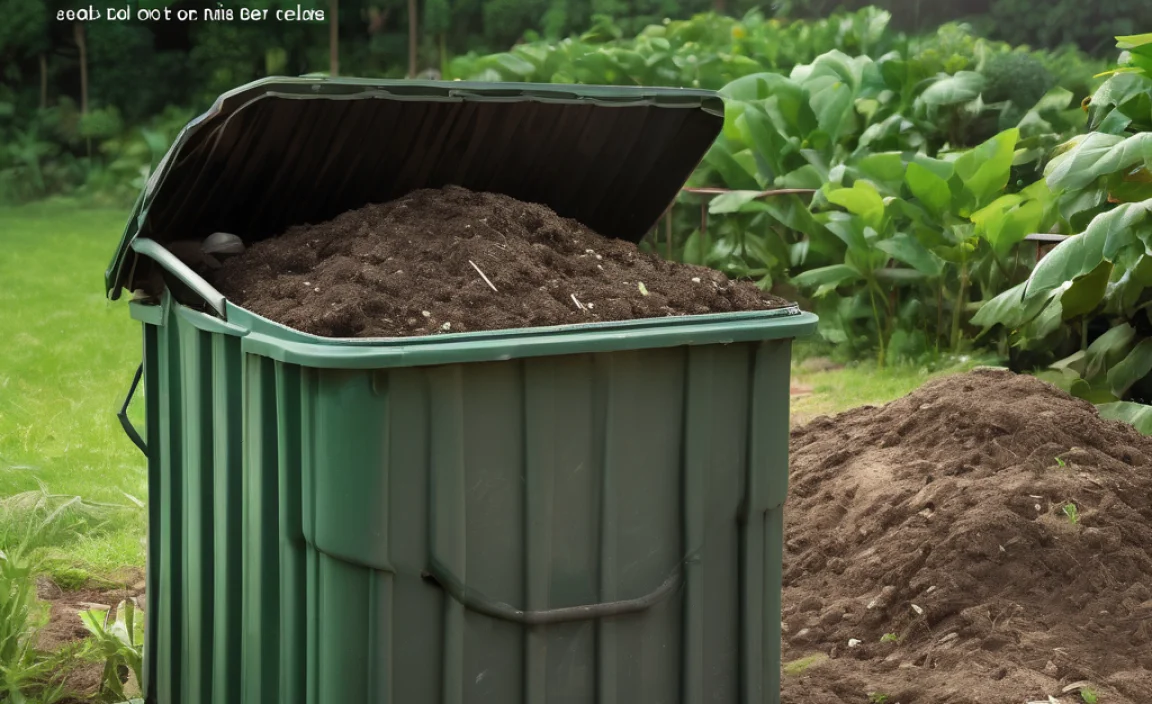
Composting takes time. Depending on your method, the materials you add, and how well you manage it, it can take anywhere from a few weeks to a few months. You’ll know it’s ready when it looks dark, crumbly, and smells earthy – like a forest floor after rain. There shouldn’t be any recognizable food scraps left.
Balcony Composting: What to Compost and What to Avoid
Knowing what goes into your compost bin is key to avoiding problems like odors and attracting unwanted guests. Here’s a handy guide:
| What TO Compost (The “Greens” & “Browns”) | What to AVOID (Or Compost with Caution) |
|---|---|
| Fruit and vegetable scraps | Meat, poultry, fish, and bones (can attract pests and cause odors) |
| Coffee grounds and paper filters | Dairy products (milk, cheese, yogurt) (can attract pests and cause odors) |
| Tea bags (remove staples) | Oily or greasy foods (can slow decomposition and attract pests) |
| Eggshells (crushed) | Diseased plants (can spread disease) |
| Yard trimmings (grass clippings, leaves, small twigs) | Weeds that have gone to seed (seeds might survive and sprout) |
| Shredded newspaper and cardboard (avoid glossy or heavily inked paper) | Pet waste (from dogs and cats – can contain pathogens; use only if you are an experienced composter and know your system can handle it, which is unlikely on a balcony) |
| Sawdust and wood chips (from untreated wood) | Chemically treated wood or yard waste |
| Hair and fur | Large branches or woody debris (too slow to decompose) |
| Plant-based teabags | Synthetic fibers or materials |
| Nut shells (except walnut shells, which can be toxic to some plants) | Anything that isn’t organic and biodegradable |
For a more detailed list, check out resources from university extension offices, like those from Oregon State University Extension.
Troubleshooting Common Balcony Composting Issues
Even with the best intentions, you might run into a snag or two. Don’t worry, these are usually easy to fix!
- Smelly Compost: This is the most common complaint.
- Cause: Usually too many “greens” or the pile is too wet, leading to anaerobic conditions (lack of oxygen). It can also happen if you’re composting meat or dairy.
- Solution: Add more “brown” materials (shredded paper, dried leaves, sawdust) to absorb moisture and balance the nitrogen. Turn or aerate the pile thoroughly to introduce oxygen. Ensure you’re not adding forbidden items like meat or dairy.
- Compost Isn’t Heating Up/Decomposing:
- Cause: The pile might be too small, too dry, or lacking nitrogen (“greens”). It could also be too cold outside for the microorganisms to work effectively.
- Solution: If the pile is too small, try adding more materials and ensure there’s a good mix of greens and browns. Make sure it’s moist like a wrung-out sponge. If it’s too dry, add water and mix. If it’s been too cold, you might just need to be patient, or if using a tumbler, ensure it’s in a slightly warmer (but not hot) spot.
- Pests (Flies, Fruit Flies):
- Cause: Exposed food scraps, especially sugary ones.
- Solution: Always cover fresh food scraps with a layer of “browns.” Ensure your bin lid is secure. For tumblers, make sure the lid is tightly closed. If you have an infestation, you might need to remove the affected materials, spread them out in the sun for a bit (to kill larvae), and then re-layer with plenty of browns, ensuring food scraps are buried.
- Compost is Too Dry:
- Cause: Too much sun, not enough moisture, or too many “browns.”
- Solution: Add water while mixing the compost. If it consistently dries out, consider repositioning the bin to a shadier spot or exploring ways to retain moisture, like adding more compostable materials that hold water.
Remember, a healthy compost pile should smell earthy, not rotten. If something seems off, it’s usually a sign that the balance of ingredients or moisture/aeration needs adjusting.
Using Your Finished Balcony Compost
Hooray! You’ve achieved compost. It’s ready when it’s dark, crumbly, smells like rich soil, and you can no longer identify the original ingredients. Here’s how to put your wonderful creation to good use:

I am passionate about home engineering. I specialize in designing, installing, and maintaining heating, ventilation, and air conditioning systems. My goal is to help people stay comfortable in their homes all year long.