Hey there, neighbor! So, you’ve got a business out here in the country and you’re wondering about composting? Maybe you’re seeing all that food waste, yard trimmings, or other organic stuff piling up and thinking, “There’s gotta be a better way!”
You’re right, there is! Composting might sound a bit earthy, but it’s actually a super smart way for rural businesses to cut down on waste, save money, and even create some fantastic natural fertilizer. Let’s dig into how you can make this work for your place, step by step. We’ll cover everything you need to know to get started, from picking the right bin to keeping your compost healthy and happy.
Composting for Rural Businesses: Your Essential Guide
Running a business in a rural setting comes with its own set of opportunities and challenges. One common challenge is managing organic waste effectively. Whether you run a farm, a restaurant, a bed and breakfast, a workshop, or any other type of rural enterprise, you likely produce organic byproducts that can end up in the trash. But what if that “waste” could actually become a valuable resource?
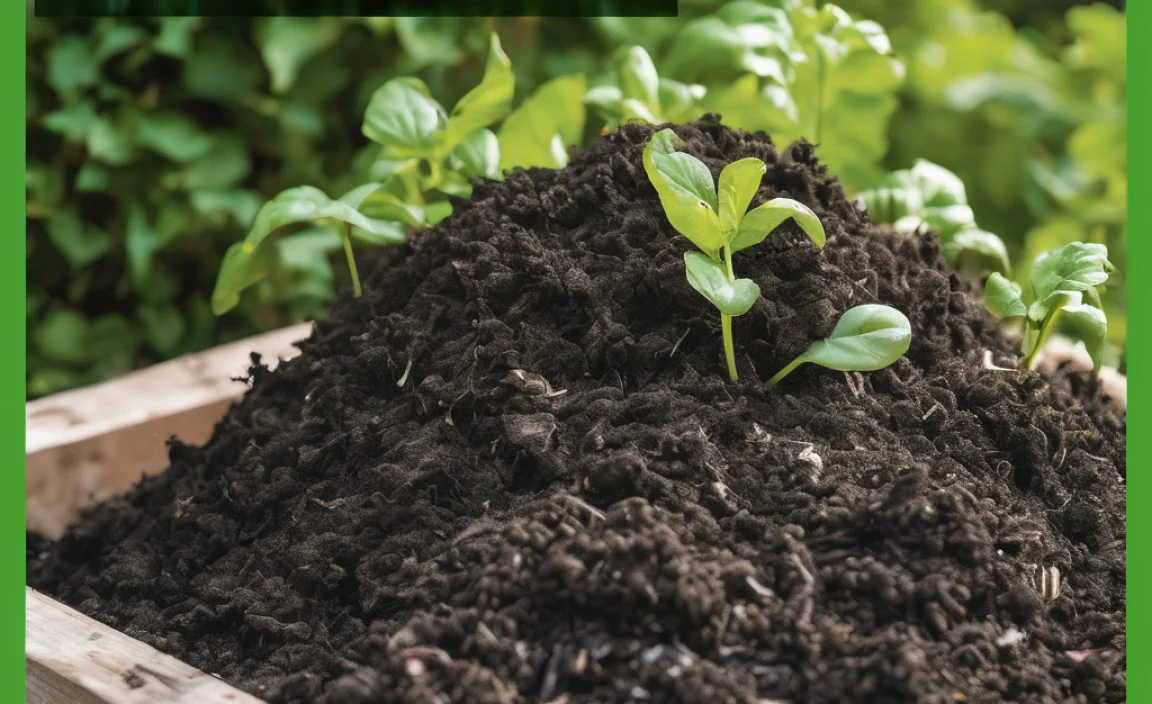
Composting is the natural process of recycling organic matter, such as leftover food scraps and yard waste, into a rich soil amendment called compost. For rural businesses, composting offers a fantastic way to reduce landfill costs, improve soil health on their property, and contribute to a more sustainable operation. Don’t worry if you’ve never composted before; this guide is designed to make it simple and straightforward, even for beginners. We’ll break down everything you need to know to get your composting program up and running smoothly.
Why Should Your Rural Business Compost?
Composting isn’t just for home gardeners; it makes a lot of sense for businesses, especially those nestled in rural landscapes. Here’s why making the switch is a great idea:
- Reduces Waste Disposal Costs: Sending less waste to the landfill means lower tipping fees and potentially smaller waste hauling bills. Those savings can add up significantly over time.
- Creates Valuable Soil Amendment: Compost is often called “black gold” by gardeners. It improves soil structure, water retention, and nutrient content, which is invaluable if you have land for landscaping, farming, or even just creating a more beautiful business environment.
- Enhances Sustainability Image: Customers and clients are increasingly aware of environmental issues. Implementing a composting program shows you’re committed to being a responsible, eco-friendly business, which can attract like-minded customers.
- Meets Potential Regulations: Depending on your location and business type, there might be regulations emerging about organic waste diversion. Starting now means you’re ahead of the curve.
- Improves On-Site Landscaping: If you use compost on your business grounds, you’ll notice healthier plants, better drainage, and reduced need for synthetic fertilizers and pesticides.
Understanding the Basics: What is Compost and How Does It Work?
At its heart, composting is about letting nature do its thing. Microorganisms—tiny living things like bacteria and fungi—break down organic materials. Think of them as tiny cleanup crews working tirelessly to decompose your waste. For this process to work efficiently, these microorganisms need a few key things:
- Greens (Nitrogen-rich materials): These materials provide the protein for the microorganisms and help them multiply. Examples include fruit and vegetable scraps, coffee grounds, tea bags, grass clippings, and fresh plant trimmings.
- Browns (Carbon-rich materials): These materials provide energy for the microorganisms and add bulk to the compost pile, helping with aeration. Examples include dried leaves, straw, shredded cardboard, newspaper, twigs, and sawdust.
- Water: Microorganisms need moisture to survive and thrive, much like any living thing. The compost pile should be about as damp as a wrung-out sponge.
- Air: The microorganisms involved in composting need oxygen to do their work. This is why turning or aerating the compost pile is important.
When you combine these elements in the right balance, the microorganisms get to work, breaking down the materials and transforming them into a dark, crumbly, nutrient-rich compost. The ideal ratio of browns to greens is often cited as around 25-30 parts carbon (browns) to 1 part nitrogen (greens) by weight. Don’t get too bogged down in exact numbers at first; a good rule of thumb is to aim for roughly two to three times more browns than greens by volume.
What CAN and CAN’T Go in Your Business Compost?
Knowing what to add and what to avoid is crucial for successful composting and preventing pests or unpleasant odors. Here’s a handy breakdown:
What to COMPOST (The Good Stuff!):
- Fruit and vegetable scraps (peels, cores, rinds, wilting produce)
- Coffee grounds and paper filters
- Tea bags (remove any staples or plastic tags)
- Eggshells (crushed)
- Yard waste: Grass clippings, leaves, plant trimmings, small twigs
- Shredded newspaper and plain cardboard (avoid glossy or heavily inked paper)
- Sawdust and wood chips (from untreated wood)
- Hay and straw
What NOT to COMPOST (Best to Avoid!):
- Meat, fish, and bones: These can attract pests and create foul odors.
- Dairy products (milk, cheese, yogurt): Similar to meat, they can attract pests and smell bad.
- Oils, grease, and fatty foods: These can slow down decomposition and create odors.
- Diseased plants or weeds that have gone to seed: It’s best to avoid spreading plant diseases or persistent weeds.
- Pet waste: Dog and cat feces can contain pathogens harmful to humans and should be composted separately or disposed of properly.
- Inorganic materials: Plastic, metal, glass, synthetic fibers—these will not break down.
- Chemically treated wood or yard waste: Avoid anything treated with pesticides or herbicides.
- Lawn clippings treated with herbicides or pesticides: These chemicals can harm beneficial microbes or end up in your finished compost.
For businesses dealing with specific types of waste, like food service, it’s especially important to stick to approved compostable materials and consider local regulations for food waste composting.
Choosing the Right Composting Method for Your Rural Business
The best composting method for your rural business depends on the volume of organic waste you produce, the space you have available, your budget, and how quickly you need finished compost. Here are some popular and practical options:
1. The Simple Outdoor Pile (or Bay System)
This is often the most straightforward and cost-effective method for rural businesses with ample space. It’s essentially a heap of organic materials in an open area.
- How it works: You pile your greens and browns together in a designated spot. For larger volumes, you might build bays using pallets or lumber to keep the pile contained and organized.
- Pros: Low cost, can handle large volumes, simple to start, requires minimal equipment.
- Cons: Slower decomposition if not managed well, can look a bit untidy, may require more frequent turning for faster results, can attract pests if not managed properly, might need screening to keep it contained.
- Best for: Businesses with significant yard waste (e.g., landscaping companies, garden centers, farms), those with plenty of open space, and operations that can tolerate a slightly slower composting cycle.
2. Tumbler Composters
These are sealed drums, usually made of plastic, that rotate on an axis. They make turning the compost easy and help retain heat and moisture, speeding up decomposition.
- How it works: You add your greens and browns to the drum, close it up, and then rotate it periodically (usually daily or every few days) to mix the contents.
- Pros: Faster decomposition than static piles, contained (less likely to attract pests), easier to turn, neat appearance.
- Cons: Can be expensive, limited capacity per batch, may require more frequent attention, can become heavy and difficult to turn when full.
- Best for: Businesses producing moderate amounts of organic waste, those concerned about pests or appearance, and operations that want finished compost relatively quickly.
3. Enclosed Bins (Plastic or Wood)
These are static containers, typically made of wood, wire mesh, or plastic. They contain the material and can help retain heat and moisture.
- How it works: You add materials to the bin. You’ll need to turn the compost manually with a pitchfork or aerator tool. Some designs have doors at the bottom for easy compost removal.
- Pros: Neater appearance than open piles, good for smaller spaces, helps retain moisture and heat, contained to deter pests.
- Cons: Can be more expensive than open piles, requires manual turning, capacity can be limited, decomposition can be slower than in tumblers or well-managed piles.
- Best for: Businesses with limited space, those looking for a tidier solution, and operations producing moderate amounts of waste who can manage manual turning.
4. Vermicomposting (Worm Composting)
This method uses specific types of worms (like red wigglers) to break down food scraps. It’s done in special bins and produces a nutrient-rich compost called worm castings.
- How it works: Worms are introduced into a bin with bedding material. You feed them food scraps, and they process them into nutrient-dense castings.
- Pros: Excellent quality compost (castings), can be done indoors or outdoors in a sheltered spot, relatively odor-free if managed correctly, suitable for smaller volumes of food waste.
- Cons: Limited to food scraps and very fine organic matter (no yard waste), requires specific types of worms, can be sensitive to temperature extremes, requires careful feeding to avoid “worm bin overload.”
- Best for: Businesses that produce a lot of food waste (restaurants, cafes, caterers) but have limited space for larger composting systems, and where producing high-quality fertilizer is a priority.
5. Larger-Scale Industrial or Commercial Composting
For businesses producing very large volumes of organic waste (e.g., farms, food processing plants, large institutions), more advanced systems like in-vessel composting, aerated static piles, or windrow composting with machinery might be necessary. These typically require significant investment and expertise.
For most rural businesses starting out, an outdoor pile/bay system or a tumbler composter will likely be the most practical and affordable choices. You can always scale up or change your method later if needed.
Setting Up Your Composting System: Step-by-Step
Ready to get your hands (a little) dirty? Here’s a practical guide to setting up a basic composting system, assuming you’re going with a popular outdoor pile or bin method.
Step 1: Choose Your Location
This is important! Pick a spot that is:
- Accessible: Easy to get to with kitchen scraps or yard waste using a wheelbarrow or cart.
- Well-drained: You don’t want your compost pile soggy from pooling water.
- Partially Shaded (Ideal): This helps maintain consistent moisture, preventing it from drying out too quickly in the sun or staying too wet in continuous rain.
- Away from water sources: Keep it a safe distance from wells, streams, or septic systems.
- Consider neighbors: While a well-managed compost pile shouldn’t smell, it’s courteous to place it where it won’t be an immediate concern for any close neighbors.
Step 2: Select Your Composting Container (Optional but Recommended)
DIY Pallet Bin:
If you have access to wooden pallets (ensure they are not treated with harmful chemicals – look for an “HT” stamp for heat-treated, which is safe), you can create a simple compost bin.
- Stand four pallets on their edges to form a square.
- Secure them together at the corners using screws, zip ties, or wire.
- You can leave one side open for easier access if desired, or create a hinged door.
Purchased Bin:
Many garden centers or online stores offer plastic compost bins or wire mesh bins. These are often easy to assemble and can provide a neater look.
Step 3: Gather Your Materials
Start collecting both your “greens” and “browns.” It’s helpful to have a designated bin or area for each type of material as you accumulate them at your business. For food scraps, a small lidded bin in your kitchen or breakroom is ideal.
Step 4: Start Layering Your Compost Pile
This is where the magic begins! The key is to alternate layers of greens and browns.
- Base Layer: Start with a layer of coarse “brown” material like small twigs or straw (about 4-6 inches deep). This helps with aeration from the bottom.
- Add Greens: Layer on your nitrogen-rich green materials (food scraps, grass clippings). Aim for a layer about 2-4 inches deep.
- Add Browns: Cover the greens with a layer of carbon-rich brown materials (dried leaves, shredded paper, straw). This layer should be about 4-6 inches deep. Covering the greens helps deter pests and prevents odors.
- Moisten: Lightly water each layer as you add it. The goal is for the material to be damp, not soaking wet – like a wrung-out sponge.
- Repeat: Continue layering greens and browns, aiming for that 2:1 or 3:1 brown-to-green ratio by volume, until your bin is about half to two-thirds full.
Step 5: Maintain Your Compost Pile
Composting is an active process. Here’s how to keep it going:
- Add Materials Regularly: As you accumulate more greens and browns, continue to add them to the pile. Try to bury fresh food scraps within the pile to deter pests and odors. Always cover new greens with a layer of browns.
- Turn Your Compost: This is crucial for aeration and speeding up decomposition.
- Aerobic (Fast) Composting: Turn the pile every 1-2 weeks using a pitchfork or compost aerator. Mix the outer layers into the center and the center layers to the outside.
- Passive (Slow) Composting: If you’re not in a hurry and have less time, you can turn it less often, perhaps once a month or even less. This will take longer to produce finished compost.
- Monitor Moisture: Check the moisture level regularly. If it feels dry, add water. If it seems too wet and is smelling sour, add more brown materials and turn it.
- Temperature (Optional but Beneficial): An active compost pile can heat up significantly in the center (130-160°F or 55-70°C). This heat kills weed seeds and pathogens and speeds up decomposition. You can check this with a compost thermometer if you’re interested.
Step 6: Harvesting Your Compost
Your compost is ready when it is dark, crumbly, smells earthy (like the forest floor), and you can no longer recognize the original materials. This can take anywhere from a few months to over a year, depending on your method and how actively you manage it.
- Harvesting from a Pile/Bin: The compost at the bottom is usually ready first. You can either dig out the finished compost from the bottom of a bin (if it has a door) or fork the entire pile onto a tarp, separating the finished compost from the unfinished material, and then return the unfinished material to the bin to continue decomposing.
- Screening (Optional): For a finer texture, you can screen the compost through a sieve or a piece of hardware cloth stretched over a frame. This removes any larger undecomposed bits, which can be returned to the active compost pile.
Practical Composting for Different Rural Businesses
Let’s look at how composting might specifically benefit a few types of rural businesses:
For Restaurants & Cafes
Waste Profile: High volume of food scraps (vegetable peels, coffee grounds, plate scrapings, spoiled ingredients).
Ideal Method: Vermicomposting is excellent for food scraps, or a well-managed tumbler or enclosed bin. Consider a partnership with a local farm that can accept your food waste for their larger-scale composting operations if your volume is too much for your own system.
Key Considerations: Strict adherence to what can be composted (no meat/dairy if managing on-site to avoid pests/odors), proper bin management for odor control, training staff on what scraps to collect.
For Farms & Market Gardens
Waste Profile: Crop residues, animal manure (if applicable and handled properly), spoiled produce, bedding materials.
Ideal Method: Outdoor pile or bay system. Large windrows managed with farm equipment can be very efficient.
Key Considerations: Managing manure requires careful balancing with carbon-rich materials like straw or woodchips to avoid odor and pathogen issues. The resulting compost is invaluable for improving farm soil health. Learn about Accepted Farming Practices for Compost Production from resources like the United States Department of Agriculture (USDA).
For Craft Breweries or Wineries
Waste Profile: Spent grains, hops, fruit pomace, wood chips from aging barrels.
Ideal Method: Outdoor pile/bay system. These materials are generally brown-heavy (high carbon) and can be excellent for composting, especially when mixed with a nitrogen source like grass clippings or manure.
Key Considerations: Spent grains can become waterlogged, so mixing them well with dry brown materials is key. The compost can be used for landscaping or sold to local gardeners.
For Rural Retailers or Workshops (e.g., fabricators, carpenters)
Waste Profile: Packaging (cardboard, paper), wood scraps (untreated), plant trimmings from any landscaping.
Ideal Method: Enclosed bin or outdoor pile, depending on volume. Focus on cardboard, paper, and untreated wood scraps.
Key Considerations: Ensure wood scraps are from untreated wood sources. Glossy or heavily printed cardboard might take longer but can still be composted. This is typically a lower volume waste stream.
Troubleshooting Common Composting Issues
Even with the best intentions, you might run into a few bumps in the road. Here are some common problems and how to fix them:
Problem: The Compost Pile Smells Bad (Ammonia or Rotten Eggs)
- Cause: Too much nitrogen-rich “green” material, or the pile is too wet and not getting enough air (anaerobic conditions).
- Solution: Add more “brown” carbon-rich materials (leaves, straw, shredded cardboard) to balance the nitrogen. Turn the pile thoroughly to introduce air and help it dry out. If it smells like ammonia, it likely has too much nitrogen – add more browns. If it smells like rotten eggs, it’s gone anaerobic – turn it and add browns.
Problem: The Compost Pile Isn’t Heating Up or Decomposing
- Cause: Not enough moisture, too many brown materials, or the pile is too small to generate sufficient heat.
- Solution: Add water until the pile is consistently damp like a wrung-out sponge. Make sure you have a good ratio of greens to browns (try adding more greens if you’ve been heavy on browns). If the pile is very small, consider combining it with another batch or building it larger.
Problem: The Compost Pile is Too Dry
Cause: Too much sun/wind, not enough moisture added, or too many brown materials.
Solution: Water the pile thoroughly. You may need to turn it while watering to ensure the moisture penetrates evenly. Consider adding more greens, which have higher moisture content. If the pile is constantly drying out, you might need to create more shade or use a cover (like a tarp or a lid) during hot, dry periods.
Problem: Pests (Rodents, Flies, etc.) are Attracted to the Pile
Cause: Exposed food scraps, meat/dairy products in the pile, or the pile is too wet and smelly.
Solution: Always bury food scraps deep within the pile and cover them with a thick layer of brown material. Avoid adding meat, dairy, or oily foods. Ensure the compost is not too wet. A wire mesh bottom can help deter rodents from burrowing underneath. Tumblers or enclosed bins are generally more pest-resistant.
Using Your Finished Compost
Once your compost is ready, it’s a gardener’s best friend! Here are some ways to use it:
- Soil Amendment: Mix compost into garden beds, vegetable patches, or flower beds. It improves soil structure, drainage, and aeration. Aim for about 2-4 inches mixed into the top 6-8 inches of soil.
- Top Dressing: Spread a thin layer (1-2 inches) of compost around trees, shrubs, and perennials. Earthworms will help work it into the soil.
- Potting Mix: Mix compost with other materials like peat moss, perlite, or coir to create a rich potting mix for containers and seedlings. A common ratio is 1/3 compost, 1/3 peat moss/coir, and 1/3 perlite/vermiculite.
- Lawn Care: Top-dress your lawn with a thin layer of compost in the spring or fall. It helps introduce beneficial microbes and improves soil health.
- Erosion Control: Compost can help bind soil particles, reducing erosion on slopes.
Using your own compost reduces the need to buy expensive fertilizers and soil conditioners, saving your business even more money.
Conclusion
Composting for your rural business is a rewarding and practical endeavor. It’s a tangible way to reduce your environmental impact, cut down on waste disposal fees, and create a valuable resource for your land. By understanding the basics of greens, browns, moisture, and air, and choosing a method that suits your operation, you can easily get started.
Don’t be intimidated! Start small, learn as you go, and don’t be afraid to experiment. The organisms doing the work are naturally resilient, and even a simple pile will eventually break down organic matter. So, gather your materials, pick a spot, and give it a try. You’ll be well on your way to turning your business “waste” into that precious “black gold” that benefits both your bottom line and the health of your property. Happy composting!
Frequently Asked Questions about Composting for Rural Businesses
What is the best composting method for a small rural business?
For small rural businesses, a well-managed enclosed bin or a tumbler composter often strikes a good balance between ease of use, containment, and effectiveness. If you have a bit more space and produce mostly yard waste, a simple outdoor pile or pallet bin can also work very well.
How long does it take to make compost?
The time it takes varies significantly. An actively managed compost pile or a tumbler can produce finished compost in as little as 2-3 months. A more passive pile that is turned less frequently can take 6 months to over a year. Factors like temperature, moisture, particle size, and aeration all play a role.
Do I need special equipment for business composting?
Not necessarily to start. A pitchfork or compost aerator tool is very helpful for turning. If you’re building your own bin, you’ll need basic tools. For larger volumes, investing in a tumbler, a more robust bin, or hiring a company for compostable waste hauling might be options.
How much space do I need for a business compost system?
For a basic outdoor pile or bin system, you might need an area of about 3x3x3 feet (1 cubic yard) as a minimum for effective composting. Tumblers take up less space, often around 2×2 feet footprint. Larger operations will naturally require more space for windrows or multiple bins.
What if my business produces mostly food waste like a restaurant?
Restaurants can generate a lot of compostable food scraps. Vermicomposting (worm composting) is excellent for food waste but has limitations on volume. For larger volumes, especially if meat and dairy are involved, consider partnering with a commercial composting facility or a local farm that can handle it safely. Properly managing food scraps on-site without attracting pests requires careful attention to detail and strict adherence to avoiding non-compostable items.

I am passionate about home engineering. I specialize in designing, installing, and maintaining heating, ventilation, and air conditioning systems. My goal is to help people stay comfortable in their homes all year long.