Hey there! I’m Troy D Harn, your go-to guy for making tough stuff like gardening and composting super simple. Ever feel like your business is creating a mountain of food scraps and paper waste, and you’re not sure what to do with it all? You’re not alone! Many urban businesses struggle with food waste. It’s a common problem, but don’t worry. We’ll walk through it together, step-by-step, and get you composting like a pro. Let’s turn that waste into something amazing!
Why Composting for Urban Businesses is a Game-Changer
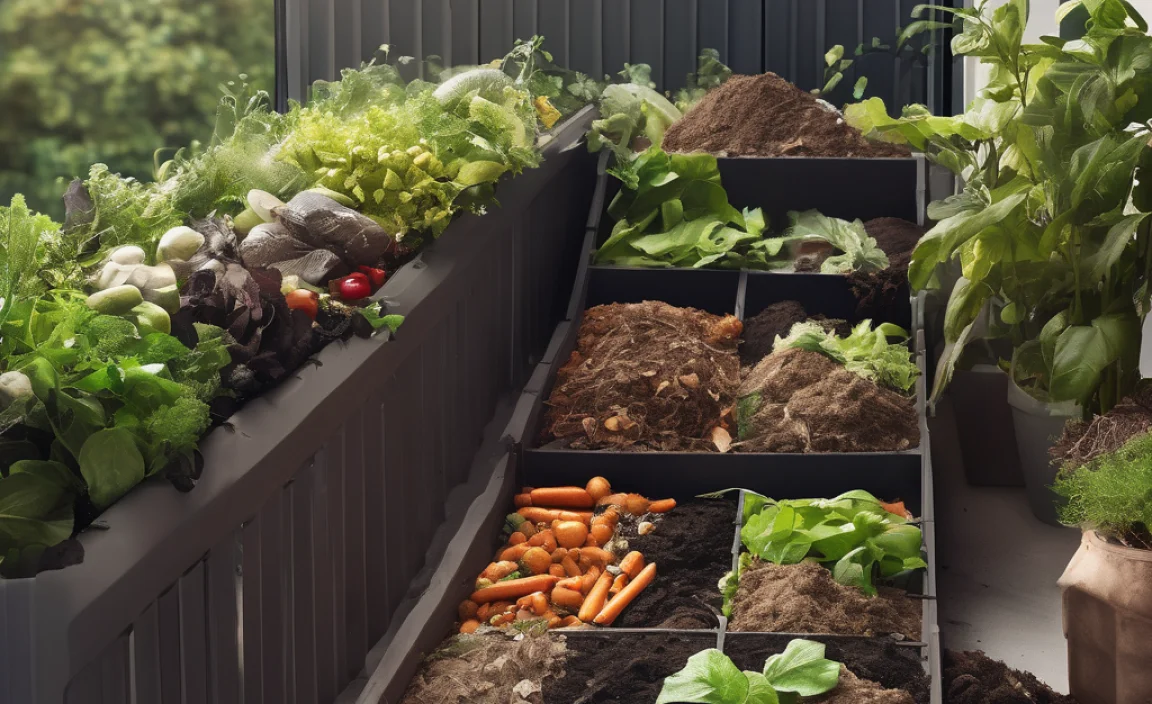
Composting might sound like something for backyard gardeners, but it’s a fantastic solution for businesses too, especially in cities. Think about all the food scraps from your breakroom, restaurant kitchen, or even packaging materials. Instead of sending it all to a landfill, where it creates harmful greenhouse gases, composting turns it into nutrient-rich soil. This is a win-win! It’s good for the planet, can save you money on waste disposal, and can even boost your business’s green image.
In urban areas, space is often limited, which can make composting seem tricky. But with the right approach, it’s totally doable. We’ll cover everything from picking the right system to managing your compost pile, making it easy for any business to get started.
The Big Benefits of Composting for Your Business
Let’s break down why going green with composting is such a smart move for your urban business:
- Reduces Landfill Waste: A huge chunk of business waste is organic material. Composting diverts this, easing the burden on landfills.
- Lowers Waste Disposal Costs: Less trash going out means lower hauling fees. Over time, this can add up to significant savings.
- Creates Valuable Soil Amendment: The end product, compost, is black gold for gardening. You can use it for landscaping, donate it to local community gardens, or even sell it.
- Boosts Your Brand Image: Customers and employees increasingly care about sustainability. A visible composting program shows you’re committed to environmental responsibility.
- Meets Growing Regulations: Some cities are starting to mandate commercial food waste recycling. Getting ahead of the curve prepares you for future requirements.
- Educational Opportunity: It’s a great way to engage your staff and show them the positive impact of their efforts.
Understanding What Goes In (and What Stays Out!)
Composting is all about balance. You need a mix of “greens” (nitrogen-rich) and “browns” (carbon-rich) to make it work. Here’s a simple breakdown:
What are “Greens”? (Nitrogen-Rich Materials)
These are typically wet, fresh materials that provide nitrogen. They help heat up the compost pile.
- Fruit and vegetable scraps
- Coffee grounds and tea bags (paper bags are fine)
- Grass clippings
- Eggshells (crushed)
- Plant trimmings (non-diseased)
What are “Browns”? (Carbon-Rich Materials)
These are usually dry, woody materials that provide carbon. They help with aeration and prevent the pile from getting too smelly.
- Cardboard (torn into small pieces)
- Paper (shredded newspaper, paper towels, napkins – avoid glossy paper)
- Dry leaves
- Straw or hay
- Wood chips or sawdust (in moderation)
- Paper packaging peanuts (biodegradable ones)
What to AVOID in Your Compost Bin
Not everything breaks down well or is good for your compost. Keeping these out is key:
- Meat, fish, and bones (attract pests and smell)
- Dairy products and oils/grease (attract pests and smell)
- Diseased plants (can spread disease)
- Weeds gone to seed (can sprout in your finished compost)
- Pet waste (can contain pathogens)
- Chemically treated wood or yard waste
- Glossy or coated paper/cardboard
- Synthetic materials
Pro Tip: When in doubt, check local composting guidelines. For example, the EPA offers great resources on what can and can’t be composted.
Choosing the Right Composting System for Your Business
The best system for your business really depends on your size, the type of waste you generate, and the space you have. Here are a few popular options for urban settings:
1. Tumbler Composter
What it is: A sealed drum that rests on a base and can be manually turned. It’s enclosed, which helps deter pests and speed up decomposition.
Best for: Small to medium-sized businesses with a moderate amount of food scraps, like cafes, small offices, or juice bars. They are great for limited outdoor space.
Pros:
- Fast composting (often 4-8 weeks)
- Pest-resistant
- Neater appearance
- Easy to mix/aerate by turning
Cons:
- Can be expensive
- Batch composting – you fill one, then age it
- Limited capacity per batch
- Can get heavy when full
2. Stationary Bin Composter (Open or Enclosed)
What it is: A large bin, often made of plastic, wood, or wire mesh, that sits in one place. It can be open-sided or have a lid.
Best for: Businesses with a bit more outdoor space and a larger volume of organic waste. Think restaurants, small groceries, or offices with kitchens.
Pros:
- Higher capacity than tumblers
- Generally less expensive
- Can compost a wider variety of materials
Cons:
- Can take longer to compost (months)
- May attract pests if not managed well
- Requires manual turning with a fork or aerator
- Can look less tidy
3. Worm Composting (Vermicomposting)
What it is: Using specific types of worms (like red wigglers) in a bin to break down food scraps. This is done in a controlled environment, often indoors or in a sheltered outdoor spot.
Best for: Businesses with primarily food scraps and very limited space, such as small offices, apartments, or businesses that want an indoor composting solution. It’s great for coffee shops and juice bars.
Pros:
- Can be done indoors, year-round
- Produces high-quality compost (“worm castings”)
- Very efficient for food scraps
- Minimal odor when managed correctly
Cons:
- Specific temperature and moisture requirements
- Can’t handle large volumes of “browns” or bulky items
- Requires careful management to keep worms healthy
- Initial setup cost for bins and worms
4. Commercial Composting Services
What it is: Partnering with a local company that picks up your organic waste and composts it at a larger facility. This is a popular “no-fuss” option for busy urban businesses.
Best for: Any business that wants to compost without managing a bin on-site. This is especially good for businesses with high volumes of food waste or those with no available outdoor space.
Pros:
- Easiest option, requires minimal effort from your staff
- No need for on-site space or management
- Handles large volumes efficiently
- Professional handling ensures proper composting
Cons:
- Ongoing cost for the service
- Less tangible benefit to showcase on-site
- You don’t get the finished compost back (usually)
- Reliance on the service provider’s schedule
Quick Comparison Table for Business Composting Systems:
| System Type | Best For | Space Needed | Effort Level | Cost (Initial) |
|---|---|---|---|---|
| Tumbler Composter | Small Offices, Cafes, Juice Bars | Small outdoor footprint | Medium (turning) | Medium to High |
| Stationary Bin | Restaurants, Small Groceries, Offices | Medium outdoor footprint | Medium to High (turning, managing layers) | Low to Medium |
| Worm Composting | Small Offices, Apartments, Coffee Shops | Small, often indoor or sheltered | Medium (feeding, moisture check) | Medium |
| Commercial Service | Any business with high waste/no space | None on-site | Low (collection) | Recurring Monthly Fee |
When selecting, consider your budget, how much waste you produce, and how much time your staff can dedicate. It’s also a good idea to check with your local municipality or waste management providers about available composting programs and regulations. In New York City, for example, the Department of Sanitation offers resources and programs for businesses; you can learn more on their official website.
Getting Started: Your Step-by-Step Guide
Ready to dive in? Here’s how to set up your business for composting success, whether you’re managing a bin yourself or setting up for a pickup service.
Step 1: Assess Your Waste Stream
Before you buy anything, take a week to track your business’s organic waste. What kinds of materials are you discarding most? How much volume are we talking about? This will help you choose the right system and estimate your needs. Are you mostly coffee grounds? Or is it a lot of vegetable peels from a cafe?
Step 2: Choose Your Composting Method
Based on your waste assessment, space, and budget, select the system that makes the most sense. If you’re unsure, starting with a commercial service is often the simplest way to begin.
Step 3: Select and Set Up Your Composting Location
For On-Site Systems:
- Ventilation: Choose a spot that gets good airflow but isn’t constantly soaked by rain.
- Accessibility: Make sure it’s easy for staff to bring waste to the bin.
- Drainage: The area should drain well so your compost pile doesn’t get waterlogged.
- Sunlight: Partial sun is ideal for many systems, especially stationary bins, as heat helps decomposition. Too much sun can dry it out.
- Regulations: Check local zoning laws or building codes to ensure composting bins are allowed in your chosen location.
For Worm Bins: Keep them in a stable temperature environment, usually between 55-77°F (13-25°C). A utility room, a sheltered loading dock, or even an office corner can work.
Step 4: Gather Your Supplies
- Compost Bin/Tumbler: Your chosen system.
- Collection Bins: Small, lidded bins for kitchens, breakrooms, or workstations to collect scraps easily.
- Tools: A pitchfork or compost aerator for turning (for stationary bins), a small shovel, and waterproof gloves.
- Water Source: You might need a hose or watering can nearby.
- “Greens” and “Browns”: Have a supply of both ready to go. You might partner with a local garden or landscape company for brown materials like wood chips or dried leaves.
Step 5: Educate Your Staff
This is CRUCIAL! Your compost bin will only work if people use it correctly. Hold a brief training session. Explain:
- What materials can and cannot be composted.
- Where the collection bins are.
- Where the main compost bin is located.
- The importance of their participation.
- Keep it simple and provide clear visual aids (posters are great!).
Step 6: Start Composting!
Begin adding your collected “greens” and “browns.” Aim for a good mix. A general rule of thumb is about 2-3 parts “browns” to 1 part “greens” by volume. Don’t pack the bin too tightly – air needs to get in.
Step 7: Manage Your Compost Pile
For Tumblers: Turn them every few days or as per the manufacturer’s instructions. This mixes the materials and adds oxygen.
For Stationary Bins: Turn the pile with a pitchfork or aerator about once a week. Try to mix materials from the outside into the center and vice versa.
Moisture: Your compost pile should be as damp as a wrung-out sponge. If it’s too dry, add water. If it’s too wet, add more “browns” and turn it more often.
Temperature: An active compost pile will heat up. This “hot composting” process kills weed seeds and pathogens. You can monitor this with a compost thermometer if you’re feeling ambitious!
Step 8: Harvesting Your Compost
Compost is ready when it looks and smells like dark, crumbly soil. It shouldn’t smell like the original food scraps. This can take anywhere from 2 months to a year, depending on your system and management.
- For Tumblers: This is usually batch-based. Once a batch is done, you empty it and start a new one.
- For Stationary Bins: You can often harvest compost from the bottom while continuing to add new materials to the top.
Step 9: Utilize Your Finished Compost
Now for the rewarding part! Use your finished compost in:
- On-site landscaping or green spaces.
- Donate it to local community gardens or urban farms.
- Offer it to employees.
- Sell it if you have a surplus and the capacity.
Many cities have great resources to help businesses get started. In Portland, Oregon, the city government actively promotes composting and offers guidance for businesses on their Bureau of Planning and Sustainability website.
Troubleshooting Common Composting Problems
Even with the best intentions, things can go wrong. Here are a few common issues and how to fix them, keeping it simple:
Problem: It smells bad (like rotten eggs or ammonia).
Cause: Too many “greens” or not enough air. It’s likely too wet and anaerobic (lacking oxygen).
Solution:
- Add plenty of “browns” (cardboard, dry leaves) to absorb moisture and balance the nitrogen.
- Turn the pile thoroughly to introduce air.
- If it’s in a bin, make sure the air vents aren’t blocked.
Problem: The pile isn’t heating up or decomposing.
Cause: Not enough nitrogen (“greens”) or it’s too dry.
Solution:
- Add more “greens” like coffee grounds or fruit/vegetable scraps.
- If it feels dry, add water and mix it in.
- Ensure the pile is a decent size (at least 3x3x3 feet for a stationary bin to generate heat effectively).
Problem: Pests (flies, rodents) are attracted.
Cause: Exposure of food scraps, or the presence of forbidden items like meat or dairy.
Solution:
- Always bury food scraps under a layer of “browns.”
- Ensure your bin is pest-resistant (tumblers are great for this!).
- Avoid adding meat, dairy, oily foods, or bones.
- If using a stationary bin, make sure the lid is secure.
- Consider a commercial service if pest issues persist.

I am passionate about home engineering. I specialize in designing, installing, and maintaining heating, ventilation, and air conditioning systems. My goal is to help people stay comfortable in their homes all year long.