Got a balcony and a passion for your community garden? You’re in for a treat! Many folks think composting is only for big backyards, but that’s simply not true. Even with limited space, you can create rich, healthy compost to supercharge your shared garden beds. It’s easier than you think, and I’m here to walk you through it, step-by-step. Let’s turn those kitchen scraps into garden gold!
Composting for Balcony Community Gardeners: Your Essential Guide
Hey there, fellow garden enthusiast! Troy D Harn here from TopChooser, ready to demystify composting for those of us rocking a balcony and contributing to a community garden. It’s a common question: “Can I really compost small-scale, especially when my garden is elsewhere?” The answer is a resounding YES! Setting up a balcony compost system might seem tricky, but it’s totally doable and incredibly rewarding. You’ll be providing your community garden with nutrient-rich goodness, and you’ll be reducing waste. We’ll cover everything you need to know, from choosing the right bin to what goes in, and how to keep it happy.
Why Compost for Your Balcony Community Garden?
Think of composting as nature’s recycling program, and you’re the conductor! When you compost, you’re taking organic materials that would otherwise end up in a landfill – like fruit peels, coffee grounds, and yard waste – and transforming them into a nutrient-dense soil amendment. This “black gold” is fantastic for your community garden.
Here’s why it’s a game-changer, especially for balcony dwellers:
- Enriches Soil: Compost improves soil structure, aeration, and water retention. Your community garden plots will thank you!
- Reduces Waste: Significantly cuts down on household waste, lessening your environmental footprint.
- Saves Money: You won’t need to buy as many soil amendments for the community garden.
- Sustainable Practice: It’s a core principle of good, earth-friendly gardening.
- Connects You Further: It deepens your involvement with the community garden, even from afar.
Choosing the Right Balcony Composting System
The biggest challenge for balcony composting is space and managing potential odors or pests. Luckily, there are fantastic systems designed for smaller living areas. The key is to find a bin that’s compact, enclosed, and easy to manage.
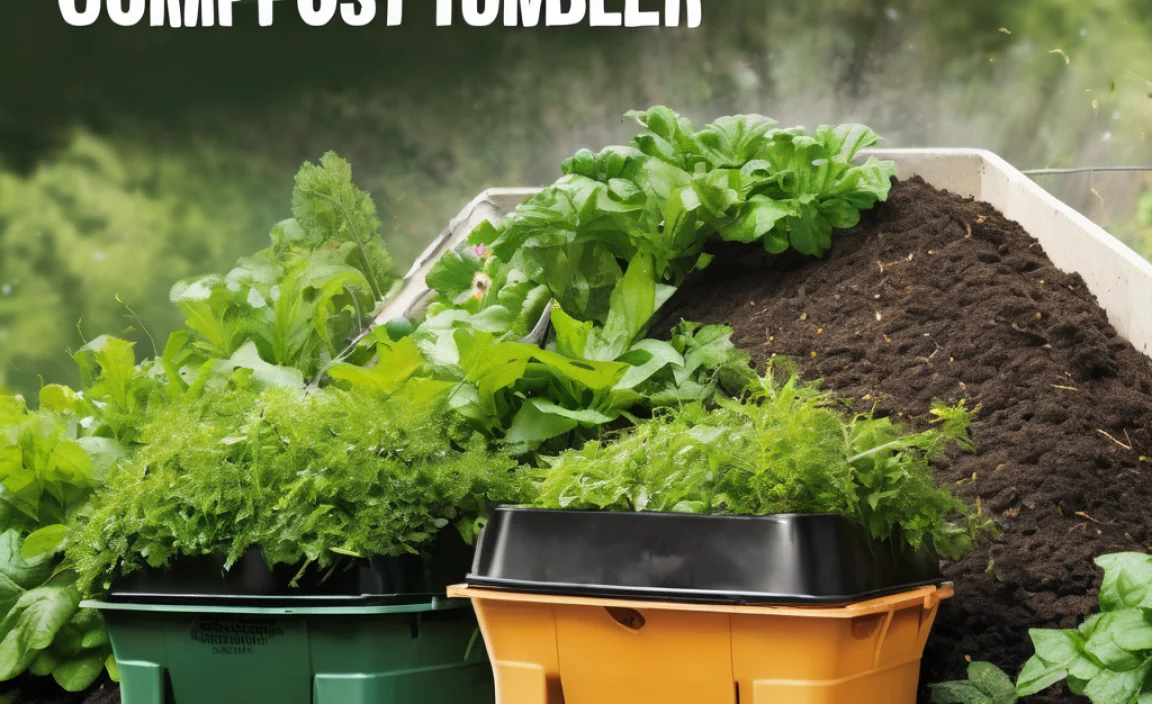
1. The Tumbler Composter
A tumbler composter is a sealed barrel on a stand that you can spin or tumble. This makes turning the compost easy, speeds up the decomposition process, and helps contain odors and pests effectively. They come in various sizes, so you can find one that fits your balcony footprint.
- Pros: Fast composting, easy to turn, good odor and pest control, enclosed system.
- Cons: Can be more expensive, might require some effort to assemble, limited capacity.
2. The Stationary Bin Composter (Compact Models)
These are typically plastic bins with lids and often have doors at the bottom for harvesting finished compost. For a balcony, you’ll want a smaller, streamlined model. Look for ones with good ventilation to ensure proper airflow, which is crucial for aerobic composting.
- Pros: Sturdier, often more affordable than tumblers, can hold a decent amount.
- Cons: Turning requires a bit more effort (using a compost fork or stirring tool), odor control relies heavily on proper layering and moisture balance.
3. Worm Composting (Vermicomposting)
This is a fantastic option for small spaces! Worm bins use specific types of composting worms (like red wigglers) to break down food scraps. They are quiet, odorless when managed correctly, and produce nutrient-rich worm castings, which are amazing for gardens.
- Pros: Highly efficient for food scraps, produces premium compost (worm castings), odorless, compact, great for apartment dwellers.
- Cons: Requires specific worm care, can’t handle as much volume as other methods, sensitive to extreme temperatures.
Top Tip: Before you buy, measure your balcony space! Make sure the bin will fit comfortably and that you have access to it for adding materials and turning.
What Goes Into Your Balcony Compost Bin? (The “Greens” and “Browns”)
Successful composting relies on a balanced diet for your compost pile. Think of it like cooking – you need the right ingredients in the right proportions. We call these “greens” and “browns.”
Greens (Nitrogen-Rich Materials)
Greens are your wet, nitrogen-rich materials. They provide the energy for the microorganisms that break down the compost. Lots of these come straight from the kitchen!
- Fruit and vegetable scraps (peels, cores, rinds)
- Coffee grounds and tea bags (remove staples from bags)
- Grass clippings (in moderation; too much can mat)
- Plant trimmings (non-diseased)
- Eggshells (crushed)
Browns (Carbon-Rich Materials)
Browns are your dry, carbon-rich materials. They provide structure, absorb excess moisture, and allow air to circulate.
- Dry leaves
- Shredded newspaper and cardboard (avoid glossy or colored inks)
- Straw or hay
- Sawdust (from untreated wood, in moderation)
- Paper towels and napkins (unsoiled)
What to AVOID in Your Balcony Compost Bin
These items can cause odors, attract pests, or introduce pathogens. Since you’re on a balcony, it’s best to play it safe and keep these out.
- Meat, fish, and bones
- Dairy products (milk, cheese, yogurt)
- Oily foods or fats
- Diseased plants or weeds gone to seed
- Pet waste (from cats or dogs)
- Chemically treated wood or yard waste
- Inorganic materials (plastic, metal, glass)
The Magic Ratio: Balancing Greens and Browns
The ideal ratio of browns to greens is generally considered to be about 2 or 3 parts browns to 1 part greens by volume. This balance is crucial for:
- Moisture Control: Too many greens can make the pile slimy and smelly. Too many browns can make it too dry and slow decomposition.
- Aeration: Browns create air pockets, preventing the pile from becoming a dense, anaerobic mess.
- Odor Management: A good balance is the best defense against unpleasant smells.
Beginner Pro-Tip: If you’re just starting, aim for a good mix. Don’t obsess over the exact ratio at first. Observe your compost. If it smells like ammonia, add more browns. If it’s dry and not breaking down, add more greens and a little water.
Setting Up Your Balcony Compost Bin: Step-by-Step
Let’s get your composter ready for action. This process is straightforward and will have you composting in no time.
-
Choose a Location:
Find a spot on your balcony that gets some sun but isn’t in direct, scorching heat all day. A little shade is often ideal to regulate temperature. Ensure it’s stable and won’t be easily knocked over.
-
Assemble Your Bin:
Follow the manufacturer’s instructions. For tumblers, this usually involves attaching the barrel to a stand. For stationary bins, it might be snapping panels together.
-
Add a Base Layer:
Start with a layer of coarse brown material at the bottom. This could be small twigs, straw, or shredded cardboard. This helps with drainage and aeration right from the start.
-
Start Layering:
Begin adding your compostable materials. A good method is to alternate layers of greens and browns. For example, a layer of kitchen scraps (greens), followed by a layer of shredded newspaper or dry leaves (browns).
-
Chop Materials (Optional but Recommended):
Smaller pieces break down much faster. Chop up larger fruit and vegetable scraps, shred cardboard, and break up dry leaves. It’s like giving the microbes a head start!
-
Moisture Check:
Your compost should feel like a wrung-out sponge – moist but not dripping. If it’s too dry, add a little water. If it’s too wet, add more brown materials. A spray bottle is handy for adding small amounts of water.
-
Turn or Tumble Regularly:
This is where the “work” comes in, but it’s essential! Tumblers make this easy – just spin for a minute or two every few days. For stationary bins, use a compost fork or stirring tool to mix the contents every week or two. Aeration is key to preventing odors and speeding up decomposition.
Maintaining Your Balcony Compost: Tips for Success
Keeping your compost healthy and productive is all about balance and observation. Here are some expert tips:
Temperature and Moisture
The ideal temperature for composting is between 130-160°F (54-71°C), but don’t stress if you can’t reach that on a balcony. Ambient temperatures will influence your compost’s speed. The “damp sponge” consistency is the most important factor for a balcony system. Adding too much water is a common beginner mistake!
Feeding Your Compost
Add kitchen scraps in moderation. Bury fresh greens in the center of the pile or bin to help deter pests and reduce odors. Always cover fresh additions with a layer of browns.
Troubleshooting Common Balcony Composting Issues
Even with the best intentions, you might run into a couple of hiccups. Here’s how to fix them:
| Problem | Cause | Solution |
|---|---|---|
| Bad Odors (Ammonia/Rotten Eggs) | Too many greens or lack of aeration. Too wet. | Add more brown materials (leaves, shredded paper). Turn the compost thoroughly to introduce air. If it’s very wet, add dry browns and try to drain excess liquid if possible. |
| Not Breaking Down / Too Dry | Too many browns, not enough moisture, or too cold. | Add more green materials. Moisten the pile with water (use a spray bottle if needed). Ensure it’s in a slightly warmer spot if practical. Turn to mix ingredients. |
| Attracting Pests (Flies, Rodents) | Uncovered food scraps, or prohibited items like meat/dairy. | Always bury kitchen scraps under a layer of brown material. Ensure your bin lid is secure. Double-check that you are not composting prohibited items. For persistent issues, consider a more secure bin like a tumbler or a well-sealed stationary bin. |
| Compost Too Wet | Too many wet green materials; poor drainage; rain getting in. | Add plenty of dry brown materials. If your bin has drainage holes, ensure they aren’t blocked. If it’s constantly raining, consider how to shield the bin slightly or add more absorbent browns. |
When is Your Balcony Compost Ready for the Community Garden?
Finished compost is a dark, crumbly, soil-like material that smells earthy and pleasant. You shouldn’t be able to recognize the original food scraps. The time it takes can vary greatly, from a few months to a year, depending on your method, how often you turn it, and the climate.
Signs of Ready Compost:
- Dark brown or black color.
- Crumbly texture.
- Earthy, pleasant smell.
- Original materials are no longer recognizable.
Once ready, you can often harvest from the bottom of stationary bins or empty tumblers. For worm compost, you’ll typically separate the worms from the finished castings. Transport it to your community garden and share the nutrient-rich goodness!
How to Use Your Compost in the Community Garden
This is the best part! Imagine the satisfaction of adding your homemade compost to the garden beds. Here’s how you can best utilize it:
- As a Soil Amendment: Mix a generous amount into the top few inches of soil in your community garden plot before planting. This is like giving your soil a multivitamin.
- As a Top Dressing: Spread a layer around existing plants. This feeds the plants slowly over time and helps retain moisture, especially crucial in warmer months. For more on soil health, resources like the EPA’s composting page offer great insights into the broader benefits.
- In Seed Starting Mixes: If you start seeds at home, a small amount of compost can be incorporated into your seedling mix for a nutrient boost right from the start.
Remember to check with your community garden coordinator about their preferences or any specific guidelines for using amendments. Most will be thrilled to receive your homemade compost!
Conclusion
See? Composting for your balcony community garden is totally achievable! By choosing the right system, understanding the “greens and browns” balance, and maintaining a bit of regular attention, you can transform your kitchen scraps into a valuable resource for your shared garden. It’s a fantastic way to contribute to a healthier environment and a more vibrant community garden, all from the comfort of your balcony. Don’t be afraid to start small and learn as you go. Happy composting, and happy gardening!
FAQ: Your Balcony Composting Questions Answered
Here are some common questions beginners have about balcony composting for their community garden:
Q1: How much space do I really need for a balcony composter?
A1: You can find compact composters suitable for even small balconies. A footprint of about 2×2 feet is often sufficient for a decent-sized bin or tumbler, plus some working space. Worm bins can be even smaller, sometimes fitting on a small table or shelf.
Q2: Will my balcony composter smell bad?
A2: If managed correctly, a balcony compost bin should not smell bad. A healthy compost pile has an earthy aroma. Foul odors typically indicate a problem, usually too many greens, too much moisture, or a lack of aeration. Proper layering and turning are key to odor control.
Q3: How often do I need to add new materials?
A3: You can add kitchen scraps and other compostables regularly, a few times a week as you generate them. Just remember to bury fresh “greens” under a layer of “browns” to maintain balance and deter pests.
Q4: How do I deal with fruit flies or other small bugs?
A4: A secure lid and burying fresh food scraps under brown material are the best ways to prevent fruit flies. If you see them, add more brown material and ensure the lid is tight. Worm bins can sometimes attract them if there’s too much uneaten food.
Q5: Can I put all my kitchen scraps in?
A5: No, you should avoid meat, dairy, oily foods, and pet waste. Stick to fruit and vegetable scraps, coffee grounds, tea bags, and eggshells. Always refer to the “What to AVOID” list for guidance.
Q6: How do I know when the compost is ready?
A6: Finished compost will be dark brown, crumbly, and smell like fresh earth. You won’t be able to identify the original ingredients. It should be cool and moist, not hot or slimy.
Q7: Do I need to add water often?
A7: You only need to add water if the compost feels dry and crumbly, like it’s not holding together well when squeezed. Aim for the consistency of a wrung-out sponge. Balcony bins can sometimes retain moisture more effectively than open piles, so check before adding water.

I am passionate about home engineering. I specialize in designing, installing, and maintaining heating, ventilation, and air conditioning systems. My goal is to help people stay comfortable in their homes all year long.