Hey there, fellow garden enthusiast! Ever looked at your community garden plot and thought about how amazing it would be to grow even healthier, happier plants? Well, you’re in the right spot. Composting is like a secret superpower for your veggies and flowers, but sometimes getting started feels a bit puzzling. Don’t worry, I’m Troy D Harn from TopChooser, and I’m here to break down composting for your community garden in a way that’s super simple and totally doable. We’ll go from zero to black gold, making your garden the envy of the neighborhood.
Composting for Community Gardens: Your Simple, Step-by-Step Guide to Rich Soil
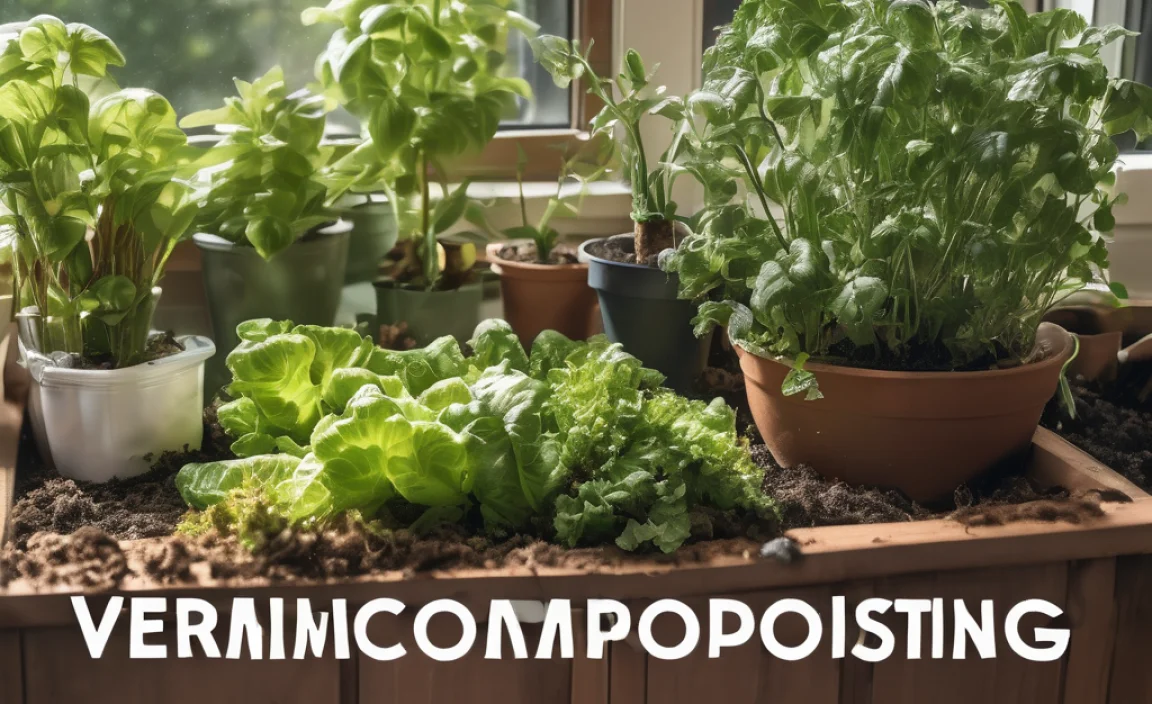
Community gardens are fantastic places. They bring people together, beautify neighborhoods, and give us all a chance to grow delicious, fresh food. But to get the best harvest, you need the best soil. And the absolute best soil food? It’s compost! Think of compost as nature’s superfood for plants. It’s recycled organic material that’s broken down into a dark, crumbly, nutrient-rich soil amendment. Using compost in your community garden isn’t just good for your plants; it’s also a wonderful way to reduce waste and teach others about sustainable practices.
For beginners, the idea of making compost might seem a little… messy. Or maybe you’ve heard conflicting advice. I get it! That’s why I’ve put together this guide. We’ll cover everything you need to know, from planning your compost system to troubleshooting common issues. My goal is to make composting for your community garden feel straightforward and achievable, even if you’ve never turned a pile before. By the end of this, you’ll be ready to create your own fantastic compost, making your community garden plots flourish.
Why Compost for Your Community Garden? The Big Wins
Before we dive into the “how,” let’s chat about the “why.” Why is composting such a big deal, especially in a shared garden space?
- Supercharges Soil Health: Compost is packed with essential nutrients that plants need to thrive. It improves soil structure, making it easier for roots to grow and for water to drain properly, preventing waterlogged soil. It also helps sandy soils retain moisture.
- Reduces Waste: So much kitchen and garden waste can be turned into valuable compost! This means less going into landfills. It’s a fantastic way for your community garden to be more sustainable and environmentally friendly.
- Builds a Stronger Garden Community: Composting can be a collaborative effort. It’s a great project for garden members to work on together, sharing knowledge and the fruits of their labor (literally!).
- Saves Money: Buying soil amendments and fertilizers can be expensive. Making your own compost is a cost-effective way to enrich your garden soil season after season.
- Improves Water Retention: Healthy soil, thanks to compost, acts like a sponge, holding onto water. This means you might need to water less often, saving time and resources – a big plus for any community garden.
- Balances Soil pH: Compost can help moderate soil pH, bringing it closer to the ideal range for most plants, which usually sits between 6.0 and 7.0.
Choosing Your Community Garden Composting Method
Okay, ready to get your hands dirty? The first step is deciding how you want to compost. Several methods work well for community gardens, and the best one for you will depend on the space you have, how many people will be involved, and how much material you expect to compost. Here are a few popular and effective options:
1. The Simple Compost Pile (Heap Method)
This is the most basic method. You simply create a pile of your compostable materials directly on the ground in a designated area. It’s best to have at least 3 feet by 3 feet by 3 feet for the pile to heat up effectively, but you can make it bigger if needed. Many community gardens choose a corner for a communal heap.
- Pros: Easiest to set up, requires no special bins, good for large volumes of material.
- Cons: Can look a bit messy if not managed well, may take longer to decompose, can attract pests if not layered correctly.
2. Enclosed Compost Bins (Tumblers or Static Bins)
These are structures designed to hold compostable materials. They can be purchased or built. Tumblers are large barrels that you can turn, making aeration easy. Static bins are usually contained boxes with doors at the bottom for easy access to finished compost. For a community garden, dedicated bins can keep things tidy and organized.
Static Bins: Often made from wood, wire mesh, or recycled plastic. They’re great because they keep the pile contained and can look neater. Many designs include a way to turn the material or access finished compost from the bottom. You can find great DIY plans online, or purchase ready-made ones.
Tumblers: These make turning the compost much easier, which speeds up decomposition. They are typically sealed, which can help deter pests. However, they often have a smaller capacity than a simple pile and can be more expensive.
- Pros: Tidier appearance, can help deter pests, tumblers make turning easy, static bins offer good containment.
- Cons: Requires purchasing or building a bin, tumblers have limited capacity, static bins can make turning more labor-intensive if not designed well.
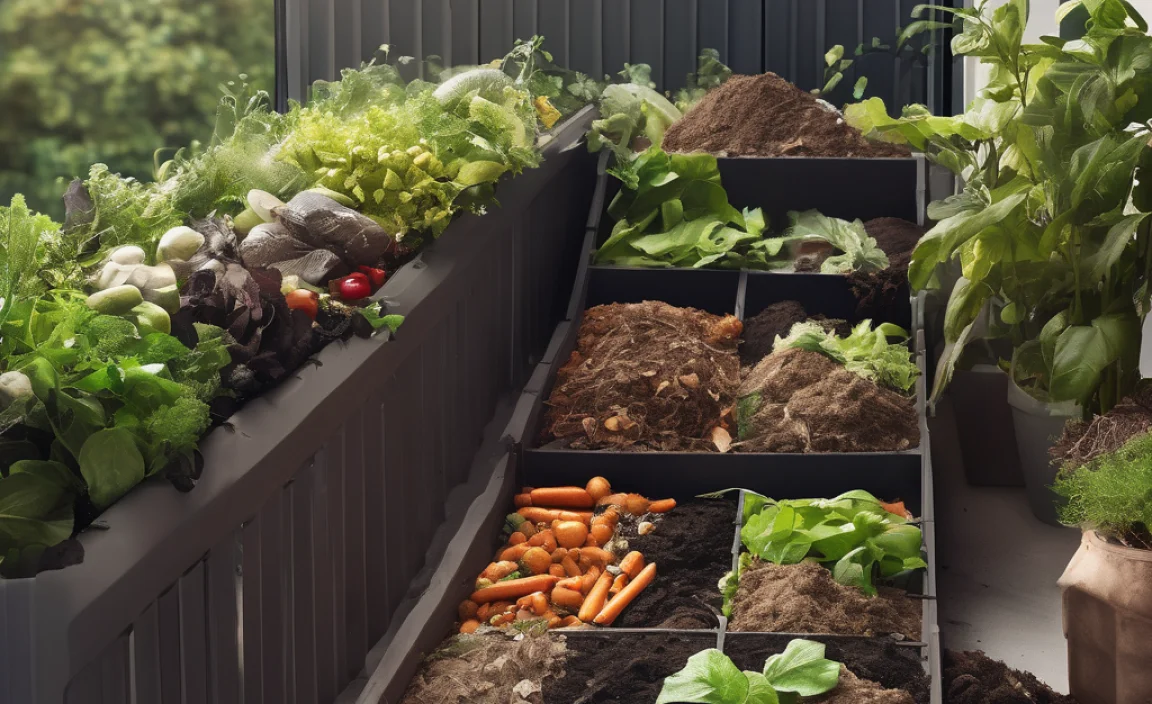
3. Three-Bin System
This is a fantastic option for a community garden that’s serious about composting. It involves three connected bins: one for actively composting, one for maturing compost, and one for finished compost. This system allows for continuous composting and ensures you always have a supply of finished material.
You can build a three-bin system from wooden pallets, which are often available for free from local businesses. Here’s a quick look at how it works:
- Bin 1: Active Composting – Add your fresh greens and browns here. Turn the material regularly.
- Bin 2: Maturing Compost – Once Bin 1 is full or the material has decomposed significantly, move it here to finish breaking down and cure.
- Bin 3: Finished Compost – This bin holds the nutrient-rich compost ready for use in the garden plots.
- Pros: Excellent for continuous composting, allows for different stages of decomposition, very efficient for larger garden communities.
- Cons: Requires more space and a more significant initial building effort.
What Goes In? The “Greens” and “Browns” Explained
This is the heart of composting! To make good compost, you need a balance of nitrogen-rich materials (called “greens”) and carbon-rich materials (called “browns”). Too much of one, and your compost won’t break down well. Too little, and it might become a smelly mess.
A good rule of thumb is to aim for roughly a 2:1 or 3:1 ratio of browns to greens by volume. This might sound complicated, but think of it as having more dry, carbon-y stuff than wet, nitrogen-y stuff.
“Greens” (Nitrogen-Rich)
These materials are typically moist and add nitrogen to your compost pile, helping it heat up and break down faster.
- Fruit and vegetable scraps (peels, cores, rinds)
- Coffee grounds and tea bags
- Grass clippings (use in thin layers to avoid matting)
- Plant trimmings (leaves, stems from non-diseased plants)
- Manure from herbivores (chickens, rabbits, cows, horses – not dogs or cats)
- Seaweed
“Browns” (Carbon-Rich)
These materials are typically dry and provide carbon, which is the energy source for the microorganisms that break down the organic matter. They also help with aeration and prevent the pile from becoming too wet and dense.
- Dry leaves
- Shredded newspaper and cardboard (avoid glossy or colored inks)
- Straw and hay
- Wood chips or sawdust (use in moderation, as they break down slowly)
- Twigs and small branches (chopped or shredded)
- Pine needles
- Eggshells (crushed)
What NOT to Compost (Especially in a Community Garden)
Some items can cause problems, attract pests, or spread disease. It’s best to keep these out of your community compost pile:
- Meat, fish, and bones (attract pests, can smell bad)
- Dairy products (similar to meat)
- Oils, grease, and fatty foods (slow decomposition, attract pests)
- Diseased plants or weeds that have gone to seed (can spread disease or weeds)
- Pet waste (dog or cat feces – can contain pathogens)
- Treated wood or sawdust from treated wood
- Coal or charcoal ash
- Synthetic materials (plastic, metal, glass)
- Weeds that have gone to seed
Building Your Community Compost Pile: A Simple Step-by-Step for Beginners
Let’s get composting! This guide assumes you’re starting with a basic pile or bin system. Remember, consistency is key, and it’s okay to learn as you go!
Step 1: Choose Your Location Wisely
Find a convenient spot within the community garden for your compost. It should be:
- Accessible: Easy for garden members to bring their scraps and for you to access finished compost.
- Well-drained: Avoid areas that get waterlogged.
- Partially Shaded: Too much direct sun can dry out the pile, while full shade might keep it too cool. A balance is good.
- Out of the way: Not directly next to high-traffic paths or seating areas, just in case there’s a slight odor during the process.
Step 2: Gather Your Materials (Greens & Browns)
Encourage garden members to collect their acceptable kitchen scraps (fruits, veggies, coffee grounds) and garden waste (leaves, small twigs). Have a designated bin or area for collecting these materials before they go into the main compost pile.
You’ll also need a good supply of “browns.” Collect fallen leaves in the autumn, shred old newspapers and cardboard (remove tape and labels), or keep a stockpile of straw. Having these ready is crucial for maintaining the right balance.
Step 3: Start Layering!
This is where it all comes together. Aim for a good mix from the start.
- Base Layer: Start with a layer of coarse brown material, like twigs or chopped branches (about 4-6 inches thick). This helps with drainage and airflow from the bottom.
- Alternate Layers: Begin adding your greens and browns. A good starting ratio is about two layers of browns for every one layer of greens.
- Add a layer of greens (kitchen scraps, grass clippings).
- Cover it with a thicker layer of browns (leaves, shredded paper).
Step 4: Turning and Aeration
Compost needs air! Microorganisms that break down the material are aerobic, meaning they need oxygen. Turning the pile mixes everything, distributes moisture, and introduces air.
- How often? Aim to turn your compost pile every 1 to 4 weeks. If you have an active pile that’s heating up, turning it more often (weekly) will speed things up.
- How to turn: Use a pitchfork or a compost aerator tool. Move the material from the outside to the center and vice versa. If you have a three-bin system, you can also turn by moving material from one bin to the next.
- Signs it needs turning: If your pile starts to smell sour or ammonia-like, it’s usually a sign it’s too wet and needs more air.
Step 5: Monitor Moisture Levels
This is crucial. Too dry, and decomposition slows to a crawl. Too wet, and it can become anaerobic (stinky and slimy). Your compost pile should feel consistently damp, like a wrung-out sponge.
- If too dry: Water it thoroughly. You might need to turn it to ensure the water penetrates all layers.
- If too wet: Add more dry brown materials (leaves, shredded cardboard) and turn the pile to help it dry out and improve airflow.
Step 6: Patience and Observation
Composting takes time! The speed depends on the materials, temperature, moisture, and how often you turn it. A hot compost pile can produce finished compost in as little as 4-8 weeks, while a cooler pile might take several months to a year.
You’ll know your compost is ready when:
- It’s dark brown and crumbly.
- It smells earthy and pleasant, like forest soil.
- You can no longer identify the original materials you put in.
- The temperature of the pile has cooled down.
Troubleshooting Common Composting Problems
Even with the best intentions, you might run into a few snags. Don’t get discouraged! Most composting problems are easily fixed.
Problem: The pile smells bad (rotten eggs, ammonia, sour).
Why it happens: Usually, this means the pile is too wet, not getting enough air, or has too many green materials. Ammonia smell often indicates too much nitrogen.
Solution:
- Add more brown materials: This helps absorb excess moisture and provides more carbon.
- Turn the pile thoroughly: This introduces air and helps dry it out.
- Check the moisture: If it feels soggy, it’s too wet. Add browns and aerate.
Problem: The pile isn’t heating up and decomposition is slow.
Why it happens: Not enough nitrogen (too many browns), pile is too small, it’s too dry, or there’s not enough air.
Solution:
- Add more nitrogen-rich “green” materials: Kitchen scraps, fresh grass clippings, or manure can help.
- Ensure the pile is large enough: A minimum of 3x3x3 feet is ideal for generating heat.
- Check moisture: If dry, water it down.
- Turn the pile: Improve aeration.
Problem: The pile is attracting flies or other pests.
Why it happens: Exposed food scraps, meat/dairy/oily items (which shouldn’t be in the pile anyway), or the pile is too wet. Flies are often attracted to fresh kitchen scraps.
Solution:
- Bury food scraps: Always cover fresh kitchen scraps with a layer of brown material.
- Do NOT add meat, dairy, or oils: Remove these from your compostables.
- Maintain proper moisture: A balanced, actively decomposing pile is less attractive to pests than a stagnant, wet one.
- Use an enclosed bin or tumbler: These are generally better at deterring pests.
Problem: The compost is too dry.
Why it happens: Not enough moisture added, too much sun, or too many dry brown materials. “Dry” is a common issue if a pile is left untended.
Solution:
- Water thoroughly: Add water gradually while turning.
- Cover the pile: Use a tarp or a thick layer of straw to retain moisture.
- Add more moist green materials: This can help boost the moisture content.
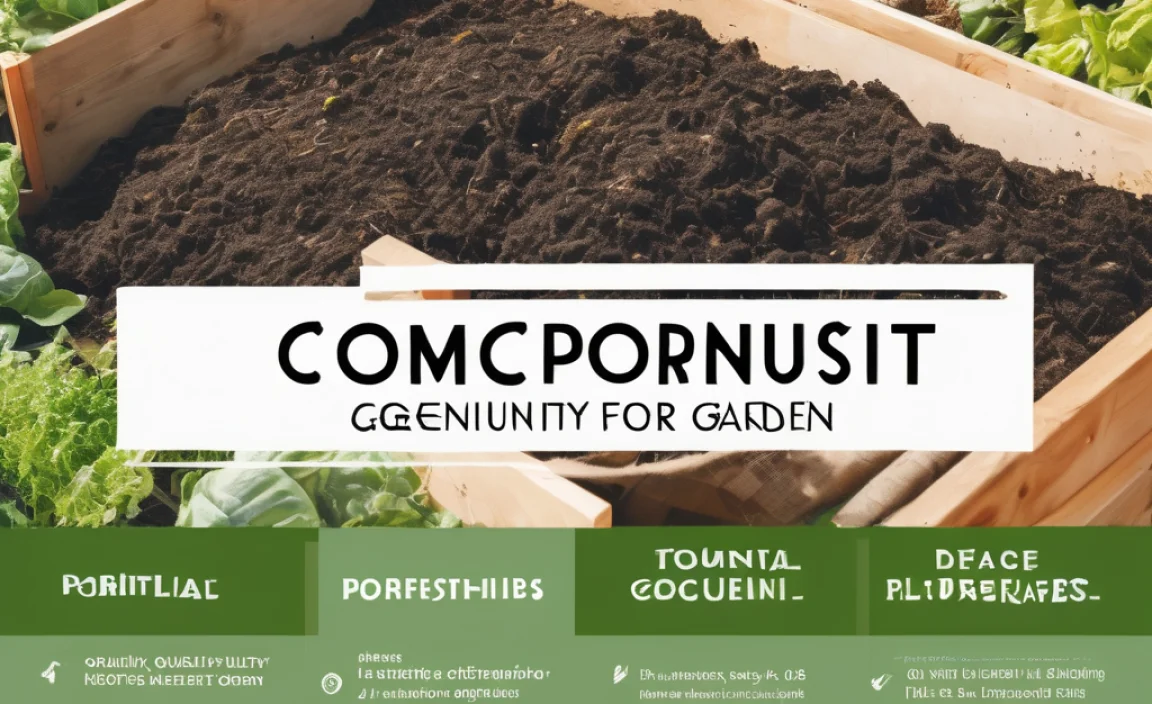
Using Your Finished Community Garden Compost
Congratulations! You’ve made it to the good stuff. Using your finished compost is the most rewarding part. You’ll have a rich, dark, earthy-smelling material that’s pure gold for your garden plots.
Here are some ways to use it:
- Soil Amendment: Mix 2-4 inches of compost into the top 6 inches of your garden beds before planting. This is arguably the best way to use compost as it improves soil structure, fertility, and water retention deep within the root zone.
- Top Dressing: Spread a 1-2 inch layer around existing plants, shrubs, and trees. The nutrients will gradually leach into the soil.
- Mulch: A layer of compost can act as a mulch, helping to suppress weeds and conserve soil moisture.
.lwrp.link-whisper-related-posts{
margin-top: 40px;
margin-bottom: 30px;
}
.lwrp .lwrp-title{
}.lwrp .lwrp-description{
}
.lwrp .lwrp-list-container{
}
.lwrp .lwrp-list-multi-container{
display: flex;
}
.lwrp .lwrp-list-double{
width: 48%;
}
.lwrp .lwrp-list-triple{
width: 32%;
}
.lwrp .lwrp-list-row-container{
display: flex;
justify-content: space-between;
}
.lwrp .lwrp-list-row-container .lwrp-list-item{
width: calc(25% – 20px);
}
.lwrp .lwrp-list-item:not(.lwrp-no-posts-message-item){
max-width: 150px;
}
.lwrp .lwrp-list-item img{
max-width: 100%;
height: auto;
object-fit: cover;
aspect-ratio: 1 / 1;
}
.lwrp .lwrp-list-item.lwrp-empty-list-item{
background: initial !important;
}
.lwrp .lwrp-list-item .lwrp-list-link .lwrp-list-link-title-text,
.lwrp .lwrp-list-item .lwrp-list-no-posts-message{
}@media screen and (max-width: 480px) {
.lwrp.link-whisper-related-posts{
}
.lwrp .lwrp-title{
}.lwrp .lwrp-description{
}
.lwrp .lwrp-list-multi-container{
flex-direction: column;
}
.lwrp .lwrp-list-multi-container ul.lwrp-list{
margin-top: 0px;
margin-bottom: 0px;
padding-top: 0px;
padding-bottom: 0px;
}
.lwrp .lwrp-list-double,
.lwrp .lwrp-list-triple{
width: 100%;
}
.lwrp .lwrp-list-row-container{
justify-content: initial;
flex-direction: column;
}
.lwrp .lwrp-list-row-container .lwrp-list-item{
width: 100%;
}
.lwrp .lwrp-list-item:not(.lwrp-no-posts-message-item){
max-width: initial;
}
.lwrp .lwrp-list-item .lwrp-list-link .lwrp-list-link-title-text,
.lwrp .lwrp-list-item .lwrp-list-no-posts-message{
};
}

I am passionate about home engineering. I specialize in designing, installing, and maintaining heating, ventilation, and air conditioning systems. My goal is to help people stay comfortable in their homes all year long.