Got a community garden buzzing with green thumbs and good intentions? That’s fantastic! Want to give your plants the best fuel without breaking the bank? Composting is your secret weapon. It might sound a bit daunting, but trust me, with a few simple steps, you can transform kitchen scraps and yard waste into garden gold. Let’s get that compost heap cooking!
Composting for Community Gardens DIY: Your Genius Essential
Hey there, fellow garden enthusiasts! Troy D Harn here, your go-to guy for making DIY projects and gardening simple and successful. If you’re part of a community garden, you know the magic that happens when a group of people come together to grow food and flowers. And what’s one of the best ways to supercharge your collective plot? You guessed it: composting!
Composting might sound like a complex science experiment, but it’s really just nature’s way of recycling. By turning organic waste into nutrient-rich compost, you’re not only feeding your garden soil but also reducing waste and saving money. This guide will walk you through the entire DIY process for setting up and maintaining a thriving compost system for your community garden. We’ll cover everything from choosing the right bin to knowing what to compost and what to avoid. Ready to transform your garden waste into gardening treasure?
Why Compost in Your Community Garden? The Big Wins
Before we roll up our sleeves and get dirty, let’s talk about why composting is such a game-changer for community gardens. It’s not just about making dirt; it’s about creating a sustainable, self-sufficient ecosystem right where you grow.
- Boosts Soil Health: Compost is like a superfood for your soil. It improves soil structure, making it easier for plant roots to grow, water to penetrate, and air to circulate. Your plants will thank you with bigger harvests and healthier foliage.
- Reduces Waste: Think about all those kitchen scraps (veggie peels, coffee grounds, eggshells) and yard trimmings (leaves, grass clippings) that usually end up in the landfill. Composting diverts this valuable organic matter, giving it a new life in your garden.
- Saves Money: Buying bags of compost or fertilizers can add up quickly, especially for a community garden with multiple plots. Once your compost system is up and running, you’ll have a free, continuous supply of high-quality soil amendment.
- Environmentally Friendly: Composting reduces greenhouse gas emissions associated with landfill waste. Plus, it lessens the need for synthetic fertilizers, which can have negative environmental impacts.
- Encourages Collaboration: Setting up and managing a compost system can be a fantastic group activity. It fosters teamwork and shared responsibility among garden members, strengthening your community bond.
Choosing Your Community Garden Compost System: Bin or Pile?
When it comes to composting in a community setting, you have a few options. The best choice often depends on the space available, the number of people involved, and the amount of organic material you expect to process.
Option 1: The Simple Compost Pile (The Big Pile Method)
This is the most basic and often the most effective method for community gardens, especially if you have ample space. It requires minimal upfront cost and can handle large volumes of material.
How it works: You simply create a heap of organic materials in a designated area. The key is to layer your “greens” (nitrogen-rich materials) and “browns” (carbon-rich materials) to create an ideal mix for decomposition.
- Pros:
- Can handle large volumes.
- Low cost to set up (just need space!).
- Easy to turn and manage for a group.
- Cons:
- Can look untidy if not managed well.
- May attract pests if not layered correctly or if meat/dairy is accidentally added.
- Takes longer to break down than contained systems, especially if not turned regularly.
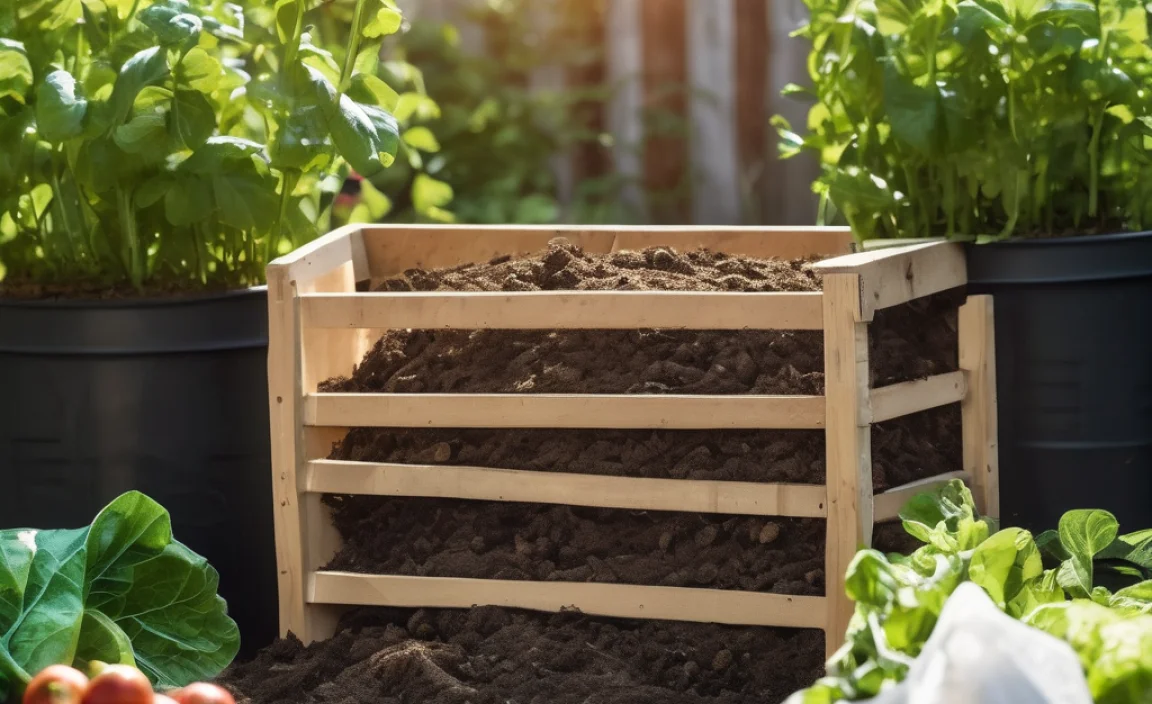
Option 2: DIY Compost Bin (The Contained Method)
If you prefer a tidier look or have some concerns about pests, building your own compost bin is a great DIY project. These are often made from wood, wire mesh, or repurposed pallets.
Types of DIY Bins:
- Wooden Bin: Built from lumber, typically in a square or rectangular shape. You can build single bins or multi-bin systems for different stages of compost.
- Pallet Bin: An excellent, budget-friendly option using free or cheap wooden pallets. Simply connect four pallets to form a square.
- Wire Mesh Bin: Created by forming wire mesh into a cylinder. This allows for good airflow but might be less sturdy for very large volumes.
You can find many designs online, including fantastic resources from university extension offices. For example, the University of California, Agriculture and Natural Resources offers great guides on composting techniques.
How it works: Similar to the pile, you layer greens and browns, but the containment helps manage moisture, temperature, and can deter pests. Many DIY bins are designed for easy turning or access.
- Pros:
- Neater appearance, tidier garden.
- Can help retain heat and moisture.
- May offer better pest deterrence.
- Provides a structured way to manage compost.
- Cons:
- Requires some DIY skill and materials to build.
- May limit the volume of compost you can process at once compared to an open pile.
- Can sometimes hinder airflow if not designed properly.
What Goes In? The “Greens” and “Browns” of Composting
The secret to successful composting lies in the balance of two types of materials: “greens” and “browns.” Think of them as the fuel for your compost-making engine.
“Greens” (Nitrogen-Rich Materials)
These are moist, nitrogen-rich materials that provide essential nutrients for the microorganisms breaking down your compost. They also help the pile heat up.
- Fruit and vegetable scraps (peels, cores, rinds)
- Coffee grounds and filters
- Tea bags (remove any staples or plastic tags)
- Grass clippings (use in thin layers to avoid matting)
- Plant trimmings (non-diseased, from the garden)
- Weeds (before they go to seed)
- Eggshells (crushed)
- Manure from herbivores (like chickens, rabbits, cows, horses – but avoid pet waste)
“Browns” (Carbon-Rich Materials)
These are dry, carbon-rich materials that provide bulk, allow for airflow, and help absorb excess moisture. They act as the insulation for your compost pile.
- Dried leaves
- Straw or hay
- Small twigs and branches (chopped or shredded)
- Cardboard (torn into small pieces, remove tape and labels)
- Paper (shredded newspaper is great, avoid glossy paper)
- Sawdust (from untreated wood, in moderation)
- Pine needles (in moderation, as they can be acidic)
The Ideal Ratio: Aim for roughly 2-3 parts “browns” to 1 part “greens” by volume. This ratio can vary, but it’s a good starting point. Too many greens can make the pile slimy and smelly; too many browns will slow down decomposition.
What to Keep OUT of Your Compost Bin
Just as important as knowing what to put in is knowing what to avoid. These items can cause problems like bad odors, attract pests, or contain harmful pathogens.
- Meat, fish, and bones
- Dairy products (cheese, yogurt, milk)
- Oily or greasy foods
- Diseased plants
- Weeds that have gone to seed
- Pet waste (dog or cat feces) – these can contain harmful pathogens.
- Treated wood or sawdust
- Synthetic materials (plastics, metal, glass)
- Coal ash or charcoal briquettes (these can contain heavy metals)
Step-by-Step: Building and Managing Your Community Compost System
Ready to get your hands dirty? Here’s a simple, step-by-step guide to setting up and maintaining your community garden’s compost system.
Step 1: Choose Your Location and Bin Type
This is crucial for success. Pick a spot that is:
- Accessible: Easy for garden members to get to with their scraps and for you to access with tools.
- Partially Shaded: Direct sun can dry out the pile too quickly, while deep shade might keep it too wet.
- Well-Drained: You don’t want your compost pile sitting in a puddle.
- Away from Water Sources: Keep it a reasonable distance from any wells or streams to prevent potential contamination.
- Consider Local Regulations: Some communities or garden associations have rules about where compost areas can be located.
Decide if you’re going with an open pile or a DIY bin. For a community garden, a sturdy, easy-to-manage bin built from pallets or lumber is often a good bet.
Step 2: Gather Your Materials
Start collecting your “greens” and “browns.” Set up a designated collection point in the garden or ask members to bring their kitchen scraps to a central staging area. Encourage members to bring dry leaves or shredded cardboard to add to the brown supply.
Step 3: Build Your Bin (If Applicable)
If you opted for a DIY bin, now’s the time to build it. For a simple pallet bin:
- Source four wooden pallets of similar size.
- Stand them up on their edges to form a square.
- Use screws, bolts, or heavy-duty zip ties to secure the corners together.
You can leave one side with latches or hinges for easier access to turn the compost. Ensure there are gaps between the pallet slats for airflow.
Step 4: Start Layering Your Greens and Browns
This is where the magic begins!
- Base Layer: Start with a layer of bulky brown materials (like twigs or straw) at the bottom. This helps with drainage and airflow.
- Alternate Layers: Add alternating layers of your green and brown materials. Aim for a thicker layer of browns for every thinner layer of greens.
- Moisture: Lightly water each layer as you add it. The compost should be as moist as a wrung-out sponge – damp, but not soaking wet.
- Mixing: Sprinkle a shovel-full of finished compost or garden soil on top of a few layers. This introduces beneficial microorganisms to kickstart the decomposition process.
Step 5: Manage Your Compost Pile: The Tuning and Turning
A compost pile needs a little attention to become finished compost. This is where the “active management” comes in.
- Aeration (Turning): Regularly turning your compost pile is key. This introduces oxygen, which the microorganisms need to thrive. It also helps distribute moisture and heat, speeding up decomposition. Aim to turn the pile every 1-4 weeks. For a community garden, assign turning duties or make it a group task. Use a pitchfork or compost aerator tool.
- Moisture Control: Check the moisture level regularly. If it feels dry, add water. If it’s too wet and smelling sour, add more brown materials and turn it to help it dry out and aerate.
- Adding New Material: You can continuously add new greens and browns to your pile. Bury new kitchen scraps into the center of the pile to help them break down faster and reduce the chance of pests. Always cover fresh greens with a layer of browns, especially if you have critters in your area.
Step 6: Know When It’s Ready
Compost is ready when it’s dark, crumbly, and smells earthy – like a forest floor after rain. You shouldn’t be able to recognize the original materials you put in.
The time it takes can vary widely, from a few months to a year or more, depending on how often you turn it, the mix of materials, and environmental conditions. In a community garden, you might manage multiple bins: one for active composting, one for curing, and one that’s already finished.
Step 7: Using Your Finished Compost
Once your compost is ready, it’s time to harvest it! Screen it if you want a finer texture (a simple hardware cloth stretched over a frame works well), and then spread it in your garden beds. You can:
- Work it into the soil before planting.
- Use it as a top dressing around established plants.
- Mix it into potting soil for container plants.
Tips for Community Garden Success
Managing a compost system for a group can present unique challenges and opportunities. Here are a few tips to make it run smoothly:
- Clear Signage: Post clear signs indicating what can and cannot be composted. Include a diagram of greens and browns.
- Designated Compost Leaders: Appoint a few enthusiastic members as “Compost Champions” or a committee to oversee the system, educate others, and organize turning days.
- Regular Communication: Keep garden members informed about the compost status, needs, and how they can contribute.
- Educational Workshops: Host a short workshop at the beginning of the season to explain composting basics to new and existing members.
- Troubleshooting Guide: Have a small, visible guide to common composting problems (smells, slow decomposition) and their solutions. The Environmental Protection Agency (EPA) also provides excellent resources on composting basics.
Composting Troubleshooting: Common Issues and Solutions
Even with the best intentions, you might run into a few snags. Here’s how to fix common composting problems:
Problem: The Compost Pile Smells Bad (Rotten Eggs or Ammonia)
- Cause: Too much nitrogen (greens) or not enough air (anaerobic conditions).
- Solution:
- Add more brown materials (e.g., shredded cardboard, dried leaves) to absorb excess moisture and balance the carbon-to-nitrogen ratio.
- Turn the pile thoroughly to introduce oxygen.
- If it smells like ammonia, it’s too nitrogen-rich. Add more browns and turn.
Problem: The Compost Pile Isn’t Heating Up or Decomposing
- Cause: Not enough nitrogen (greens), too dry, or too many large materials.
- Solution:
- Add more green materials like kitchen scraps or grass clippings.
- Add water until it’s moist like a wrung-out sponge.
- Chop or shred larger materials into smaller pieces to increase surface area for microbes.
- Turn the pile to aerate it.
Problem: The Pile is Too Wet and Slimy
- Cause: Too many greens, not enough browns, or it’s been rained on too much without adequate drainage.
- Solution:
- Add a generous amount of brown materials (leaves, shredded paper, sawdust).
- Turn the pile well to dry it out and improve airflow.
- If it’s in a very rainy climate, consider a covered bin or adding a tarp during prolonged wet spells.
Problem: Pests (Rodents, Flies) Are Visiting
- Cause: Exposed food scraps, presence of meat/dairy/oily foods.
- Solution:
- Ensure you are not adding prohibited items like meat, dairy, or oily foods.
- Always bury kitchen scraps deep within the pile and cover them with a layer of browns.
- Turn the pile regularly; this disrupts nests and makes it less attractive.
- If using an open pile, consider building a contained bin with a lid or wire mesh at the bottom.
- A well-maintained, hot compost pile is less attractive to pests.
Compost Components: A Quick Reference Table
Here’s a handy table summarizing common compostable materials and what to avoid for clarity.
| Category | What To Add (Greens – Nitrogen) | What To Add (Browns – Carbon) | What To AVOID |
|---|---|---|---|
| Kitchen Scra
.lwrp.link-whisper-related-posts{ margin-top: 40px; }.lwrp .lwrp-description{ } max-width: 150px; }@media screen and (max-width: 480px) { } }.lwrp .lwrp-description{ } max-width: initial; }; |

I am passionate about home engineering. I specialize in designing, installing, and maintaining heating, ventilation, and air conditioning systems. My goal is to help people stay comfortable in their homes all year long.