Hey there, fellow gardeners! Ever look at your thriving community garden in the countryside and wish you could give it an even bigger boost, naturally? I’m Troy D. Harn, and I’m here to help. Composting might sound a bit complex, but it’s actually one of the simplest and most rewarding things you can do for your garden. It’s like giving your soil a superfood smoothie! Let’s dive in and unlock the secrets to fantastic composting for your rural community garden. We’ll cover everything you need to know, step-by-step, so you can get started making rich, dark compost that will make your plants sing.
Why Composting is a Gardener’s Best Friend
Composting is the magic of turning kitchen scraps and yard “waste” into a nutrient-rich soil amendment. Think of it as nature’s recycling program! In a rural community garden setting, where space might be a bit more generous and organic materials abundant, composting becomes an even more powerful tool. It’s not just about reducing waste; it’s about building a healthier, more vibrant garden ecosystem from the ground up.
Using compost in your community garden offers a treasure trove of benefits:
- Improves Soil Structure: Compost loosens heavy clay soils and helps sandy soils retain moisture, making it easier for plant roots to grow and access nutrients and water.
- Adds Essential Nutrients: It’s packed with the goodness plants need (like nitrogen, phosphorus, and potassium), acting as a slow-release fertilizer that feeds your plants over time.
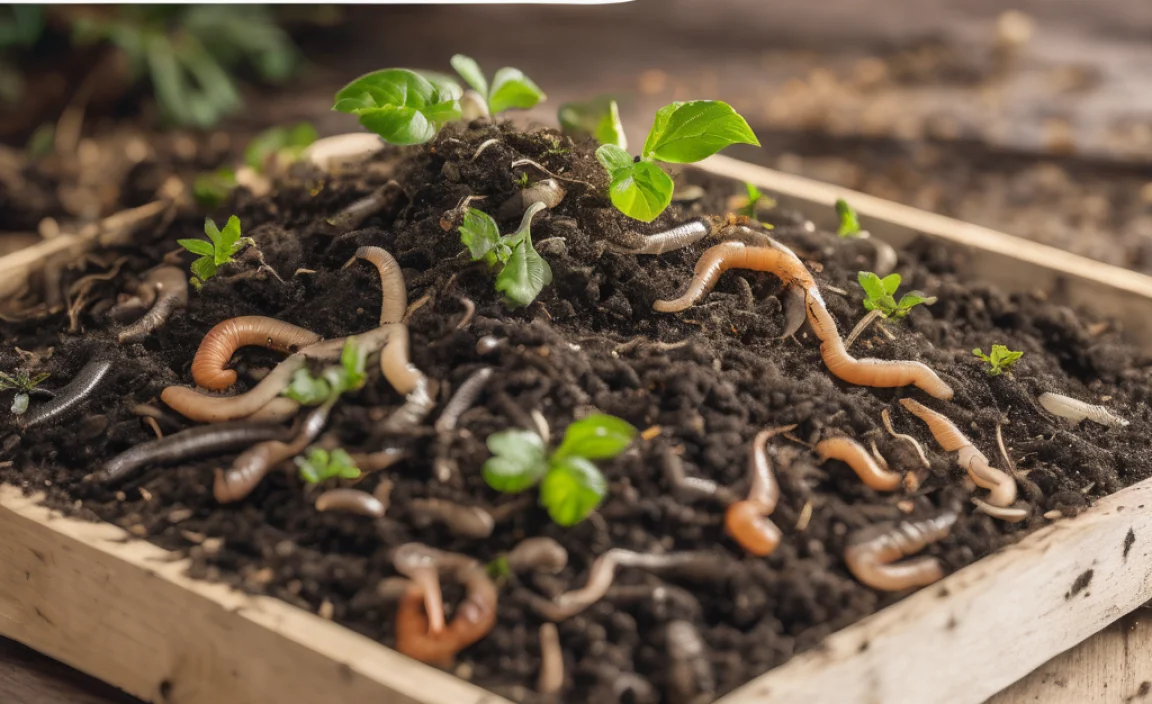
- Boosts Beneficial Microorganisms: Compost is teeming with life – bacteria, fungi, and earthworms – that help break down organic matter, suppress plant diseases, and make nutrients available to plants.
- Increases Water Retention: Compost acts like a sponge, holding onto water and reducing the need for frequent watering, which is a huge plus, especially during dry spells.
- Reduces Waste: Instead of sending food scraps and yard trimmings to the landfill, you transform them into something invaluable for your garden.
- Saves Money: Making your own compost means you buy less fertilizer and soil amendments, keeping more funds available for other community garden projects or supplies.
Composting Basics: The Recipe for Success
At its heart, composting is about balancing four key ingredients, often called “Greens” and “Browns,” along with air and water. Getting this balance right is the secret sauce to speedy, effective composting.
The “Greens” (Nitrogen-Rich Materials)
These are typically moist, nitrogen-rich materials that provide the “fuel” for the microorganisms to break down the compost pile. Think of them as the energizers!
- Fruit and vegetable scraps (peels, cores, rinds, wilted greens)
- Coffee grounds and tea bags (remove staples from bags)
- Grass clippings (in thin layers to avoid matting)
- Plant trimmings (non-diseased)
- Manure from herbivores (like chickens, rabbits, cows, horses – ensure it’s well-aged if possible)
The “Browns” (Carbon-Rich Materials)
These are usually dry, bulky materials that provide carbon, offering energy for the microbes and helping to aerate the pile. Think of them as the structural elements that keep things from getting too soggy or smelly.
- Dry leaves
- Straw and hay
- Shredded newspaper and cardboard (non-glossy, avoid colored inks if possible)
- Twigs and small branches (chopped or shredded)
- Sawdust (from untreated wood only)
- Pine needles
What to AVOID in Your Compost Pile
Some things just don’t belong in a healthy compost pile. Keeping these out prevents pests, unwanted odors, and the spread of disease. Here’s what to steer clear of:
- Meat, fish, and dairy products (attract pests and can smell bad)
- Oily or greasy foods
- Diseased plants or weeds that have gone to seed (you don’t want to spread them)
- Pet waste (from cats and dogs – can carry pathogens)
- Treated wood products
- Coal ash or charcoal briquettes
- Synthetic materials or plastics
Choosing Your Composting System for a Rural Garden
For community gardens in rural settings, you often have a bit more flexibility with space. This opens up several excellent composting methods. The best choice depends on how much material you generate, how quickly you want compost, and how much space you have available.
1. Open Piles
This is the most straightforward and often the most practical for group efforts in a rural area. You simply create a heap of your compostable materials.
- Pros: Easy to set up, can handle large volumes, requires no special bins, cost-effective.
- Cons: Can look a bit untidy if not managed well, may dry out or get too wet more easily, can attract pests if not maintained.
Best for: Community gardens with ample space, situations where large volumes of material are generated.
2. Simple Bin Systems (DIY or Purchased)
These involve using enclosed bins to contain your compost. They can be made from wood, wire mesh, or purchased as plastic units.
- Pros: Neater appearance, helps retain moisture and heat, can deter pests.
- Cons: May have capacity limits, can be more expensive if purchased, DIY bins require some effort to build.
Best for: Gardens with a moderate amount of space, or where a tidier appearance is preferred.
DIY Wooden Compost Bin Example
A simple, sturdy wooden bin is a great project for a community garden. You can often source recycled pallets for free, making this a budget-friendly option.
Materials:
- 3 or 4 wooden pallets (ensure they are untreated – look for an IPPC stamp with “HT” for heat-treated, avoid ones with “MB” for methyl bromide treatment)
- Wire or zip ties, or screws/nails
- Tools: Saw (if needed to cut pallets), drill, screwdriver, hammer, work gloves, safety glasses.
How to build:
- Stand three pallets up on their edges to form three sides of a square or rectangle.
- Secure them together at the corners using wire, zip ties, or screws/nails. For extra stability, you can screw them to wooden posts driven into the ground.
- If you want a fourth side, you can attach the fourth pallet, leaving it hinged with rope or just wire ties so it can be opened for access, or leave it open for easier turning.
- If you have a lot of material or want more than one bin, you can simply line up more pallets to create multiple bays for different stages of compost.
This creates an open-fronted bin that’s easy to fill and turn. You can line the inside with chicken wire if you’re concerned about small pests getting through the pallet gaps.
3. Tumbler Composters
These are rotating drums designed for faster composting. You load the materials, close the lid, and give it a spin every few days.
- Pros: Faster composting time, easy to turn, enclosed and pest-resistant, neat appearance.
- Cons: Higher initial cost, limited capacity, can be heavy when full, may require more frequent monitoring of moisture.
Best for: Community gardens with limited space and a consistent stream of kitchen scraps, or for those who want compost quickly without much heavy labor.
Step-by-Step Composting Guide for Your Community Garden
Ready to build your compost empire? Here’s how to get started, whether you’re using an open pile or a bin.
Step 1: Choose Your Location
Find a spot that is:
- Accessible: Easy to get to with wheelbarrows and garden waste.
- Convenient: Not too far from where you’ll use the compost.
- Shaded or Partially Shaded: This helps maintain moisture and prevents the pile from drying out too quickly in the sun.
- Well-Drained: Avoid areas that get waterlogged.
- Out of the Way: Choose a spot that won’t be an eyesore or a nuisance to the wider community.
Step 2: Start Building Your Pile (The “Lasagna Method”)
This is where we build our compost “lasagna” by layering your Greens and Browns. Aim for a good mix, roughly 2-3 parts Browns to 1 part Greens by volume. Don’t worry about perfection; nature is forgiving!
- Base Layer: Start with a layer of coarse, bulky Browns like twigs or straw (about 4-6 inches deep). This helps with drainage and aeration from the start.
- Add Greens: Layer on your kitchen scraps, grass clippings, or other Green materials (about 2-4 inches deep). Try to chop larger items into smaller pieces to speed up decomposition.
- Add Browns: Cover the Greens with a layer of dry leaves, shredded paper, or straw (about 4-6 inches deep). This helps to insulate, retain moisture, and prevent odors.
- Repeat: Continue layering Greens and Browns, like making a lasagna. A good rule of thumb is to always finish with a layer of Browns to keep things tidy and discourage pests.
- Moisten: Lightly water each layer as you build. The pile should be moist like a wrung-out sponge, not dripping wet.
Step 3: Aeration is Key (Turning Your Compost)
Microorganisms need oxygen to do their work efficiently. Turning your compost pile introduces air.
- Frequency: Aim to turn your compost every 1-4 weeks. The more you turn it, the faster it will break down.
- How to Turn: Use a garden fork or a pitchfork to move the outer layers to the center and the inner layers to the outside. Break up any clumps. This is also a great time to check moisture levels.
- For Tumblers: Simply give your tumbler a good spin every few days.
Pro Tip: If you’re using an open pile or a multi-bin system, you can “turn” by moving material from one bin to another. For a single open pile, turning is essential.
Step 4: Monitor Moisture Levels
Your compost needs to be damp but not soaking wet. Too dry, and decomposition slows to a crawl. Too wet, and it can become anaerobic (lacking oxygen) and start to smell bad.
- Check it: Squeeze a handful of compost. If only a drop or two of water comes out, it’s perfect (like a wrung-out sponge).
- Too Dry? Add water when you turn the pile.
- Too Wet? Add more Brown materials and turn the pile to help it dry out and improve aeration.
Step 5: Be Patient and Watch It Transform
This is the part that requires the most patience! Depending on the method, the size of your materials, and how often you turn and manage it, compost can be ready in as little as 2-3 months or take up to a year.
A well-managed compost pile will heat up considerably in the center. This heat is a sign that the microorganisms are working hard and it’s also great for killing weed seeds and pathogens. As it matures, the active decomposition slows down, and the pile will cool.
Step 6: Harvesting Your Compost
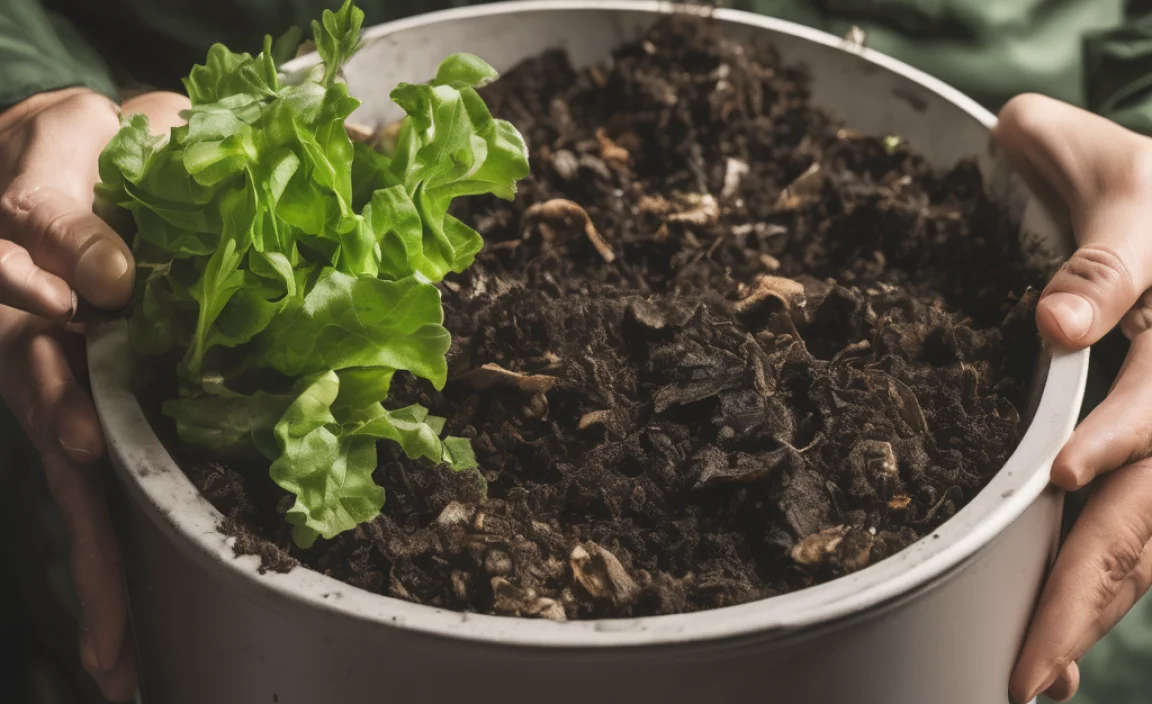
You’ll know your compost is ready when it looks and smells like dark, crumbly soil. You shouldn’t be able to recognize the original materials you put in.
- Screening (Optional): You can use a screen (hardware cloth stretched over a wooden frame) to sift out larger, unfinished pieces. These unfinished bits can be tossed back into a new compost pile.
- Using It: Gently mix finished compost into your garden beds, around trees and shrubs, or use it as a top dressing for lawns.
For community gardens, consider having a communal “compost team” or rotating responsibility for turning and monitoring the piles. This shared effort makes the task less daunting.
Troubleshooting Common Composting Problems
Don’t get discouraged if your compost pile doesn’t behave perfectly at first. Most issues are easily fixed with a little know-how.
| Problem | Cause | Solution |
|---|---|---|
| Bad Odor (Ammonia/Rotten Eggs) | Too much Green material (nitrogen) and not enough air, or too wet. | Add more Brown material (leaves, shredded cardboard) and turn the pile to aerate it. Ensure it’s not too wet. |
| Pile Not Heating Up | Not enough Green material, too dry, or too small. | Add more Green material. Add water if dry. Ensure the pile is at least 3x3x3 feet for optimal heat retention. Turn the pile. |
| Decomposition is Slow | Either too many Browns or not enough Greens, or the pile is too dry, or it hasn’t been turned. | Add more Green material. Moisten the pile if dry. Turn it regularly. Chop materials into smaller pieces. |
| Attracting Pests (Rodents, Flies) | Exposure of food scraps, meat, dairy, or oily items. Pile is too dry. | Bury food scraps deep within the pile, always cover Greens with Browns. Avoid meat, dairy, and oils entirely. Ensure the pile is moist. Use a bin with a lid if pests are a persistent issue. |
| Pile is Too Wet and Soggy | Too much Green material, or excessive rain without adequate drainage or turning. | Add plenty of Brown material (straw, dry leaves, shredded cardboard) and turn the pile thoroughly to incorporate the Browns and introduce air. Consider covering the pile somewhat during heavy rain. |
Composting Tools for Your Rural Garden
You don’t need a lot of fancy equipment, but a few key tools can make the composting process much easier and more efficient for your community garden.
- Spade or Shovel: For moving larger volumes of material, excavating, and mounding.
- Garden Fork or Pitchfork: Your best friend for turning the compost pile and aerating it. Look for one with sturdy tines.
- Wheelbarrow: Essential for transporting materials to and from the compost pile and for moving finished compost.
- Gloves: Protect your hands from dirt, thorns, and any potential irritants.
- Watering Can or Hose with Sprayer: For moistening the pile.
- Optional: Shredder/Chipper: If you have a lot of woody material or large scraps, a shredder can significantly speed up decomposition by creating smaller pieces.
- Optional: Compost Thermometer: Can help you monitor the internal temperature of your pile, indicating microbial activity.
- Optional: Sifter/Screen: For creating finer compost by separating out undecomposed material.
Many of these tools are likely already available in a community garden setting, or members might have them they can share. The key is practicality and durability for repeated use.
Integrating Compost into Your Community Garden Practices
Once your compost is ready, it’s time to put it to work! Here’s how to best use that black gold in your rural community garden:
- Soil Amendment: In the fall or spring, spread a 2-4 inch layer of compost over your garden beds and gently fork it into the top 6-8 inches of soil. This prepares the beds for planting and enriches the soil for the entire season.
- Mulch: Apply a 1-2 inch layer of compost around plants, vegetables, and fruit trees. This helps retain soil moisture, suppresses weeds, and slowly releases nutrients.
- Potting Mix: Mix finished compost with existing soil and perhaps some perlite or vermiculite to create a rich, nutrient-dense potting mix for containers and seed starting. A common ratio is 1/3 compost, 1/3 garden soil, 1/3 other amendments.
- Top Dressing: Sprinkle a thin layer of compost around established plants, especially perennials and shrubs, to provide a nutrient boost.
- Lawn Care: For community green spaces, a light layer of compost spread over your lawn in spring or fall can significantly improve turf health and reduce the need

I am passionate about home engineering. I specialize in designing, installing, and maintaining heating, ventilation, and air conditioning systems. My goal is to help people stay comfortable in their homes all year long.