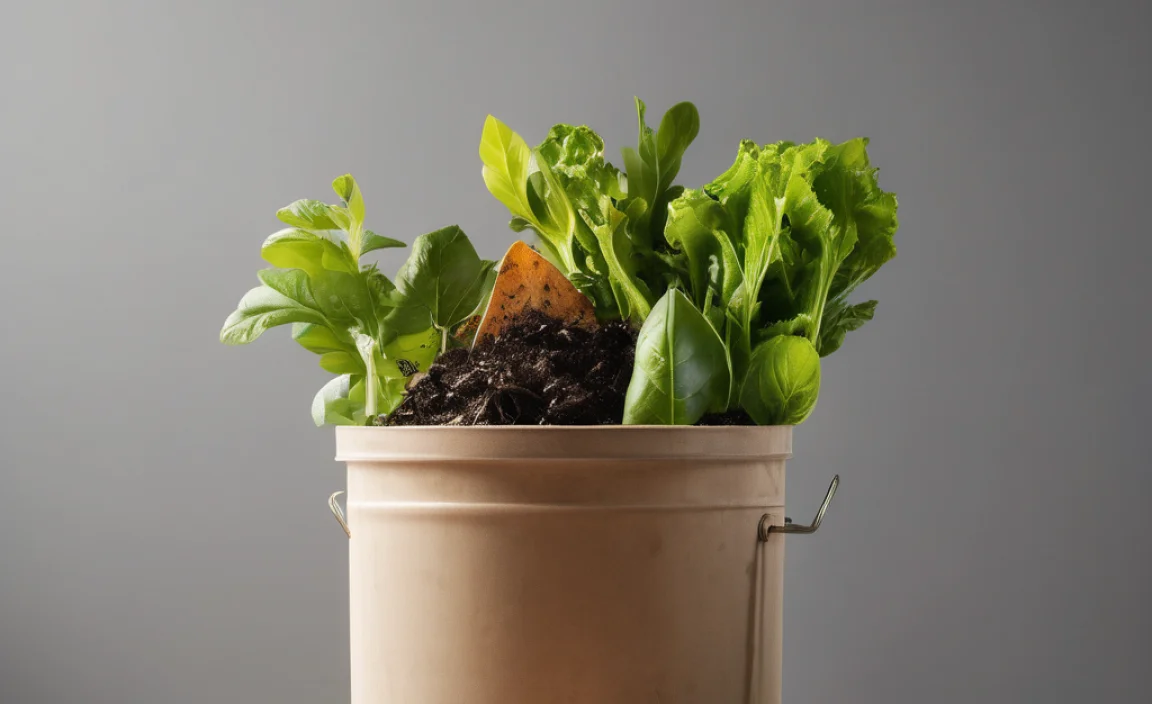
Ever look at your kitchen scraps and garden waste and think, “There’s got to be a better way than just tossing this?” You’re right! Composting is a game-changer, turning everyday discards into black gold for your garden. It sounds complicated, but I’m here to show you how incredibly simple and rewarding a composting DIY project can be. Forget the overwhelm; we’re going to break it down step-by-step. Ready to make your garden happier and reduce waste? Let’s dig in!
Composting DIY: Your Effortless Guide to Garden Gold
Hey there, I’m Troy D Harn from TopChooser, and I love making DIY projects approachable for everyone. Today, we’re tackling composting. If you’ve ever felt frustrated by food waste or wanted to give your garden a serious boost without buying pricey amendments, you’re in the right spot. Composting is nature’s recycling program, and setting up your own system is easier than you think. We’ll walk through everything from choosing a bin to what you can (and can’t!) compost. By the end, you’ll be well on your way to creating nutrient-rich compost right in your backyard!
Why Compost? The Big Benefits Kickstart
Before we get our hands dirty, let’s talk about why this composting DIY project is so worthwhile. It’s not just about reducing what goes into your trash bin, though that’s a huge plus. For homeowners and renters alike, healthy soil is the foundation of a thriving garden, whether you’ve got a sprawling backyard or a small balcony. Let’s break down the awesome advantages:
- Boosts Soil Health: Compost is like a multivitamin for your soil. It improves soil structure, aeration, and drainage, making it easier for plant roots to grow and drink.
- Reduces Waste: Food scraps and yard trimmings make up a significant portion of household waste. Composting diverts this from landfills, where it can produce harmful methane gas.
- Enriches Soil Naturally: It’s packed with essential nutrients that plants need, reducing or even eliminating the need for synthetic fertilizers.
- Conserves Water: Compost helps soil retain moisture, meaning you’ll need to water your plants less often. Big win for dry spells and busy schedules!
- Saves Money: Think about it – you’re creating your own high-quality soil amendment for free, plus you’ll buy fewer fertilizers and bagged soil products.
- Supports a Healthier Environment: By composting, you’re contributing to a more sustainable lifestyle and reducing your overall environmental footprint.
See? It’s a win-win-win! Now, let’s figure out the best way for you to get started.
Choosing Your Composting Comrades: Bin Styles Explained
The first big decision in your composting DIY journey is choosing a composting system. Don’t worry, there’s no single “right” answer. It depends on your space, how much waste you generate, and how hands-on you want to be. Here are the most common options:
1. Stationary Bins (The Classic Choice)
These are large, enclosed containers, often made of wood, recycled plastic, or wire mesh. They can be simple structures or purchased as pre-made tumblers. Because they stay put, they’re great if space isn’t an issue and you don’t need to move your compost around.
- Pros: Can handle larger volumes, relatively easy to build or buy, keeps pests out better than open piles.
- Cons: Turning can be a bit more work, takes up a dedicated space.
2. Tumbling Composters (The Speedy Spinners)
These are enclosed drums or barrels that sit on a frame and can be rotated. They make turning your compost super easy – just give it a spin! This speeds up the decomposition process because it allows for great aeration. They’re also great for keeping critters out.
- Pros: Easy to turn and aerate, faster composting, good pest deterrence, can look quite neat.
- Cons: Can be more expensive, limited capacity per batch, sometimes can get too wet if not managed right.
3. Open Piles (The No-Fuss Free-For-All)
This is the simplest approach. You just designate an area in your yard and start piling your compostable materials. It’s the most budget-friendly option, requiring no special bin at all!
- Pros: Effortless to start, no cost for a bin, can handle large volumes, easy access for adding materials.
- Cons: Can look messy, more susceptible to pests and drying out if not managed well, can take longer to break down.
4. Worm Composting (Vermicomposting – For the Apartment Dweller!)
Don’t have a yard? No problem! Worm composting uses special composting worms (like red wigglers) in a contained bin to break down kitchen scraps. It’s perfect for small spaces and produces amazing compost. For more on this, check out resources from the Environmental Protection Agency (EPA) on home composting.
- Pros: Ideal for small spaces (even indoors!), produces high-quality compost quickly, minimal odor if managed correctly.
- Cons: Requires specific types of worms, sensitive to temperature extremes, can’t handle large volumes of yard waste.
My Pick for Beginners: The Stationary Bin DIY
For most people diving into composting DIY for the first time, a stationary bin is often the sweet spot. It balances ease of use with capacity. You can buy one, or easily build a simple one yourself! We’ll focus on the DIY build because it really drives home how achievable this is.
DIY Stationary Bin: The Simple Build
Ready to build your own! This is a straightforward project perfect for a weekend. We’re going for a simple, sturdy bin using readily available materials.
Materials You’ll Need:
- Four sturdy wooden corner posts (e.g., 4x4s, about 3-4 feet long)
- Wooden planks or pallets for the sides (enough to cover three sides, with gaps for airflow)
- Heavy-duty zip ties, wire, or screws
- Optional: Hardware cloth or chicken wire for pest deterrence
- Tools: Shovel, staple gun (if using wire), drill (if using screws), saw (if cutting pallets)
Step-by-Step Construction:
- Choose Your Spot: Find a level, well-drained area in your yard that gets some sun and some shade. It should be convenient for adding scraps and eventually for harvesting compost.
- Set the Posts: Dig holes about 1-2 feet deep and sink your four corner posts, ensuring they are plumb (straight up and down) and spaced about 3-4 feet apart to form a square. Backfill and tamp down the soil firmly.
- Attach the Sides: Now, let’s build the walls. You can use wooden planks or even dismantled pallets.
- Planks: Attach horizontal planks to the outside of the posts, leaving about a 1-2 inch gap between each plank. This gap is crucial for airflow, which helps your compost break down faster and prevents it from getting smelly. You can secure them with screws or heavy-duty zip ties.
- Pallets: If you’re using pallets, you can simply stand them up along three sides of your posts and secure them. This is super fast! Again, ensure there are gaps for air.
Leave one side completely open for easy access to add materials and to turn your compost.
- Add Pest Protection (Optional): If pests are a concern in your area, staple hardware cloth or chicken wire securely to the inside of the planks or pallets before adding compost. Make sure it covers the gaps too.
- Start Composting! You’re done with the build! Now comes the fun part – filling it up.
This simple bin allows for excellent aeration and easy access, making it a fantastic and affordable starter for your composting DIY adventure.
The Nitty-Gritty: What Goes In and What Stays Out?
This is where many beginners get a little hesitant. What can you actually compost? The key is to balance “greens” and “browns.”
Greens (Nitrogen-Rich Materials):
These are typically moist materials that provide nitrogen, essential for the microorganisms that break down your compost.
- Fruit and vegetable scraps
- Coffee grounds and tea bags
- Grass clippings (in thin layers to avoid matting)
- Plant trimmings (non-diseased)
- Eggshells (crushed)
Browns (Carbon-Rich Materials):
These are dry, woody materials that provide carbon, offering energy for the microbes. They also help with aeration and prevent the pile from becoming too dense and smelly.
- Dry leaves
- Shredded newspaper or cardboard (avoid glossy or colored ink)
- Straw or hay
- Small twigs and branches (chopped up)
- Sawdust (from untreated wood, in moderation)
What to AVOID (The Compost Criminals):
Putting the wrong things in your compost can attract pests, create foul odors, or introduce diseases. Stick to this simple rule: if it’s animal-based or diseased, leave it out.
- Meat, fish, and bones
- Dairy products
- Oily or greasy foods
- Diseased plants
- Weeds that have gone to seed (they might still sprout!)
- Pet waste (dog and cat feces)
- Treated wood
- Coal or charcoal ash
- Synthetic materials
Here’s a quick rundown to keep in your kitchen:
| YES, COMPOST THESE! (Greens & Browns) | NO, AVOID THESE! |
|---|---|
| Fruit & vegetable scraps | Meat, fish, bones |
| Coffee grounds & tea bags | Dairy products |
| Grass clippings | Oily or greasy foods |
| Eggshells | Diseased plants |
| Dry leaves | Weeds with seeds |
| Shredded newspaper/cardboard | Pet waste |
| Straw, hay | Treated wood |
| Small twigs | Coal/charcoal ash |
Following this guide ensures your composting DIY works smoothly and efficiently.
The Composting Recipe: Layering for Success
Think of composting like baking a cake – you need the right ingredients in the right proportions. Aim for a balance of greens and browns. A good starting ratio is roughly two to three parts browns to one part greens by volume. Too many greens can make your pile wet and smelly; too many browns can slow down decomposition.
Step-by-Step Filling Your Bin:
- Start with Browns: Lay down a base layer of carbon-rich browns (like twigs or straw) at the bottom of your bin. This helps with drainage and airflow.
- Add Greens: Next, add a layer of your nitrogen-rich greens (kitchen scraps, grass clippings). Try to chop larger items into smaller pieces; they’ll break down faster.
- Cover with Browns: Always cover your green layer with a brown layer. This is your secret weapon against odors and fruit flies! It also helps maintain the crucial carbon-to-nitrogen ratio.
- Moisten as You Go: Each time you add new materials, especially if they are dry browns, give them a light sprinkle of water. Your compost pile should feel like a damp, wrung-out sponge – not soggy and not bone dry.
- Repeat Layering: Continue to add alternating layers of greens and browns, always topping with browns.
Maintaining Your Compost Pile: The Effortless Part
This is where the “effortless” part really shines. Once your bin is set up and you’re adding materials, you don’t need to fuss over it constantly. However, a little attention goes a long way.
Turning Your Compost:
This is the most active part of composting, and it’s essential for speeding things up and ensuring even decomposition. Turning incorporates oxygen, which the microbes need.
- How often? Aim to turn your compost every 1-2 weeks. If you’re using a tumbler, just give it a few spins every few days. With a stationary bin, use a pitchfork or compost aerator to mix the materials from the outside in, and the bottom up.
- What to look for: The center of your pile will be the hottest, where decomposition is happening most vigorously. You want to bring cooler outer materials into the center and warm center materials to the outside.
Moisture Management:
As mentioned, dampness is key. If your pile seems too dry, add water while turning. If it seems too wet and slimy, add more brown materials and turn it thoroughly to incorporate them and introduce air.
Patience is a Virtue:
Composting is a natural process, and nature takes its time. Depending on the materials, temperature, and how often you turn it, your compost can be ready anywhere from a few months to a year. Tumblers generally speed things up, while a slow-and-steady pile might take longer.
For more scientific insight, resources like USDA Agricultural Research Service offer in-depth information on the science behind composting.
Troubleshooting Common Composting Quirks
Even with the best intentions, sometimes things don’t go exactly as planned. Don’t get discouraged! Here are a few common issues and how to fix them:
Issue: My compost pile smells bad (like ammonia or rotten eggs).
Cause: Too many “greens” (nitrogen) or the pile is too wet and compacted, preventing airflow. This leads to anaerobic decomposition, which stinks.
Fix: Add a generous layer of “browns” (carbon materials like dry leaves or shredded cardboard) and turn the pile thoroughly to aerate it. Ensure good airflow by not packing materials too tightly.
Issue: Nothing seems to be happening; it’s just sitting there.
Cause: The pile might be too dry, too cold, or lacking nitrogen. Microbes need moisture, warmth, and food to work.
Fix: Check the moisture – it should be like a damp sponge. Add water if dry. Ensure you have a good mix of greens and browns. If it’s very cold outside, decomposition will slow down. You can add more “green” materials or give it a good turn to introduce warmer air.
Issue: I’m attracting too many flies or rodents.
Cause: Exposed food scraps or adding meat/dairy/oily products.
Fix: Always bury fresh kitchen scraps under a layer of brown material. Make sure you’re not adding forbidden items. If issues persist, consider a more enclosed bin system or a tumbler that seals better.
Issue: My compost is too wet and soggy.
Cause: Too many wet green materials, not enough brown materials, or too much rain.
Fix: Add plenty of dry browns (shredded cardboard, dry leaves, straw) and turn the pile to mix them in. If it’s raining heavily, you might need to put a tarp over your open pile temporarily.
Harvesting Your Black Gold
How do you know when it’s ready? Finished compost will be dark brown or black, crumbly, and smell earthy and pleasant, like a forest floor after rain. You shouldn’t be able to recognize the original materials you put in.
Steps to Harvest:
- Stop Adding New Material: About 2-4 weeks before you plan to harvest, stop adding fresh scraps to the bin you want to empty.
- Turn and Let Cure: Give it a good turn and let it sit for a couple of weeks. This “curing” period allows the compost to finish breaking down and stabilize.
- Sift (Optional): You can use a sieve or hardware cloth stretched over a frame to sift the compost. This will remove any larger, unde

I am passionate about home engineering. I specialize in designing, installing, and maintaining heating, ventilation, and air conditioning systems. My goal is to help people stay comfortable in their homes all year long.