Hey there, neighbor! Are you looking for a way to make your farm more sustainable and get some amazing, nutrient-rich soil? Composting might sound a bit tricky, but it’s actually super straightforward. We’ll break it down so you can start turning your farm scraps into garden gold in no time. Get ready to discover how easy composting can be, saving you time and boosting your harvest!
Composting for Farmers: Your Easy, Time-Saving Guide
As farmers, we juggle a lot. Between planting, tending, and harvesting, finding extra time can feel impossible. But what if I told you there’s a way to create a super-powered soil amendment right on your farm, using materials you already have? That’s where composting comes in. It’s not just an eco-friendly practice; it’s a smart way to enrich your soil, reduce waste, and save money on fertilizers. This guide is all about making composting for farmers effortless and time-efficient. We’ll cover the basics, show you the simplest methods, and help you get started today, no matter how busy you are.
Why Should Farmers Consider Composting?
Let’s be honest, farm life is demanding. So, why add composting to the list? The benefits are huge and directly impact your bottom line and your farm’s health:
- Soil Health Improvement: Compost adds vital organic matter to your soil, improving its structure, water retention, and aeration. Healthier soil means healthier plants that are more resistant to pests and diseases.
- Waste Reduction: Farms generate a lot of organic waste – from crop residues to animal manures. Composting diverts this from landfills or burning, turning potential problems into valuable resources.
- Reduced Fertilizer Costs: Compost is packed with nutrients that plants need. By using your homemade compost, you can significantly cut back on the amount of commercial fertilizer you need to buy, saving you money.
- Sustainable Farming Practices: Composting is a cornerstone of sustainable agriculture. It closes the nutrient loop on your farm, mimicking natural processes and reducing your environmental footprint.
- Increased Crop Yields: With improved soil fertility and plant health, you’ll often see an increase in crop yields and quality.
Think of it as a natural budget booster and a super-charge for your fields. It’s a win-win!
The Core Components of Composting: The “Greens” and “Browns”
At its heart, composting is about balancing two types of materials: “greens” and “browns.” These are the ingredients that feed the microorganisms doing all the hard work.
What Are “Greens”?
Greens are usually moist, nitrogen-rich materials. They provide the protein for the composting microbes. Think of them as the fuel that heats up the pile.
- Kitchen scraps (vegetable peels, fruit rinds, coffee grounds, tea bags – avoid meat and dairy for simplicity)
- Fresh grass clippings
- Manures (from herbivores like cows, horses, chickens – ensure they are well-aged if possible, especially chicken manure)
- Weeds (before they go to seed)
- Seaweed
What Are “Browns”?
Browns are typically dry, carbon-rich materials. They provide the energy for the microbes and help with airflow in the compost pile, preventing it from becoming a slimy mess.
- Dry leaves
- Straw and hay
- Wood chips and sawdust (in moderation)
- Shredded newspaper and cardboard (avoid glossy or colored inks)
- Pine needles
- Dry stalks and stems
The magic happens when you get the ratio of greens to browns right. A good starting point is roughly 2 parts browns to 1 part greens by volume. Don’t stress too much about perfection; compost piles are forgiving! You’ll learn to eyeball it with practice.
Choosing Your Composting Method: Effortless Options for Farmers
Not all composting methods require hours of turning. For busy farmers, efficiency is key. Here are some of the most practical and time-saving approaches:
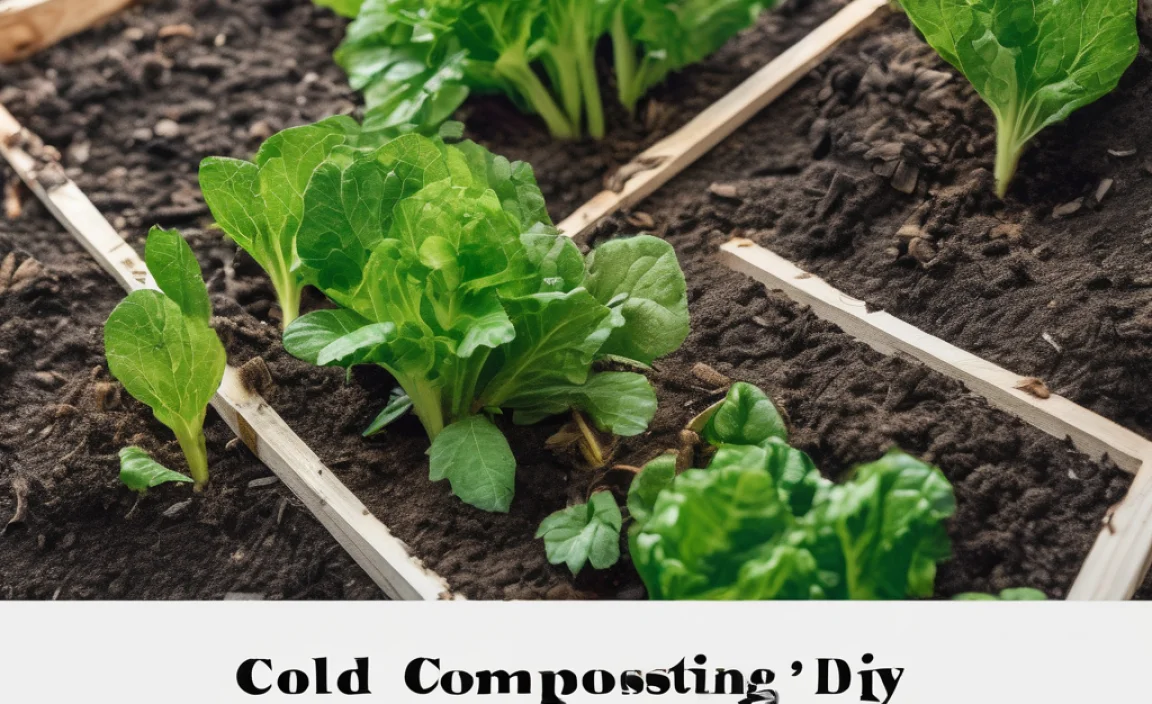
1. The Simple Pile Method (Passive Composting)
This is the most straightforward approach and requires the least effort. You literally just create a pile!
How it works:
- Choose a Location: Find a convenient spot on your farm that’s well-drained and has easy access. It doesn’t need to be fancy.
- Start Layering: Begin with a base layer of coarse brown materials like twigs or straw to ensure good airflow. Then, start adding your greens and browns in alternating layers. Aim for that 2:1 brown-to-green ratio. Chop larger materials into smaller pieces to speed up decomposition.
- Add Materials as You Go: Simply continue to add kitchen scraps, manure, grass clippings, and yard waste to the pile as you generate them. Try to bury kitchen scraps in the center of the pile to deter pests.
- Let Nature Do Its Work: The beauty of this method is that you don’t need to turn the pile frequently. Microorganisms will naturally break down the materials over time. You can lightly moisten it if it seems too dry.
Time Commitment: Very low. You’re mostly just adding materials. Decomposition can take anywhere from 6 months to 2 years, depending on your climate and materials.
Best For: Farmers with plenty of space who aren’t in a rush for finished compost. It’s great for bulk composting of yard waste and crop residues.
2. The “Lasagna” or Layered Composting Method
This method is similar to the simple pile but involves more intentional layering, which can lead to faster breakdown and a neater, more contained pile.
How it works:
- Prepare the Ground: Choose your spot and clear a level area.
- Layer Like a Cake: Start with a thick layer (4-6 inches) of brown material (e.g., straw, shredded cardboard). Then add a thinner layer (2-3 inches) of green material (e.g., grass clippings, kitchen scraps). Sprinkle a little finished compost or soil on top if you have it – this introduces beneficial microbes.
- Repeat Layers: Continue alternating thick layers of browns with thinner layers of greens, sprinkling compost/soil every few layers. Keep the ratio of browns to greens in mind.
- Keep it Moist: Water each layer as you build it. The pile should be as damp as a wrung-out sponge.
- Minimal Turning: While you can turn it to speed things up, this method often breaks down well with just occasional turning (maybe once or twice in the first few months) or even no turning at all, like the simple pile. Covering it with a tarp can help retain moisture and heat.
Time Commitment: Low to moderate. More effort in the initial building, but less ongoing work than traditional turning methods.
Best For: Those who want a more organized pile and potentially quicker results than the simple pile, with minimal active involvement.
3. Using a Compost Bin or Tumbler
Compost bins, whether purchased orDIYed from pallets, can help contain your compost and sometimes speed up the process. Tumblers are rotating bins that make turning very easy.
How it works:
- Gather Materials: Have your greens and browns ready.
- Fill the Bin: Start adding materials, aiming for the correct ratio. Many bins suggest a 50/50 mix to start.
- Add Water: Ensure the contents are moist.
- Turn (if applicable): For static bins, turn the material every few weeks with a pitchfork. For tumblers, simply spin the drum every few days to mix and aerate. Tumblers are fantastic for speeding up decomposition and making turning effortless!
- Harvest: Compost is usually ready when it’s dark, crumbly, and smells earthy. This can take from 1 to 6 months in a tumbler or a well-managed bin.
Time Commitment: Moderate, especially with tumblers. Turning is required but significantly reduced with a tumbler.
Best For: Farmers with limited space or those who want a more contained system. Tumblers are great for busy schedules.
For farmers looking for the most effortless integration into their routine, the Simple Pile or Lasagna Method are excellent starting points. If you’re willing to invest a little in equipment for maximum ease, a good compost tumbler is hard to beat.
Step-by-Step: Getting Your Farmer Compost Pile Started
Ready to get your hands dirty (in a good way)? Here’s a simple, no-fuss guide to starting your first farmer’s compost pile:
Step 1: Pick Your Spot
Find a convenient, well-drained area on your farm. It could be an unused corner of a field, near a garden, or by your barn. Direct contact with the soil is great as it allows worms and microbes to enter.
Step 2: Gather Your Materials
Start collecting your “greens” (food scraps, grass clippings, manure) and “browns” (leaves, straw, shredded paper). It’s helpful to have a good pile of browns ready to go, as you often add more browns than greens.
Step 3: Build Your Base
Lay down a 4-6 inch layer of coarse brown material like small branches, straw, or shredded cardboard. This helps with airflow from the bottom and drainage.
Step 4: Start Layering
Add your next layer, about 2-4 inches, of green material. Then, add another thicker layer, 4-6 inches, of brown material. Aim for roughly twice as much brown material as green material. If you have finished compost or healthy soil, sprinkle a little on top of your greens – this introduces beneficial microorganisms.
Step 5: Add Moisture
The pile needs to be moist, like a wrung-out sponge. Water each layer as you add it. If your green materials are very moist (like fresh manure or food scraps), you might not need much extra water initially.
Step 6: Continue Adding
As you generate more waste on your farm, continue adding the greens and browns to your pile. Try to mix them in a bit or bury fresh food scraps under a layer of browns to keep pests away.
Step 7: Age and Use
Now, let nature do its thing! For the simplest methods, you won’t need to turn it. It will naturally decompose. This can take anywhere from several months to over a year to become rich, dark compost. You’ll know it’s ready when it’s crumbly, smells earthy, and the original materials are no longer recognizable. Use it to amend your garden beds, around trees, or in your fields.
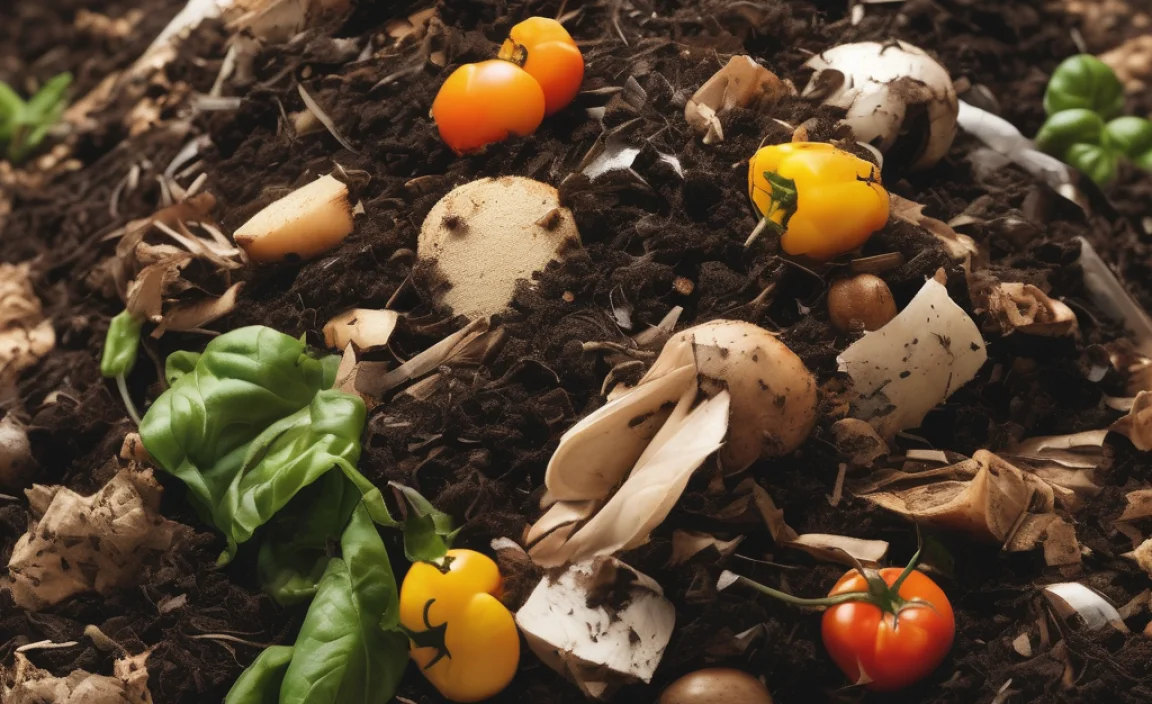
What Can You Compost? A Quick Reference for Farmers
Knowing what to put in your compost pile makes the process smoother. Here’s a quick breakdown:
| Good to Compost (Greens) | Good to Compost (Browns) | Avoid Composting (for simplicity/safety) |
|---|---|---|
| Fruit & Vegetable Scraps | Dry Leaves | Meat & Bones |
| Coffee Grounds & Filters | Straw & Hay | Dairy Products (Milk, Cheese, Yogurt) |
| Tea Bags | Shredded Newspaper/Cardboard (non-glossy) | Oily Foods & Greases |
| Grass Clippings (in moderation) | Wood Chips & Sawdust (small amounts) | Diseased Plants |
| Plant Trimmings (non-woody) | Pine Needles | Weeds with Mature Seeds |
| Manure (Cow, Horse, Chicken – well-aged is best) | Twigs & Small Branches | Pet Waste (Dog, Cat – can contain pathogens) |
| Seaweed | Eggshells | Treated Wood |
Remember, the key is balance. Too much of one thing can slow down decomposition or create odors. If you’re ever unsure, err on the side of adding more browns!
Troubleshooting Common Composting Hiccups
Even with the simplest methods, you might run into a minor issue. Don’t worry, these are usually easy to fix!
Problem: The Pile Smells Bad
Cause: Usually too many “greens” (nitrogen-rich material) or the pile is too wet. This leads to anaerobic (without air) decomposition, creating ammonia or rotten egg smells.
Solution: Add more “brown” materials like dry leaves, straw, or shredded cardboard. This helps balance the nitrogen and improves airflow. If it’s too wet, add more browns and turn it if possible.
Problem: The Pile Isn’t Heating Up or Breaking Down
Cause: Likely too many “browns” (carbon-rich material) or it’s too dry. The microbes need moisture and a good balance of greens and browns to thrive.
Solution: Add more “green” materials like kitchen scraps or fresh grass clippings. Make sure the pile is moist – water it thoroughly if it feels dry. You can also try chopping materials smaller to increase surface area for microbes.
Problem: Pests (Flies, Rodents) are Visiting
Cause: Exposed food scraps, or the pile isn’t hot enough to deter them.
Solution: Bury all food scraps deep in the center of the pile, covering them with a thick layer of brown material. If you are using a simple pile, consider building sides with logs or wire mesh to create a contained area. A compost tumbler is excellent for keeping pests out.
Problem: The Compost is Too Wet and Slimy
Cause: Too much moisture, often from too many wet green materials like grass clippings or kitchen waste, with not enough absorbent browns.
Solution: Mix in plenty of dry brown materials like straw, shredded cardboard, or dry leaves. Ensure the pile is not in a spot that collects water. If it’s in a bin, make sure there are drainage holes. Turning the pile can help it dry out.
Remember, a healthy compost pile is a living ecosystem. A little observation and adjustment go a long way. For more detailed information on composting science, the U.S. Environmental Protection Agency (EPA) has excellent resources on composting and waste management.
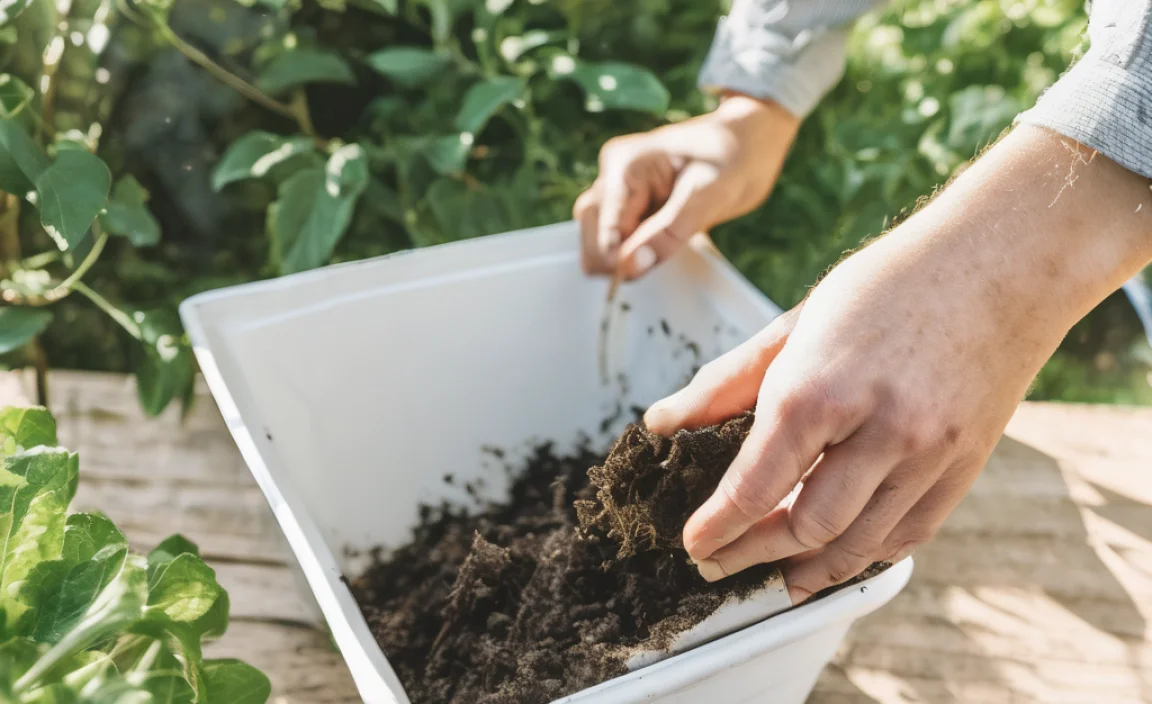
Using Your Finished Compost: Feeding Your Farm
Once your compost is dark, crumbly, and smells like fresh earth, it’s ready to use! This nutrient-rich material is often called “black gold” for a reason. Here’s how to put it to work on your farm:
- Soil Amendment: Mix compost directly into your garden beds or fields before planting. A layer about 1-3 inches thick worked into the top 6-8 inches of soil is a great start. This improves soil structure, drainage, and nutrient content.
- Top Dressing: Spread a layer of compost around existing plants, trees, and shrubs. This slowly releases nutrients and helps the soil retain moisture.
- Compost Tea: For a liquid boost, you can make compost tea. Steep finished compost in water (usually aerated with a pump) for 24-48 hours, then use the liquid to water your plants. This provides readily available nutrients.
- Potting Mix: Mix finished compost with other ingredients like perlite or vermiculite to create a premium potting mix for starting seedlings or growing plants in containers.
- Lawns: Spread a thin layer of compost over your lawn in the spring or fall. Rake it in lightly. This helps to revitalize your lawn and reduce the need for synthetic fertilizers.
Using your own compost closes the nutrient cycle on your farm, making your operation more self-sufficient and sustainable. It’s incredibly rewarding to see the direct impact on your plants’ growth and health.
Frequently Asked Questions About Composting for Farmers
Q1: How much space do I really need for a compost pile?
A: For simple methods, you can start with a pile as small as 3x3x3 feet, which is about a cubic yard. This is a manageable size that still allows for effective decomposition. Larger farms might opt for bigger piles or multiple piles to handle more volume.

I am passionate about home engineering. I specialize in designing, installing, and maintaining heating, ventilation, and air conditioning systems. My goal is to help people stay comfortable in their homes all year long.