“`html
Hey there, fellow DIY enthusiasts and eco-warriors!
Got food scraps piling up? Wondering if there’s a simple way to turn that kitchen waste into something useful for your garden? You’re not alone! Many of us are looking for easy, budget-friendly ways to be kinder to our planet. Composting might sound a bit intimidating, but I’m here to show you it’s totally doable, even if you’re just starting out.
We’ll break down exactly how to set up your own composting system, making it easy to follow every step of the way. Get ready to transform your waste into garden gold!
Composting For Hotels DIY: Turn Your Waste into Garden Gold
It’s no secret that reducing waste is a big deal for our planet. For hotels, this can feel like a huge challenge. Think about all the food scraps from guest meals, buffets, and room service! Where does it all go? Often, it ends up in landfills, contributing to greenhouse gas emissions. But what if I told you there’s a fantastic, DIY-friendly solution that can make a real difference right at your hotel? I’m talking about composting!
Composting might sound like a big, complicated process, but it doesn’t have to be. With a few simple tools and a little know-how, you can set up your own composting system. This not only reduces your hotel’s environmental footprint but also creates nutrient-rich compost that can be used to beautify your hotel’s gardens, plant trees, or even donated to local community gardens. Ready to dive in? Let’s break down how you can do it yourself!
Why Should Hotels Consider Composting?
Before we get our hands dirty, let’s talk about why composting is such a smart move for hotels. It’s more than just “going green”; it makes good business sense too.
- Waste Reduction: Hotels generate a significant amount of organic waste daily. Composting diverts a large portion of this waste from landfills.
- Cost Savings: Less waste going to landfill often means lower waste disposal fees. Plus, you create free fertilizer!
- Enhanced Sustainability Image: In today’s world, travelers increasingly choose businesses that demonstrate a commitment to environmental responsibility. Composting is a visible and impactful way to showcase this.
- Nutrient-Rich Soil: The end product, compost, is an excellent natural fertilizer for landscaping and gardens, improving soil health and reducing the need for chemical fertilizers.
- Staff Engagement: Implementing a composting program can engage your staff in sustainability efforts, fostering a sense of purpose and teamwork.
Understanding the Basics: What is Composting?
At its heart, composting is nature’s way of recycling. It’s the process of breaking down organic materials – like food scraps and yard waste – into a rich, dark, soil-like substance called compost. This happens thanks to tiny decomposers: microorganisms like bacteria and fungi, along with larger helpers like worms and insects. They eat the organic matter and, in the process, transform it into nutrient-rich humus.
Think of it like a well-managed ecosystem in a pile. These helpful organisms need a few key things to thrive:
- “Greens”: These are nitrogen-rich materials that provide protein for the decomposers. Think fruit and vegetable scraps, coffee grounds, tea bags, and grass clippings.
- “Browns”: These are carbon-rich materials that provide energy and bulk. Examples include dry leaves, shredded newspaper, cardboard, straw, and wood chips.
- Water: The compost pile needs to be moist, like a wrung-out sponge, so the microorganisms can live and work.
- Air: The decomposers need oxygen to breathe. Turning the pile or using a well-ventilated bin helps with this.
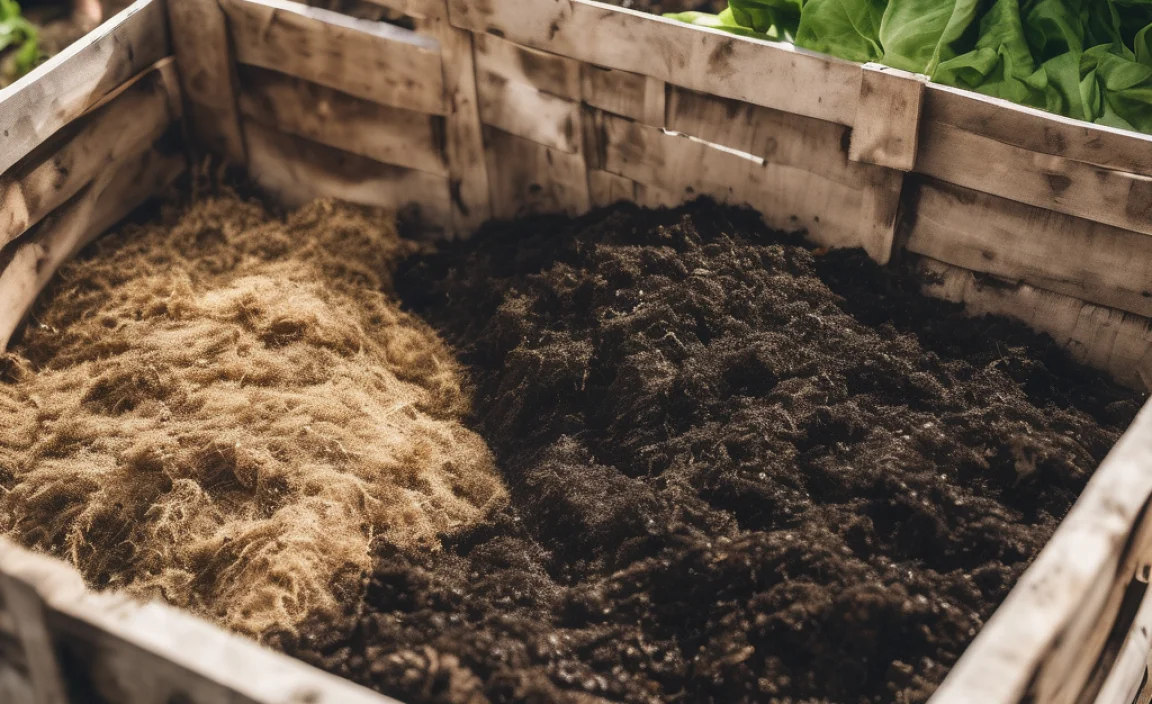
The “Greens” and “Browns” Ratio: A Balancing Act
Getting the right mix of “greens” and “browns” is key to successful composting. A good starting point is a ratio of about 2-3 parts browns to 1 part greens by volume. This might sound tricky, but it’s more about balance than precise measurement.
Too many greens can make your pile soggy and smelly. Too many browns can slow down the decomposition process. You’ll learn to tell when it’s right by how your pile looks and smells. A healthy compost pile should smell earthy, not foul.
Here’s a quick look at what goes in:
| Good to Compost (Greens) | Good to Compost (Browns) |
|---|---|
| Fruit scraps | Dry leaves |
| Vegetable scraps | Shredded newspaper (black and white ink) |
| Coffee grounds and filters | Shredded cardboard (uncoated) |
| Tea bags (staples removed) | Straw or hay |
| Grass clippings (in thin layers) | Wood chips or sawdust (untreated wood) |
| Plant trimmings | Eggshells (crushed) |
What to Avoid
Just as important as knowing what to add is knowing what to leave out:
- Meat, fish, and dairy products: These can attract pests and create foul odors.
- Oily foods: Grease and oils can slow down decomposition and create an anaerobic (low-oxygen) environment.
- Diseased plants: To avoid spreading plant diseases, it’s best to remove these from your compost.
- Weeds that have gone to seed: These can sprout in your finished compost and spread in gardens.
- Pet waste (dog and cat): This can contain pathogens that are harmful to humans.
- Chemically treated wood: Avoid anything treated with preservatives.
- Coal or charcoal ash: These can be toxic.
Choosing Your DIY Composting Method for a Hotel
For hotels, space and volume of waste are key considerations. Here are a few DIY-friendly methods that can work:
1. The Simple Three-Bin System
This is a classic and versatile method. You build or buy three bins side-by-side. It allows you to have compost in different stages of decomposition.
- Bin 1 (Active Composting): This bin is for adding fresh materials.
- Bin 2 (Cooking/Maturing): Once Bin 1 is full, you turn its contents into Bin 2. This is where the main decomposition happens.
- Bin 3 (Curing): Compost from Bin 2 moves here to finish curing, becoming ready for use.
Pros: Efficient for larger volumes, keeps materials organized, allows for continuous composting.
Cons: Requires more space and effort to build/maintain.
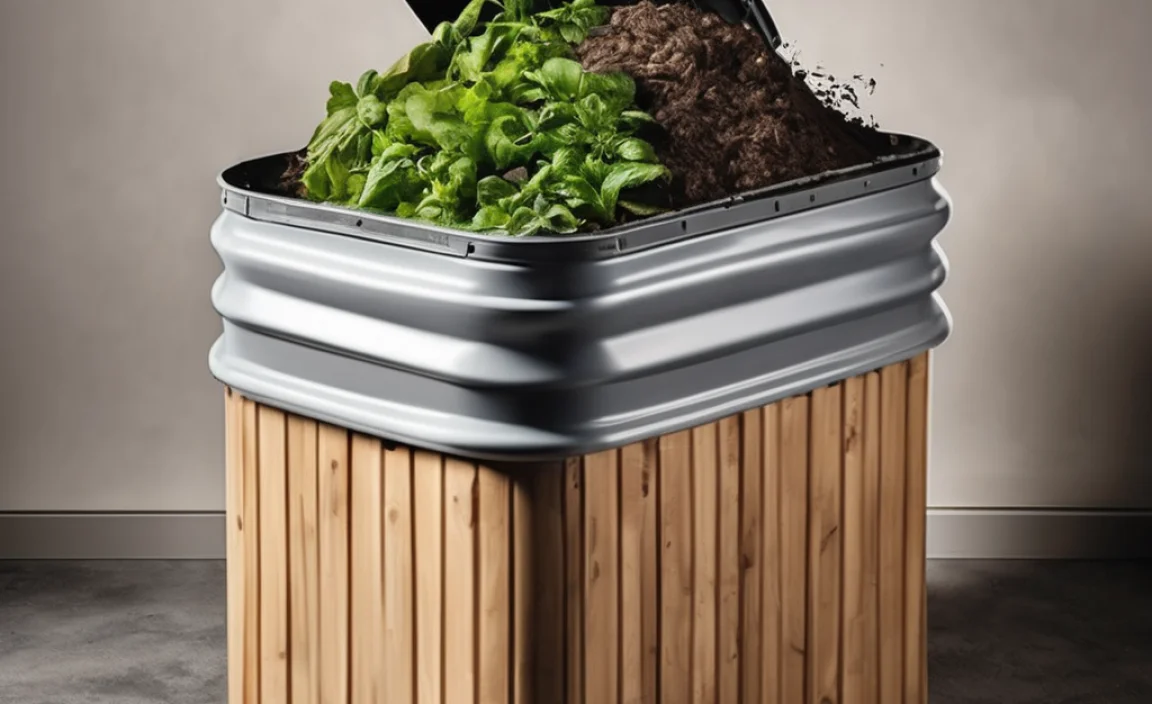
2. Tumbler Composting
A compost tumbler is a barrel or drum that’s mounted on a stand and can be rotated. This makes turning the compost easy and speeds up the process. Many DIYers build their own from large plastic barrels or drums.
Pros: Faster composting, contained (reduces pests and odors), easy to turn, keeps things tidy.
Cons: Can be expensive to buy, DIY versions require some construction skill, might have a limited capacity for very large hotels.
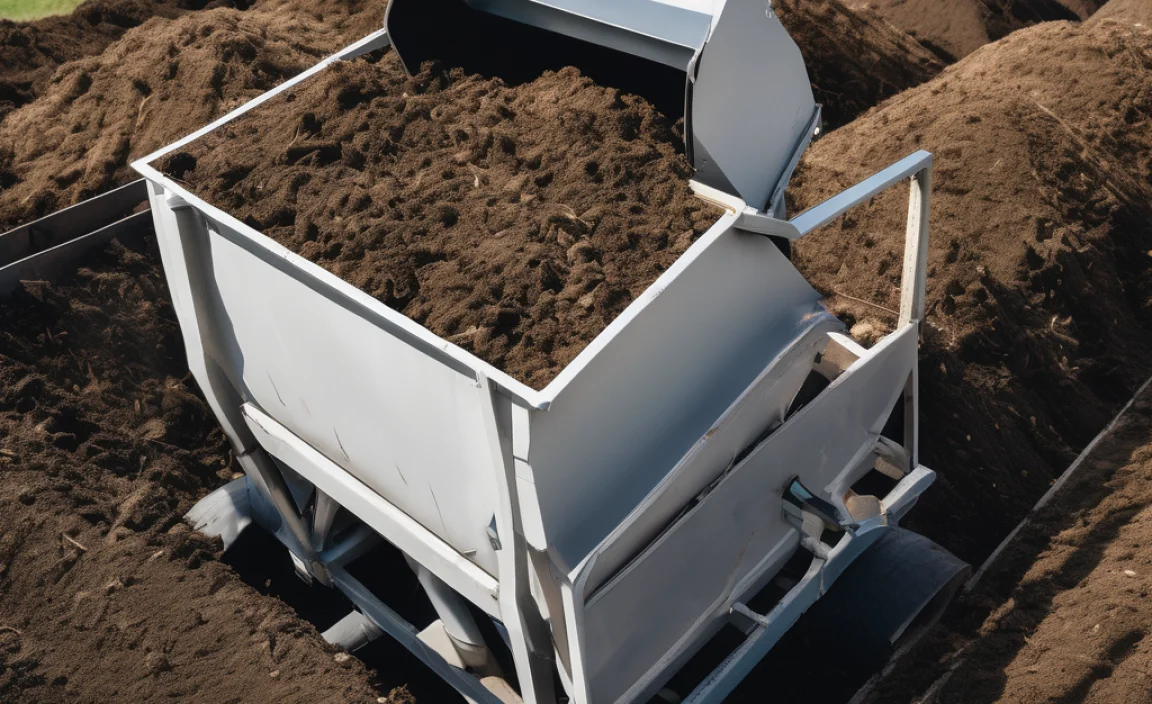
3. Aerated Static Pile (ASP) Composting
This method is great for larger volumes of food waste, like what a hotel kitchen would produce. It involves piling the compostable materials and then using a blower and perforated pipes to force air through the pile. This is a more advanced DIY project, but very effective for hotels.
For this, you’d typically construct a simple outdoor pad and build a large pile. Perforated pipes are laid underneath or within the pile, connected to a small blower. The blower is run periodically to push air through the system, aerating the pile and speeding up decomposition significantly while controlling odors.
Pros: Very effective for large volumes, controls odors and flies, faster decomposition, requires less frequent turning.
Cons: More complex to set up, requires some technical know-how and potentially electrical components for the blower, needs a designated outdoor space.
DIY Steps: Setting Up Your Composting System
Let’s get practical. Here’s how you can start building your composting efforts, focusing on a robust, adaptable method like the three-bin system or a large-scale DIY tumbler. For simplicity, we’ll outline steps that can be adapted to different scales.
Step 1: Choose Your Location
Find a spot that’s:
- Accessible: Easy to get to with kitchen waste and for gardeners to retrieve compost.
- Level: For stability, especially for bins or tumblers.
- Well-drained: You don’t want water pooling around your compost.
- Partially Shaded: Too much direct sun can dry out the pile, while too much shade might keep it too wet.
- Considerate of Neighbors: If possible, place it away from property lines or frequently used guest areas to prevent any potential odor issues.
Step 2: Gather Your Materials and Tools
For a DIY three-bin system, you’ll likely need:
- Wooden pallets (often free from local businesses)
- Posts (4×4 lumber) for corners
- Wire mesh or chicken wire (for sides and base if desired)
- Screws, nails, or heavy-duty zip ties
- Hinges and a latch (for an optional door on the front)
- Saw, drill, hammer, measuring tape
For a DIY tumbler, you might need:
- A large, sturdy plastic barrel or drum (food-grade is best)
- A base made from wood or metal for the barrel to rest on and rotate.
- A sturdy rod or pipe to go through the center of the barrel to act as an axle.
- Hardware like bolts, nuts, and washers.
- A drill with large bits.
You’ll also need collection bins for the kitchen to gather scraps. Stainless steel bins with lids are a good choice for hygiene and aesthetics.
Step 3: Build Your Composting Rig
For a Three-Bin System:
- Frame: Use lumber or sturdy pallets to create three connected bays, roughly 3x3x3 feet each (or larger if needed). You can use pallets as the sides and back, with posts at the corners for extra support.
- Dividers: Create partitions between the bins, also using pallets or lumber.
- Front Access: Leave one side of each bin open or create removable slats or a hinged door for easy access to turn and remove compost.
- Ventilation: Ensure there are gaps in the pallets or use wire mesh on the sides to allow airflow.
For a DIY Tumbler:
- Prepare the Barrel: Clean the barrel thoroughly. Drill several large holes (about 1-2 inches in diameter) all around the sides and ends for aeration.
- Create the Axle: Cut a sturdy metal rod or pipe long enough to go through the center of the barrel. Securely attach it so it spins with the barrel. You might need to drill holes in the center of the barrel’s ends and use a flange bearing or simply rest the rod on supports.
- Build the Base: Construct a sturdy wooden or metal stand that holds the barrel axle, allowing the barrel to spin freely.
- Seal and Secure: Ensure the barrel lid is secure and can be opened for adding materials and emptying.
For more detailed building plans and safety guidelines for DIY compost bins, resources like the U.S. Environmental Protection Agency (EPA) offer valuable information on composting methods.
Step 4: Start Adding Materials
Begin collecting compostable materials from the hotel’s kitchen and any outdoor areas.
Kitchen Collection::
- Place smaller, lidded bins in strategic kitchen locations (prep areas, dishwashing stations).
- Train staff on what can and cannot be composted.
- Establish a routine for emptying these smaller bins into the main compost system.
Layering:
- Start with Browns: Lay down a base layer of brown materials (like dry leaves or shredded cardboard) about 4-6 inches thick in your main bin or tumbler. This helps with drainage and airflow.
- Add Greens: Add your collected kitchen scraps (greens). Chop larger items into smaller pieces to speed up decomposition.
- Cover with Browns: Always cover your green materials with a layer of brown materials. This is crucial for controlling odors and deterring pests.
- Maintain Moisture: The pile should be damp, like a wrung-out sponge. If it’s too dry, add a little water. If it’s too wet, add more browns.
Step 5: Manage Your Compost Pile
This is where regular attention pays off:
- Turning: Regularly turn your compost pile. For a three-bin system, this means moving material from Bin 1 to Bin 2, and then from Bin 2 to Bin 3. For a tumbler, simply give it a spin every few days. Aim to turn or tumble at least once a week. Turning aerates the pile, mixes materials, and speeds up decomposition.
- Moisture Check: Squeeze a handful of compost. If a few drops of water come out, it’s good. If it’s dry and crumbly, add water. If it’s soggy and matted, add more browns and turn it.
- Temperature: A healthy, active compost pile will get quite warm in the center (130-160°F or 55-70°C). This heat is good – it kills weed seeds and pathogens. You can use a compost thermometer to monitor this, but it’s not essential for beginner success.
- Patience: Composting takes time! Depending on your method, materials, and how often you turn it, compost can be ready in anywhere from a few weeks to several months.
Step 6: Harvesting Your Compost
You’ll know your compost is ready when it’s dark brown, crumbly, and smells earthy and pleasant. You shouldn’t be able to recognize the original materials.
- From Bins: Remove the finished compost from the curing bin (Bin 3) or the bottom of your active bin. You might want to sift it to remove any larger, undecomposed pieces, which can go back into the active bin.
- From Tumblers: Once mature, empty the tumbler and let it cure for a couple of weeks, if needed, before use.
This finished compost is a black gold that can be used to:
- Enrich the soil in hotel landscaping.
- Repotting indoor plants.
- Start a small herb or vegetable garden for the hotel’s restaurant.
- Donate to local community gardens or landscaping projects.
Tips for Hotel-Specific Composting Success
Hotels have unique challenges and opportunities. Here are some tips to make your composting program a hit:
- Staff Training is Crucial: Educate kitchen, housekeeping, and grounds staff on what goes into the compost. Clear signage is a must.
- Designated Collection Points: Set up easily accessible and hygienic collection bins in the kitchen. Consider walk-in coolers or dedicated carts.
- Manage Odors and Pests: Always layer greens with browns. If odors are an issue, you might need more browns, better aeration, or a different bin type. Pests are usually deterred by proper layering and by avoiding meat/dairy. Secure bins can help.
- Volume Management: If you’re generating a huge amount of food waste, consider a slightly larger DIY rig or even exploring commercial composting solutions if DIY becomes overwhelming, though DIY keeps costs down initially. Some hotels even partner with local composting facilities.
- Integration with Operations: Think about how composting fits into your hotel’s workflow. Who is responsible for what? Make it a part of the daily routine.
- Promote Your Efforts: Let guests know about your composting program! Put a small notice in rooms, on your website, or in your welcome materials. This can be a great marketing angle.
Measuring Your Impact
It’s rewarding to see the difference you’re making. Keep track of:

I am passionate about home engineering. I specialize in designing, installing, and maintaining heating, ventilation, and air conditioning systems. My goal is to help people stay comfortable in their homes all year long.