Ever wonder what to do with your kitchen scraps or yard waste? Turning them into rich soil might sound complicated, but it’s actually a fantastic project for kids! It’s a hands-on way to teach them about nature and how things grow. We’ll walk you through everything, making it super easy to get started. You’ll be making fantastic compost in no time! Let’s dive in and get our hands a little dirty!
Composting for Kids: A Fun, Step-by-Step Adventure
Hey there, fellow home improvers and garden enthusiasts! Troy D Harn here, your go-to guy for making life around your home a little easier and a lot more rewarding. Today, we’re talking about something super cool that you can do with the kids – composting! It’s not just good for your garden; it’s a fantastic learning experience for little ones. We’re going to break it down into simple steps so that anyone, even if you’ve never composted before, can get started. Think of me as your friendly neighbor showing you the ropes. We’ll cover what you need, how to build or set up your compost system, and what to put in and keep out. Ready to turn trash into treasure?
Why Composting is Awesome for Kids
Composting is more than just a way to reduce waste. For kids, it’s like a science experiment that gets tangible results! They get to be part of a cycle that helps the environment. What’s not to love about that?
- Teaches Environmental Stewardship: Kids learn that their actions can make a positive impact. They see how food scraps and yard waste can be transformed into something useful.
- Sparks Curiosity: They’ll ask questions! Why does it break down? What are worms doing in there? It’s a gateway to understanding biology and decomposition.
- Connects with Nature: Gardening and composting get kids outdoors and interacting with the natural world. They see where their food comes from and how soil is made.
- Develops Responsibility: Caring for a compost pile (even a small one) teaches kids patience and responsibility. They have to add materials, turn the pile, and wait for results.
- Reduces Waste: It’s a practical lesson in recycling and sustainability. They’ll feel proud knowing they’re helping the planet by diverting waste from landfills.
Getting Started: What You Need for Kid-Friendly Composting
You don’t need a fancy setup to start composting. The goal here is simplicity and engagement for the kids. We want it to be easy to manage and fun to observe.
Choosing Your Composting System
There are a few options, and the best one for you and your kids depends on your space and how much you want to compost.
- Compost Bin: These are readily available at garden centers or online. They keep things tidy and can look quite neat. Some are enclosed tumblers that make turning easy, which kids might find fascinating.
- DIY Compost Pile: If you have a bit more space, you can simply create a pile in a corner of your yard. It’s the most basic method. You can even use chicken wire or wood pallets to create a simple enclosure.
- Worm Composting (Vermicomposting): This is a fantastic, contained option perfect for smaller spaces, like apartments or balconies. It uses special composting worms (red wigglers) to break down food scraps. It’s often a big hit with kids because they love seeing and handling the worms! For more on setting up a worm bin, check out resources from the Environmental Protection Agency (EPA).
Essential Tools for Little Composters
Keep it simple! These are things that will help you and the kids manage the compost and make it a fun activity.
- Shovel or Pitchfork: For turning the compost pile. A smaller, lighter shovel might be good for kids.
- Bucket with a Lid: For collecting kitchen scraps to carry to the compost bin. A fun, colorful bucket is a bonus!
- Gloves: To keep hands clean (or as clean as they get during a fun gardening project!).
- Watering Can: To keep the compost pile moist.
- A Small Notebook and Pencil: For kids to record what goes in, what they observe, and when they turn the pile. This adds a science journal element!
The “Greens” and “Browns”: What Goes In (and What Doesn’t!)
Composting is all about balancing two types of materials: “greens” and “browns.” Think of them as the fuel for your compost fire. Getting this balance right is key to quick, healthy compost.
“Greens” – The Nitrogen-Rich Stuff
Greens are wet, nitrogen-rich materials. They provide the moisture and nitrogen that microorganisms need to multiply and do their work. Kids can help collect these from the kitchen!
- Fruit and vegetable scraps
- Coffee grounds and tea bags (without staples or plastic)
- Grass clippings
- Plant trimmings (soft, green ones)
“Browns” – The Carbon-Rich Stuff
Browns are dry, carbon-rich materials. They provide aeration (air pockets) and energy for the microorganisms. These are often found in the yard or around the house.
- Dry leaves
- Shredded newspaper or cardboard (avoid glossy paper)
- Straw or hay
- Small twigs and branches (chopped small)
- Sawdust from untreated wood
What to Keep OUT of Your Compost Pile
Some things can cause problems, like attracting pests, smelling bad, or introducing diseases. Teaching kids what not to compost is just as important!
- Meat, fish, and bones
- Dairy products (cheese, yogurt, milk)
- Oily foods or grease
- Diseased plants
- Weeds that have gone to seed (you don’t want to spread more weeds!)
- Pet waste (from dogs and cats – this can contain harmful pathogens)
- Coal or charcoal ash
- Treated wood
Having a visual chart can be super helpful for kids. You can even draw pictures of what goes in and what stays out!
Step-by-Step: Composting for Kids
Let’s get this compost party started! This guide assumes you’ve chosen a simple bin or a designated spot for a pile. If you’re doing vermicomposting, the steps will be slightly different, but the principles of adding greens and browns still apply.
Step 1: Set Up Your Compost Station
Find a convenient spot for your compost bin or pile. It should be:
- Accessible: Easy for you and the kids to reach.
- Well-Drained: Not in a spot that collects water.
- Partially Sunny/Shady: Too much sun can dry it out; too much shade might keep it too wet. A balance is good.
- Away from Living Areas: While a well-managed compost pile shouldn’t smell bad, it’s best to keep it a little distance from your doors and windows.
Step 2: Start Layering – The “Lasagna” Method
This is where the fun begins! We’re going to build our compost pile in layers, like a delicious lasagna.
- Base Layer (Browns): Start with a 4-6 inch layer of coarse brown materials at the bottom. This could be small twigs, straw, or shredded cardboard. This layer helps with drainage and aeration.
- Next Layer (Greens): Add a few inches of green materials on top of the browns. Think fruit and veggie scraps from the kitchen!
- Another Layer (Browns): Cover the greens with a couple of inches of brown materials. This helps prevent odors and discourages pests. Dry leaves or shredded newspaper work well here.
- Keep Going: Continue alternating layers of greens and browns. A good general rule is to have more browns than greens by volume, aiming for roughly a 2:1 or 3:1 ratio of browns to greens.
Kid Tip: Let the kids be the “layer managers”! They can choose which color (green or brown) goes next and pile it on. Use their notebook to draw the layers.
Step 3: Add Water – Keep it Damp, Not Soggy
Your compost pile needs moisture to work. It should feel like a damp, wrung-out sponge.
- Use your watering can to lightly dampen each new layer you add.
- If your compost pile seems dry, give it a good watering.
- If it looks too wet and is smelling sour, add more brown materials and turn it.
Step 4: Turn the Pile – The Aeration Station!
Turning the compost pile introduces oxygen, which is essential for the microorganisms that do the breaking down. It also mixes the materials, helping them decompose faster and preventing clumping.
- About once a week, or whenever you add a significant amount of new material, use your shovel or pitchfork to turn the pile.
- Try to mix the outer materials into the center and vice versa.
- This is a great job for older kids with supervision, using a smaller shovel. Younger kids can help gather leaves or other brown materials to add after turning.
Kid Tip: Make turning a game! Call it “compost aerobics” or “mixing magic.”
Step 5: What to Compost as You Go
Continue collecting kitchen scraps (greens) in your lidded bucket. When the bucket is full, or when you’re out in the yard, add the contents to your compost pile using the layering method (Step 2). Always try to bury food scraps under a layer of brown material.
Step 6: Be Patient – The Waiting Game
Composting takes time! Depending on the materials you use, the temperature, and how often you turn it, compost can be ready in as little as three months or take up to a year.
- You’ll know it’s ready when it looks and smells like dark, crumbly soil.
- You shouldn’t be able to recognize the original materials anymore.
- The pile will also shrink significantly in size.
Troubleshooting Common Composting Hiccups
Even experienced composters run into issues sometimes. Here are a few common problems and how to fix them, with kid-friendly explanations.
Problem: It Smells Bad (Like Ammonia or Rotten Eggs)
Cause: Usually too many “greens” (nitrogen-rich materials) or not enough air. The pile is too wet and anaerobic (lacking oxygen).
Solution:
- Add more “browns” (carbon-rich materials) like dry leaves, shredded cardboard, or straw.
- Turn the pile thoroughly to introduce air.
- If it’s very wet, add more browns and turn more frequently.
Problem: It’s Not Breaking Down
Cause: The pile might be too dry, too cold, or lack nitrogen (too many browns).
Solution:
- Add water until it feels like a damp sponge.
- Add more “greens” (nitrogen-rich materials) like fruit and vegetable scraps or grass clippings.
- Turn the pile to mix everything.
- If it’s cold weather, decomposition will naturally slow down. Be patient!
Problem: Pests (Flies, Rodents) are Visiting
Cause: Often due to exposed food scraps or certain types of food being added.
Solution:
- Ensure you’re not adding meat, dairy, or oily foods.
- Always cover fresh food scraps with a layer of brown materials.
- Turn the pile regularly.
- Consider using a compost bin with a lid, especially for kitchen scraps.
- If using an open pile, keeping it well-managed and buried food scraps deep within the pile can deter pests.
Fun Activities to Do with Your Kid Composters
Make composting an engaging family activity! Here are some ideas:
- Compost Journal: Have kids draw pictures of what goes into the compost, note the layers, draw the turning process, and describe changes they see.
- Compost Detectives: Look for signs of decomposition. Can they spot tiny bugs? Are the leaves starting to fall apart?
- Compost Bingo: Create bingo cards with items that can go in the compost (apple core, dry leaf, grass clipping) and items that can’t (meat, cheese, plastic).
- Worm Watching (for Vermicomposting): Gently look for the red wigglers and see them working. You can even feed them some more scraps and watch them munch away!
- Harvest Day Celebration: When the compost is ready, let the kids help sift it. Discuss what it will be used for – feeding their plants, a new garden bed, or helping a local community garden.
Using Your Finished Compost
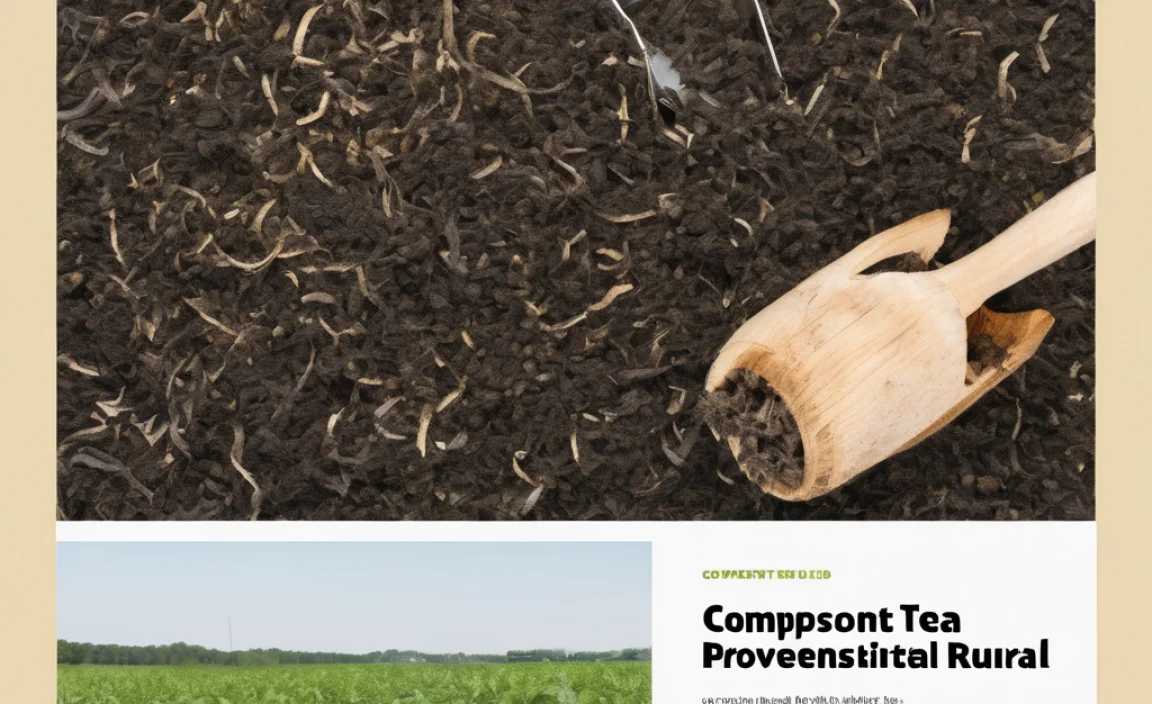
Once your compost is dark, crumbly, and smells earthy, it’s ready to use! It’s often called “black gold” by gardeners, and for good reason. It’s packed with nutrients that plants love.
Mix it into your garden soil, use it as a top dressing for your lawn, add it to potting soil for containers, or use it to start new seedlings. The kids will be amazed to see the results of their hard work benefitting your plants!
Quick Comparison: Compost Bins vs. Piles vs. Worm Bins
Here’s a quick look at the different methods to help you choose:
| Feature | Compost Bin (Enclosed) | Compost Pile (Open) | Worm Bin (Vermicomposting) |
|---|---|---|---|
| Space Needed | Small to medium; can sit on patio or in yard. | Medium to large; requires designated yard space. | Very small; ideal for indoors or balconies. |
| Cost | Varies (can be purchased or DIY). | Low (can be a free-standing pile). | Varies (bins can be purchased or DIY; special worms needed). |
| Pest Control | Good to excellent (especially with lids). | Can be challenging; requires careful management. | Excellent (when managed properly). |
| Speed of Composting | Moderate to fast. | Moderate; can be slower if not managed well. | Fast for food scraps, but produces less volume than traditional composting. |
| Kid Appeal | Moderate (can watch materials break down). | Moderate (if they enjoy outdoor tasks). | High (kids love seeing and interacting with worms!). |
| Ease of Turning | Tumblers are easiest; stationary bins require shoveling. | Requires shovel/pitchfork. | Minimal turning; often just adding food and bedding. |
For “composting for kids step by step,” a worm bin or a simple enclosed bin is often easiest to manage and most engaging. The University of California, Division of Agriculture and Natural Resources, offers great resources on home composting that can provide more detailed scientific background if you’re curious!
When is My Compost Ready?
This is the moment of truth! Your compost is ready when it meets these criteria:
- Appearance: It will be dark brown, crumbly, and resemble rich soil
- Odor: It should smell earthy and pleasant, like the forest floor after rain. No ammonia or sour smells.
- Texture: You shouldn’t be able to recognize the original materials (like banana peels or leaves).
- Temperature: A finished compost pile will be at ambient (room) temperature. A vigorously composting pile will be hot in the center, but it will cool down as it finishes.
This process can take anywhere from 3 months to a year, depending on how often you turn it, the ratio of greens to browns, and the temperature. Patience is a virtue, especially in composting!
Frequently Asked Questions About Composting for Kids

I am passionate about home engineering. I specialize in designing, installing, and maintaining heating, ventilation, and air conditioning systems. My goal is to help people stay comfortable in their homes all year long.