Hey there! Are you a restaurant owner or manager tired of seeing food scraps pile up, costing you money and hurting the planet? It can feel overwhelming, right? But what if I told you that turning that waste into a valuable resource is totally doable, even for your busy kitchen? We’re going to break down how to start composting at your restaurant, step-by-step. Get ready to save money and go green, the easy way!
Composting For Restaurants DIY: Your Genius, Essential Guide
Running a restaurant is tough. You’re juggling menus, customers happy, and staff managed. The last thing you probably want to think about is food waste. But here’s the thing: that food waste is a huge opportunity!
Composting is the natural process of recycling organic matter, like food scraps and yard waste, into a rich soil amendment. For restaurants, this means significantly cutting down on landfill waste, reducing disposal fees, and even creating a fantastic marketing angle. And the best part? You can absolutely do it yourself, without needing a massive budget or a degree in environmental science. We’re talking simple, practical steps that fit into your busy restaurant life.
This guide is designed to be your go-to resource, making composting for your restaurant feel less like a chore and more like a smart business move. We’ll cover everything from understanding what can be composted to choosing the right system for your needs and getting your team on board. Let’s get started!
Why Your Restaurant Needs to Compost (Like, Yesterday!)
Before we dive into the “how,” let’s talk about the “why.” Composting isn’t just a trendy buzzword; it’s a powerful tool for a more sustainable and profitable restaurant.
- Slash Waste Disposal Costs: Think about how much you pay to haul away your trash. A significant portion of that is likely food waste. By composting, you reduce the volume of your garbage, directly lowering your waste management bills. It’s like getting paid to throw away less!
- Boost Your Green Credentials: Customers today care about where their food comes from and how businesses operate. Composting shows you’re committed to sustainability, which can attract environmentally conscious diners and give you a competitive edge.
- Reduce Your Environmental Footprint: Food waste decomposing in landfills produces methane, a potent greenhouse gas. Composting diverts this waste and turns it into a valuable resource that enriches soil, promotes healthy plant growth, and sequesters carbon.
- Potential for On-Site Use or Sale: The compost you create is nutrient-rich soil. You could use it for on-site herb gardens, landscaping at your restaurant, or even sell it to local gardeners or farms.
- Employee Engagement: Getting your staff involved in a sustainability initiative can boost morale and create a shared sense of purpose.
Understanding the “Greens” and “Browns” in Your Kitchen
Composting relies on a balance of two main types of materials: “greens” and “browns.” Getting this balance right is key to efficient composting. Think of it like baking – you need the right ratio of ingredients for a good result.
Greens (Nitrogen-Rich): These are typically wet, nitrogen-rich materials that provide the energy for the microorganisms that break down the waste. In a restaurant setting, this will be your most common compostable items:
- Fruit and vegetable scraps (peels, rinds, cores, etc.)
- Coffee grounds and filters
- Tea bags (remove any staples or plastic tags)
- Eggshells (crushed)
- Plate scrapings (from food that hasn’t touched non-compostable materials like plastic or paper)
Browns (Carbon-Rich): These are dry, carbon-rich materials that provide the bulk and air pockets for your compost pile. They help balance the “greens” and prevent the pile from becoming a soggy, smelly mess.
- Cardboard (torn into small pieces, plain brown is best)
- Paper napkins and towels (unsoiled or lightly soiled with food, avoid greasy ones)
- Paper bags
- Sawdust (untreated wood only)
- Straw or hay
- Dry leaves (if you have outdoor space)
What NOT to Compost in Your Restaurant
This is super important to avoid pests, odors, and to ensure your compost is safe and effective. Stick to the basics!
- Meat, fish, and bones: These can attract pests and create strong odors.
- Dairy products: Similar to meat, these can attract pests and go rancid.
- Oils and fats: These can slow down the composting process and make the pile greasy.
- Diseased plants: You don’t want to spread plant diseases.
- Weeds that have gone to seed: You might end up with weeds in your compost.
- Pet waste: This can contain harmful pathogens.
- Chemically treated wood or yard waste: Avoid anything with pesticides or herbicides.
- Glossy or coated paper: The coatings don’t break down easily.
- Plastic, metal, glass, or Styrofoam: These are definitely not compostable!
Choosing the Right Composting System for Your Restaurant
The best composting system for your restaurant depends on a few factors: the amount of waste you generate, your available space, your budget, and your local regulations.
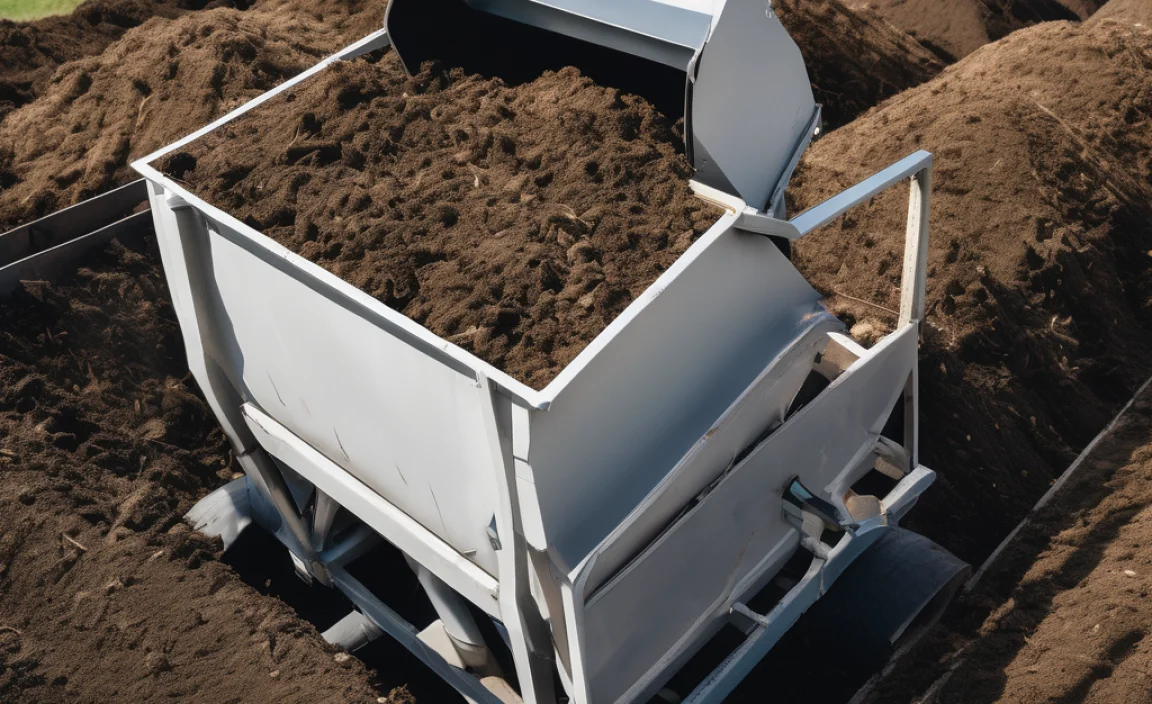
Option 1: On-Site Composting Bin Systems
These are great for restaurants with some outdoor space, like a patio, backyard, or even a large alleyway. They require a bit more hands-on management but offer direct control over the process.
Types of Bins:
- Stationary Bins: These are fenced-in or box-like structures. You add materials to the top and harvest finished compost from the bottom. They can be built from wood, wire mesh, or purchased as sturdy plastic units.
Pros: Can handle larger volumes, relatively inexpensive to build yourself.
Cons: Slower decomposition than tumblers, requires more manual turning for aeration.
- Tumbler Bins: These are enclosed drums that rotate. They make turning the compost easy, which speeds up decomposition and helps contain odors and pests.
Pros: Faster composting, easier to manage, better pest and odor control.
Cons: Can be more expensive, may have capacity limits depending on the size.
DIY Stationary Bin Example: The Pallet Bin
This is a super budget-friendly option! You can often get free wooden pallets from local businesses. You’ll need about 4 to create a sturdy bin.
- Find four free wooden pallets.
- Stand three pallets up on their edges to form three sides of a square.
- Use screws or heavy-duty zip ties to connect them securely at the corners.
- Use the fourth pallet as a removable front or door. You can attach it with hinges or simply tie it in place so it can be opened for access.
DIY Tumbler Idea: The Barrel Tumbler
You can create a functional tumbler by modifying a large plastic barrel. There are many tutorials online for how to attach a barrel to a sturdy base with a rod through the center for easy spinning. This often requires some basic DIY skills and tools.
Option 2: Using a Commercial Composting Service
If you have very limited space, or your team doesn’t have the bandwidth for managing an on-site system, a commercial service is often the most practical choice. These companies provide collection bins for your compostable waste and haul it away regularly to a large-scale composting facility.
How it Works:
- Research Local Providers: Search for “commercial composting services” or “food waste recycling” in your area. Organizations like the Environmental Protection Agency (EPA) offer resources on waste management.
- Get Quotes: Contact providers to discuss your waste volume, bin size needs, and collection frequency.
- Set Up Bins: The service will deliver designated bins for your compostable materials.
- Educate Staff: Train your team on what goes in the compost bin and what stays in the regular trash.
- Collection: The service picks up the full bins on a schedule.
Pros: Minimal effort for your staff, handles large volumes efficiently, often cost-effective for restaurants with significant food waste, ensures proper composting at scale.
Cons: You don’t get to keep the finished compost, relies on an external vendor.
Option 3: Vermicomposting (Worm Composting)
For smaller restaurants or those with very specific waste streams (like pre-consumer vegetable scraps), vermicomposting can be an option. This method uses red wiggler worms to break down food scraps in a controlled environment. It’s highly efficient and produces a nutrient-rich compost called “worm castings.”
Considerations:
- Requires specialized worms (not earthworms from your garden).
- Needs careful management of moisture, temperature, and what you feed the worms.
- Can process a significant amount of food scraps but might not handle the sheer volume of a large, busy restaurant’s total food waste.
- Best suited for pre-consumer waste (kitchen scraps before they are served) rather than plate scrapings, to avoid attracting pests or odors.
Pros: Produces high-quality compost, can be done indoors or in small spaces, efficient breakdown of food waste.
Cons: Requires specific care for worms, may not be suitable for all restaurant waste types, can be a learning curve.
Practical Implementation: Step-by-Step Guide
Ready to get composting? Here’s how to implement it in your restaurant, whether you go DIY or use a service.
Step 1: The Waste Audit (Know What You’re Dealing With)
Before you start, take a close look at your trash bins for a week. What kind of organic waste is being generated? Where is it coming from (kitchen prep, plate scrapings, bar)? This helps you estimate volumes and identify the best disposal methods.
Step 2: Site Selection & Equipment (If Going DIY)</h2
If you’re setting up an on-site bin:
- Location: Choose a spot that’s accessible for staff but out of the way of customers. It should have good drainage and ideally some sun to help heat the pile, but not so much that it dries out too quickly. Ensure you have space for adding materials and turning/harvesting. Check local health codes regarding proximity to buildings or food prep areas.
- Bins: Select or build your composting bins (pallet bins, tumblers, etc.).
- Tools: You’ll need a pitchfork or sturdy shovel for turning, a wheelbarrow for moving materials, and sturdy gloves.
- Collection Bins: Place smaller, clearly labeled compost collection bins in strategic locations like prep stations, dishwashing areas, and the bar. These should have tight-fitting lids.
Step 3: Staff Training (The Most Crucial Step!)
Your team’s participation is vital. Make it clear, simple, and consistent.
- Educate: Explain why the restaurant is composting and the benefits.
- Demonstrate: Show them exactly what goes into the compost bins (greens) and what goes into the trash or recycling. Use clear signage with pictures.
- Assign Roles: Designate specific staff members to manage the compost bins (emptying kitchen bins into the main system, turning the pile if applicable) or to ensure collected materials are placed correctly if using a service.
- Regular Reminders: Brief your team regularly, especially during initial rollout.
Step 4: Collection & Initial Setup
For DIY Bin Systems:
- Start by layering some “browns” (like shredded cardboard) at the bottom of your compost bin to ensure good airflow.
- Begin adding your collected “greens” (fruit/veg scraps, coffee grounds) from your kitchen bins.
- For every layer of “greens” you add, try to add a layer of “browns” to maintain that ideal balance. A good rule of thumb is roughly 2-3 parts browns to 1 part greens by volume.
- Keep the pile moist, like a wrung-out sponge. Water if it’s too dry.
For Commercial Services:
- Place the provided bins strategically.
- Ensure staff is trained to use only these bins for approved compostable materials.
- Set up a regular schedule for the service to pick up the bins.
Step 5: Managing Your Compost Pile (DIY)
This is where the magic happens:
- Aeration: Regularly turn your compost pile with a pitchfork or shovel. Aim for at least once a week. Tumblers make this easy – just give them a spin! Good airflow is critical; it feeds the microorganisms and prevents odors.
- Moisture: Check the moisture level regularly. It should feel like a damp sponge. If it’s too dry, add water. If it’s too wet, add more “browns” and turn it to help it dry out and aerate.
- Temperature: A healthy compost pile will heat up in the center as the microorganisms work. This heat is good; it kills weed seeds and pathogens. You don’t need to monitor the temperature precisely, but a hot pile is a sign of a well-balanced, active compost.
- Patience: Composting takes time. Depending on your method and management, it can take anywhere from a few weeks to several months for waste to break down into usable compost.
Step 6: Harvesting and Using Your Compost
Finished compost is dark, crumbly, and smells like fresh earth. You’ll know it’s ready when you can no longer identify the original food scraps.
- Harvesting: If using a stationary bin, you can usually access finished compost from an opening at the bottom. For tumblers, empty the entire batch once it’s finished.
- Screening (Optional): You can sift the compost through a screen (a piece of hardware cloth nailed to a wooden frame) to remove any larger, unfinished pieces. Put these back into the active compost bin.
- Usage:
- Use it to enrich the soil in your restaurant’s planters or any on-site herb gardens.
- Offer it to local community gardens or urban farms.
- Market it as a sustainable product or amenity.
What About Composting Pre-Consumer vs. Post-Consumer Waste?
It’s important to understand the difference:
- Pre-Consumer Waste: This is food waste generated before it reaches the customer. Think vegetable peelings, coffee grounds, eggshells, and prep scraps from the kitchen. This is generally the easiest and most desirable waste to compost.
- Post-Consumer Waste (or Plate Waste): This is food left on customers’ plates after a meal. This can be trickier to manage. It often contains grease, bones, and other items that are harder to compost or might attract unwanted pests if not managed very carefully. Many commercial composting services accept post-consumer waste, but on-site systems might be better suited for pre-consumer waste only.
Table: Waste Type & Composting Suitability
| Waste Type | Composting Suitability (On-Site/DIY) | Composting Suitability (Commercial Service) | Notes |
|---|---|---|---|
| Fruit & Vegetable Scraps | Excellent | Excellent | Primary “Green” material. |
| Coffee Grounds & Filters | Excellent | Excellent | Good source of nitrogen. |
| Tea Bags | Good | Good | Remove staples/plastic. |
| Eggshells (crushed) | Good | Good | Adds calcium. |
| Bread, Grains, Pasta (small amounts) | Fair | Good | Can become dense, introduce pests if large amounts. |
| Meat, Fish, Bones | Poor (Avoid) | Often Accepted | Attracts pests, odors. |

I am passionate about home engineering. I specialize in designing, installing, and maintaining heating, ventilation, and air conditioning systems. My goal is to help people stay comfortable in their homes all year long.