Have you ever seen little critters in your compost bin and wondered if they were friends or foes? It’s a common question, especially when you’re just starting out with composting at your school. Don’t worry, those bugs are actually a super important part of the composting process! We’ll help you understand who these guests are and why they’re essential for turning your school’s scraps into valuable compost. Get ready to learn how to get your compost bin buzzing with the right kind of life!
Composting for Schools: The Bug Briefing
Thinking about starting a composting program at your school? That’s fantastic! Composting is a brilliant way to reduce waste and create nutrient-rich soil for school gardens. You might have heard about different composting methods, but focusing on the tiny helpers – the bugs – is key to success, especially for beginners. These little workers are the real heroes of your compost pile, breaking down kitchen scraps and yard waste into something truly amazing. This guide will introduce you to the most common “bugs” you’ll find and explain exactly why they’re more important than you think. Let’s dive in and understand how to work with nature’s tiny but mighty recyclers!
Why Bugs Love Your Composting Bin
Your school’s compost bin is like a five-star buffet for a whole host of beneficial organisms. These creatures are drawn to the feast of organic materials – from fallen leaves to leftover fruit peels. They thrive in the dark, moist, and nutrient-rich environment that a well-managed compost pile provides. Their ultimate goal? To break down these larger materials into much smaller pieces, which then allows even tinier microbes to do their work. It’s a team effort, and these bugs are the frontline workers!
Think of it like a natural recycling system. Without these critters, the decomposition process would be significantly slower, and your compost pile might become a smelly, stagnant mess. They aerate the pile, introduce beneficial microbes, and efficiently process the waste. So, the next time you see a bug in your compost, give it a little nod of appreciation!
Meet the Compost Crew: Your Buggy Buddies
The world inside a compost pile is surprisingly diverse. While you might not see all of them at once, these are the most vital members of your school’s composting team. They might seem small, but their impact is huge.
The Earthworm Wonders
If you’re using a worm bin (vermicomposting), these are your stars! Red wigglers (Eisenia fetida) are the champions of this method. They don’t like to burrow deep into large piles like their garden cousins, but they are voracious eaters of organic matter. They ingest food scraps and soil, digest them, and excrete nutrient-rich castings, which are like gold for plants.
- What they look like: Small, reddish-brown worms, usually smaller and plumper than regular garden earthworms.
- What they do: Eat decaying organic matter, breaking it down into nutrient-rich worm castings. They also help aerate the material.
- Where to find them: Primarily in dedicated worm bins, but can sometimes show up in well-established, moist compost piles.
The Mighty Mites
Don’t let the name fool you; compost mites are mostly beneficial. There are different types, but the ones you’ll most commonly see are the tiny, pale or reddish-brown mites. They are some of the first decomposers to appear, helping to break down tougher materials like plant fibers and animal manure, making them accessible to other organisms.
- What they look like: Very small, often pale, whitish, or reddish-brown specks, moving on the surface of the compost.
- What they do: Break down tougher organic matter. Some species prey on other small pests like fungus gnat larvae, which is a bonus!
- Where to find them: All over the compost pile, especially in areas with a lot of decaying plant material.
The Awesome Ants
While ants can sometimes be a nuisance in other areas, in a compost pile, they’re generally quite helpful. They help to break down materials and aerate the compost as they move through it. They’re particularly good at processing dry, fibrous materials.
- What they look like: The familiar ants you see around.
- What they do: Help break down organic matter and aerate the pile.
- Consideration: If ants become overly dominant, it might indicate the compost is too dry.
The Beneficial Beetles
Many species of beetles are valuable members of the compost ecosystem. Larvae and adult beetles alike will feast on decaying organic matter, insect eggs, and even some small pests. They help to chop down larger materials into smaller bits, speeding up the composting process.
- What they look like: Various sizes and colors; you might see ground beetles, rove beetles, or carrion beetles. Their larvae are often grub-like.
- What they do: Break down larger organic materials and can help control populations of other insects.
- Where to find them: Often found in moist areas of the compost pile, under larger pieces of debris.
The Tiny Springtails
These are very small, wingless insects that get their name from their ability to spring into the air when disturbed, using a special appendage called a furcula. They are crucial in the early stages of decomposition, feeding on fungi and bacteria, and helping to break down tougher plant materials. They’re a sign that your compost is working!
- What they look like: Tiny, often whitish or grayish, jumpy little bugs.
- What they do: Decompose organic matter, feed on fungi and bacteria.
- Where to find them: Abundant in moist compost, often seen as a white “dust” on the surface.
The Speedy Slaters (Pill Bugs & Sow Bugs)
Yes, these are actually crustaceans, not insects, but they are fantastic composters! They’re efficient at breaking down decaying plant matter, especially tougher materials like cellulose. They love damp, dark environments, which makes your compost bin a perfect habitat.
- What they look like: The familiar segmented, grayish creatures that can roll into a ball (pill bugs) or stay elongated (sow bugs).
- What they do: Eat decaying organic matter, especially plant material.
- Where to find them: In the damp, darker areas of the compost pile.
The “Not-So-Good” Bugs (and What They Mean)
While most bugs you find are beneficial, a sudden explosion of certain critters can signal an imbalance in your compost pile. These aren’t necessarily “bad” bugs, but they might be a sign that something needs adjusting.
The Fly Frenzy (Fruit Flies & Fungus Gnats)
A sudden swarm of tiny flies, especially fruit flies, often means exposed food scraps are sitting on top for too long. Fungus gnats are less problematic; their larvae actually feed on fungus and decomposing organic matter. However, a massive number can be annoying.
- What they look like: Small, common flies. Fruit flies are often brownish, while fungus gnats are dark and slender.
- What they mean: Too much exposed food waste, or perhaps the pile is too wet.
- Solution: Bury food scraps deeper in the pile and ensure there’s enough “brown” material (like dried leaves or cardboard) to absorb moisture.
The Unwanted Ants (in Excess)
While a few ants are fine, if your compost bin is teeming with ants and they seem to be taking over, it’s a sign. Ants don’t like too much moisture or acidity. A very dry compost pile or one that’s become too acidic can attract them.
- What they mean: The compost is likely too dry or has an imbalance of nitrogen-rich “greens.”
- Solution: Add more moisture to the pile and ensure a good balance of “greens” and “browns.”
The Science of Decomposing: A Quick Look
Composting is a biological process involving several stages and a diverse community of organisms. It’s a natural cycle that transforms waste into valuable soil amendment. Here’s a simplified breakdown:
Stage 1: Mesophilic Stage
This is the initial breakdown phase. Temperatures begin to rise due to the activity of mesophilic bacteria and fungi. They work on simple sugars and starches.
Stage 2: Thermophilic Stage
As the mesophilic organisms do their work, temperatures increase further, reaching potentially 130-160°F (55-70°C). This “hot” composting stage is dominated by thermophilic (heat-loving) bacteria and actinomycetes. This high heat is great for killing weed seeds and pathogens.
Stage 3: Cooling and Curing Stage
As the readily available food sources are depleted, temperatures begin to drop. This is when mesophilic organisms and other organisms, including the bugs we’ve discussed, re-colonize the pile. Worms, mites, sow bugs, and other creatures break down the remaining materials and begin to stabilize the compost.
The bugs play a crucial role in the second half of this process, essentially “pre-digesting” and shredding materials, making them easier for microbes to fully decompose and for the compost to mature into stable humus.
Essential Tools for a Bug-Friendly Compost Bin
You don’t need a ton of fancy equipment to start a successful compost program at your school, especially when you embrace the help of the natural composting crew. Here are a few basics that will make the process smoother and more enjoyable.
Compost Bin Options
The type of bin you choose can influence the types of bugs you attract and how easy it is to manage. For schools, durability and ease of use are key.
- Tumbler Composters: These enclosed bins rotate, making turning easy. They can help retain heat and moisture, creating a good environment for decomposition. While less accessible to ground-dwelling bugs, they still support mites and springtails.
- Stationary Bins: Made from plastic, wood, or wire mesh, these are common, often affordable, and allow easy access for a wider range of beneficial insects and worms. They are great for allowing natural inhabitants to find their way in. For schools, look for sturdy, rodent-resistant models.
- Open Piles: A simple heap of organic materials. This is the most natural environment and will attract the widest variety of beneficial insects and earthworms. Requires more space and careful management to avoid odor and pests.
- Worm Bins (Vermicomposting): Specifically designed for red wiggler worms. These are often stackable trays or enclosed bins. Ideal for schools with limited space or for processing only certain types of food scraps.
Essential Tools
These are the workhorses that will help you manage your compost pile and keep your bug buddies happy and productive.
- Compost Aerator/Turning Tool: A long, sturdy metal tool with forks at the end. It’s designed to easily aerate the compost pile without disturbing the contents too much. This is much easier than using a pitchfork for large piles.
- Garden Fork or Pitchfork: Useful for initial turning, moving materials around, and breaking up clumps in larger piles.
- Shovel: For moving finished compost and raw materials.
- Watering Can or Hose with Sprayer: Essential for maintaining the correct moisture level, which is crucial for bug activity.
- Kitchen Compost Pail: A small, lidded container to collect food scraps in the school cafeteria or classrooms before taking them to the main compost bin. Easier to manage and reduces odors.
- Gloves: To keep your hands clean and protected.
- Collection Bin/Cart: To transport materials to and from the compost site.
Building Your School’s Perfect Compost Pile: A Step-by-Step Guide
Getting started is simpler than you might think. Follow these steps to set up a thriving compost system that welcomes your beneficial bug “employees.”
Step 1: Choose Your Location and Bin
Find a spot that is:
- Level and well-drained.
- Accessible for students and staff to deliver scraps.
- Partially shaded to prevent drying out too quickly in summer.
- Away from direct building foundations.
Select a bin type suitable for your school’s space, budget, and the volume of waste you expect. For a school setting, a sturdy, rodent-resistant stationary bin or a large tumbler is often a good choice.
Step 2: Gather Your Materials: The Green and Brown Balance
Composting success hinges on the right mix of “greens” (nitrogen-rich) and “browns” (carbon-rich). Aim for a ratio of roughly 2 parts browns to 1 part greens by volume. This balance is crucial for preventing odors and creating an ideal environment for bugs.
Greens (Nitrogen):
- Fruit and vegetable scraps (from cafeteria, classrooms)
- Coffee grounds and tea bags
- Grass clippings (in moderation)
- Eggshells
- Plant trimmings
Browns (Carbon):
- Dry leaves
- Shredded newspaper or plain cardboard (no glossy ink)
- Straw or hay
- Wood chips or sawdust (from healthy, untreated wood)
- Paper towels and napkins (unsoiled by chemicals or sanitizers)
Step 3: Start Layering Your Pile
Begin by placing a layer of coarse brown materials (like twigs or chopped cardboard) at the bottom of your bin. This helps with aeration and drainage.
- Add a Brown Layer: Start with a few inches of shredded cardboard, dry leaves, or small twigs.
- Add a Green Layer: Layer on your collected food scraps and other nitrogen-rich materials. Try to cover them with brown materials to reduce odors and deter pests.
- Add Another Brown Layer: Cover the greens with more brown material.
- Moisten: Lightly dampen each layer as you go. The goal is for the material to feel like a wrung-out sponge – moist, but not dripping.
Step 4: Regular Additions and Turning
Adding New Scraps: When adding new kitchen scraps (greens), always bury them within the pile, ideally surrounded by brown materials. This is a key step to keeping your bug friends happy and preventing issues like fruit flies. If using a tumbler, add materials and then give it a good turn.
Turning the Pile: This is where aeration comes in. For stationary bins or open piles, use your compost aerator or garden fork to turn the pile every 1-2 weeks. This mixes the materials, introduces oxygen (essential for aerobic decomposition and for many bugs), and helps the pile heat up, speeding up the process.
If you have a compost tumbler, turn it every few days. This is much easier and provides excellent aeration.
Step 5: Monitor Moisture and Temperature
Moisture: Regularly check the moisture level. If it feels dry, add water. If it’s too wet and smells sour, add more “brown” materials and turn. A good compost pile should be moist but not waterlogged. This is critical for supporting your bug population.
Temperature: The core of a healthy compost pile should heat up during the thermophilic stage. You can use a compost thermometer, but for beginners, the appearance of steam when you turn the pile is a good indicator it’s working. Don’t worry if it doesn’t get super hot; a cooler, slower compost pile will still break down with the help of bugs.
Step 6: Patience and Harvesting
Composting takes time. Depending on the method and how diligently you manage your pile, compost can be ready anywhere from a few months to a year.
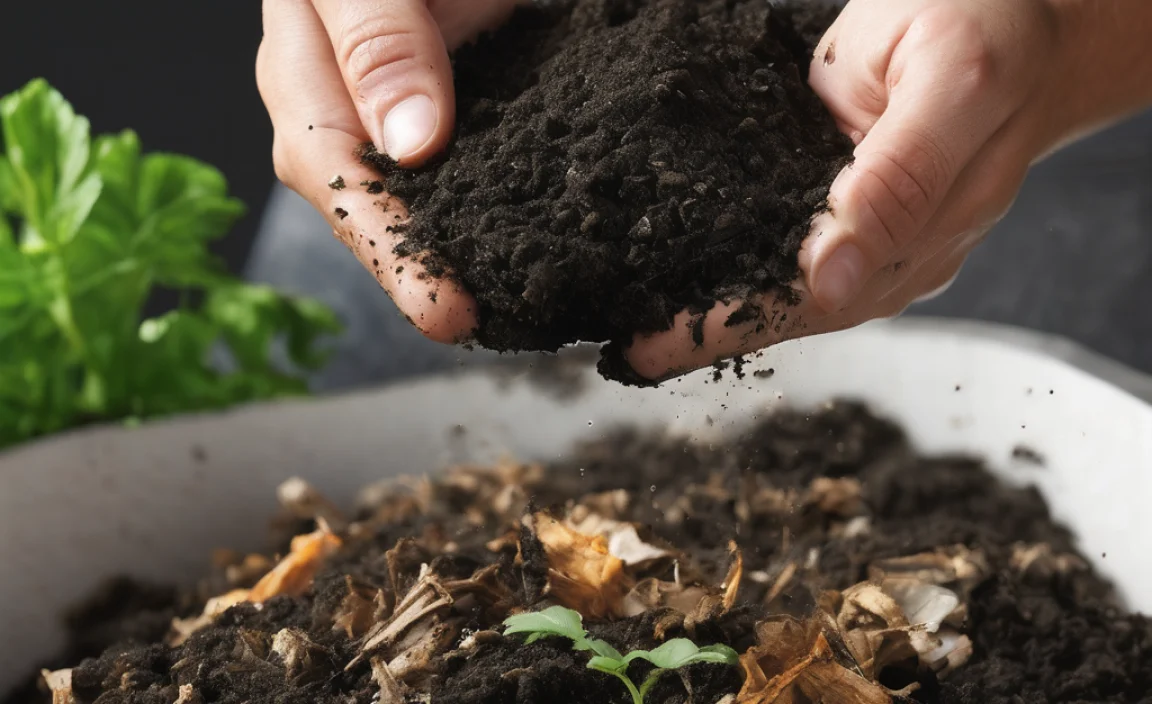
What to look For: Finished compost will be dark, crumbly, and smell earthy, like rich soil. You shouldn’t be able to recognize the original materials.
Harvesting: For stationary bins, you can often harvest from the bottom. For tumblers, you’ll empty the entire batch when it’s ready. You can screen your compost to remove any larger, uncomposted materials, which can go back into a new active pile.
Troubleshooting Common Compost Issues
Even with the best intentions, sometimes things don’t go perfectly. Here are a few common issues and how to fix them, focusing on how they relate to your bug population.
Issue: Bad Odors (Ammonia or Rotten Egg Smell)
What it means: This usually indicates an imbalance of “greens” and “browns,” leading to anaerobic (without oxygen) conditions. Too many nitrogen-rich materials or a pile that is too wet can cause this. The beneficial bugs need oxygen to thrive!
The Fix:
- Add more “

I am passionate about home engineering. I specialize in designing, installing, and maintaining heating, ventilation, and air conditioning systems. My goal is to help people stay comfortable in their homes all year long.