Got a school buzzing with energy and wanting to go green? Teaching composting can sometimes feel a bit overwhelming, like trying to herd cats into a compost bin! You want your students and staff to get hands-on with nature, reduce waste, and create healthy soil, but where do you even start? Don’t sweat it! We’re going to break down composting for schools training into super simple steps. Let’s get your school composting like pros!
Your School’s Composting Kickstart: The Essential Training Guide
Welcome, future compost champions! As Troy D Harn from TopChooser, I’m here to help you transform your school’s approach to waste. Composting at school is a fantastic way to teach valuable lessons about sustainability, environmental stewardship, and the natural cycles of our planet. It’s not just about reducing what goes into landfills; it’s about creating a living, breathing educational tool right in your schoolyard.
This no-nonsense guide is designed for anyone ready to implement or improve a composting program in a school setting. We’ll cover everything from the basics of what composting is to setting up your bins, training your team, and keeping the program thriving. Think of this as your friendly roadmap to green success. Ready to dig in?
Why Compost at School? The Big Wins
Before we get our hands dirty, let’s talk about why this is such a game-changer for schools. Composting isn’t just a trend; it’s a vital practice that benefits everyone involved.
- Educational Powerhouse: It’s a living laboratory for science, environmental studies, and teamwork. Students learn firsthand about decomposition, nutrient cycles, and soil health.
- Waste Reduction Champion: Schools generate a lot of organic waste – food scraps from the cafeteria, yard waste, etc. Composting diverts this from landfills, cutting down on trash and associated costs.
- Environmental Steward Training: It instills a sense of responsibility and empowers students and staff to be active participants in caring for the environment.
- Resource Creation: The compost produced is a valuable soil amendment that can be used in school gardens, landscaping, or even by the community.
- Cost Savings: Reducing waste can lead to lower waste disposal fees. Plus, using school-made compost can save money on purchasing soil and fertilizers.
What Exactly is Composting? The Simple Breakdown
At its core, composting is nature’s way of recycling. It’s a process where organic materials – like food scraps and yard trimmings – are broken down by tiny living organisms (think bacteria and fungi) and larger critters (like worms and insects) into a rich, dark, soil-like material called compost. It’s essentially a controlled decomposition.
For an effective compost pile, you need a few key ingredients:
- “Greens” (Nitrogen-rich): These are moist, leafy materials that provide nitrogen to fuel the microorganisms. Examples include fruit and vegetable scraps, coffee grounds, tea bags, and grass clippings.
- “Browns” (Carbon-rich): These are drier, woody materials that provide carbon for energy and add bulk for air circulation. Examples include dry leaves, shredded cardboard, sawdust, and straw.
- Water: Compost needs to be about as damp as a wrung-out sponge. Too dry, and the process slows down; too wet, and it can get stinky and anaerobic.
- Air: Microorganisms need oxygen to do their work efficiently. Turning or aerating the compost helps provide this.
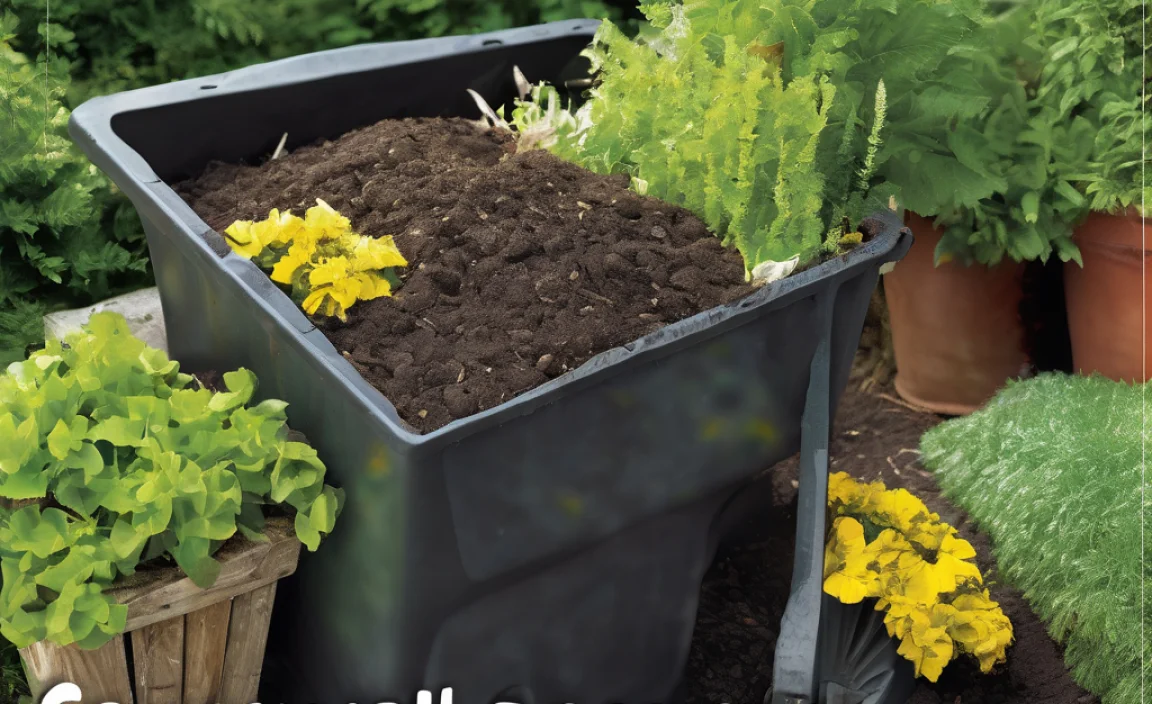
Setting Up Your School Compost System: Practical Steps
Choosing the right composting method for your school depends on your space, budget, and the amount of organic waste you expect. Here are a few popular options and how to get started:
Option 1: The Classic Three-Bin System
This is a workhorse for schools that generate a good amount of organic waste and have some outdoor space. It allows for continuous composting.
| Bin 1: Adding Materials | Bin 2: Actively Composting | Bin 3: Curing Compost |
|---|---|---|
| This bin is for fresh “greens” and “browns.” You add new material here as it’s collected. | Once Bin 1 is full, it’s turned into Bin 2. This is where the hot, active composting happens. You’ll turn this pile regularly to aerate it and keep it moist. | Finished compost from Bin 2 moves here to cure and mature. It cools down, and remaining pathogens are killed off. You can start using the compost from Bin 3 once it’s ready. |
Getting Started with a Three-Bin System:
- Location, Location, Location: Choose a spot that’s accessible for waste collection, has good drainage, and is somewhat sheltered from extreme weather. It shouldn’t be too close to buildings or play areas to avoid any potential odors.
- Build or Buy: You can build a simple three-bin system using wooden pallets, lumber, or wire mesh. Numerous DIY plans are available online. Alternatively, you can purchase pre-made compost bin systems. For a school setting, sturdy, larger-capacity bins are recommended. Local municipal waste management or environmental organizations might offer resources or discounts on bins.
- Gather Materials: Ensure you have a way to collect “greens” (e.g., collection bins in the cafeteria, classrooms) and “browns” (e.g., access to shredded paper, or a pile of dry leaves).
- Start Layering: Begin with a base layer of coarse “browns” for aeration. Then, add your collected “greens” followed by a layer of “browns.” Aim for a ratio of about 2-3 parts “browns” to 1 part “greens” by volume for optimal results.
- Maintain Moisture and Air: Keep the compost pile damp like a wrung-out sponge. Turn the contents of Bin 2 regularly (every 1-2 weeks) with a pitchfork to introduce air.
Option 2: Tumbler Composter
Tumblers are enclosed, rotating drums. They are excellent for schools with limited space, as they are tidier and can speed up the composting process.
Getting Started with a Tumbler:
- Choose a Sturdy Tumbler: Look for a double-chambered tumbler if possible. This allows you to have one chamber filling while the other is actively composting and curing.
- Location: Place it on a level surface in a convenient location, ideally with some sun to help heat things up, but not in constant scorching sun that could dry it out too quickly.
- Balancing Greens and Browns: Tumblers work best when the “greens” and “browns” are balanced. Too much “greens” can lead to odor; too many “browns” will slow decomposition. A good starting point is about a 1:1 or 2:1 ratio of browns to greens.
- Chop Materials: For faster composting, break down larger items into smaller pieces (e.g., chop fruit peels, shred cardboard).
- Turn Regularly: The key to a tumbler is regular turning. Aim to give it a few spins every day or two. This mixes the contents, aerates them, and helps maintain moisture.
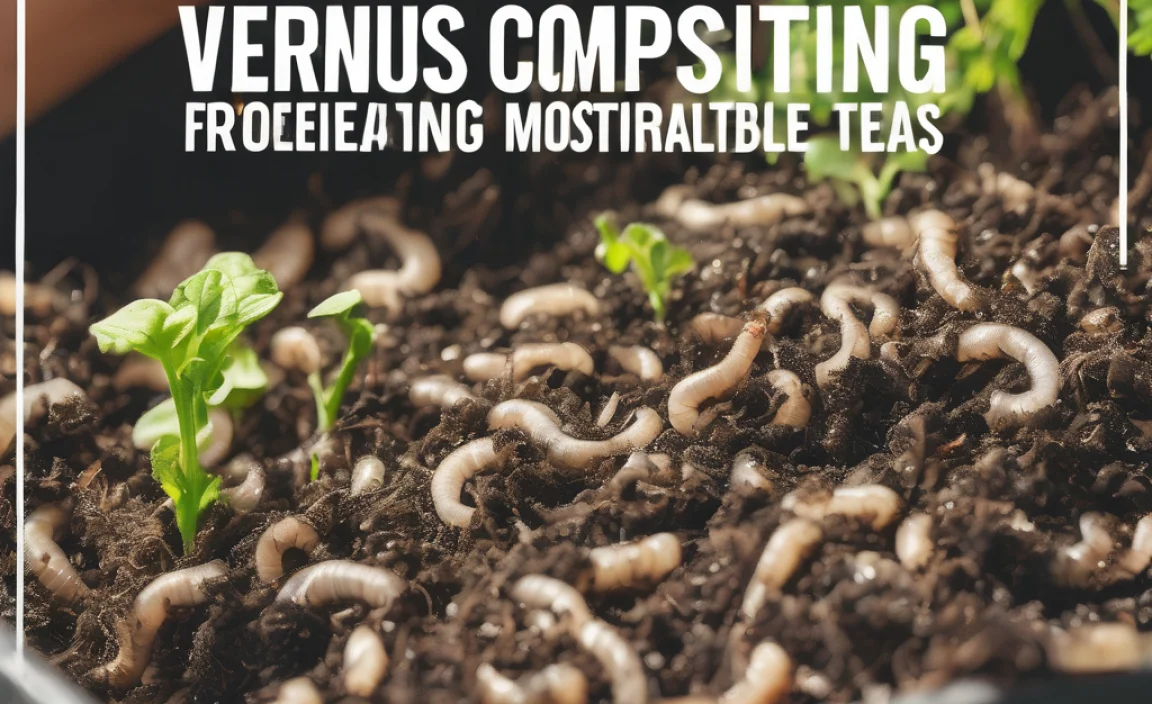
Option 3: Worm Composting (Vermicomposting)
This is a fantastic, contained option, perfect for classrooms or smaller areas. Red wiggler worms do the hard work, turning kitchen scraps into nutrient-rich worm castings.
Getting Started with Vermicomposting:
- Get a Worm Bin: You can buy specialized worm bins or create your own using opaque plastic storage totes. Ensure it has good ventilation holes.
- Add Bedding: Fill about half the bin with shredded newspaper, cardboard, coconut coir, or aged leaves. Moisten the bedding until it’s like a damp sponge.
- Introduce the Worms: Purchase composting worms (Red Wigglers are ideal) from a reputable supplier. Gently place them on top of the bedding. They will migrate down into the bedding over a day or two.
- Feeding: Start by burying a small amount of food scraps (fruit and vegetable peels, coffee grounds, tea bags – avoid meat, dairy, and oily foods) in one corner of the bin. As the worms eat it, move the food to different spots. Don’t overfeed!
- Harvesting Castings: After a few months, you’ll have nutrient-rich worm castings. There are several methods for harvesting, often involving separating the worms from the finished material.
What Can and Can’t Be Composted at School?
Knowing what goes into your compost bin is crucial for success and for maintaining a healthy, odor-free system. Here’s a quick cheat sheet:
| YES! Compost These (Greens & Browns) | NO! Avoid These |
|---|---|
| Greens: | Avoid: |
| Fruit scraps and peels | Meat, fish, and bones |
| Vegetable scraps and peels | Dairy products (milk, cheese, yogurt) |
| Coffee grounds and filters | Oily foods and grease |
| Tea bags (staples removed if metallic) | Diseased plants |
| Eggshells (crushed) | Weeds that have gone to seed |
| Grass clippings (in moderation) | Pet waste (dog, cat feces) |
| Browns: | Non-compostable materials (plastic, metal, glass) |
| Dry leaves | Chemically treated wood or yard waste |
| Shredded newspaper and plain cardboard (no glossy print or tape) | |
| Straw and hay | |
| Wood chips and sawdust (untreated) | |
| Toilet paper rolls and paper towel rolls |
Important Note: For school cafeterias, it’s often best to stick to raw fruits and vegetables. Cooked foods can sometimes attract pests or create odors if not managed very carefully. Always check with your local health and safety guidelines regarding food waste composting.
Training Your School Community: The Key to Success
A composting program is only as good as the people participating in it. Effective “composting for schools training” involves educating students, teachers, cafeteria staff, and custodians.
1. Student Training (The “Compost Crew”)
Make it fun and engaging! Children are natural learners and can be excellent ambassadors for the program.
- Classroom Lessons: Integrate composting into science lessons. Explain the “why” and “how” in age-appropriate terms.
- Hands-On Activities: Organize “compost pickup” days, have students help layer materials, turn the compost, or observe the process.
- Visual Aids: Use posters, charts, and clear signage near waste bins to show what belongs in the compost.
- Compost Ambassadors: Designate students as “Compost Captains” or “Eco-Heroes” who can remind others and answer simple questions.
- Workshops: Hold short, engaging workshops during an assembly or special event to introduce new students or reinforce practices.
2. Staff Training (Cafeteria, Custodial, Teachers)
These are the people on the front lines. Their buy-in and understanding are crucial.
- Clear Protocols: Provide simple, easy-to-follow instructions for collecting scraps, identifying compostable items, and operating the bins.
- Tool Familiarization: Ensure they know how to use any tools involved (pitchforks, shovels, tumblers).
- Q&A Sessions: Offer opportunities for staff to ask questions and voice concerns.
- Designated Roles: Clearly define who is responsible for what aspect of the program (e.g., daily collection, bin turning, monitoring).
- Ongoing Support: Make sure there’s a point person they can go to with issues or questions.
3. What to Cover in Training Sessions:
- The benefits of composting at school.
- What materials are compostable and what are not.
- Where compostable materials should be collected and stored before going to the main bin.
- How to properly add materials to the compost bin(s) – layering, ratios.
- The importance of moisture and aeration (turning).
- What to do if they notice any issues (bad smells, pests).
- Safety guidelines (e.g., wearing gloves when handling waste, proper lifting techniques).
Consider partnering with local Master Gardeners or your local waste management authority. They often offer free workshops or resources specifically for schools and communities looking to start composting programs. For instance, the U.S. Environmental Protection Agency (EPA) provides excellent foundational information on composting that can be adapted for a school setting.
Troubleshooting Common Composting Problems
Even with training, you might run into a few bumps. Don’t get discouraged! Most composting issues are easily fixed.
Problem: It smells bad!
- Cause: Too much “greens” or too wet (anaerobic conditions).
- Solution: Add more “browns” to absorb moisture and improve aeration. Turn the pile thoroughly. Ensure good air circulation for the bin. If using a bin with a lid, make sure it’s not sealed too tightly.
Problem: It’s not breaking down.
- Cause: Too dry, not enough “greens,” or pile too small.
- Solution: Add water to moisten the pile. Add more “greens” (nitrogen-rich materials). Ensure the pile is a decent size (at least 3x3x3 feet for traditional piles) to build up heat. Turn the pile to distribute moisture and air.
Problem: Attracting Pests (insects, rodents).
This is less common with proper management, but can happen.
- Cause: Exposed food scraps, inclusion of meat/dairy/oily foods.
- Solution: Bury food scraps deep within the pile or under a layer of “browns.” Ensure no forbidden items (meat, dairy, oils) are added. Use a contained bin system or a tumbler, which are less accessible to pests. Netting or hardware cloth can also deter some animals.
Problem: It’s too hot or too cold.
- Cause: Pile size, weather, moisture, or lack of aeration.
- Solution: If too hot (unpleasant to touch), it might need turning or water. If too cold, it might need more “greens” or to be insulated during cold weather (e.g., covered with straw or a tarp). A pile that’s too small will struggle to heat up effectively.
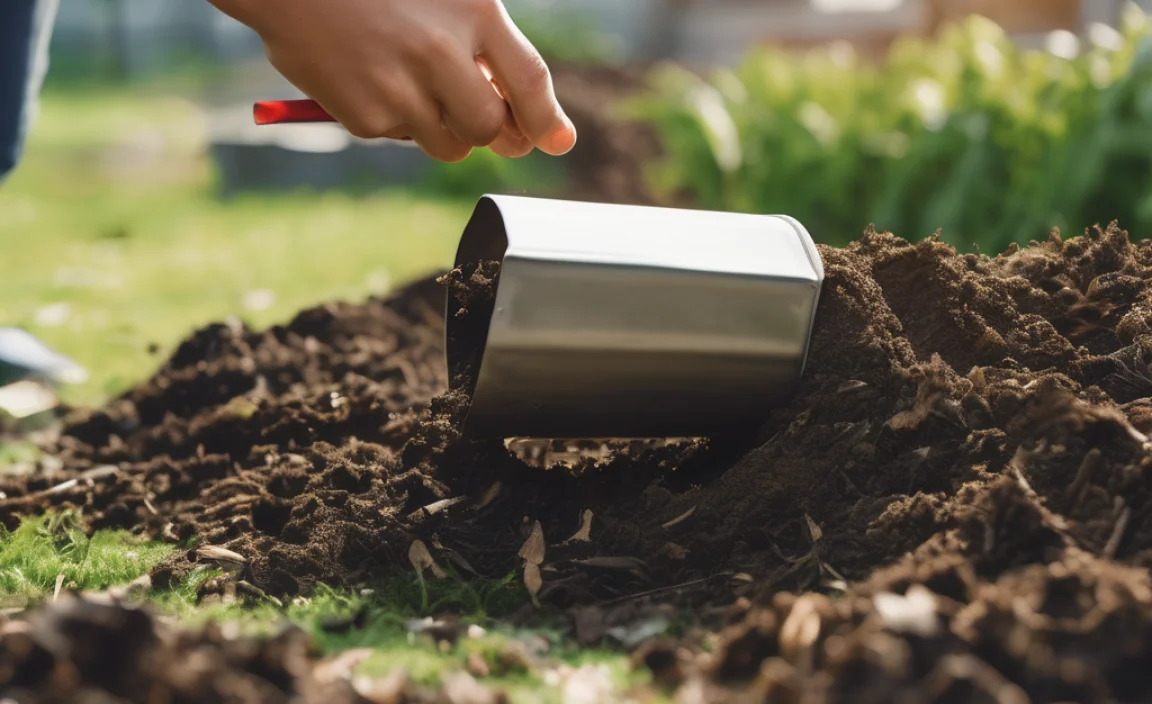
Utilizing Your School’s Compost: The Harvest
Once your compost is dark, crumbly, and smells earthy (like a forest floor!), it’s ready to use! This is often the most rewarding part.
- School Gardens: Mix compost into garden beds to enrich the soil for growing vegetables, flowers, or herbs.
- Landscaping: Use it as a top dressing around trees and shrubs to improve soil health and retain moisture.
- Potting Mix: Blend it with other ingredients like peat moss or topsoil to create custom potting mixes for plants.
- Educational Demonstrations: Use the finished compost in classroom activities to show the life cycle of organic matter.
It’s a physical representation of the school’s efforts to be sustainable. Imagine students seeing the plants in the school garden thrive, fueled by the very waste they helped transform!
For more advanced guidance on compost quality, you can refer to resources like The Compost Research and Education Foundation, though for school use, visual and olfactory inspection is usually sufficient.
Keeping the Momentum Going: Sustainability and Growth
Starting a composting program is a great achievement, but keeping it running smoothly requires ongoing effort and enthusiasm.
- Regular Audits: Periodically review your process. Are there areas for improvement? Are bins being used correctly?
-
.lwrp.link-whisper-related-posts{
margin-top: 40px;
margin-bottom: 30px;
}
.lwrp .lwrp-title{}.lwrp .lwrp-description{
}
.lwrp .lwrp-list-container{
}
.lwrp .lwrp-list-multi-container{
display: flex;
}
.lwrp .lwrp-list-double{
width: 48%;
}
.lwrp .lwrp-list-triple{
width: 32%;
}
.lwrp .lwrp-list-row-container{
display: flex;
justify-content: space-between;
}
.lwrp .lwrp-list-row-container .lwrp-list-item{
width: calc(25% – 20px);
}
.lwrp .lwrp-list-item:not(.lwrp-no-posts-message-item){max-width: 150px;
}
.lwrp .lwrp-list-item img{
max-width: 100%;
height: auto;
object-fit: cover;
aspect-ratio: 1 / 1;
}
.lwrp .lwrp-list-item.lwrp-empty-list-item{
background: initial !important;
}
.lwrp .lwrp-list-item .lwrp-list-link .lwrp-list-link-title-text,
.lwrp .lwrp-list-item .lwrp-list-no-posts-message{}@media screen and (max-width: 480px) {
.lwrp.link-whisper-related-posts{}
.lwrp .lwrp-title{}.lwrp .lwrp-description{
}
.lwrp .lwrp-list-multi-container{
flex-direction: column;
}
.lwrp .lwrp-list-multi-container ul.lwrp-list{
margin-top: 0px;
margin-bottom: 0px;
padding-top: 0px;
padding-bottom: 0px;
}
.lwrp .lwrp-list-double,
.lwrp .lwrp-list-triple{
width: 100%;
}
.lwrp .lwrp-list-row-container{
justify-content: initial;
flex-direction: column;
}
.lwrp .lwrp-list-row-container .lwrp-list-item{
width: 100%;
}
.lwrp .lwrp-list-item:not(.lwrp-no-posts-message-item){max-width: initial;
}
.lwrp .lwrp-list-item .lwrp-list-link .lwrp-list-link-title-text,
.lwrp .lwrp-list-item .lwrp-list-no-posts-message{};
}

I am passionate about home engineering. I specialize in designing, installing, and maintaining heating, ventilation, and air conditioning systems. My goal is to help people stay comfortable in their homes all year long.