Hey there! Ever feel like tossing those kitchen scraps into the trash is a missed opportunity? Maybe you’ve heard about composting and thought, “That’s for people with big yards, not my cozy apartment.” Well, I’m here to tell you that’s just not true anymore! Composting in a small space is totally doable, and honestly, it’s pretty genius. It’s easier than you think to turn your food waste into something amazing for plants. Let’s break down how to get started, right in your own home. Get ready to transform your kitchen waste into garden gold!
Composting for Small Apartments DIY: Genius & Essential
Living in a small apartment doesn’t mean you can’t be a composting champ. Gone are the days when composting was only for folks with sprawling backyards. Thanks to some clever DIY methods, you can easily compost right in your kitchen, on your balcony, or even a small corner of your living space. This isn’t just about reducing waste; it’s about creating nutrient-rich goodness that can give your potted plants a real boost. Plus, it feels great to know you’re doing something good for the planet, one coffee ground at a time.
Why Compost in a Small Apartment?
So, why bother composting when you have limited space? Let’s look at the benefits:
- Reduces Landfill Waste: A massive amount of what we toss in the bin is food scraps and organic material that could be composted. Keeping this out of landfills reduces methane gas, a potent greenhouse gas.
- Creates Powerful Plant Food: Compost is like a superfood for your plants. It improves soil structure, helps retain moisture, and provides essential nutrients, leading to healthier, happier plants.
- Saves Money: You’ll buy fewer fertilizers and soil amendments for your houseplants or any small garden you might have.
- Connects You with Nature: Even in an urban setting, composting is a hands-on way to engage with natural cycles.
- It’s Surprisingly Simple: With the right method, apartment composting is clean, odor-free, and easy to manage.
Choosing Your Small-Space Composting Method
The key to successful apartment composting is choosing a method that fits your lifestyle and space. Here are some of the most popular and effective DIY options:
1. Worm Composting (Vermicomposting)
This is probably the most popular method for indoor composting. It uses specific types of worms (red wigglers, not earthworms!) to break down food scraps. It’s efficient, relatively fast, and, believe it or not, odorless when done correctly. Worm bins are compact and can fit under a sink or in a closet.
How it Works: Red wigglers live in a bin filled with bedding material (like shredded newspaper or coconut coir). You feed them your kitchen scraps, and they eat it, producing nutrient-rich worm castings (worm poop!).
Pros:
- Very efficient nutrient-wise.
- Produces high-quality compost (worm castings).
- Relatively quick decomposition.
- Can be odorless if managed properly.
- Compact bin sizes are readily available.
Cons:
- Requires specific types of worms.
- Can be sensitive to temperature fluctuations.
- Some people might have a mental block about using worms.
- Initial setup cost for worms and bin.
2. Bokashi Composting
Bokashi is a unique fermentation process. Instead of aerobic decomposition (like traditional composting), it uses anaerobic fermentation, meaning it happens without oxygen. This process can handle a wider range of food scraps, including meat, dairy, and oils, which are usually a no-go for other methods. The end product isn’t finished compost but an “amino-rich material” that needs to be buried in soil or added to a traditional compost pile to finish breaking down. However, the liquid produced can be a fantastic plant fertilizer.
How it Works: You layer food scraps in an airtight Bokashi bin with a special Bokashi “bran” (inoculated with effective microorganisms). This bran kickstarts the fermentation. The airtight container prevents odors and most pests.
Pros:
- Can compost meat, dairy, and oily foods.
- Results in a fermented product that’s rich in nutrients.
- Produces a liquid fertilizer (“Bokashi tea”).
- Airtight system is typically odor-free.
- Relatively fast pre-composting process.
Cons:
- The fermented material is not finished compost and needs further decomposition.
- Requires purchasing the Bokashi bran.
- The process can generate a strong, vinegary smell when you open the bin.
- Need a place to bury the fermented material or another compost system.
3. Electric Composter / Food Cycler
These are countertop appliances that use heat and aeration to rapidly dehydrate and breakdown food scraps into a nutrient-rich soil amendment. They are the fastest option, often completing a cycle in a matter of hours.
How it Works: You put your food scraps in the appliance, close the lid, and it runs a cycle to dry and grind the waste. What comes out is a dry, sterile, soil-like material.
Pros:
- Very fast – cycles take hours, not weeks or months.
- Can handle most food scraps, including meat and dairy.
- Odorless during operation.
- Compact and easy to use.
- Produces a ready-to-use amendment.
Cons:
- High upfront cost for the appliance.
- Uses electricity.
- The resulting material is not true compost; it’s more like a fertilizer additive that can be mixed with soil.
- Results can vary depending on the model and food type.
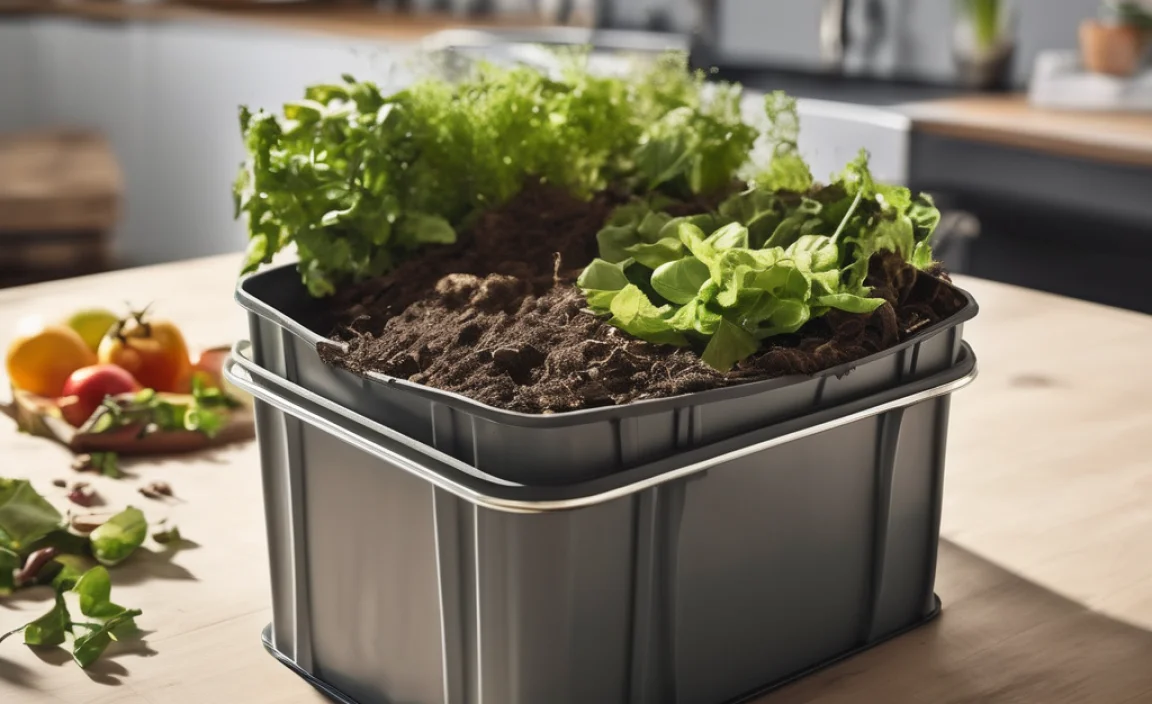
4. Small-Scale Traditional Composting (Balcony or Designated Indoor Bin)
This is a more traditional method, but adapted for smaller spaces. You’ll need a compact compost bin specifically designed for patios, balconies, or even indoors. These bins are typically enclosed to manage moisture and odors.
How it Works: You layer “greens” (nitrogen-rich food scraps) and “browns” (carbon-rich materials like shredded paper or cardboard). With regular turning (or sometimes passive aeration systems) and moisture management, the materials break down into compost.
Pros:
- Results in traditional, finished compost for your plants.
- Can handle a good volume of scraps.
- More control over the process.
Cons:
- Requires more space than worm composting or Bokashi.
- Can attract pests if not managed properly.
- Potential for odors if moisture and balance are off.
- Decomposition can take longer.
Getting Started: A Step-by-Step DIY Guide (Focusing on Worm Composting)
For dwellers of small spaces, worm composting (vermicomposting) is often the go-to. It’s relatively easy to set up and manage, and the results are fantastic. Here’s how to DIY your own worm bin:
Step 1: Gather Your Materials
You’ll need a few things to get your worm farm up and running:
- Worm Bin: You can buy a commercial worm bin or DIY one using opaque plastic storage totes. Two totes are best: one for the worms to live in (with a lid) and another to collect liquid.
- Worms: Order red wigglers (Eisenia fetida) from a reputable online supplier or local worm farm. You’ll need about half a pound to a pound to start.
- Bedding: This is what the worms live in and consists of materials like shredded newspaper (avoid glossy ink), cardboard, coconut coir, or aged leaves. Moisten it so it’s damp, like a wrung-out sponge.
- Food Scraps: Your kitchen waste, minus things worms don’t love (more on that below).
- Minerals (Optional but Recommended): A sprinkle of worm chow, crushed eggshells, or rock dust can provide essential grit and minerals for the worms.
Step 2: Prepare Your Worm Bin
If you’re DIYing a bin from plastic totes:
- Drill Drainage Holes: In the bottom of one tote (this will be your worm habitat), drill about 10-15 small holes (1/4 inch). These allow excess liquid to drain.
- Drill Aeration Holes: In the lid of this tote, drill more small holes for airflow.
- Prepare the Collection Tote: The second tote will sit underneath the first to catch any leachate (worm tea). Do NOT drill holes in this one.
- Add Bedding: Fluff up your chosen bedding material (e.g., shredded newspaper) and moisten it until it’s damp but not soggy. Fill the bottom tote about 2/3 full with this moist bedding.
Step 3: Introduce Your Worms
Gently place your red wigglers on top of the prepared bedding. Leave them for an hour or so without food. This gives them time to acclimate to their new home. They will naturally burrow down into the bedding.
Step 4: Start Feeding Your Worms
Begin by burying small amounts of food scraps a few inches down into the bedding, away from the edges. A good starting point is to feed them about 1/4 to 1/2 pound of food per pound of worms per week. Gradually increase the amount as your worm population grows and they show they can handle it.
What NOT to Feed Your Worms:
- Citrus peels in large quantities (can make the bin too acidic).
- Onion and garlic skins (worms don’t particularly like them).
- Meat, dairy, or oily foods (these can attract pests and create odors).
- Excessive amounts of starchy foods (bread, pasta).
- Anything processed or heavily seasoned.
What Worms LOVE:
- Fruit and vegetable scraps (apple cores, banana peels, carrot tops, lettuce).
- Coffee grounds and tea bags (remove staples).
- Crushed eggshells (adds grit and calcium).
- Plain cooked pasta or rice in small quantities.
Step 5: Ongoing Management
- Moisture: The bedding should always feel like a wrung-out sponge. If it’s too dry, mist it with water. If it’s too wet, add more dry bedding.
- Aeration: Loosely fluff the bedding every week or two to ensure good airflow.
- Harvesting Lemon and Worm Castings: After a few months, you’ll start seeing dark, crumbly material – worm castings! You can harvest these by gently pushing the finished compost to one side and adding fresh bedding and food to the other, encouraging the worms to migrate. Or, you can carefully sift the material to separate the castings.
What About Bokashi? A Quick Overview
If worms aren’t your thing, or you want to handle meat/dairy, Bokashi is a great alternative.
DIY Bokashi Bin Setup:
- Airtight Bin: You need an airtight container with a spigot at the bottom to drain the “Bokashi tea.” Many opt for a purchased Bokashi bin for this.
- Bokashi Bran: Purchase this from a composting supply store or make your own if you’re feeling adventurous (it involves inoculating wheat bran with effective microorganisms).
- Layering: Add food scraps (finely chopped for faster fermentation) to the bin, sprinkle liberally with Bokashi bran, and press down firmly to remove air. Seal the lid tightly.
- Draining: Drain off the liquid every few days. This is your potent plant fertilizer!
- Fermentation: Once the bin is full, let it ferment for another two weeks.
- Post-Fermentation: The fermented material is acidic and needs to be buried in soil (a large planter pot, community garden plot, or even a friend’s yard) or added to a traditional compost pile for another 2-4 weeks to finish decomposing before planting.
External resource on Bokashi: For a deeper dive into the science behind Bokashi and how to make your own bran, check out North Carolina State University Extension offers insights into various composting methods, including this fermented option.
What Can I Compost in My Small Apartment?
The general rule of thumb is that if it grew, it can generally be composted, with a few caveats for small-space systems:
Commonly Compostable Items (for most systems):
- Fruit and vegetable scraps
- Coffee grounds and filters
- Tea bags (check for plastic tags)
- Eggshells (crushed)
- Yard trimmings (small amounts, if you have them)
- Shredded newspaper and cardboard (uncoated, no glossy parts)
- Hair and nail clippings
Items to Use with Caution or Avoid in Worm Bins/Bokashi:
- Meat, fish, and bones (risk of odors and pests, only Bokashi can handle this during fermentation)
- Dairy products (same reasons as meat)
- Oily or greasy foods (same reasons as meat)
- Citrus peels (in large quantities, can make worm bins too acidic)
- Onions and garlic (worms tend to avoid them)
- Diseased plants (can spread to your soil amendments)
- Weeds that have gone to seed (unless you have a very hot compost pile)
- Pet waste (dog/cat feces can contain pathogens)
Tools and Accessories for Apartment Composting
You don’t need a fancy setup, but a few helpful tools can make apartment composting even easier:
| Tool/Accessory | Why It’s Helpful | Notes for Small Spaces |
|---|---|---|
| Kitchen Countertop Pail | Collects scraps conveniently before taking them to your main bin. | Look for one with a charcoal filter to control odors. Small, decorative ones fit right in. |
| Shredder (Optional) | Great for prepping newspaper/cardboard bedding for worm bins or traditional compost. | Larger shredders aren’t necessary; a strong pair of scissors can often do the trick for small amounts. |
| Gloves | Keeps your hands clean when handling food scraps or compost. | Any comfortable pair will do. |
| Small Trowel or Hand Fork | For gently mixing bedding and food in worm bins or aerating compost. | Essential for aerating worm bins and turning compost piles. |
| Spray Bottle | For maintaining the perfect moisture level in worm bins. | Fill with water. Essential for worm bins. |
| Moisture Meter (Optional) | Helps you accurately gauge the moisture content of your compost. | Useful for ensuring your compost isn’t too wet or too dry. |
| Measuring Cups/Scale (for Worms) | Helps you feed the correct amount of food to your worms. | Important for beginners to avoid overfeeding. |
Troubleshooting Common Apartment Composting Issues
Even with careful planning, you might run into a snag. Here’s how to fix it:
- Odor: This is the most common fear. If your bin smells “off” (not like fresh earth), it’s usually too wet, too acidic, or you’ve added too much “green” material (food scraps) without enough “browns” (carbon sources like shredded paper).
- Fix: Add more dry browns (shredded cardboard, newspaper). If it’s a worm bin, check for buried food that hasn’t been eaten; gently bury it deeper or remove it. Ensure good aeration. For active compost, turn it to introduce oxygen. Ensure any leachate is drained.
- Pests (Fruit Flies, Gnats): Usually attracted by exposed food scraps.
- Fix: Bury food scraps deeper in
- Fix: Bury food scraps deeper in

I am passionate about home engineering. I specialize in designing, installing, and maintaining heating, ventilation, and air conditioning systems. My goal is to help people stay comfortable in their homes all year long.
